
Photoshop text Effects


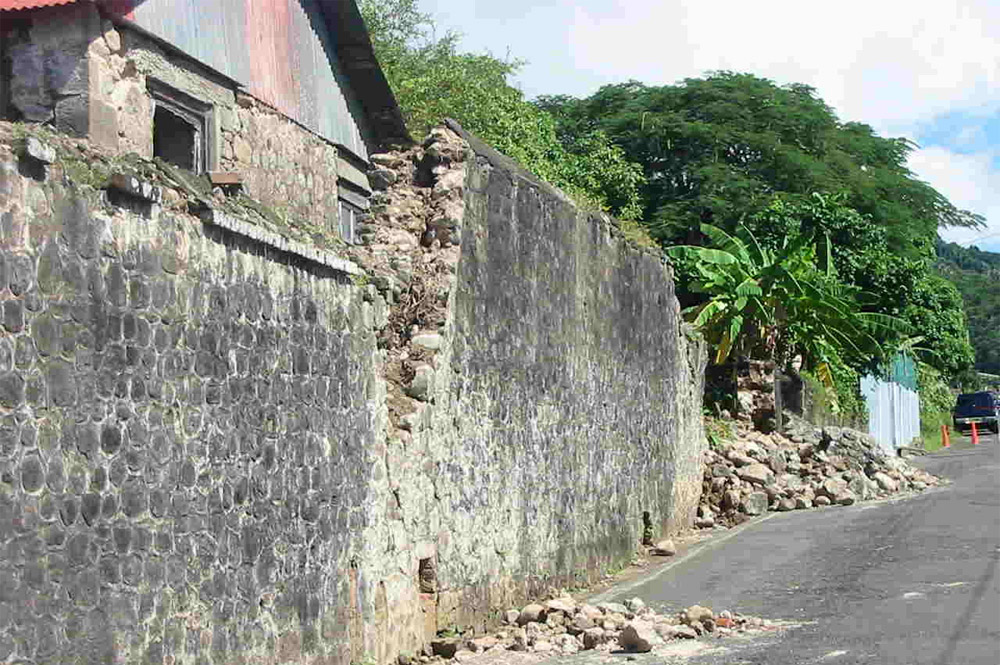
Find yourself a nice photo of a wall to put your logo on (i found this image on the internet with . Every image is suitable if there is a suitable structure (no smooth walls!).

http://img.dreamdealer.nl/dd/graffiti/stap1.jpg

Step 2
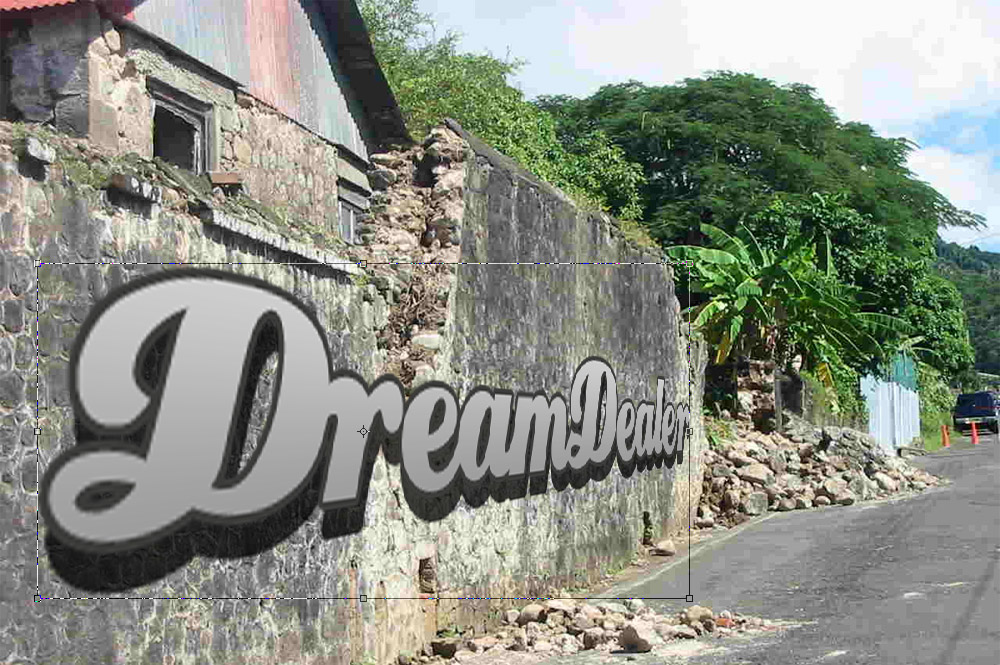
Place the logo you want to use in a new layer. The logo has to be a pixel-based image (no fonts, paths and shapes) because in the next step we will apply a "perspective transfer" which requires the layer to be pixel-based.

http://img.dreamdealer.nl/dd/graffiti/stap2.jpg

Step 3
Select "perspective transform" in the edit-menu en change the aspects of the logo that it fits the perspective of the wall. When you mak a "perspective transform" the selection you're transforming gets a bounbing box. You can use the lines of this bounding box to align the logo with the wall.

http://img.dreamdealer.nl/dd/graffiti/stap3.jpg

Step 4
The logo was just a bit to wide, but thats no problem. You can adjust this with the normal transform tool (CTRL+T). Make it a bit smaller so it will fit nicely in the wall. If the perspective of the logo doesn't look realistic, redo the previous steps, because the realism of this is the most important.
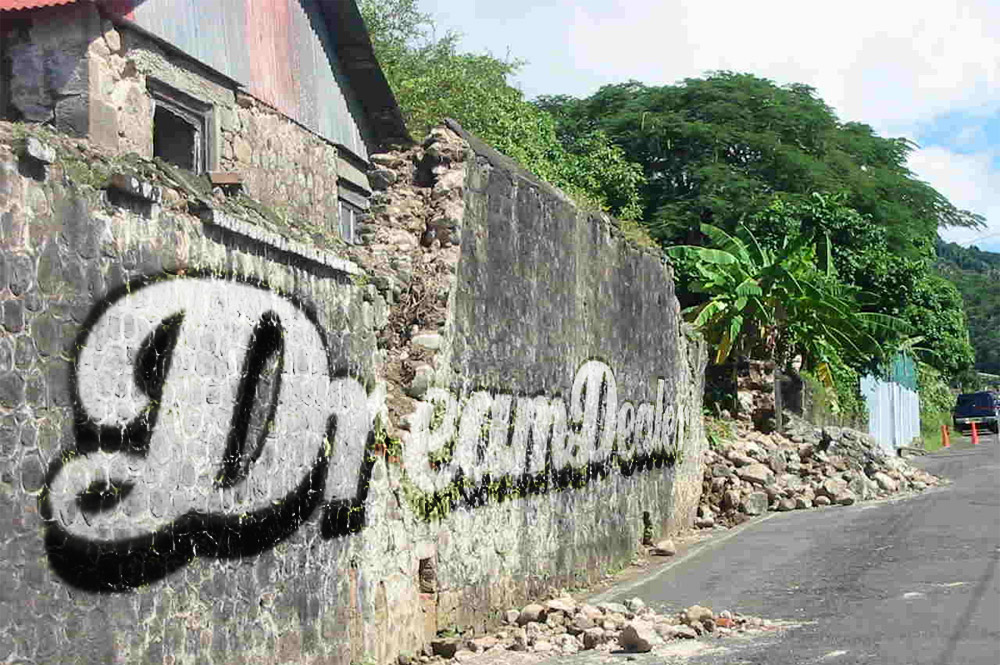
http://img.dreamdealer.nl/dd/graffiti/stap4.jpg

Step 5
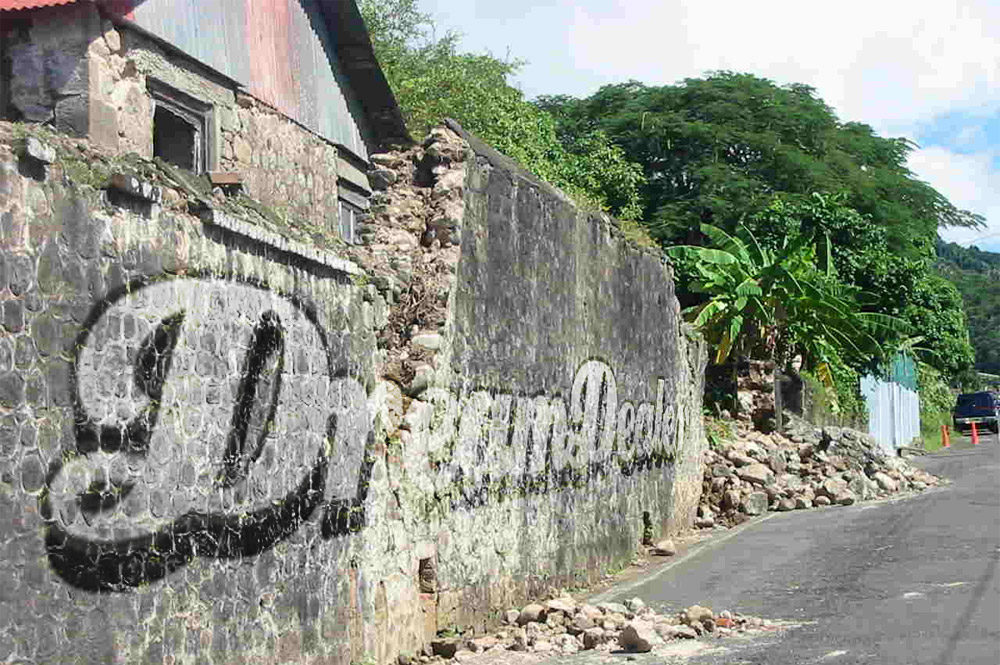
After this, put the blending mode of the logo layer to "overlay":


The result:
http://img.dreamdealer.nl/dd/graffiti/stap6.jpg

Step 6
The logo still has sharp edges and looks more like a sticker than a graffiti drawing. To make this a bit more realistic we are going to blur the edges a bit. To blur only the edges, but not the logo, you'll have to make a copy of the layer and place it under te original logo.


Step 7
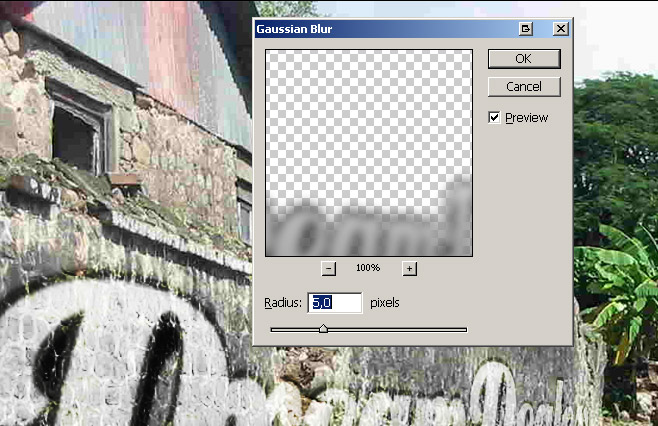
The, blur the copied layer with a "Gaussian Blur" with a value of 5,0 pixels. The gaussian blur is found in the filter-menu.
http://img.dreamdealer.nl/dd/graffiti/stap8.jpg

Step 8
At last, to improve the realism, use the eraser tool to erase the logo where the wall is worn down.

http://img.dreamdealer.nl/dd/graffiti/stap9.jpg

Comments

Popular posts from this blog

Use x-ray techniques in Photoshop to show naked skin through clothing

    Do those new naked body scanners have you freaked out at the airports? As far as the TSA is concerned, those x-ray machines are here to stay, but you might as well take comfort in knowing that airport security guards aren't the only ones looking at your private parts. Practically anyone with a computer can manage to see through your clothes, and it's all thanks to a little program called Photoshop. Thanks, Adobe. With a few tweaks using the tools in Photoshop, you can see those boobs in no time, male or female. The video is in German, but it's not hard to figure our what's going on, especially if you're familiar with Photoshop. First, create a few duplicate layers, then get a handle on some of these tools to make the naked body through the clothes: * Auswahl erstellen (Create Selection) * Tonwertspreizung (Input Levels) * Belichtung (Exposure) You can also do this see-through clothing effect in free design programs, such as  GIMP .

Photoshop Shapes – Add, Subtract, Intersect and Exclude

’ve gone ahead and created a new Photoshop document, with white as my background color, and I’ve used the Ellipse Tool to draw a single circular shape (I held down my Alt (Win) / Option (Mac) key as I was dragging out the shape to force it into a perfect circle): A circular shape drawn with the Ellipse Tool. If we look in my Layers panel , we see that my document currently contains two layers – the white-filled Background layer on the bottom and the Shape layer (Shape 1) for my shape directly above it: The Layers panel showing the Shape layer sitting above the Background layer. With the Ellipse Tool still selected, I’ll draw a second similar shape partly overlapping the original: Adding a second shape to the document. By default, Photoshop assumes that each time we draw a new shape, we want to draw a separate, independent shape, and it places the new shape on its own Shape layer. If we look again in my Layers panel, we see that I now have a second Shape layer (S...

How To Create Simple Cover Art Design in Photoshop Photoshop Tutorial

                              Art Design in Photoshop   Photoshop Tutorial