In
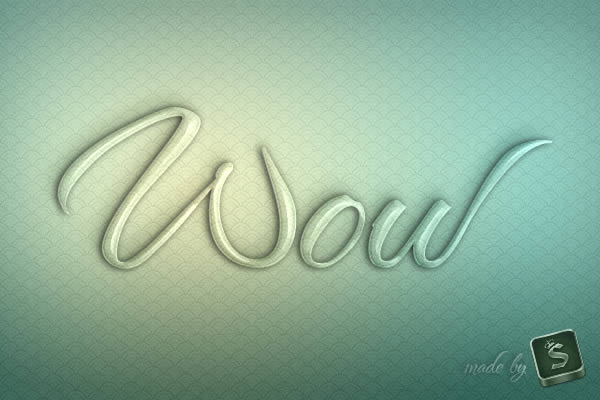
this quick tip tutorial we will show you how to create a glass text
effect using layer styles in Photoshop. Let’s get started!
Step 1
Preparing
assets and creating document. First create a new .PSD document, 600 x
400 pixels in RGB mode, 72 DPI with WHITE background color. Now prepare
your assets. Install The Nautigal font into your computer and optionally
open the .PAT file for creating background or use the Background Image
instead of starting new document, so you can skip creating background
and jump to step 3 of this tutorial.
Step 2
Making
Background. Go to Menu > Layer > Layer Style > Blending
Options and use the settings below. You can also access Blending Options
with two faster ways. First and the fastest way is to double click on
the layer in your layers menu. Other way is to right click on the layer
in your layers menu and choose Blending Options. When you are done with
all the settings below, don’t forget to hit “OK” in the Blending Options
window! If you have downloaded the Patterns file – use the pattern
number 31. You can also leave the background without the pattern overlay
or use any other pattern as the result will look great on any light
background.
Step 3
Start
creating first text layer. Now we can start making our text effect.
First choose a type tool and change font to Tha Nautigal, size around
255 pt and anti-alliasing Sharp. Now type your text somewhere in the
center of the image. You can write any word, but in this tutorial I’ll
use “Wow”.
Step 4
This
first text layer will be at the bottom of all text layers. Go to Menu
> Layer > Layer Style > Blending Options and use the settings
below on your text.
Step 5
Creating
and customizing 2nd text layer. Now duplicate your text layer. Select
new text layer. Select the text layer in layer menu and go to Menu >
Layer > Duplicate layer and name it as you wish. Now go to Menu >
Layer > Layer Style > Clear Layer Style as we will make different
style for this layer. Finally go to Menu > Layer > Layer Style
> Blending Options and use the settings below on your text. You can
also use the quicker methods to access Blending Options from “Step 2″ of
this tutorial. When you are done with all the settings below, don’t
forget to hit “OK” in the Blending Options window! This text layer will
be in the middle of all 3 text layers in your layer menu. So for now it
should be above the first one.
Step 6
Creating
and customizing last 3rd text layer. We are almost there. Now we need
to duplicate our 2nd text layer. Select the text layer in layer menu and
go to Menu > Layer > Duplicate layer and name it as you wish. Now
go to Menu > Layer > Layer Style > Clear Layer Style as we
will make different style for this layer. Finally go to Menu > Layer
> Layer Style > Blending Options and use the settings below on our
text. Again you can use the quicker methods to access Blending Options
from “Step 2″ of this tutorial. When you are done with all the settings
below, don’t forget to hit “OK” in the Blending Options window! This
text layer will make most of the effects and must be on top of all other
text layers.
Final Image


Comments
Post a Comment