New Content-Aware Fill
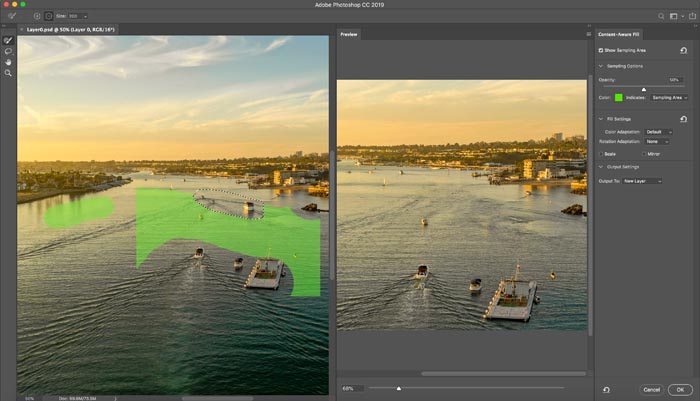
We all love Content Aware fill (CAF). When it first appeared in Photoshop, it revolutionized how we do our retouching. We can make a selection and choose Fill>Content aware (Shift+Backspace) and the area is magically filled seamlessly. At least that’s how it’s supposed to work. Sometimes you get weird artifacts and we reach for the clone stamp tool. That’s because, CAF grabs pixel from another part of the document to heal the area and it either works or not.Now, we get a Content aware workspace by choosing Edit>Content Aware Fill. You will see a live preview on the right, before committing.
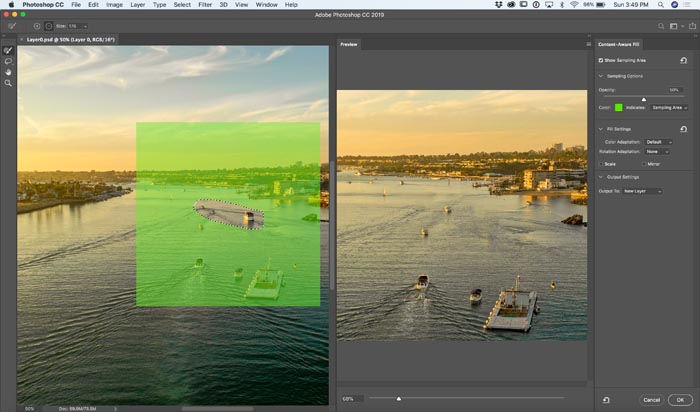
The areas that appear in green are the areas that will be used to sample from. Paint with the brush to exclude areas. Hold down Alt/Option to add areas to sample from. We can now define the sample areas, this really changes things.) Watch the video to see this is action).
There are check boxes that allow rotation, scaling, or mirroring of pixels to help with perspective, faces and other things.
Choose output to new layer to get a non-destructive healing layer.
Frame Tool
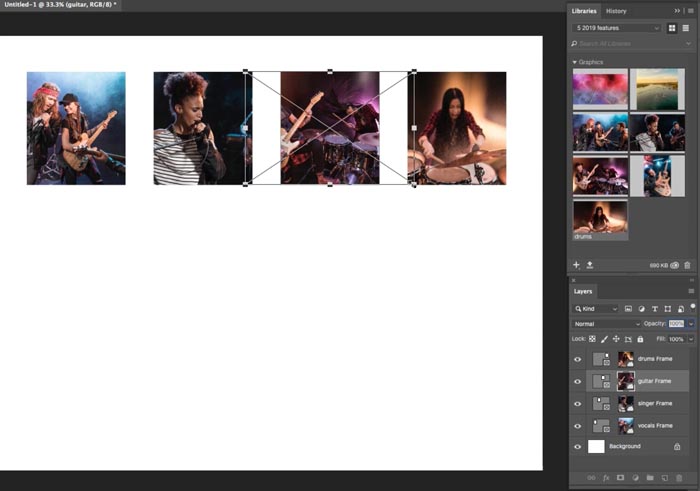
<span data-mce-type="bookmark" style="display: inline-block; width: 0px; overflow: hidden; line-height: 0;" class="mce_SELRES_start"></span>If you have ever had to create things like thumbnails, you will love this feature.
Here is what it replaces: You would create a rectangle. Drop in a photo. Create a clipping group to add the photo to the rectangle and then resize and reposition the photo.
Now you just grab the frame tool (rectangle or oval) and draw on the canvas. Now you can drag a photo from the library, or a different layer and it will go into the shape and resize to fit. Here are a few tips:
- Double click with frame tool to toggle between selecting the photo and selecting the frame.
- To replace with a new photo, drag in a new one and it will replace existing image.
- This is big: Right click in the layers panel to convert and text or shape to a frame, custom shapes!!

HDR Panorama
This is new in ACR (Camera RAW) and Lightroom ClassicTo create an HDR Panorama (A panoramic image that is in HDR and has all the dynamic range). We would first merge all the bracketed photos to HDR. Then we stitch all the HDR images into a Panorama. (See the tutorial here on how to do all this).
Now, we can just select all the images in the filmstrip, right click and choose Merge to HDR Panorama. This saves a lot of steps.
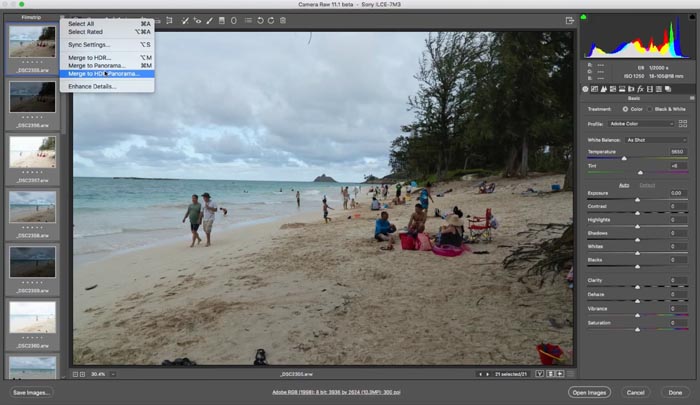
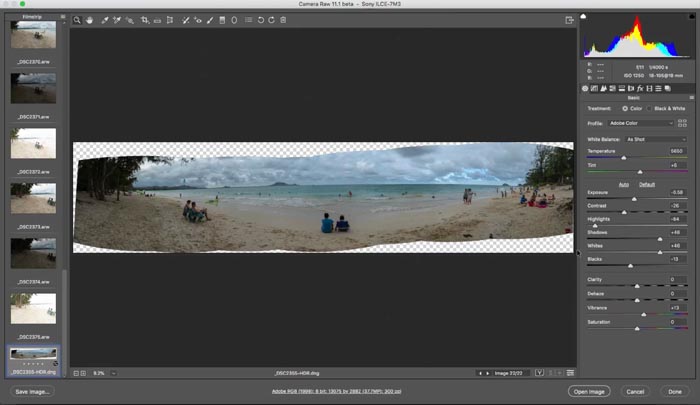
There are some caveats though. At the moment, it doesn’t work with DJI drone images, because they are only .7 of a stop brackets. I’ve heard murmurings that you need 2 stops of bracket for it to work. (You can still do it with the 2 step method as shown here).
Blending mode Preview
Instead of guessing the Layer Blending modes, choose the move tool. Click on Normal in the Layers panel, as you move through the different previews, Photoshop now shows a preview.

Other Changes
- If you have the move tool selected, double click on type and you can edit the text.
- To apply text, transform, place and crop, click away on th canvas (you don’t have to select a different tool anymore.
- Scaling: Don’t don’t need to hold down Shift anymore to constrain proportions while scaling. (If you hold Shift, you now transform disproportionate (the behavior is now swapped around).
- Multiple undo is now Cmd/Ctrl+Z, no longer Alt+Cms/Ctrl+Z
- Lock the position of your panels: Window > Workspaces > Lock.
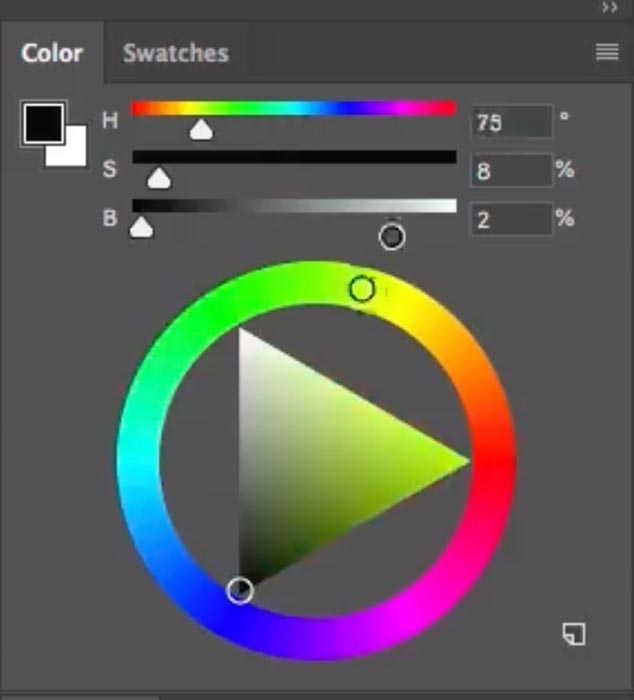
- Right click on the Color Swatch in the Color Panel and choose Color Wheel. You now get a color wheel that makes it easier to see complimentary colors and make color choices. (Looks more like the one in Painter).
- Math in number fields (simple math like “200/2” gets calculated and the result returned)
- Concept artists are always flipping the document horizontally to Help with composition. Choose View>Flip Horizontal to get a preview without actually changing the pixels and losing quality each time.
Thanks for checking this out and bookmark this page, as Ill be adding more videos here soon
PHOTOSHOP CC 2019 NEW FEATURE TUTORIALS
- 5 Big Little hidden things in Photoshop CC2019
- New Photoshop Frames in depth
- Content aware fill in depth
- New Features in Lightroom Classic
- Adjustable Depth Of Field
Check out PS 2019 here
Great to see you here at the CAFE
Thanks
Colin
More CC 2019 New Feature tuts
► Lightroom New Features tour and tutorial► Frames in Photoshop CC 2019
Comments
Post a Comment