
Calligraphy with Photoshop and Illustrator

 Calligraphy is a Visual Type Art which in former time, it can be done only on traditional method, using pen, brush, or swan feather. But now, you can easily make calligraphy on digital method.

Img

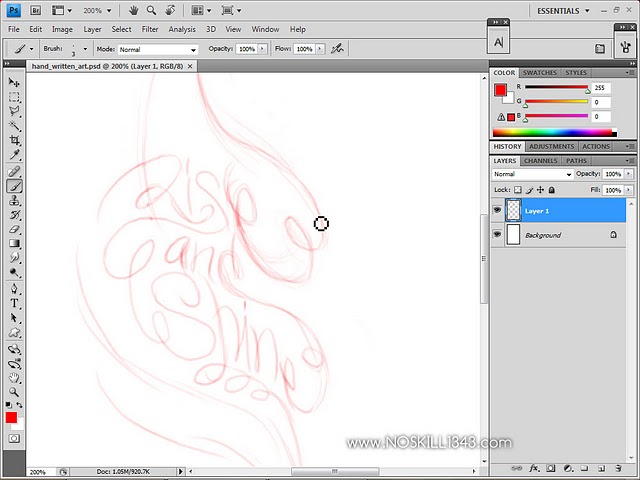
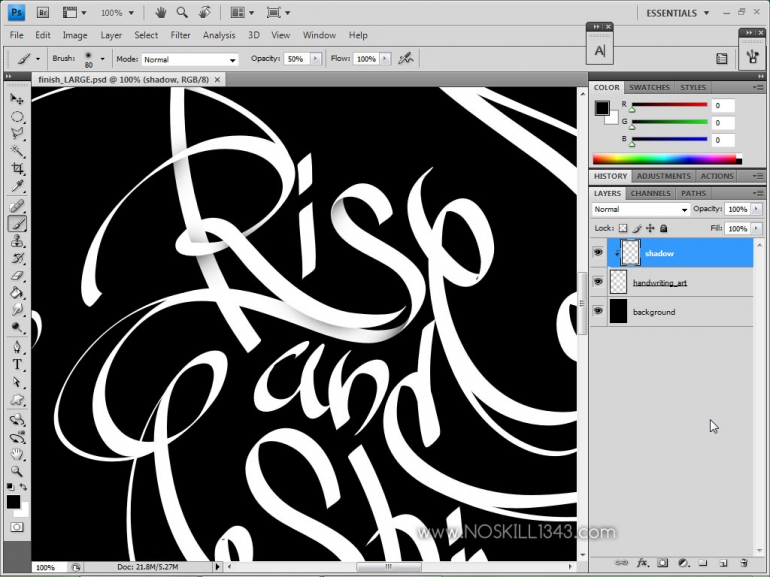
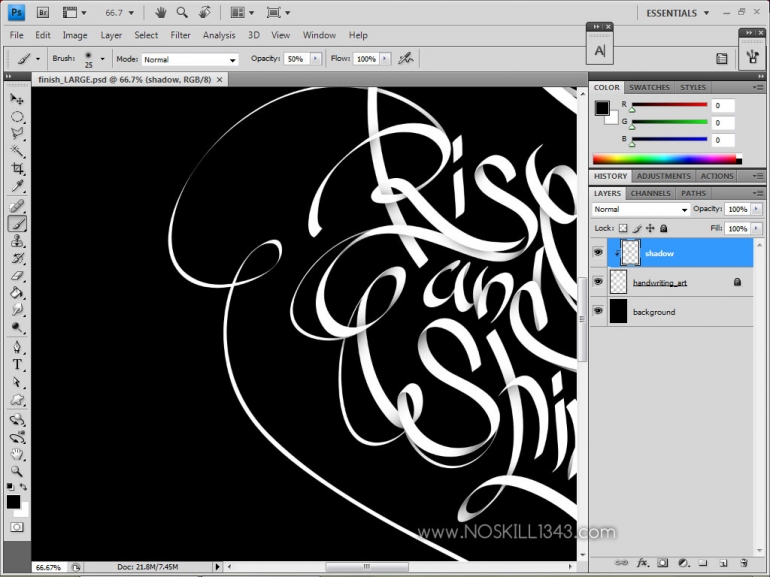
In this tutorial, I want to share step by step how to make Digital Calligraphy with Adobe Photoshop and Adobe Illustrator. See the finished version: "Rise and Shine". I hope this tutorial will be useful.


*Click on the image to enlarge.

Wanna get more useful tutorials and freebies? Subscribe to our newsletter!

1. Make the sketch, u can scan from your sketch book, or make the sketch in Photoshop. And to shorten the work time I make the sketch in Photoshop. Just draw a rough sketch, no detail needed.


Img
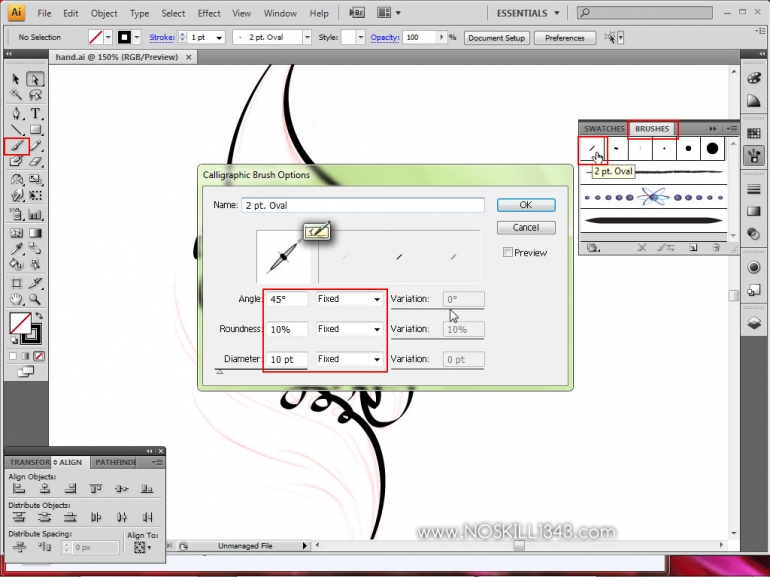
2. Open your sketch in Adobe Illustrator, choose "Paint Brush Tool" or press "B". Open the brush palette ( Window - Brushes ) or press "F5", double click on "2 pt. Oval" brush to open the brush option, then use this setting:
Angle = 45 - Fixed
Roundness = 10% or lower - Fixed
Diameter = Try your best - Fixed
Now you are ready to write calligraphy, make new layer above the sketch layer, and trace the sketch.


Img
Img
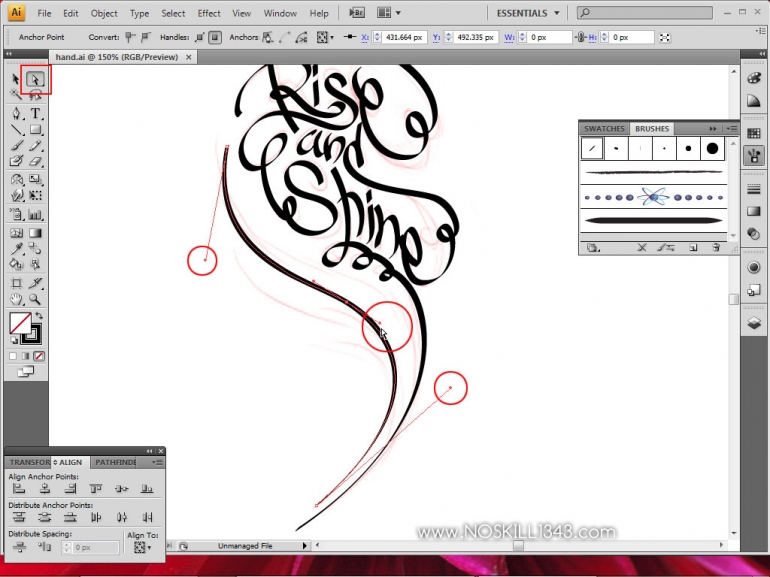
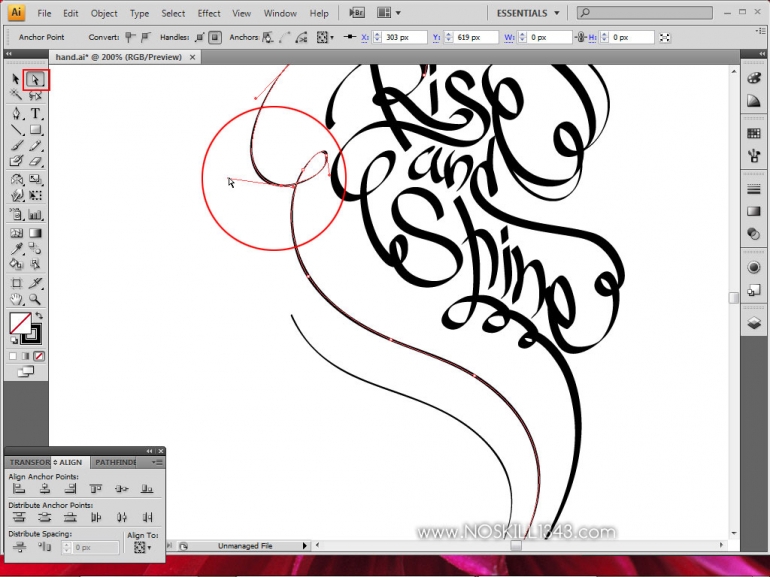
3. Refine the path shape with "Direct Selection Tool" or press "A". We don't have to do this step, if you already have a smooth shape.


Img
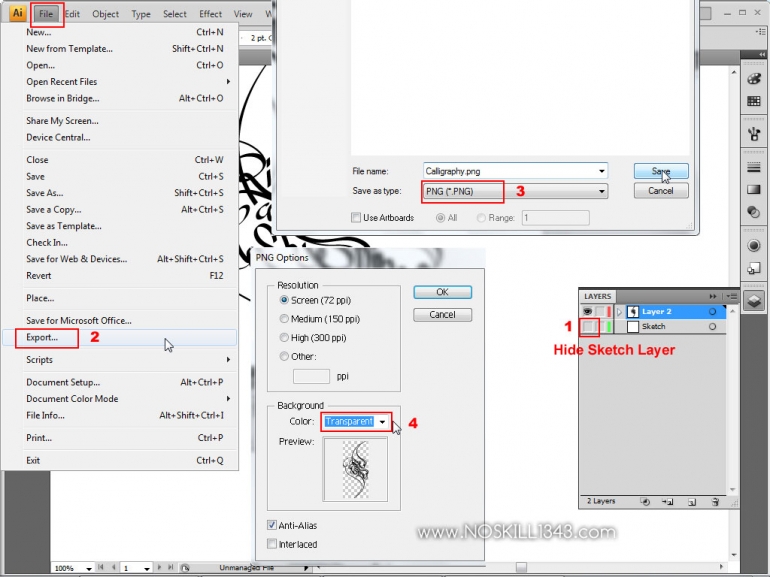
4. Hide your "Sketch" Layer and Export your calligraphy to png with transparent background.


Img
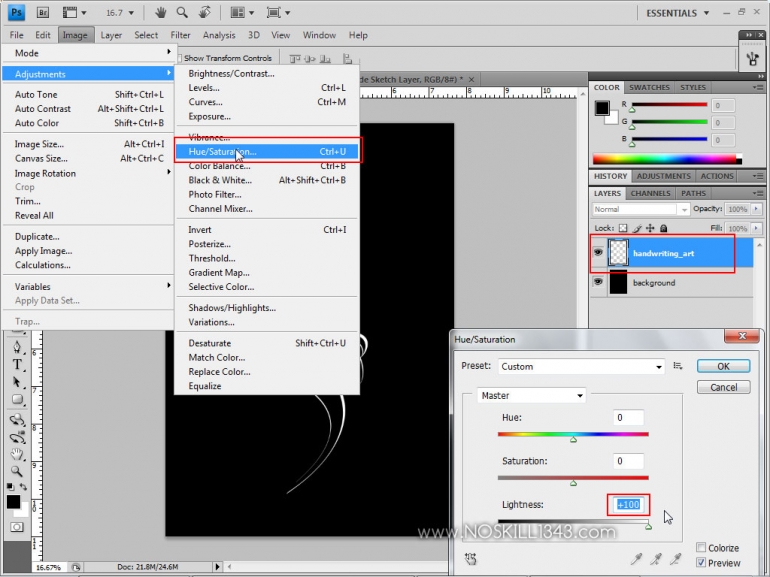
5. Open your Png file in Photoshop. I want to change my Calligraphy to white color, you can easily change the color by pressing "Ctrl+U" or go to "Image - Adjustment - Hue/Saturation", then set lightness to 100%. Create background layer and fill it with black color (You can use "Paint Bucket Tool" or press "B").


Img
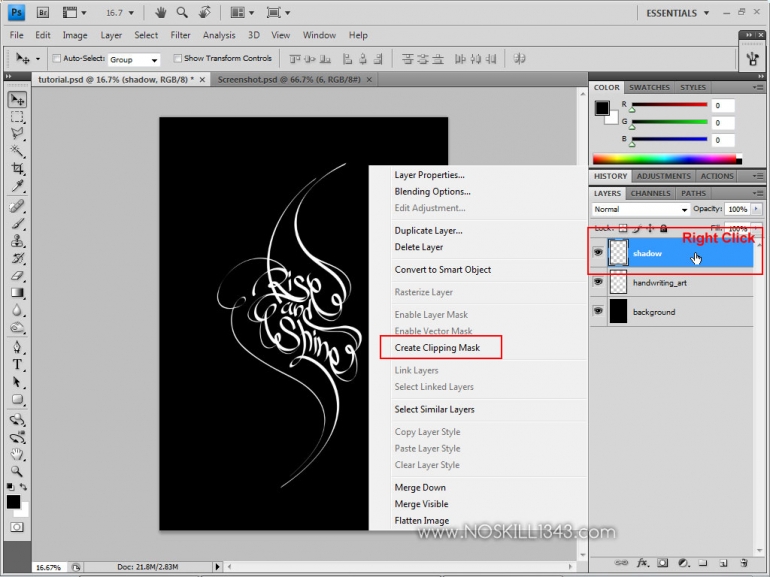
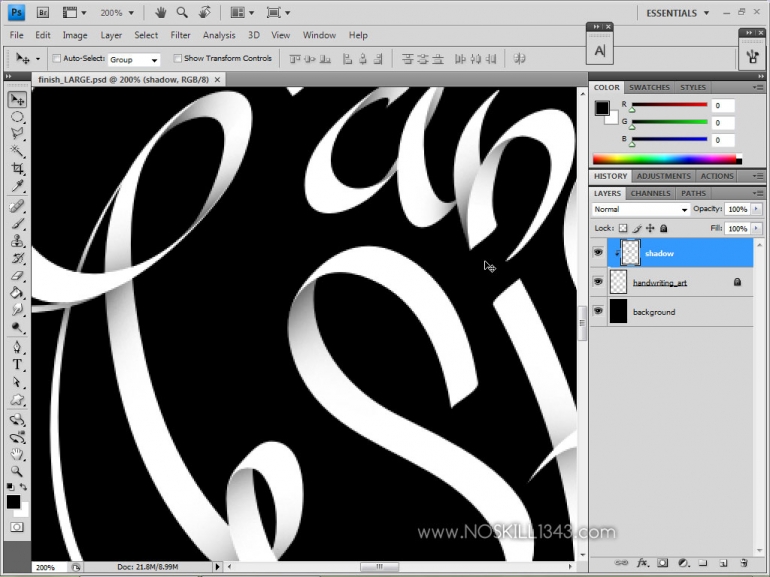
6. Create new layer, give it a name "Shadow" and place it above your calligraphy layer. Right click on "Shadow" layer then choose "Create Clipping Mask".


Img
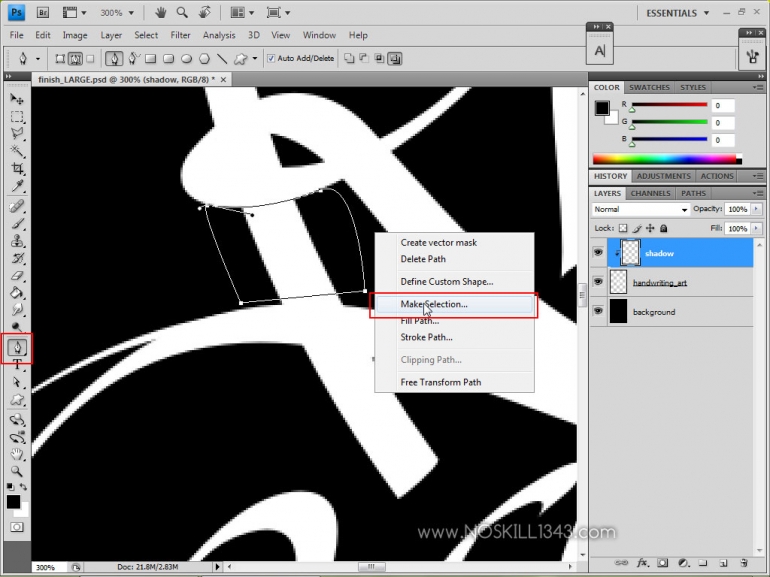
7. Now, we will make the shadow, and you must brush manually to make 3D effect. First you must make selection, and I recommend you to use "Pen Tool", because you can make the shape of your selection easily. After you create the shape with Pen Tool, right click and choose "Make Selection", set Feather Radius to "0".


Img
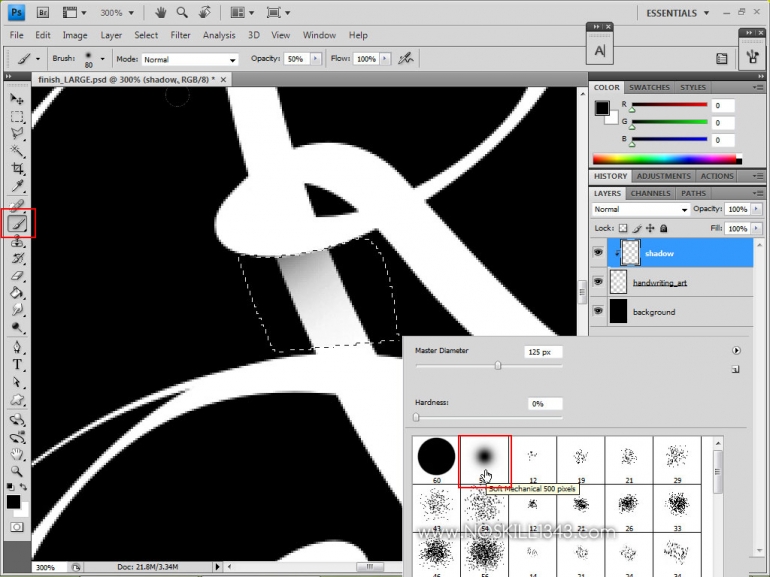
8. Select "Brush Tool" and choose "Soft Round Brush" (standard Photoshop brush). Now, brush slowly in the selection area with black color.


Img
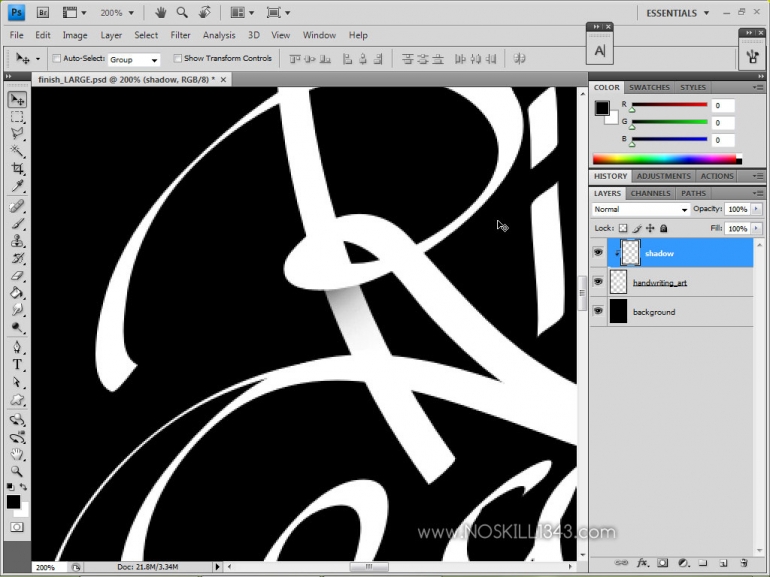
9. After you done with your brush, remove the selection by pressing "Ctrl+D" or right click and choose "Deselect".

Repeat step 7 to step 9 to your another shape, you must use your feeling to place the shadow and you'll make cool 3D effect.


Img
Img
Img


Read more:https://photoshop-zon.blogspot.com

Comments

Popular posts from this blog

Use x-ray techniques in Photoshop to show naked skin through clothing

    Do those new naked body scanners have you freaked out at the airports? As far as the TSA is concerned, those x-ray machines are here to stay, but you might as well take comfort in knowing that airport security guards aren't the only ones looking at your private parts. Practically anyone with a computer can manage to see through your clothes, and it's all thanks to a little program called Photoshop. Thanks, Adobe. With a few tweaks using the tools in Photoshop, you can see those boobs in no time, male or female. The video is in German, but it's not hard to figure our what's going on, especially if you're familiar with Photoshop. First, create a few duplicate layers, then get a handle on some of these tools to make the naked body through the clothes: * Auswahl erstellen (Create Selection) * Tonwertspreizung (Input Levels) * Belichtung (Exposure) You can also do this see-through clothing effect in free design programs, such as  GIMP .

Photoshop Shapes – Add, Subtract, Intersect and Exclude

’ve gone ahead and created a new Photoshop document, with white as my background color, and I’ve used the Ellipse Tool to draw a single circular shape (I held down my Alt (Win) / Option (Mac) key as I was dragging out the shape to force it into a perfect circle): A circular shape drawn with the Ellipse Tool. If we look in my Layers panel , we see that my document currently contains two layers – the white-filled Background layer on the bottom and the Shape layer (Shape 1) for my shape directly above it: The Layers panel showing the Shape layer sitting above the Background layer. With the Ellipse Tool still selected, I’ll draw a second similar shape partly overlapping the original: Adding a second shape to the document. By default, Photoshop assumes that each time we draw a new shape, we want to draw a separate, independent shape, and it places the new shape on its own Shape layer. If we look again in my Layers panel, we see that I now have a second Shape layer (S...

How To Create Simple Cover Art Design in Photoshop Photoshop Tutorial

                              Art Design in Photoshop   Photoshop Tutorial