
Which Photoshop version do I need?
I'Let's get started
Download this tutorial as a print-ready PDF!
Related tutorials:
How to create the gold text
I’ll start with the steps for creating a new document and adding the text.
But if you already added your text, you can skip to Step 4 where we start turning the text into gold.
Step 1: Create a new Photoshop document
Go up to the File menu and choose New to create a new document.
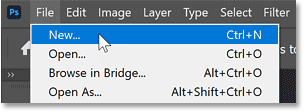
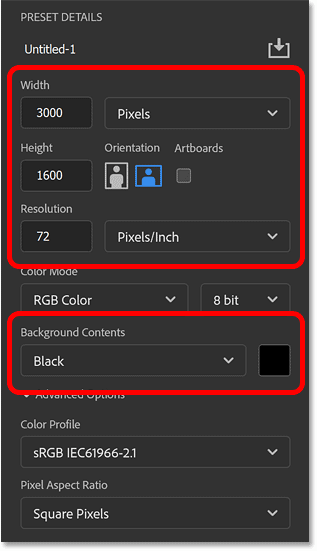
In the New Document dialog box, I’ll set:
- The Width to 3000 pixels
- The Height to 1600 pixels
- The Resolution to 72 pixels per inch
- The Background Contents to Black
Then click Create to close the dialog box and create the document.
The new document appears.
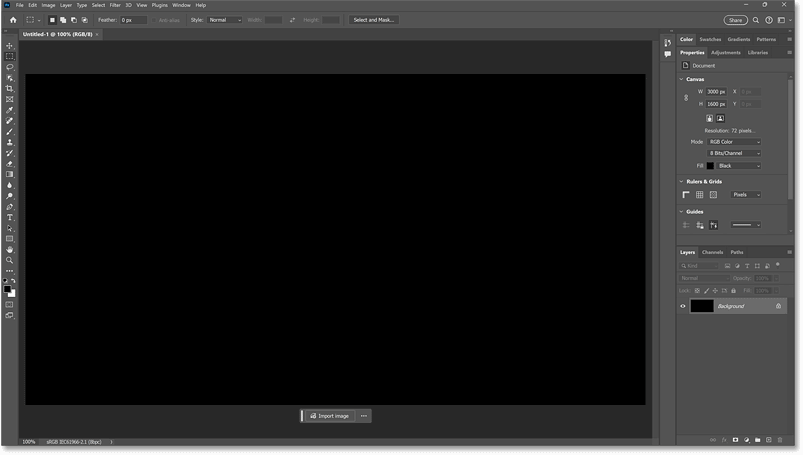
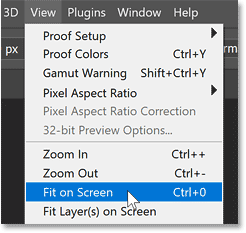
Zoom in on the document if needed by going up to the View menu and choosing Fit on Screen.
Hiding the Contextual Task Bar
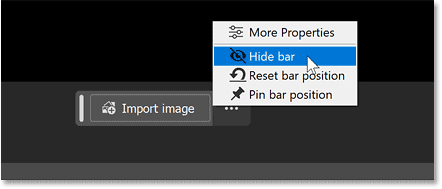
Before we go any further, let’s hide the Contextual Task Bar (which should be somewhere near the bottom of the canvas) since we don’t need it for this effect.
To hide it, click the three dots on the right and choose Hide bar.
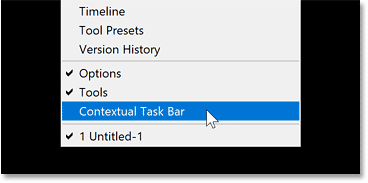
You can always bring it back later by going up to the Window menu and choosing Contextual Task Bar at the bottom of the list.
Step 2: Add your text
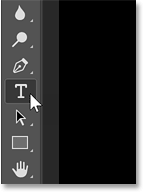
In the toolbar, select the Type Tool.
Then in the Options Bar, choose your font.
I’ll keep things simple and use Times New Roman with the weight set to Bold.

Still in the Options Bar, click the color swatch to choose a color for the text from the Color Picker.
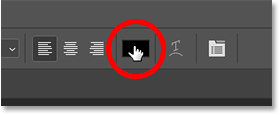
The color won’t matter once we turn the text into gold.
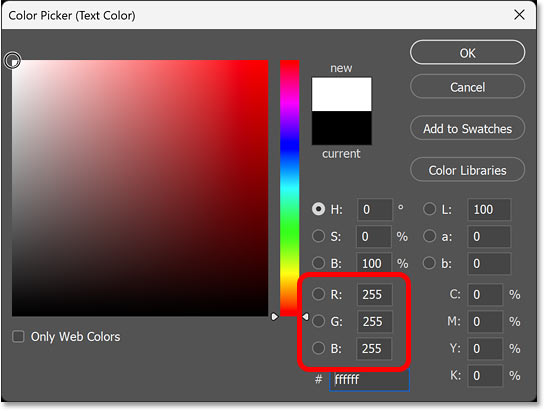
But since the document background is black, choose white for now (with the R, G and B values set to 255).
Click OK to close the Color Picker.
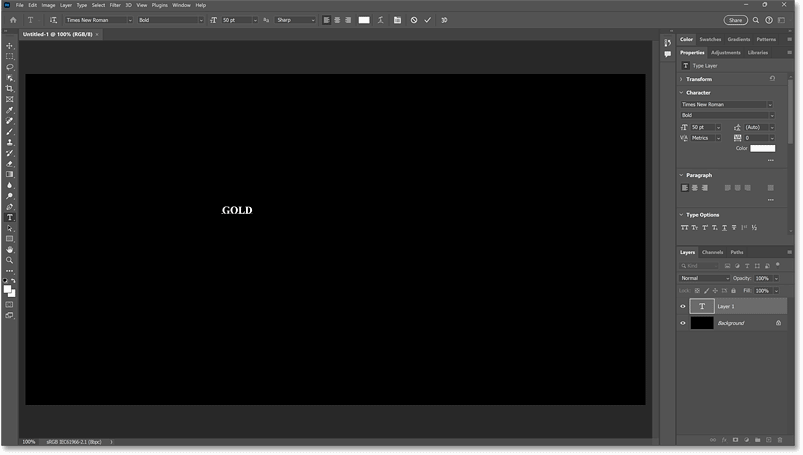
Then click in the document and add your text.
I’ll type the word GOLD
.
We’ll resize the text in the next step.
Click the check mark in the Options Bar to accept it.
Step 3: Resize and reposition the text on the canvas
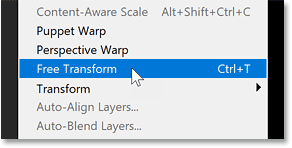
To resize the text, go up to the Edit menu and choose Free Transform.
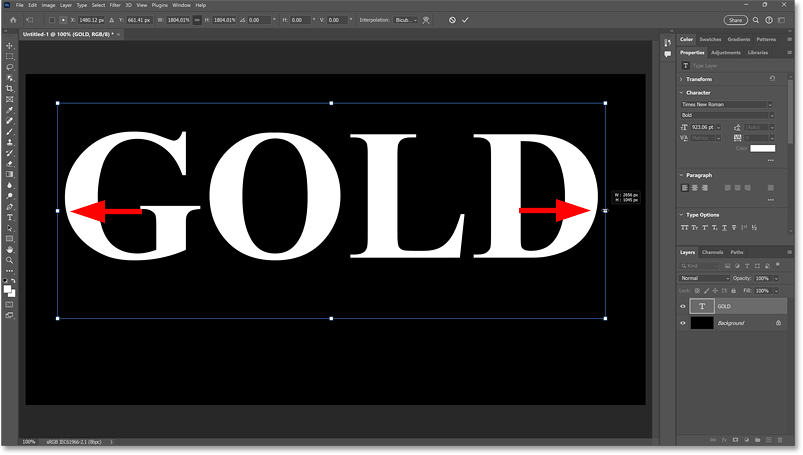
In the Options Bar, make sure that the link icon between the Width and Height fields is active so you won’t distort the shape of the text as you resize it.
Then drag the transform handles to scale the text to the size you need.
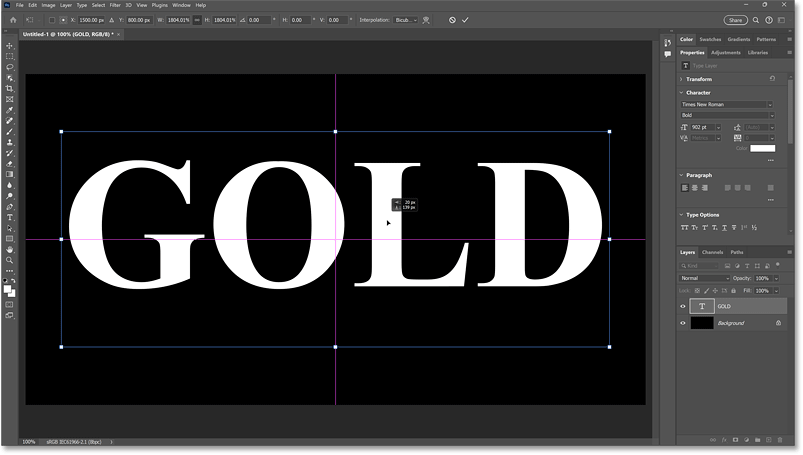
And center the text on the canvas by clicking and dragging inside the transform box.
Tip: If you need to scale the text further after centering it, you can scale it from its center by holding the Alt key (Option key on a Mac) as you drag the handles.
Then to accept it and close Free Transform, click the check mark in the Options Bar.

Step 4: Make a copy of the type layer
We have our text, so let’s start turning it into gold.
In the Layers panel, the text is on its own type layer above the background.
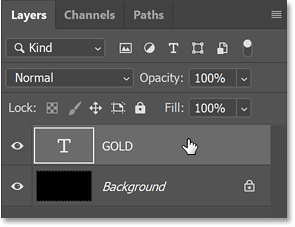
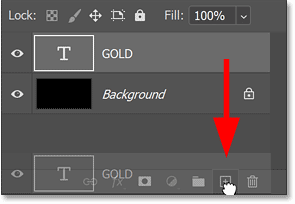
We actually need two copies of our text: one for the main letters and one for the stroke we’ll add around the letters.
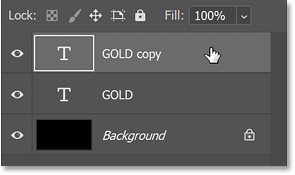
So make a copy of the type layer by dragging it down onto the Add New Layer icon.
The copy appears above the original.
Step 5: Add a Gradient Overlay layer effect
With the copy of the type layer selected, click the fx icon at the bottom of the Layers panel.
Then choose a Gradient Overlay effect from the list.

Step 6: Create a custom gold color gradient
Photoshop opens the Layer Style dialog box set to the Gradient Overlay options.
We’re going to create our own custom gold color gradient.
So click the gradient color swatch.

Then in the Gradient Editor, double-click on the color stop below the left side of the gradient preview bar.

This opens the Color Picker.
I’ve sampled some colors from a photo of a gold coin. So to use the same colors, set:
- R to 246
- G to 238
- B to 173
Then click OK to close the Color Picker.

Back in the Gradient Editor, double-click on the color stop below the right side of the gradient preview bar.

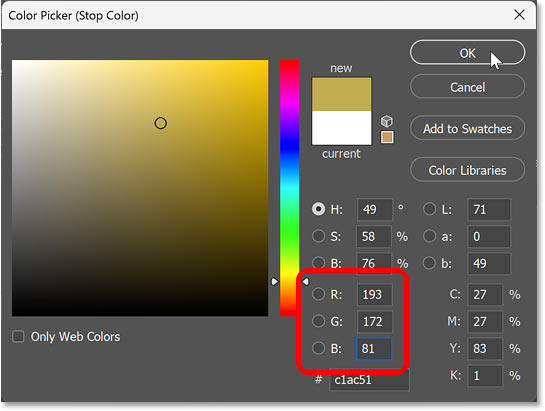
In the Color Picker, set:
- R to 193
- G to 172
- B to 81
Then click OK.
Step 7: Save the gold gradient as a preset
We’ll need this gradient again later so save it as a preset.
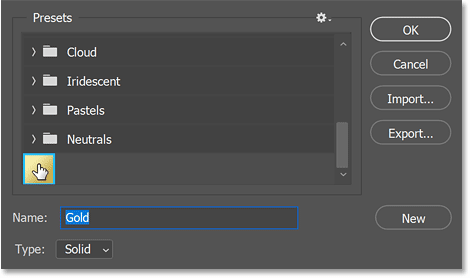
Give the preset a name. I’ll name it Gold
.
Then to save it, click New.
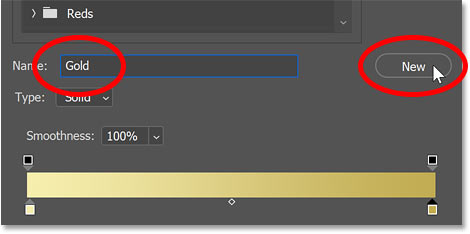
The gold preset appears as a thumbnail below the gradient sets.
Click OK to close the Gradient Editor.
Step 8: Change the gradient Style to Reflected
Back in the Layer Style dialog box, change the gradient Style to Reflected.

This moves the darker color in the gradient to the top and bottom of the letters, with the lighter color running through the middle.

Step 9: Add a Bevel and Emboss layer effect
All of the layer effects we can add are listed along the left of the Layer Style dialog box.
Choose the Bevel & Emboss effect by clicking its tab (don’t just click the checkbox or the options won’t appear).

Then change the Technique to Chisel Hard.

In the Shading section, go to the Gloss Contour option.
Click on the small arrow to the right of the thumbnail.
Then choose the Ring - Double contour by double-clicking on its thumbnail (third one from the left, bottom row).

Above that, change the Angle to 120 degrees.
And turn on Anti-aliased to smooth out any jagged edges.

Then to add more contrast to the effect, increase the Opacity for both the Highlight Mode and Shadow Mode to 75 percent.

Step 10: Increase the Size value to fill in the letters
But notice how the letters look like they have a stroke around them, which is not what we want.
We need to fill in all of the empty space inside the letters.

We do that by increasing the Size value.
The easiest way is to click inside the box where the current Size value appears.
Then hold the Shift key on your keyboard and press the Up Arrow key repeatedly to increase the value by 10 pixels at a time.
When the letters are nearly filled in, release the Shift key and continue pressing the Up Arrow to increase the value by 1 pixel at a time until they’re filled in completely.

And now the letters look more like solid gold.

Step 11: Increase the Depth value
Increase the Depth value to around 170 percent.

This enhances the lighting and adds more contrast to the reflections in the letters.

Step 12: Add an Inner Glow layer effect
Add an Inner Glow layer effect by clicking its tab on the left of the Layer Style dialog box.
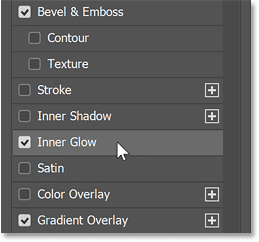
- Change the Blend Mode to Multiply
- Increase the Opacity to 50 percent
- Click the color swatch to choose a new color
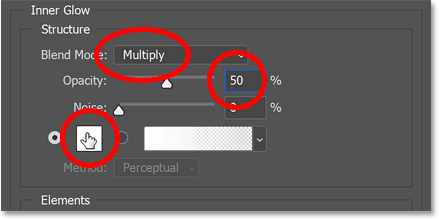
In the Color Picker, set:
- R to 232
- G to 128
- B to 31
Then click OK to close the Color Picker.

Finally, increase the Size of the glow until it is completely covering the letters.

When you’re done, click OK to close the Layer Style dialog box.
The first part of our gold effect is done.

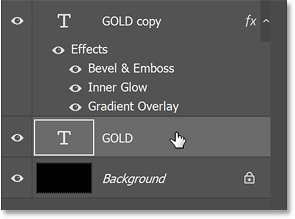
Step 13: Select the original type layer
Next we’ll create the second part of the gold text effect by adding more gold around the letters.
In the Layers panel, click on the original type layer to select it.
Step 14: Add a Stroke layer effect
Click the fx icon at the bottom of the Layers panel.
Choose a Stroke layer effect from the list.
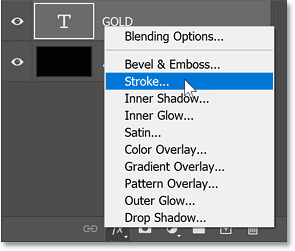
Photoshop reopens the Layer Style dialog box.
In the Stroke options, change the Fill Type to Gradient.

- Then click the arrow next to the gradient preview bar
- Scroll down past the gradient sets
- Choose the gold preset we saved earlier by double-clicking on its thumbnail

Change the gradient Style to Reflected.

Then set the Position to Outside and increase the Size of the stroke to how wide you want it to be.
I’ll set the size to 16 pixels. Remember the size you choose here because we’ll need it again in a moment.

Here’s how the text should look so far with the stroke around the letters.
We'll make the stroke look like gold next.

Step 15: Add a Bevel and Emboss layer effect to the stroke
On the left of the Layer Style dialog box, choose Bevel & Emboss by clicking its tab.

Then change the Style to Stroke Emboss to apply it to the stroke.
And set the Size value to the same size you chose for the stroke, which in my case was 16 pixels.

Before we move on, make sure:
- The Technique is set to Chisel Hard
- Gloss Contour is set to Ring - Double
- Anti-aliased is selected.

Step 16: Turn on the Contour option
Just below the words “Bevel & Emboss” on the left of the Layer Style dialog box, click inside the checkbox for the Contour option.

This further enhances the lighting around the stroke.

Step 17: Add an Outer Glow layer effect
Choose the Outer Glow layer effect to add a glow around the letters.
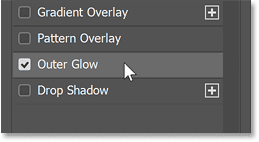
Increase the Opacity of the glow to 40 percent.
Then click the color swatch to choose a new color.
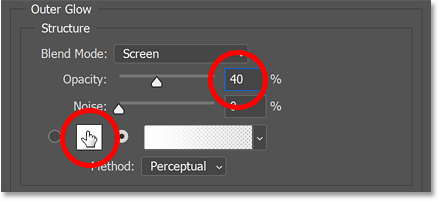
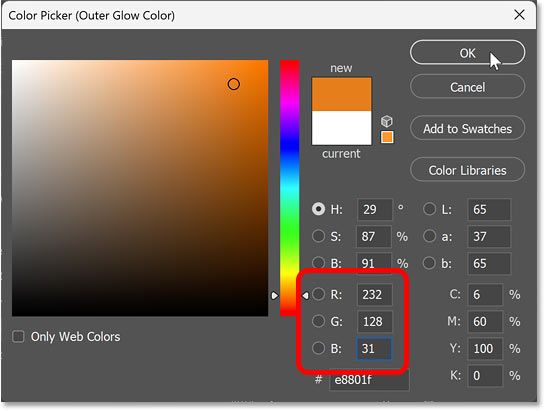
In the Color Picker, set:
- R to 232
- G to 128
- B to 31
This is the same color we used earlier for the Inner Glow.
Then close the Color Picker by clicking OK.
Drag the Size slider to the right to increase the value until you see the glow around the letters.
In my case, a value of around 110 works well.

We’re done with our layer effects, so click OK to close the Layer Style dialog box.
Here’s my result with the glow added.

Step 18: Add a new blank layer above the text
Let’s finish off the gold text by adding a few sparkles around the letters. We’ll add the sparkles on their own separate layer.
In the Layers panel, click the type layer on top to select it.

Then click the Add New Layer icon.
A new blank layer appears above the type layers.

I’ll double-click on the layer’s name and rename it Sparkles
.

Step 19: Select the Brush Tool
To create the sparkles, we need one of Photoshop’s brushes.
Select the Brush Tool from the toolbar.

Step 20: Load the Legacy Brushes set
Right-click anywhere in the document to open the Brush Preset Picker.

The brush we need is an older brush that you won’t find in any of Photoshop’s default brush sets. Instead, we need to load in the Legacy Brushes set.
So click the gear icon in the upper right of the Brush Preset Picker and choose Legacy Brushes at the bottom of the list.

Click OK to confirm that you want to load the Legacy Brushes.

Step 21: Select the Crosshatch 4 brush
Then right-click again to reopen the Brush Preset Picker and scroll down to the new Legacy Brushes set.

Twirl it open and scroll down to the Assorted Brushes group.

Then twirl the Assorted Brushes open, scroll down to the brush called Crosshatch 4 and double-click on it to select it.

Step 22: Sample a brush color from the text
To choose a color for the sparkles, hold the Alt key (Option key on a Mac) to temporarily switch from the Brush Tool to the Eyedropper Tool.

Click on a light gold color in the text to sample it.
Then release the Alt or Option key to switch back to the Brush Tool.

Step 23: Click on the letters to add random sparkles
The default size of the brush is 48 pixels, which is probably too small.

But you can use the left and right bracket keys to adjust the brush size from your keyboard.
I’ll increase the size to around 100 pixels using the right bracket key.
Then I’ll click in the top right of the letter G to add a sparkle.

Let’s add a few more sparkles.
You might want to change the size of the brush before each click just to add some variety. So press the left bracket key to make it smaller or the right bracket key to make it larger.
I’ll add a second sparkle, also on the letter G. Then a third sparkle in the lower part of the letter L, and a fourth sparkle in the top left of the letter D.

If the sparkles are too bright, lower the Opacity of the Sparkles layer in the Layers panel.
I’ll lower it to 80 percent.

And with that, our gold text effect is done.
I'll show you how to save it with a transparent background next.

How to save the gold text with a transparent background
What if you want to save your gold text with a transparent background so you can place it on a different background?
To remove the background, just go to the Layers panel and turn off the Background layer by clicking its visibility icon.

This gives us a transparent background, indicated by the checkerboard pattern.

To keep the transparency when we save it, we need to save it as a PNG file.
So go up to the File menu and choose Save a Copy (not Save As because the PNG format won’t be listed).

In the Save a Copy dialog box:
- Navigate to where you want to save the file on your computer
- Click on the File Type and choose PNG from the list
- Give the file a name (I’ll name it
gold-text.png
)

Then click the Save button.

In the PNG Format Options dialog box, choose the Smallest file size and click OK.
We’ll place the gold text on a new background next.

How to place the gold text on a new document
Now that we saved our gold text as a PNG file, here’s how to place it on a new background.
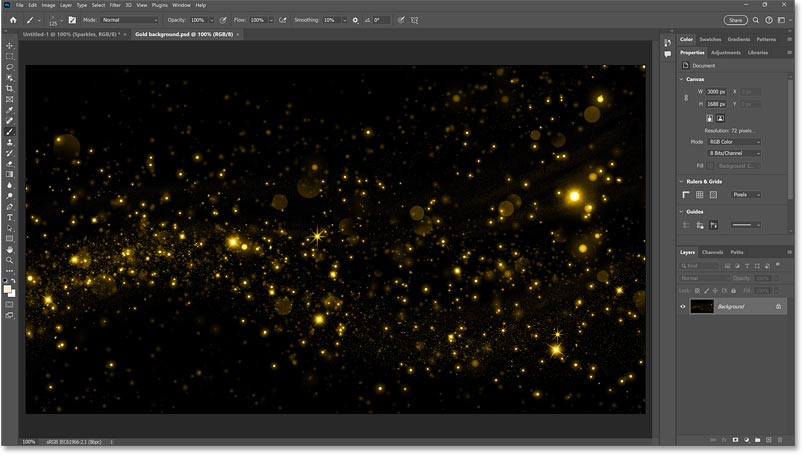
Open the background image you want to use. It will open in its own document.
I’ll use this sparkly gold background from Adobe Stock.
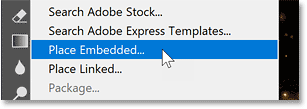
Go up to the File menu and choose Place Embedded.
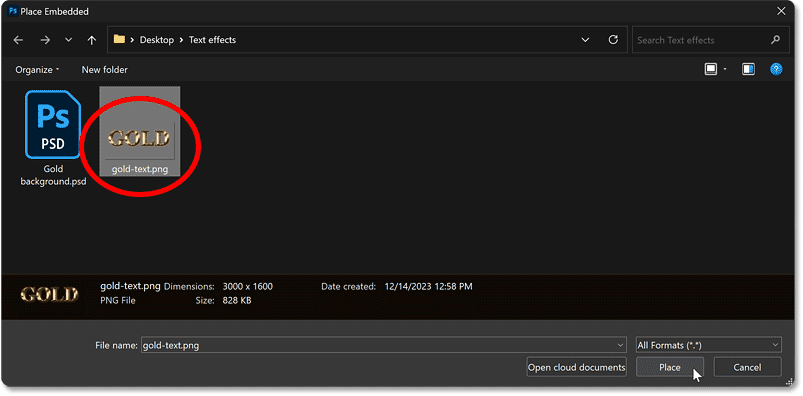
In the dialog box:
- Navigate to where you saved the PNG file
- Click on the file to select it
- Click Place
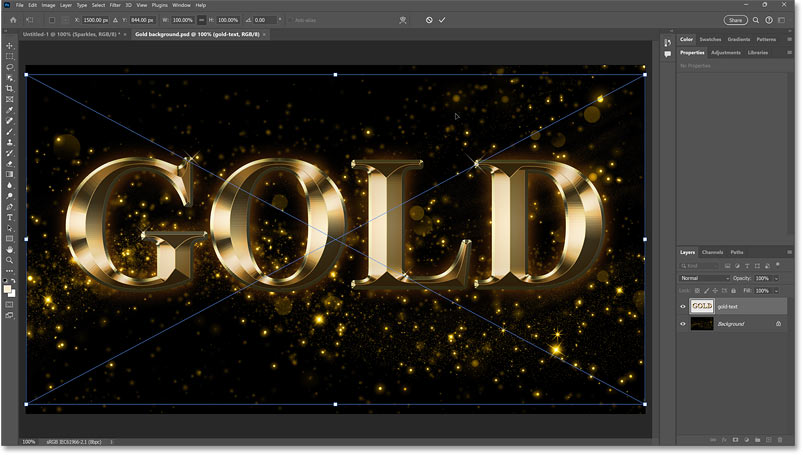
Photoshop places the gold text into the document.
It also adds the Free Transform handles around the text so you can resize or reposition it if needed.
To accept it and close Free Transform, click the check mark in the Options Bar.

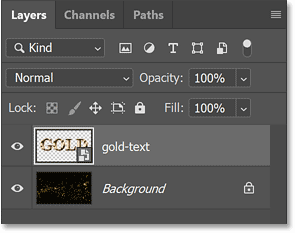
In the Layers panel, the gold text appears on a separate layer above the background image.
Comments
Post a Comment