Text-only GIFs
Text-only GIFs are by far the easiest format to explore if you are short on time. They are best used for displaying information, such as events, dates and sales and can double up as a more noticeable version of a static call-to-action image. Even though this method is devoid of images, it can still look incredibly effective if generated according to brand guidelines, colours and typefaces.
1. Open a new document in Photoshop and type in your desired dimensions
2. Ensure that your layers window is open. If you cannot see it, go to Window > Layers.
3. Don’t forget to click on the padlock icon on your background layer first to unlock it for editing (its name will automatically change to layer 0).
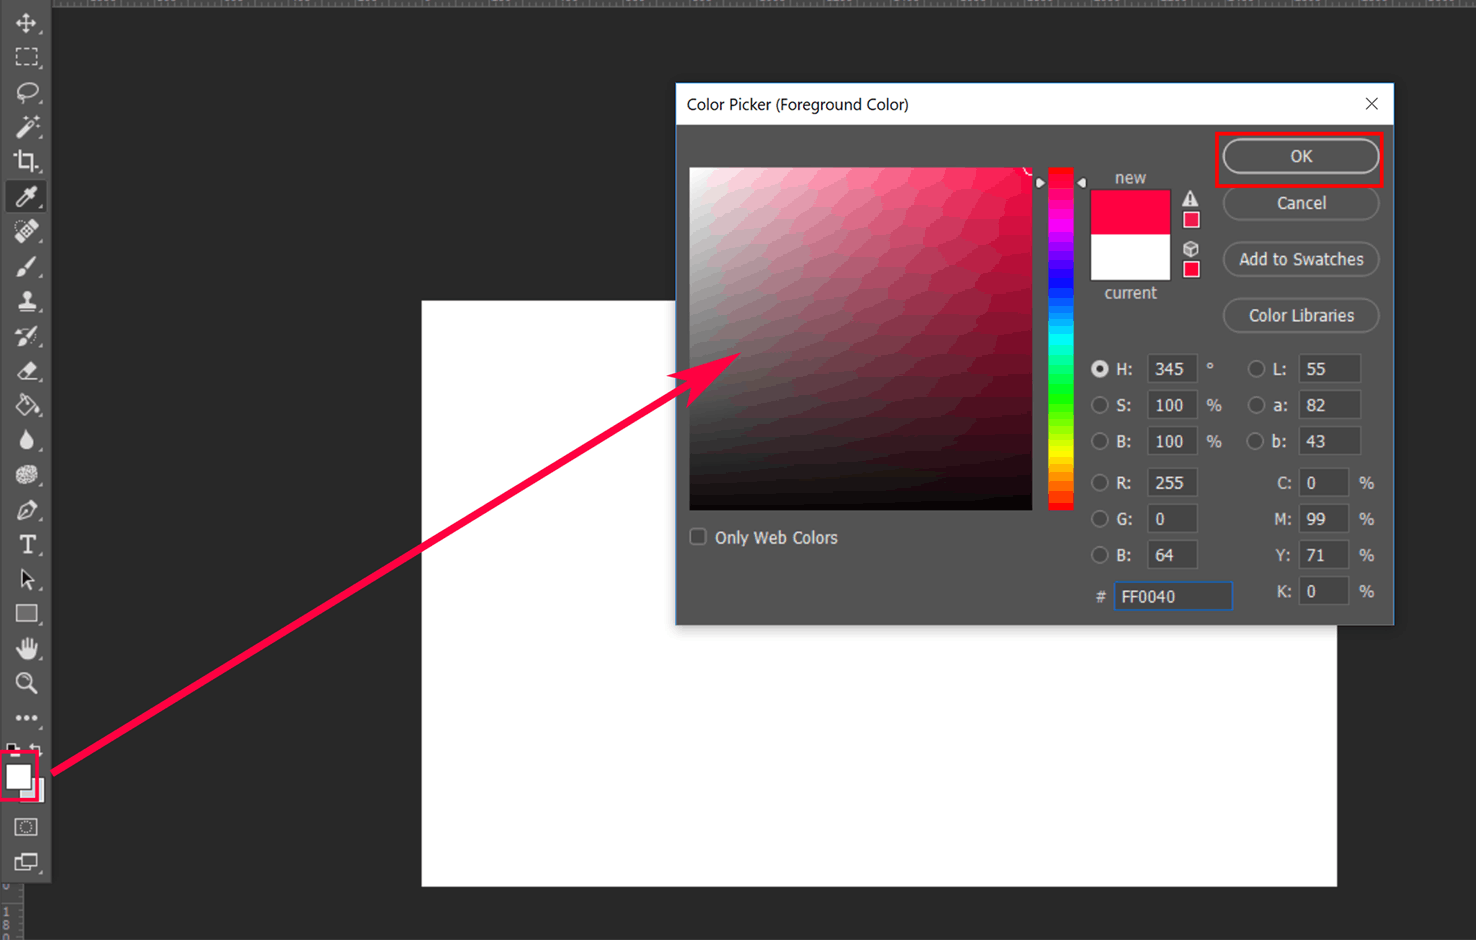
4. Choose a background colour for your first layer – ideally in line with your brand styling. Click the colour swatch square on the bottom left hand side and select a colour from the spectrum window. Click ‘OK’ when you are happy with the colour you have chosen.
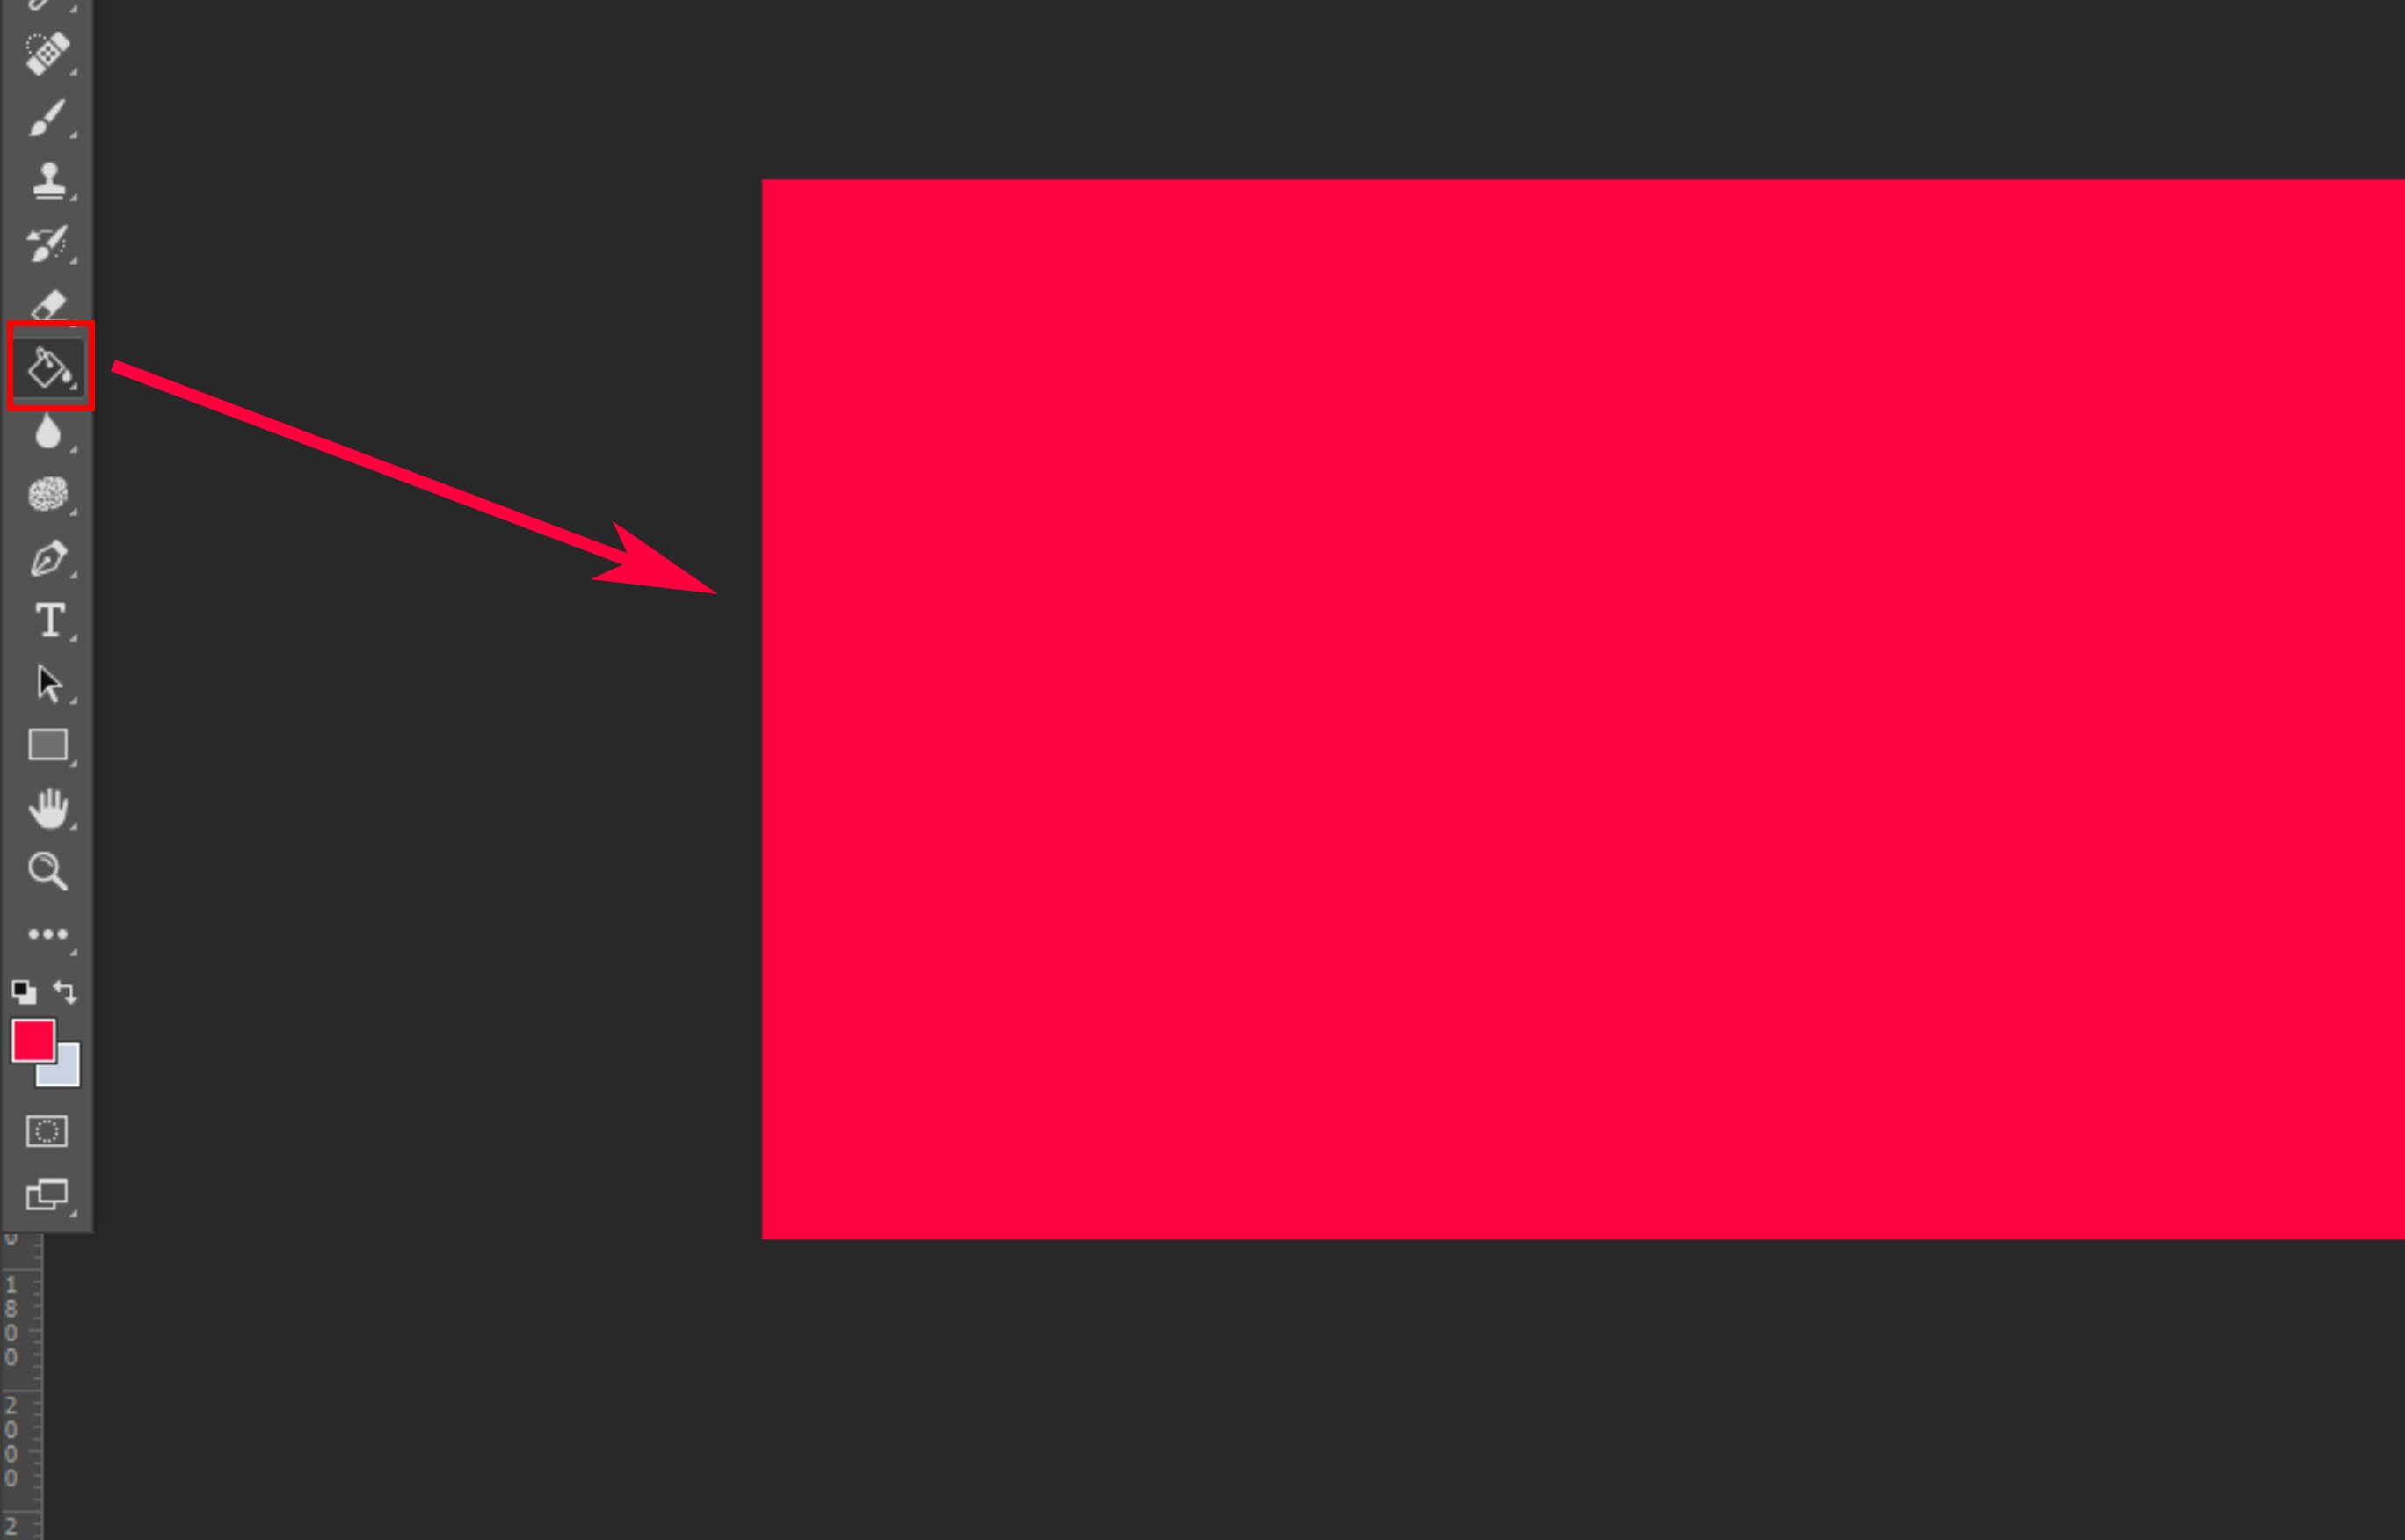
5. Fill the background with your chosen colour by clicking on the paint bucket and then on the white space of the layer.
 6. Add the text you would like to appear in the first part of your GIF on top of this background layer. Select the ‘T’ button on the left hand side and choose a font relevant to your brand. Use the top toolbar to edit your text.
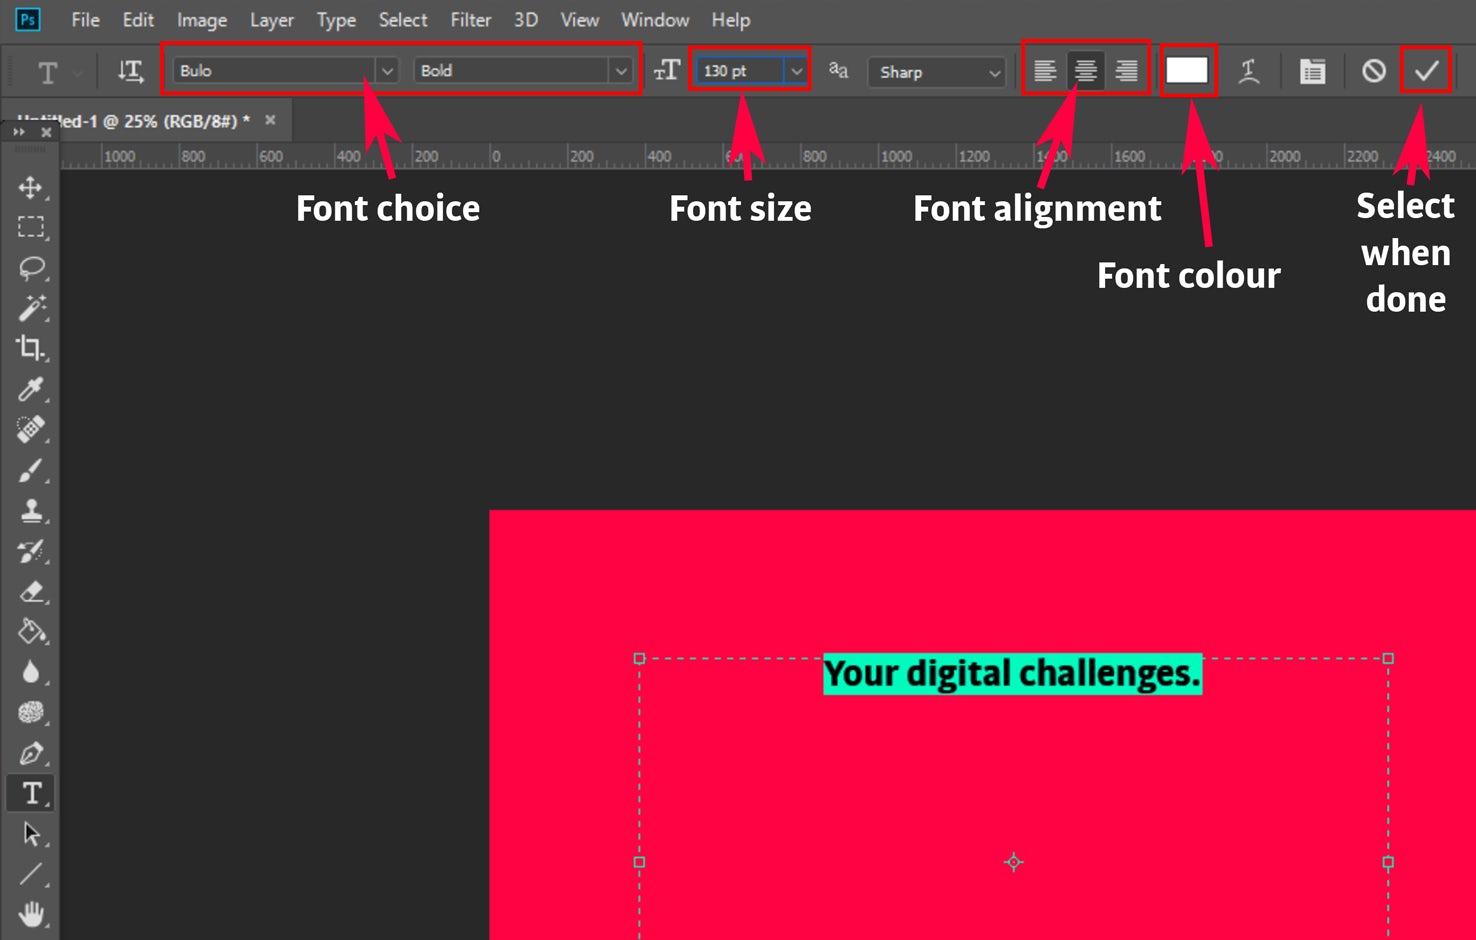
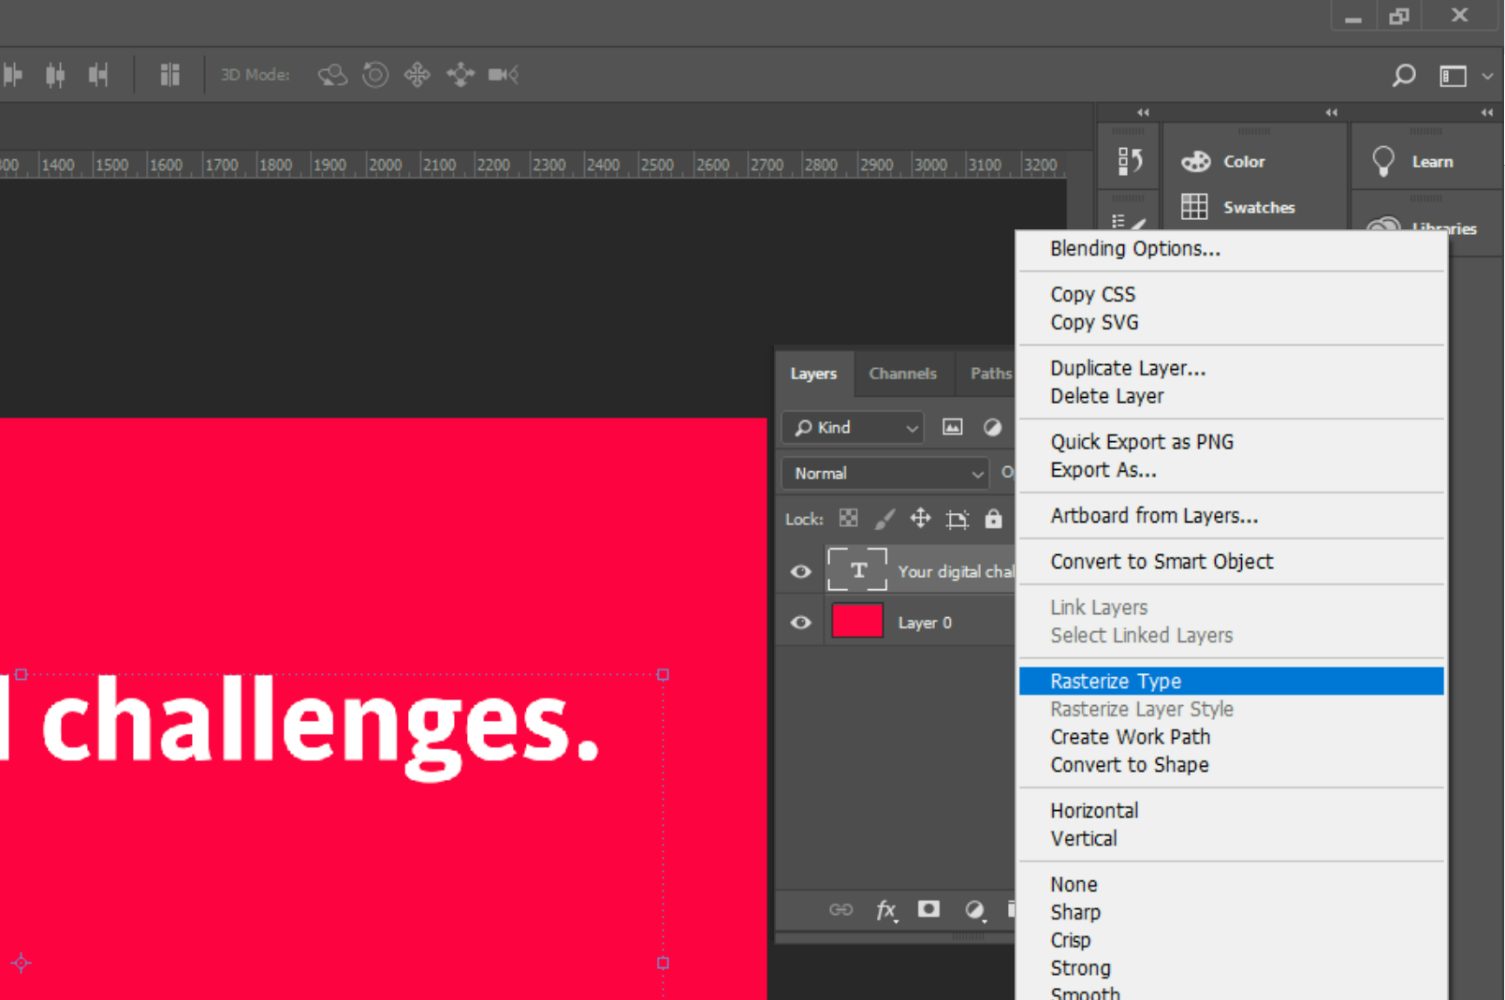
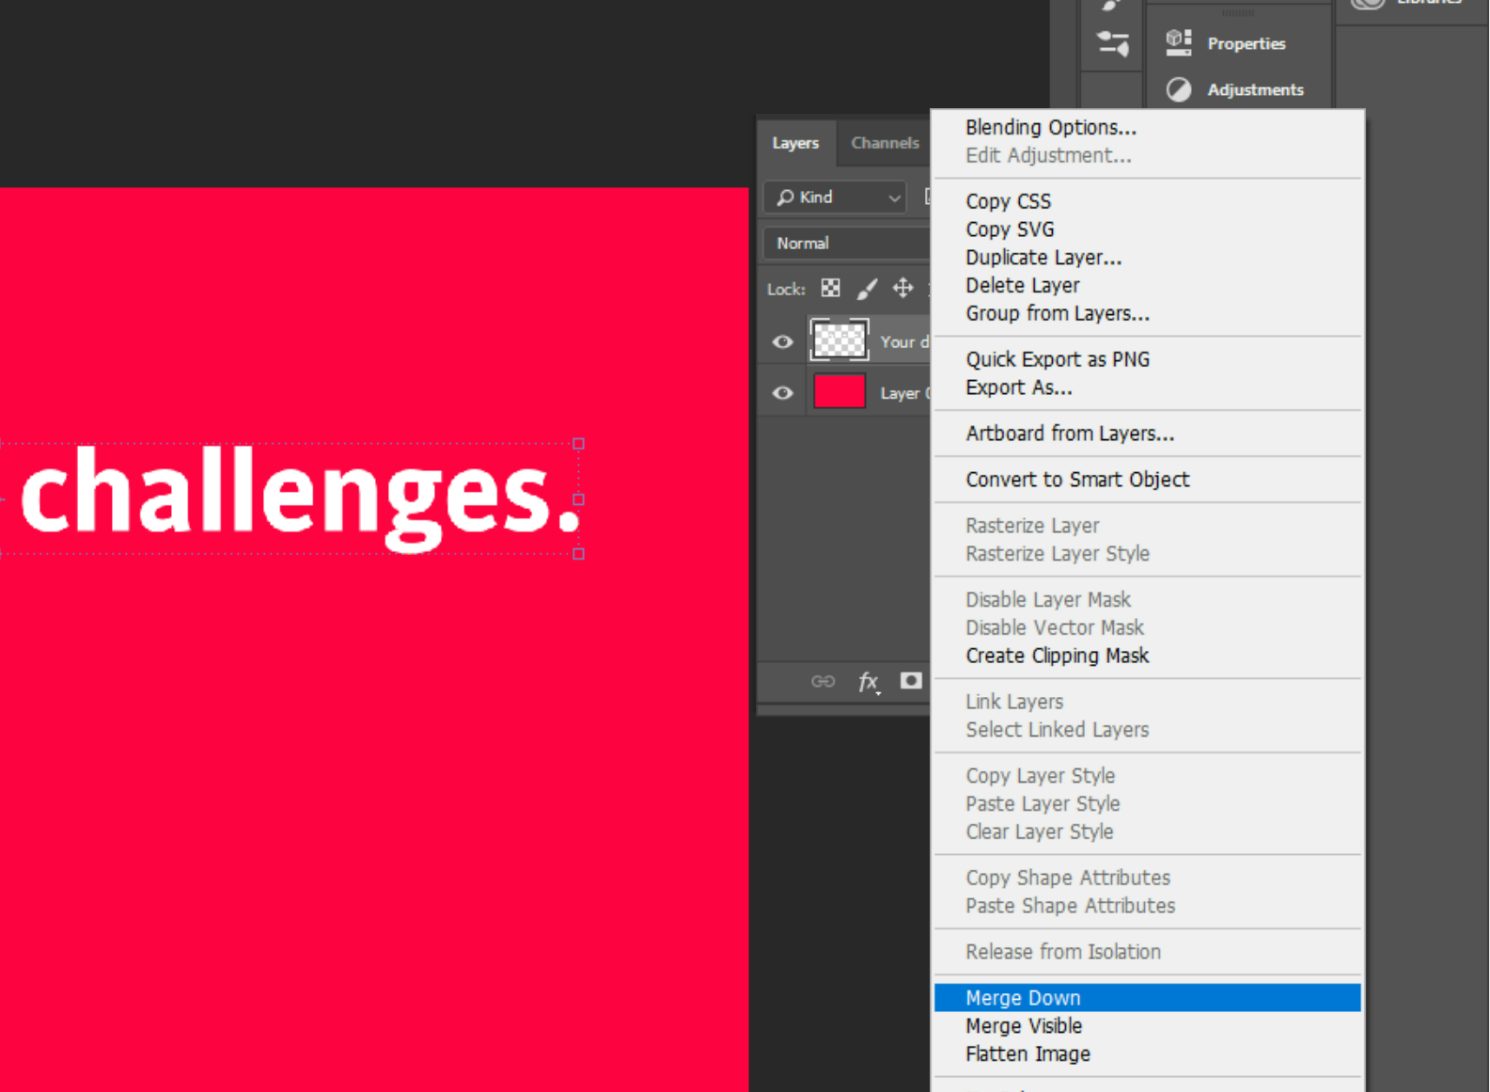
7. If you are completely happy with your text, you will now need to rasterize the text layer and merge it with your coloured background. Right click on the text layer and click on ‘rasterize type’. Right click again and select ‘merge down’:
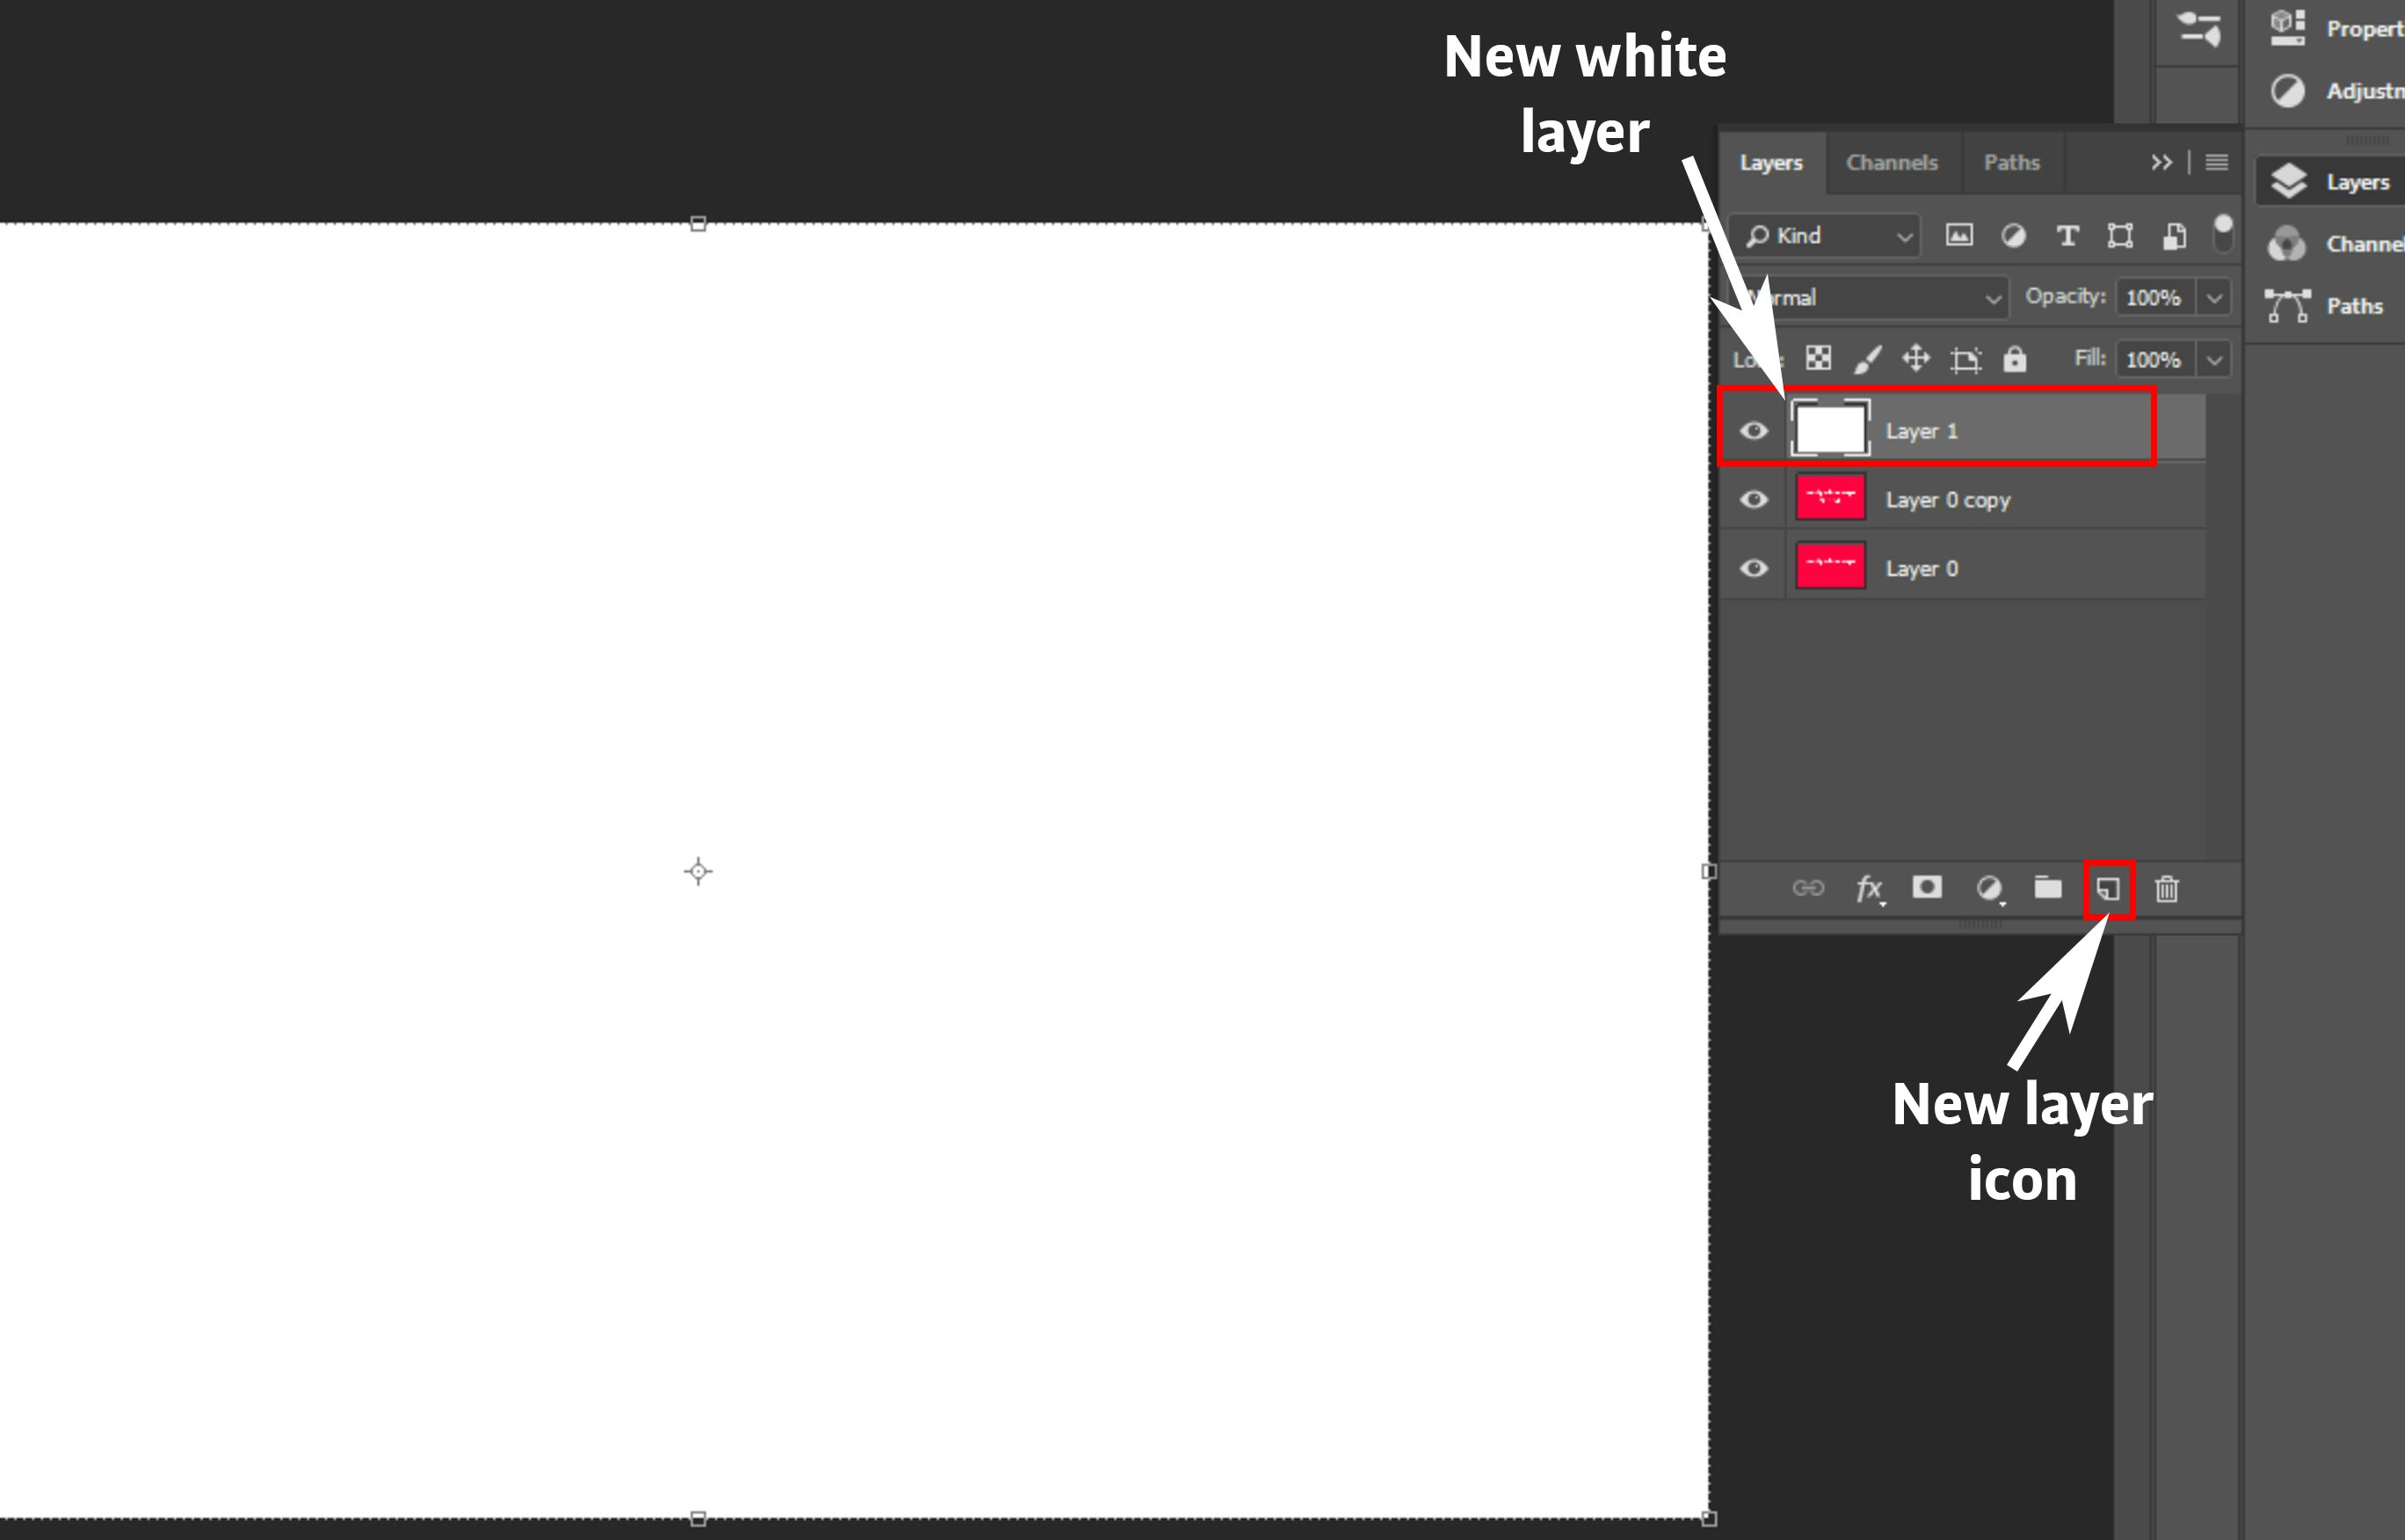
8. Now we can create more text layers for our GIF using the same method. For this example, I will make another line of text appear underneath the first line from the first layer. To do this, duplicate your bottom layer using Ctrl+J, or dragging it to the new layer icon.
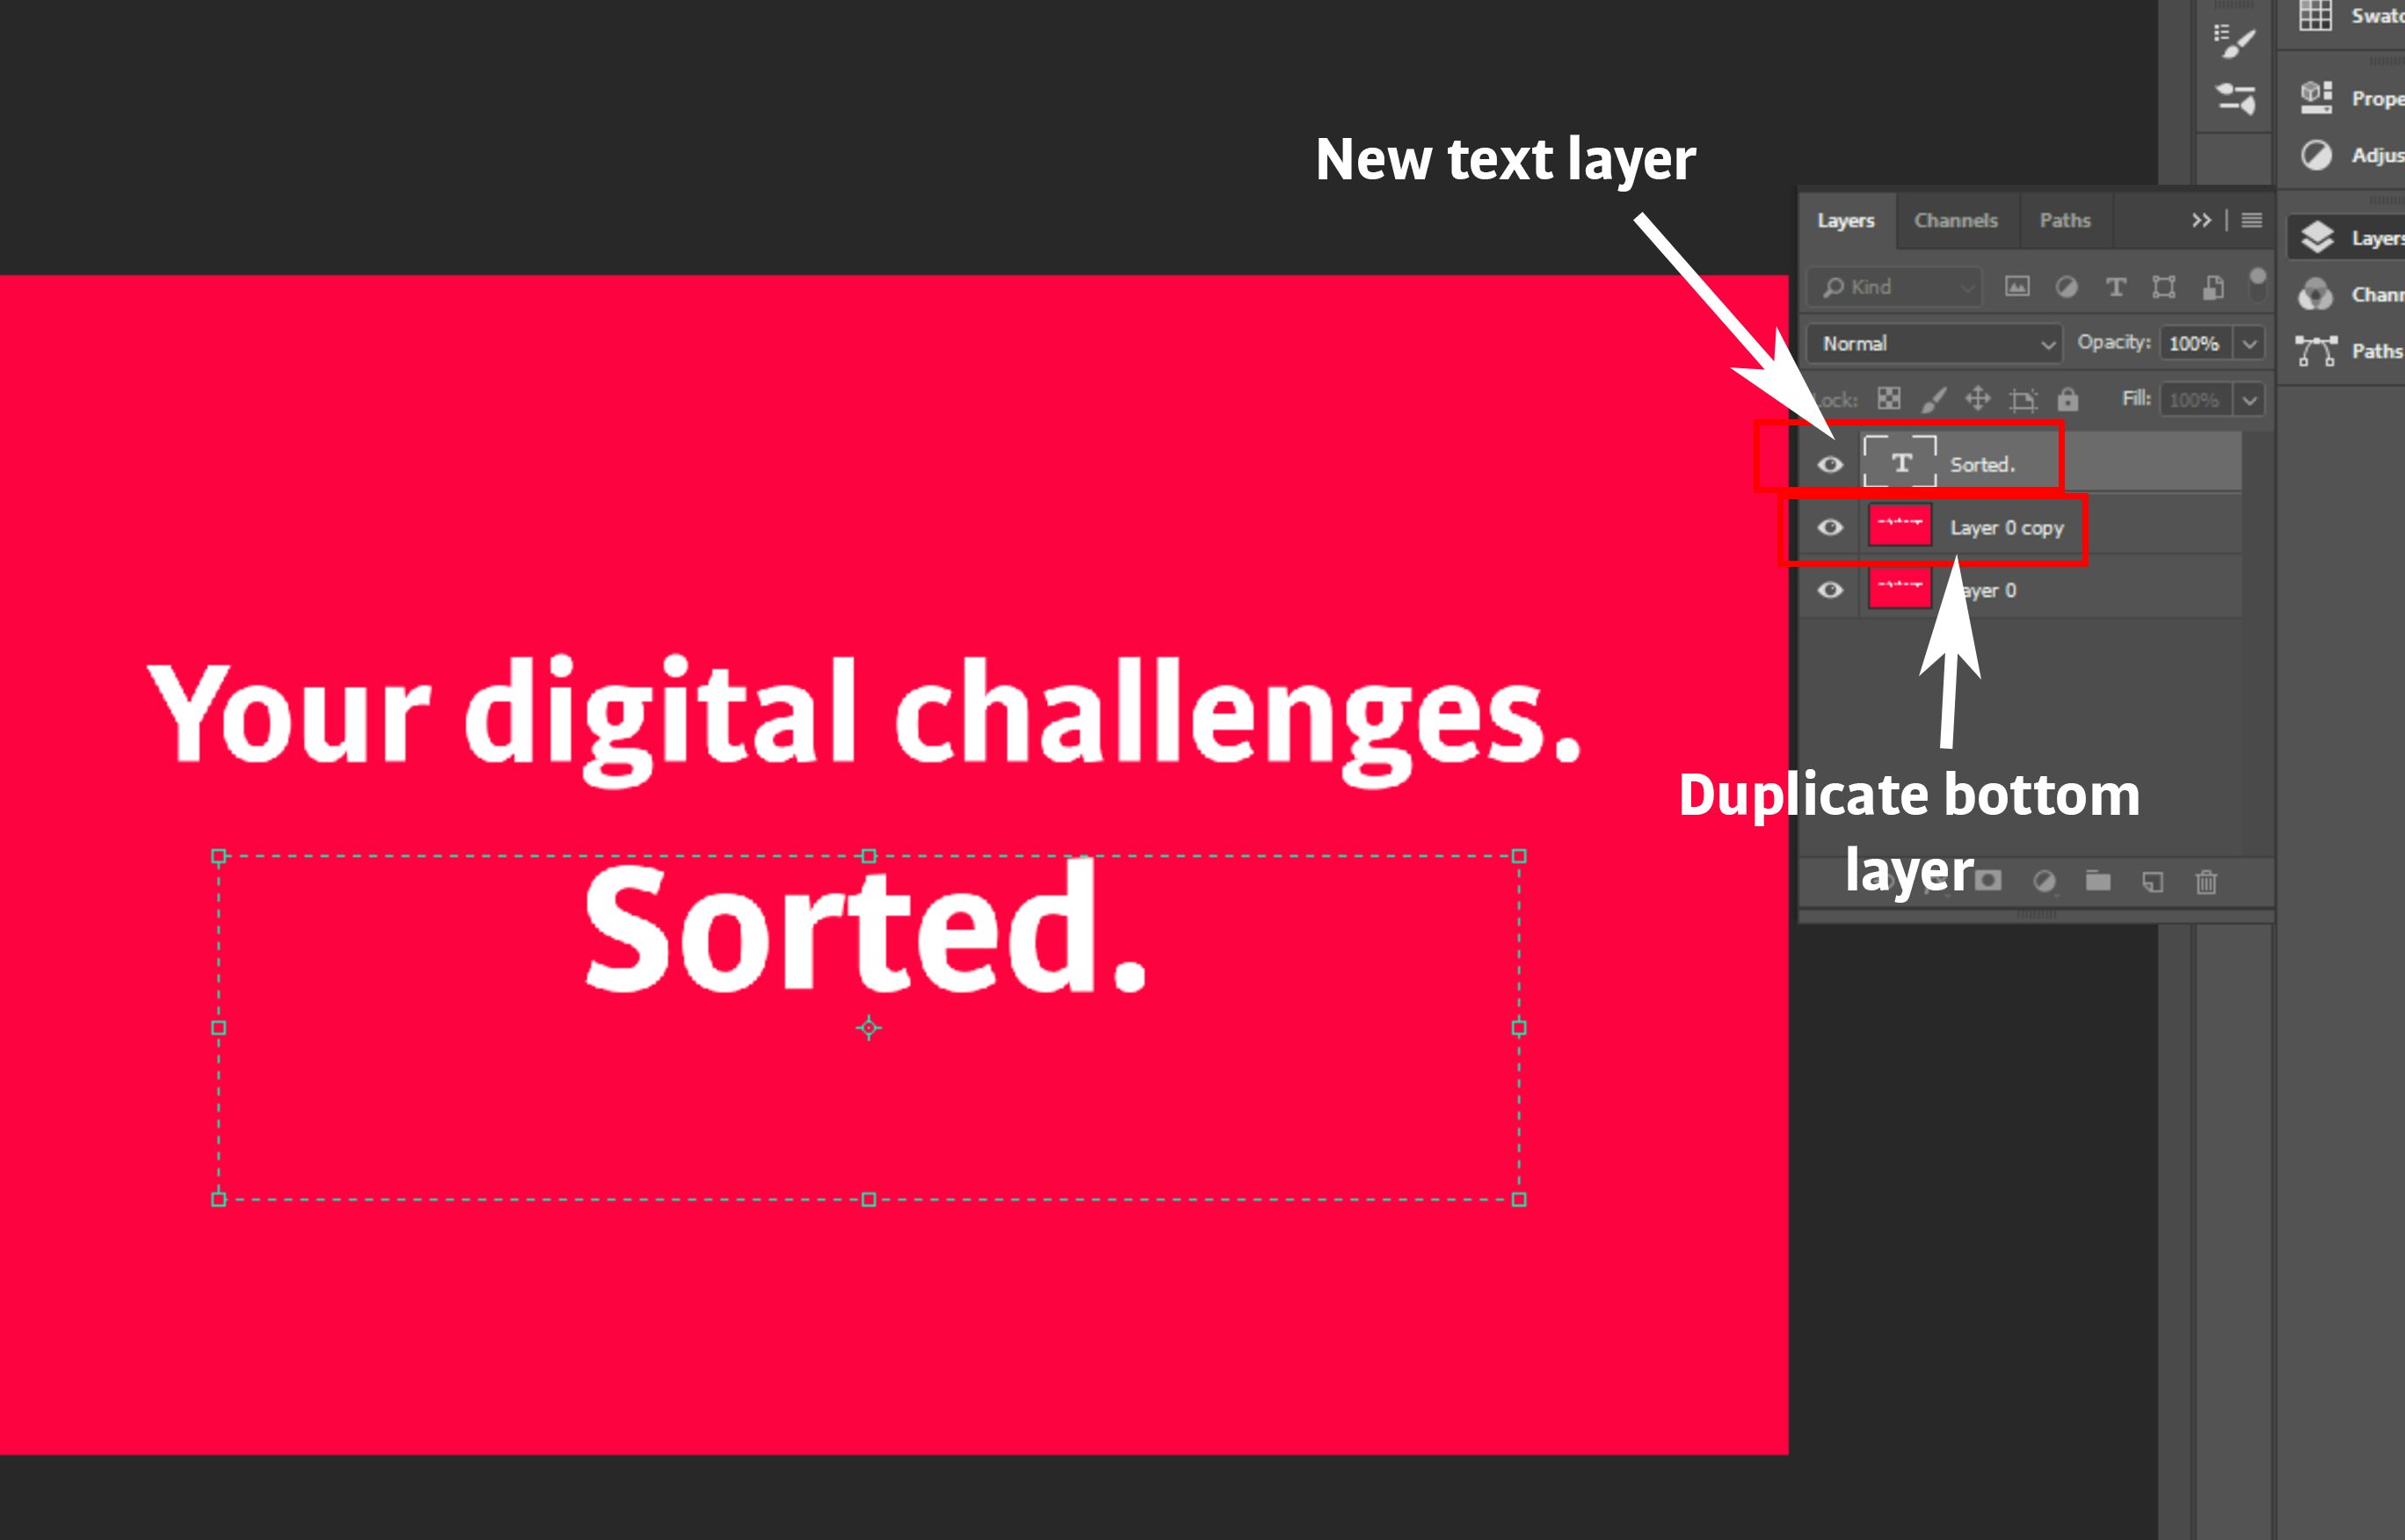
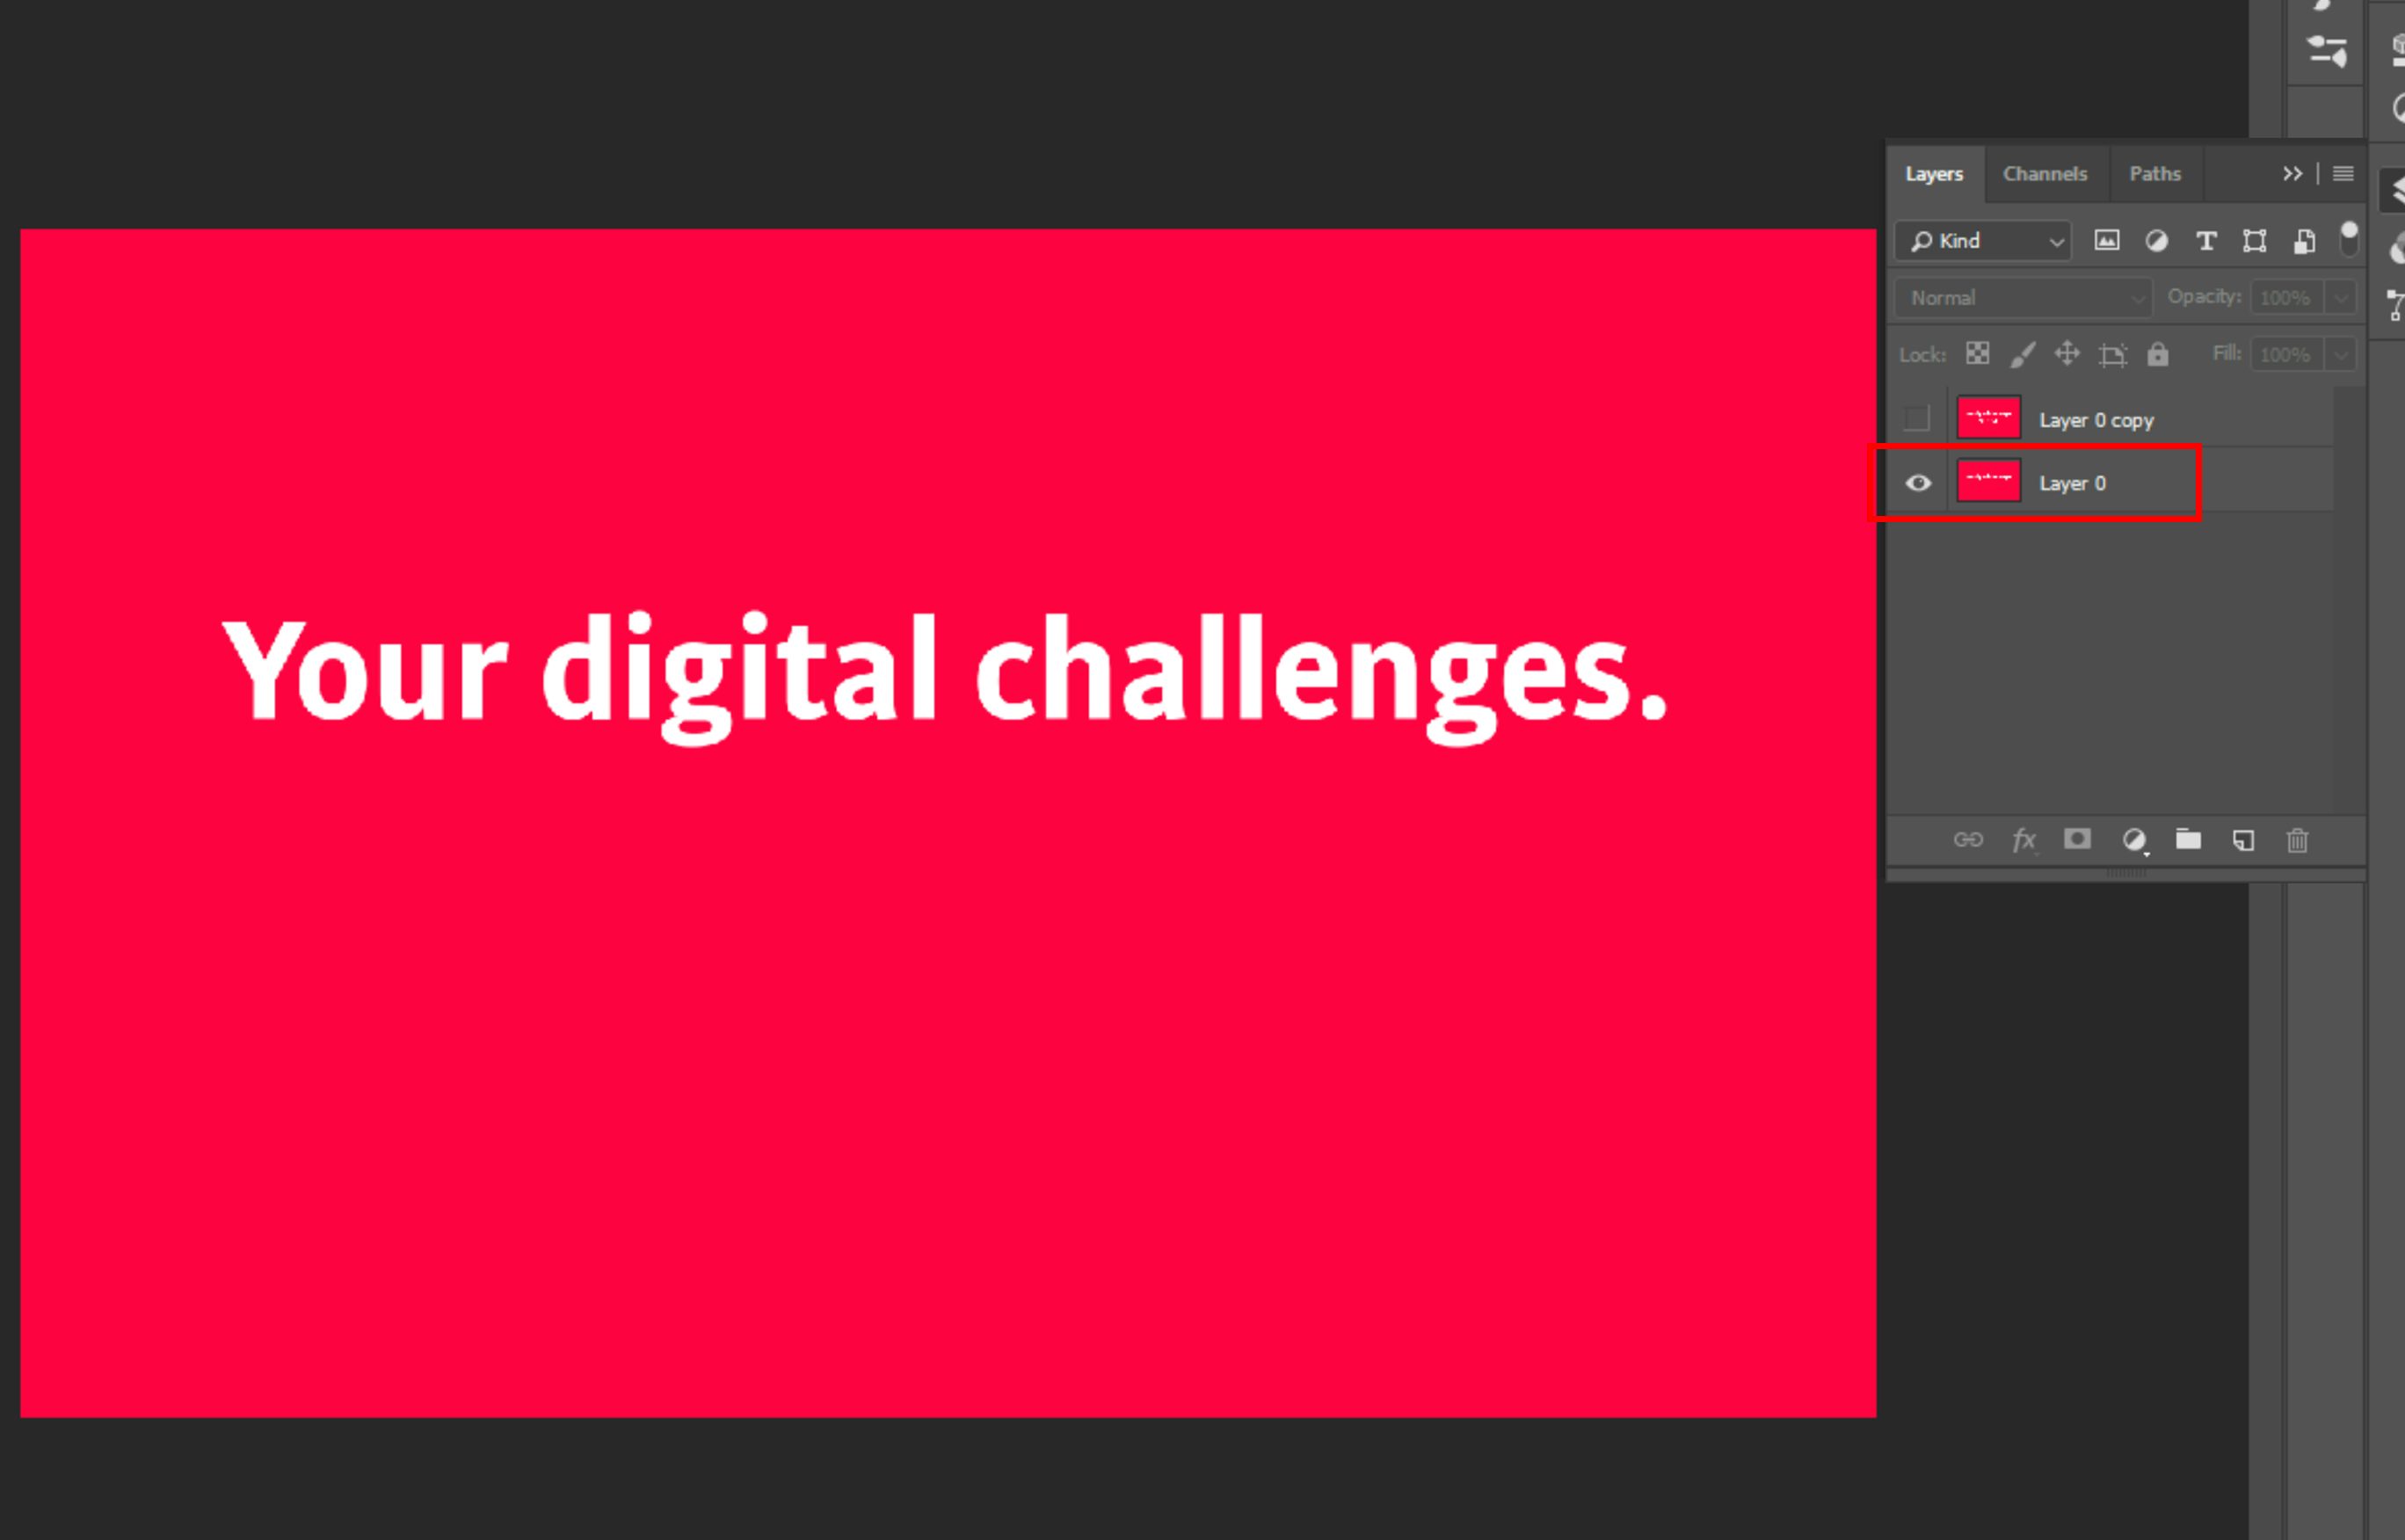
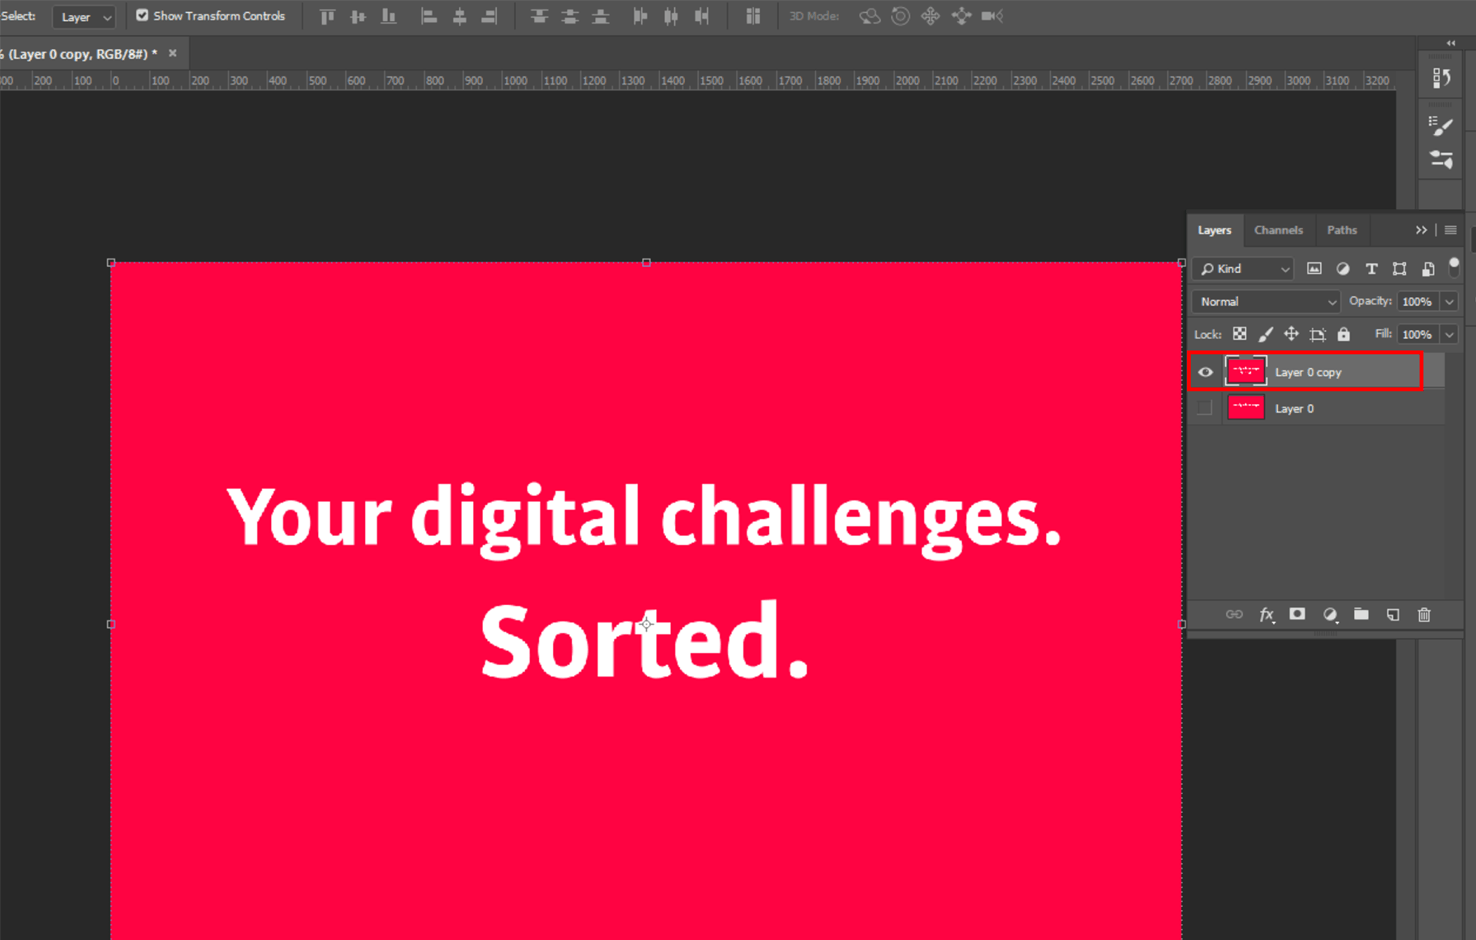
9. Rasterize the new text layer and merge it onto the duplicate layer as we did before, so you have two layers that look like this:
(bottom layer):
(top layer):
10. I’m now going to add a final layer with the Econsultancy logo. To do this, click on the ‘new layer’ icon and fill it with a background colour. I will use white for this last layer:
11. Insert the logo into the file by dragging and dropping the logo from your computer folder into Photoshop. It will appear as a new layer. Move it around on the canvas until you are happy with its position.
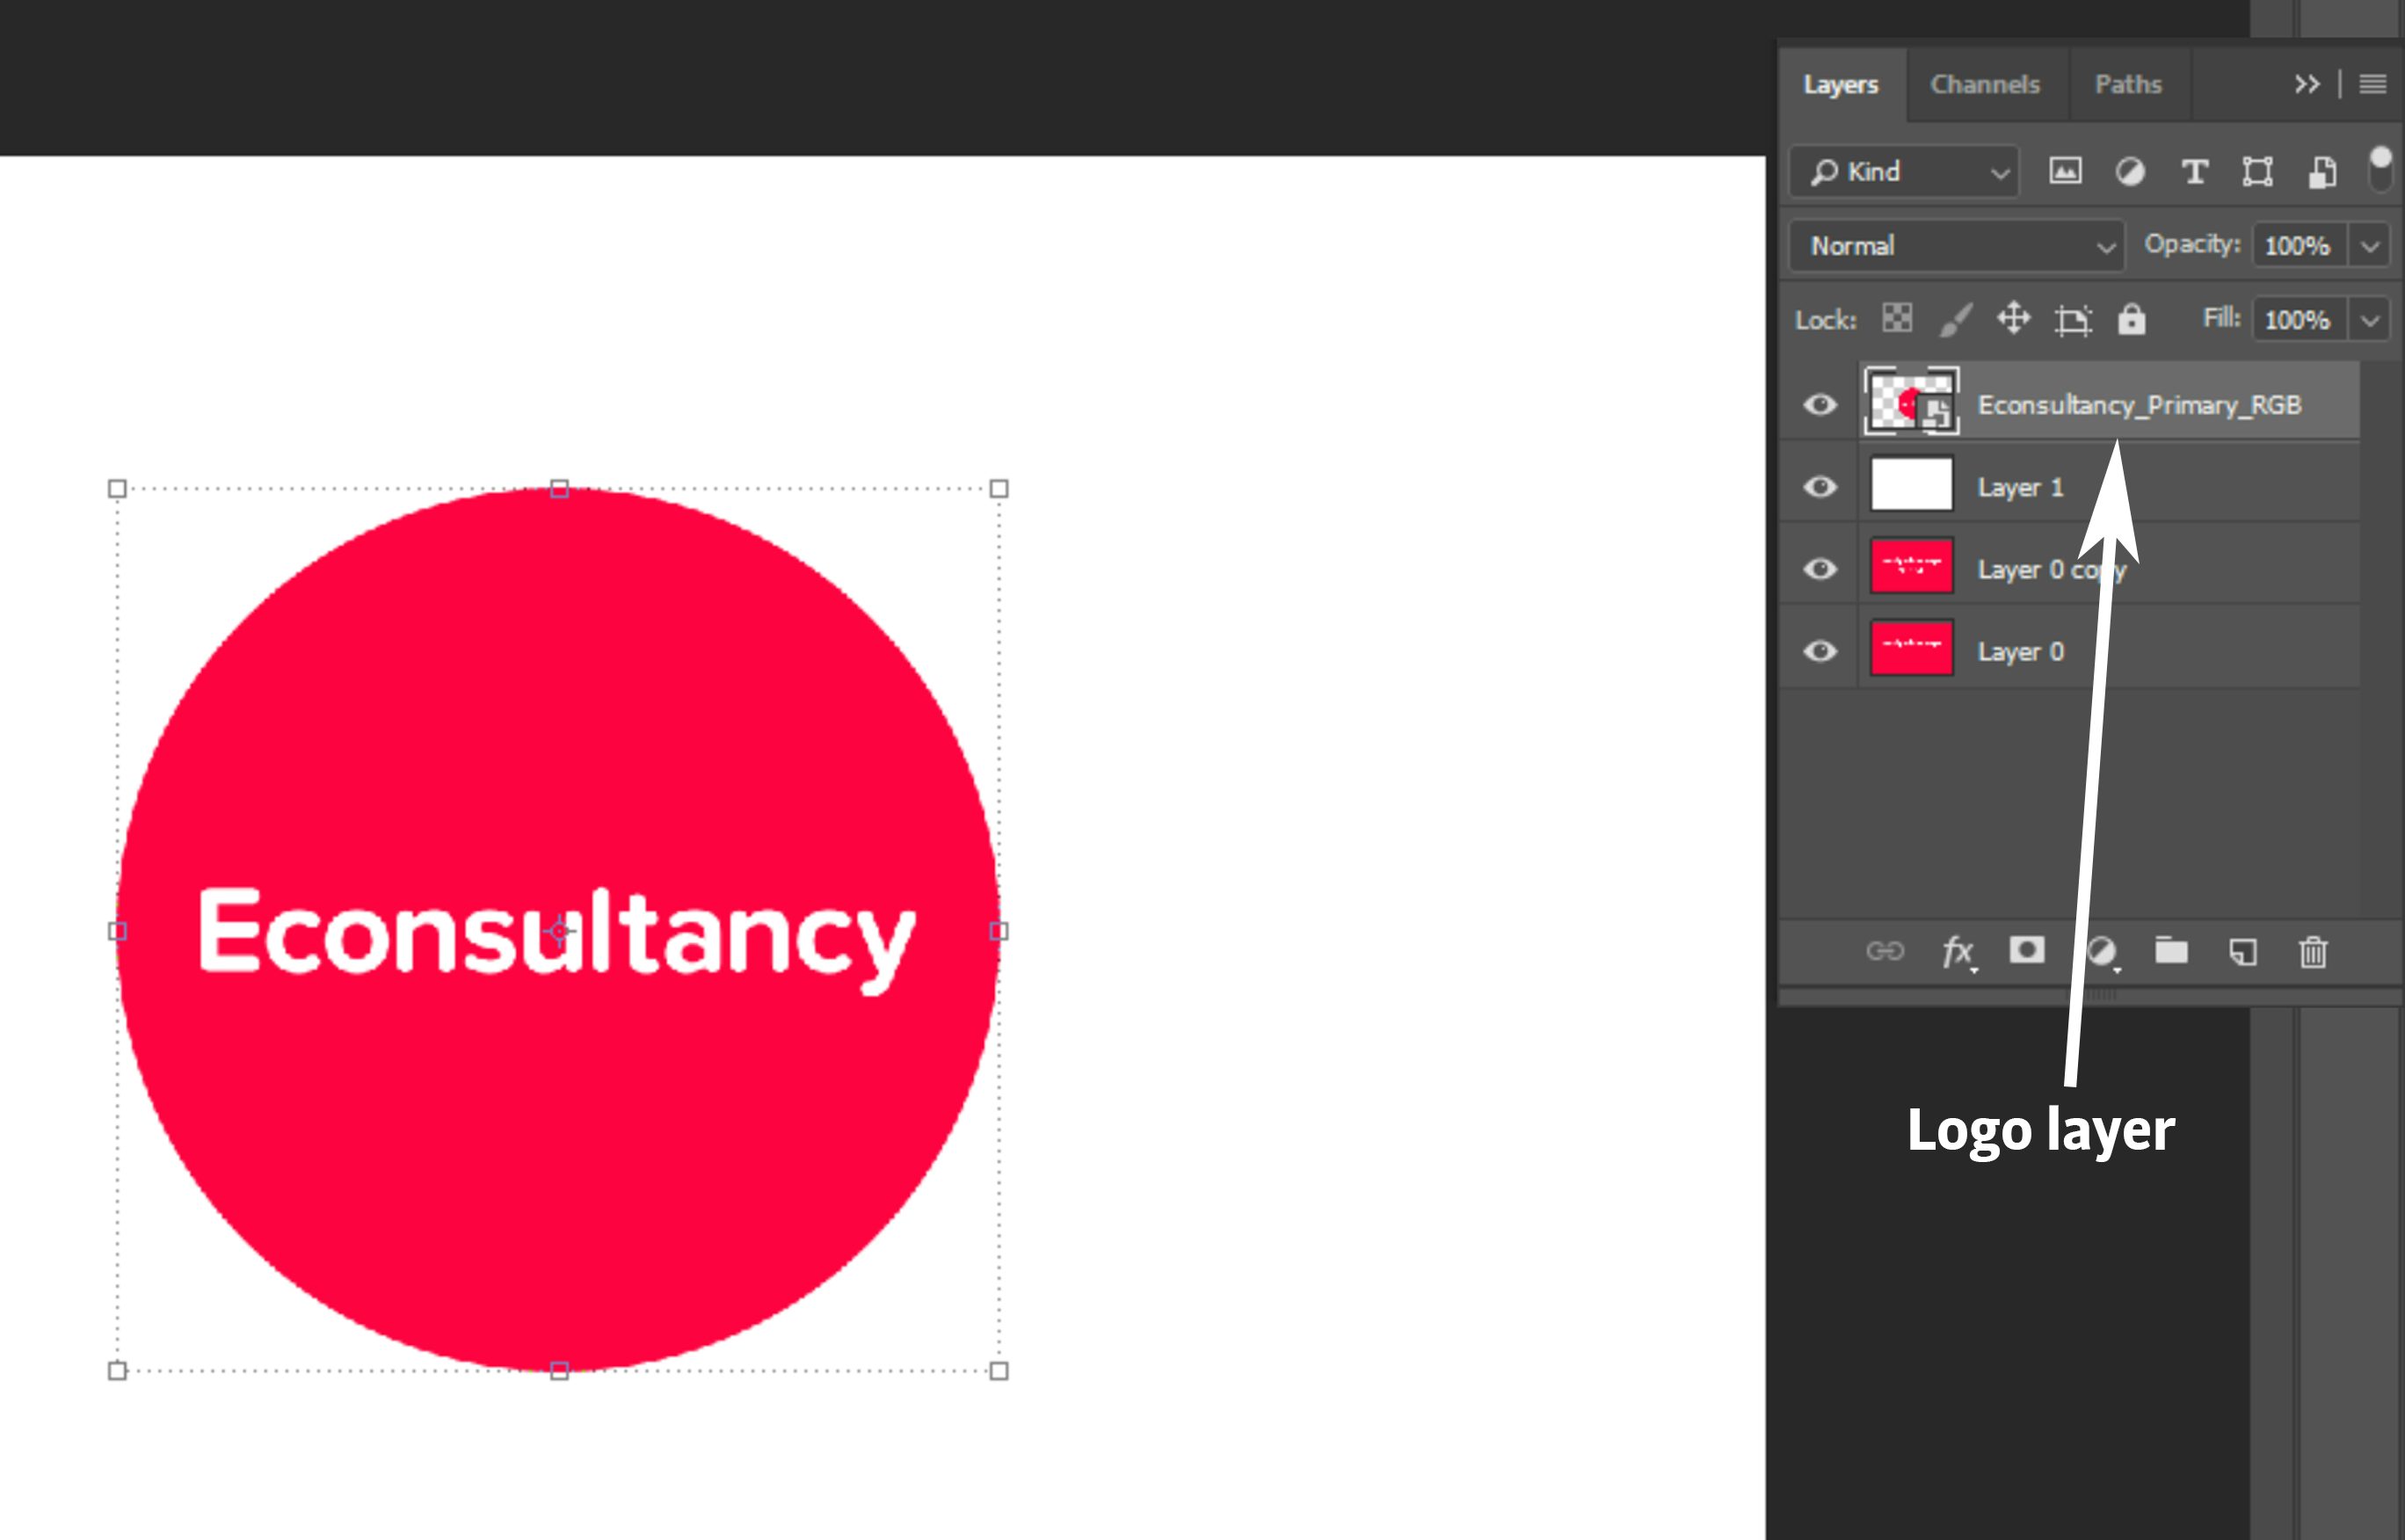
12. Rasterize and merge the logo layer down onto the plain white background layer as before.
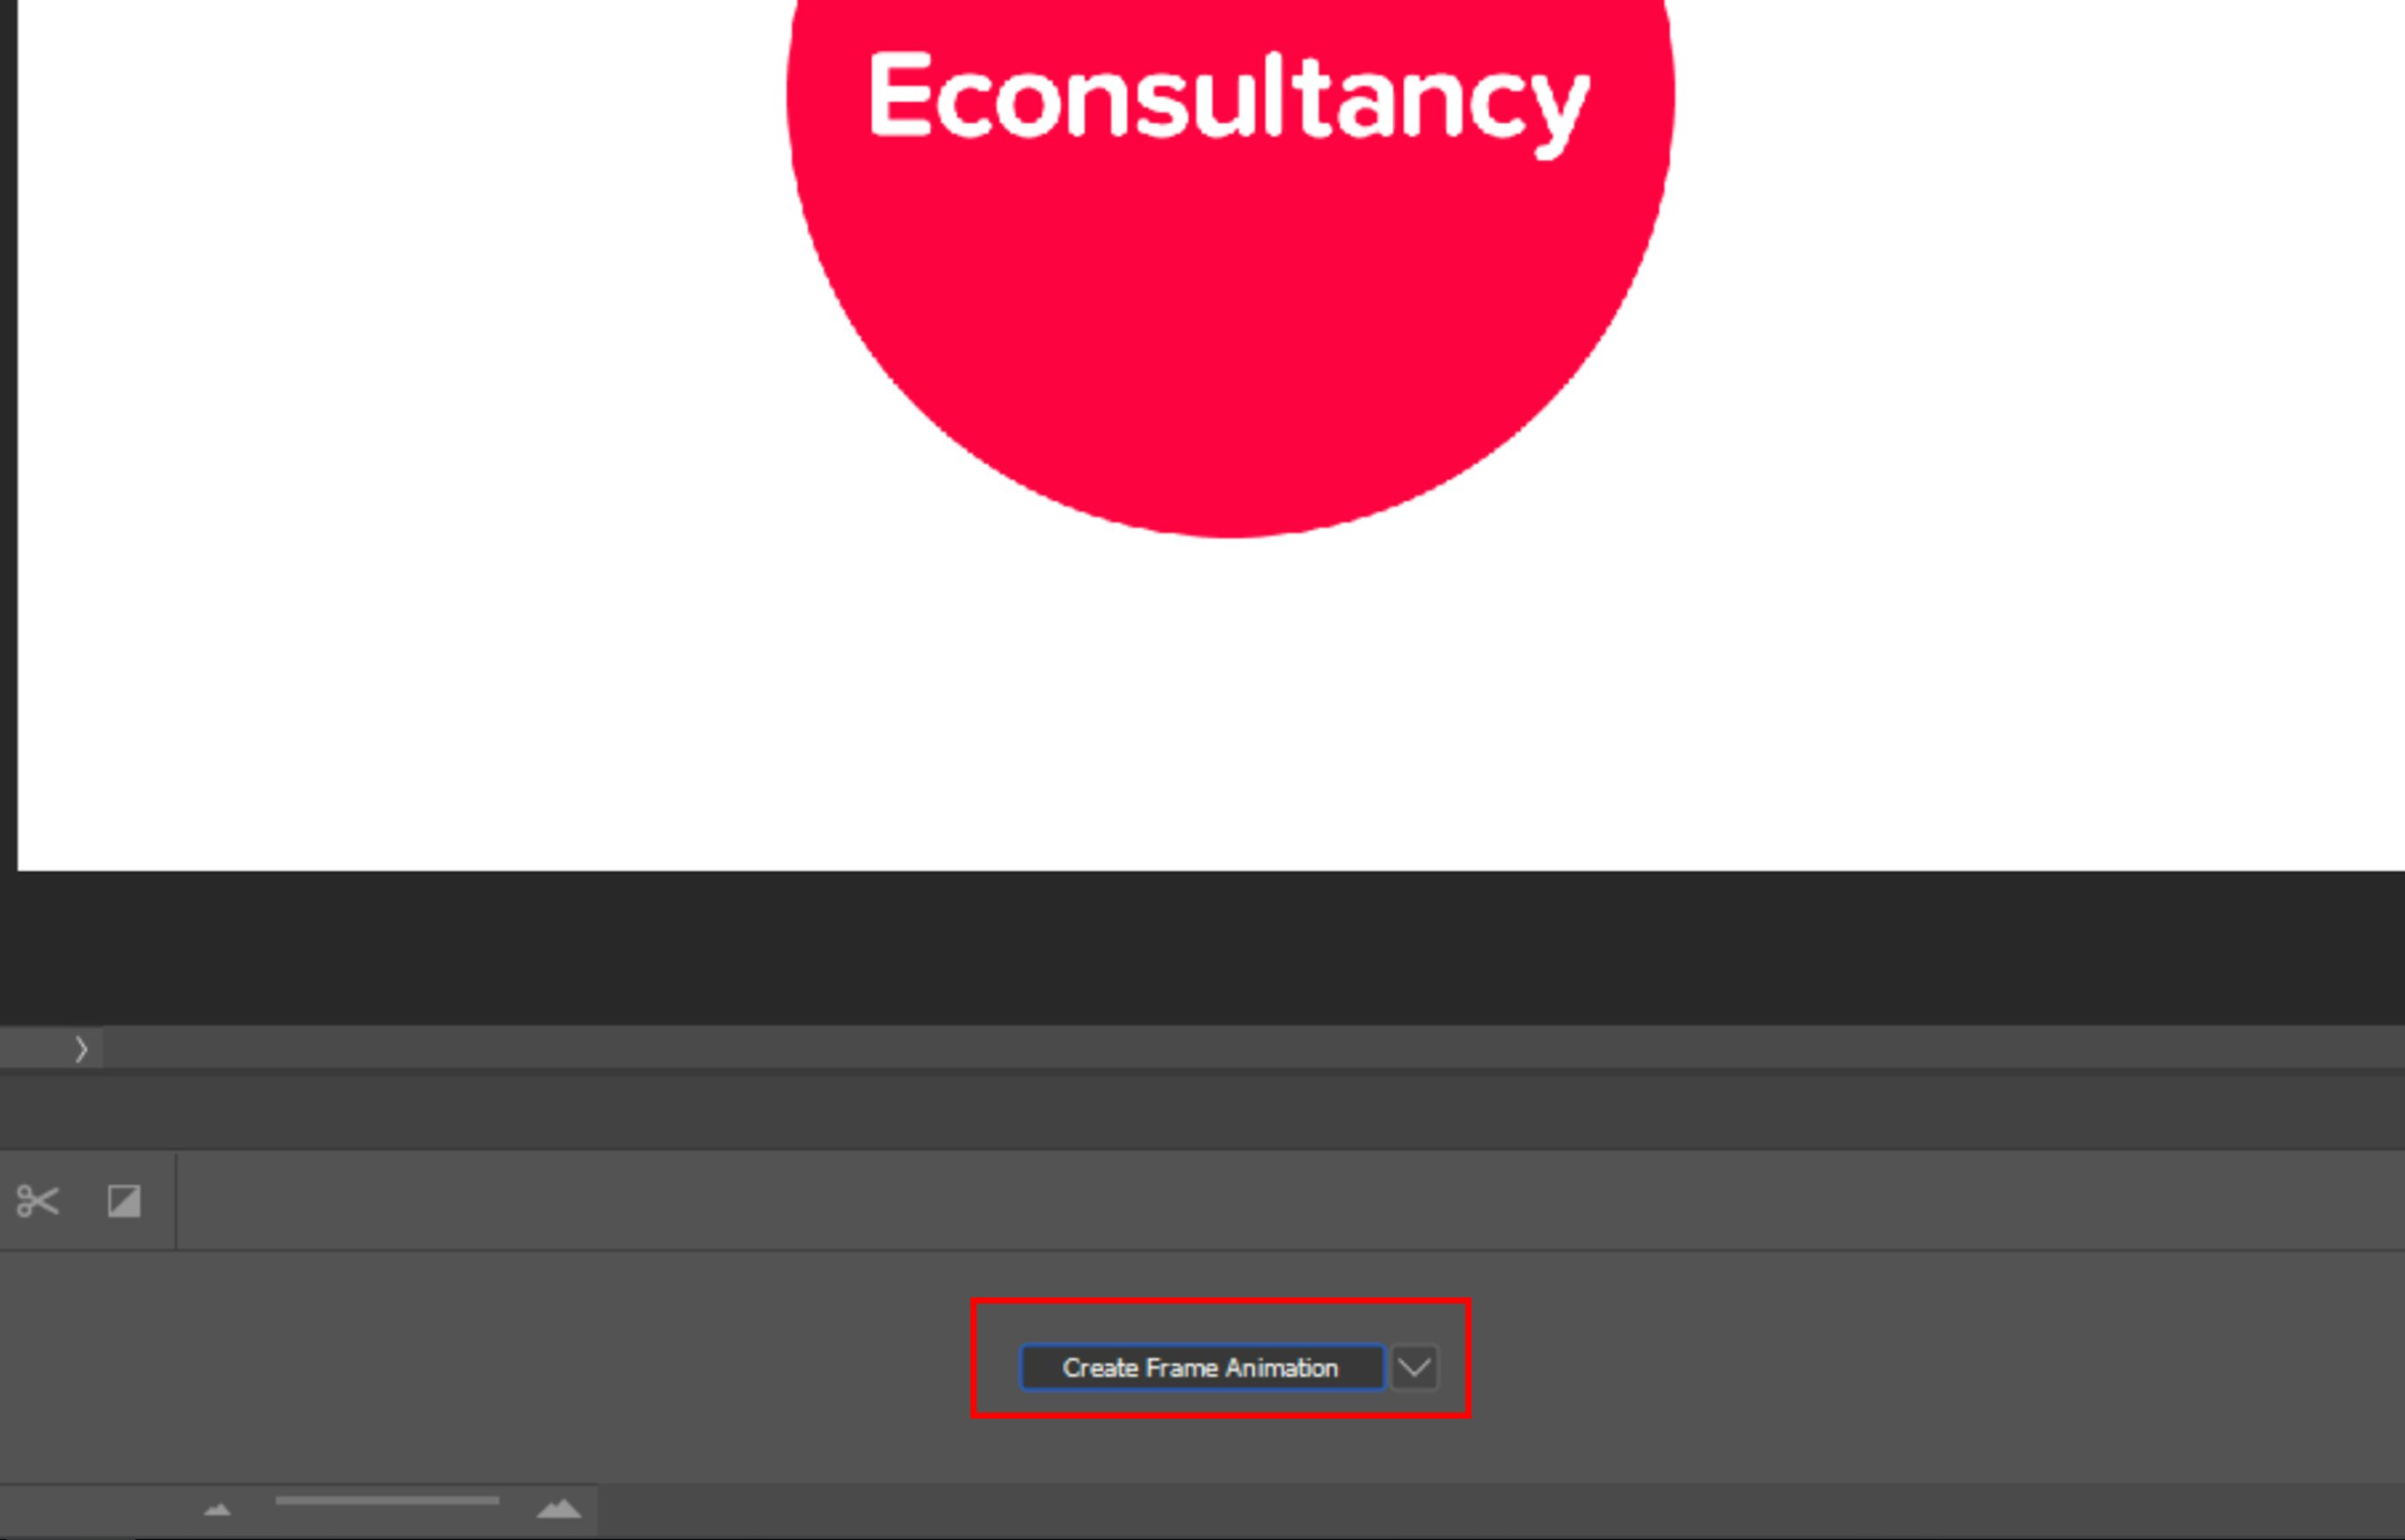
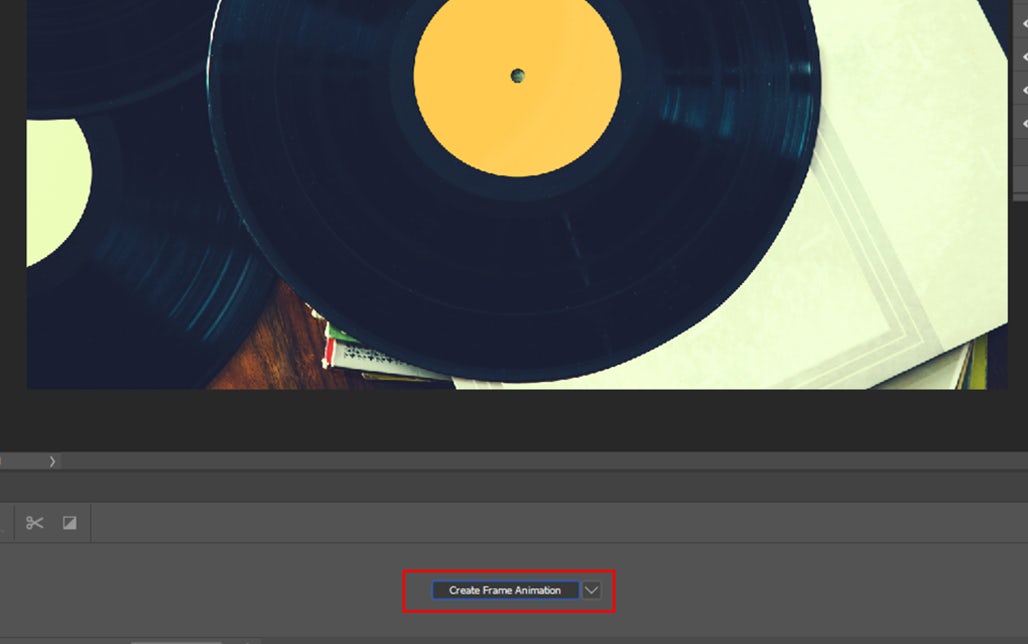
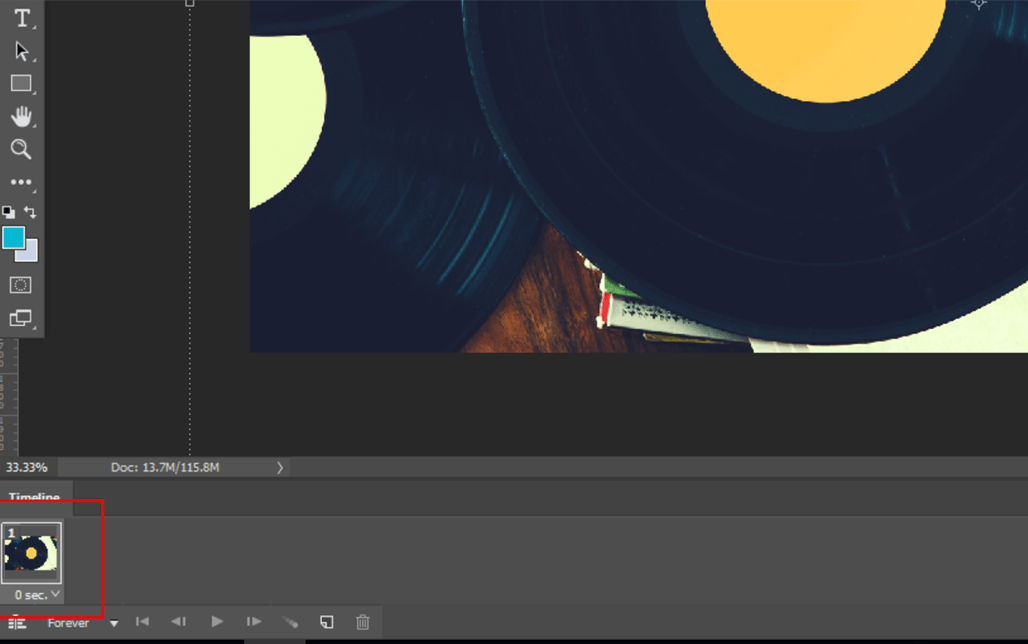
13. We are now ready to make our layers into an animation. Go to Window > Timeline to open the timeline window at the bottom of the screen. Then click ‘Create Frame Animation’:
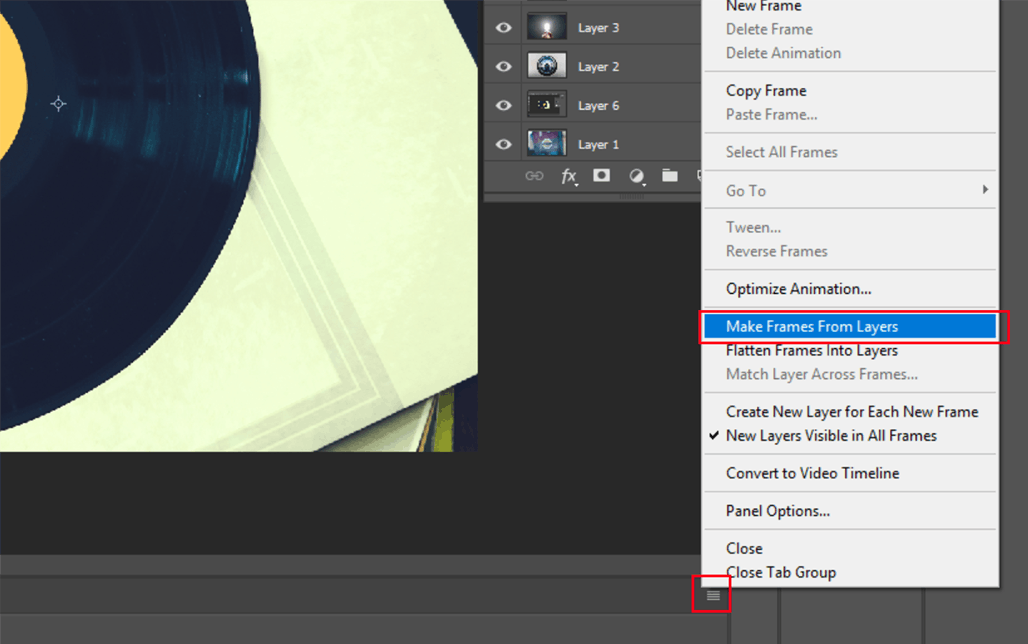
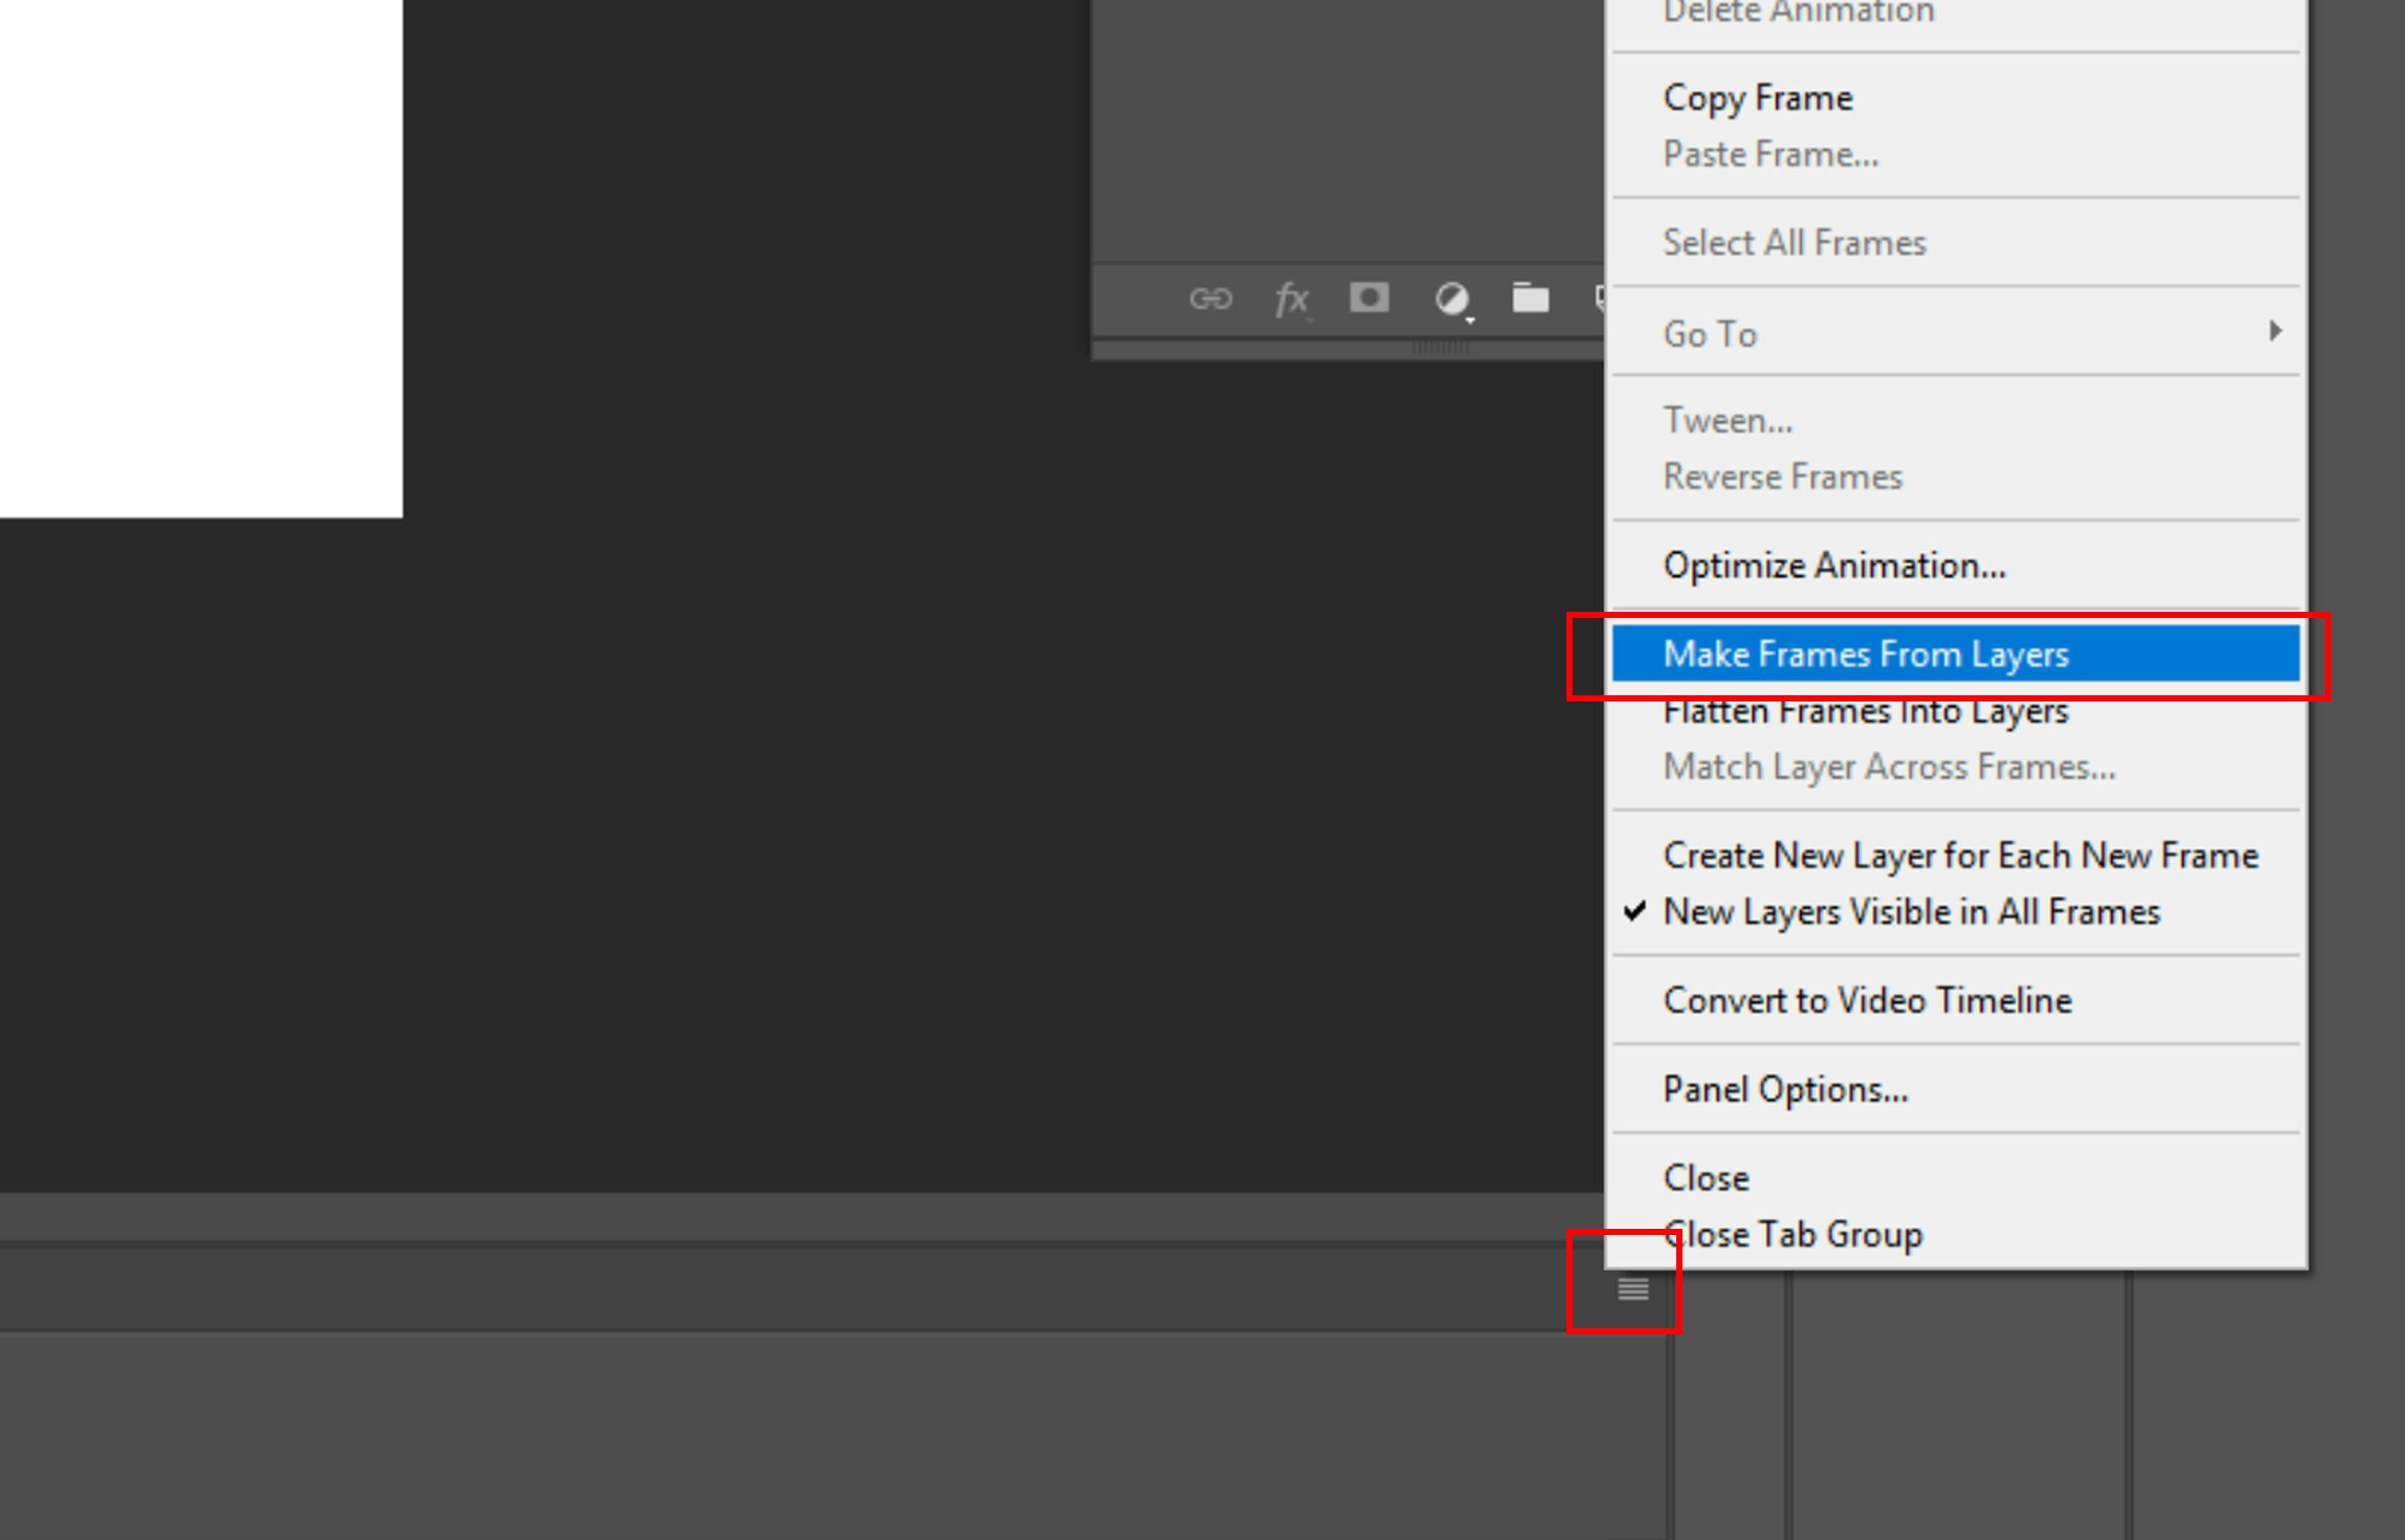
 14. Click on the small button on the top right hand side of the timeline window and select ‘Make Frames From Layers’. All of your layers will appear in order on your timeline window.
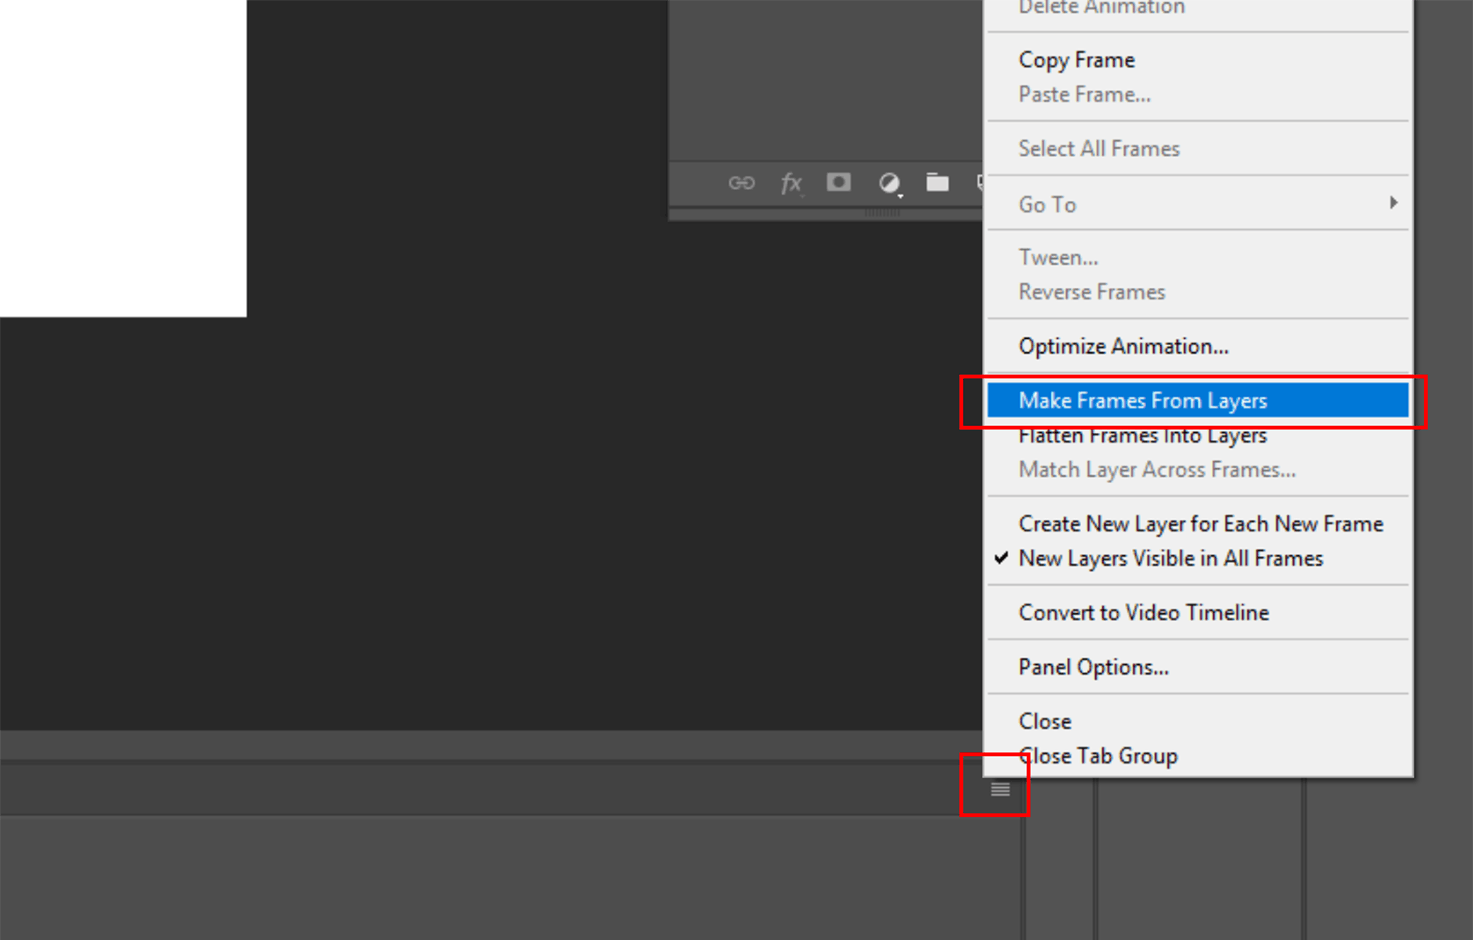
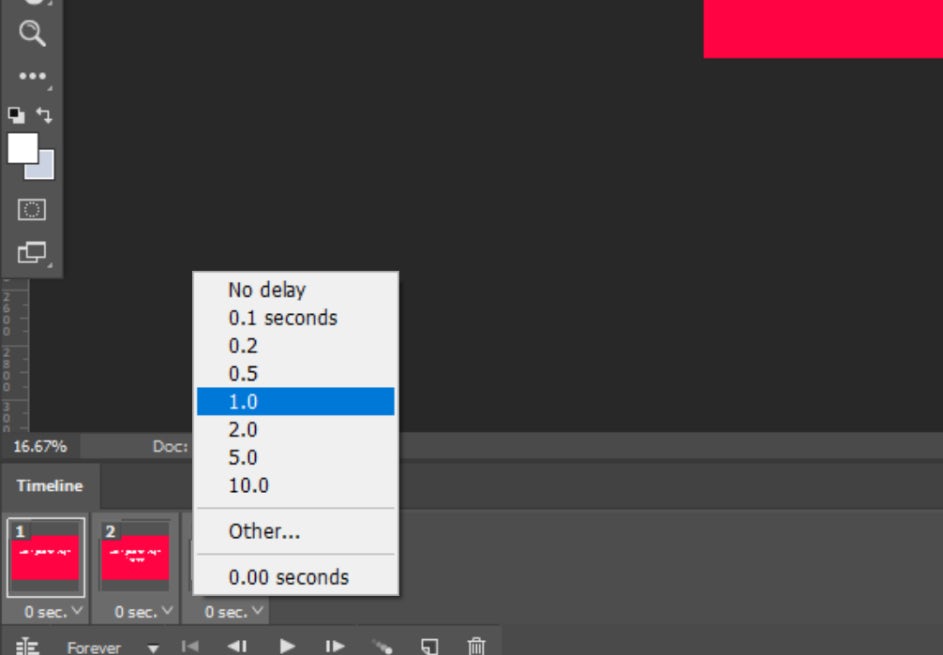
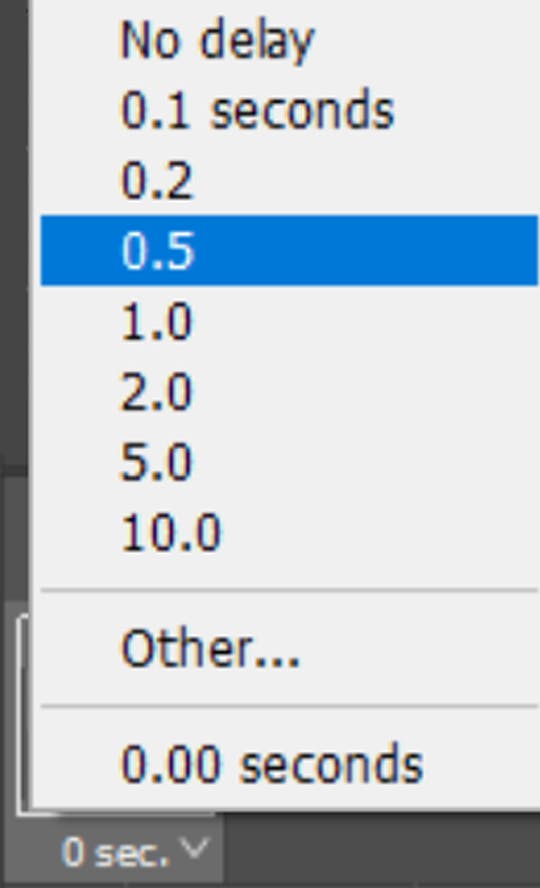
15. Hold shift and select the first and last frames in your timeline to select them all. Right click on one of the frames and choose your frame delay. NB text layers will require a longer delay time than image-based animations so that the viewer can comfortably read it.
 16. You can take some time to experiment at this point with flashing layers and repeats at this stage by duplicating the frames, dragging them into different orders and editing colours. This will make your final GIF more interesting.
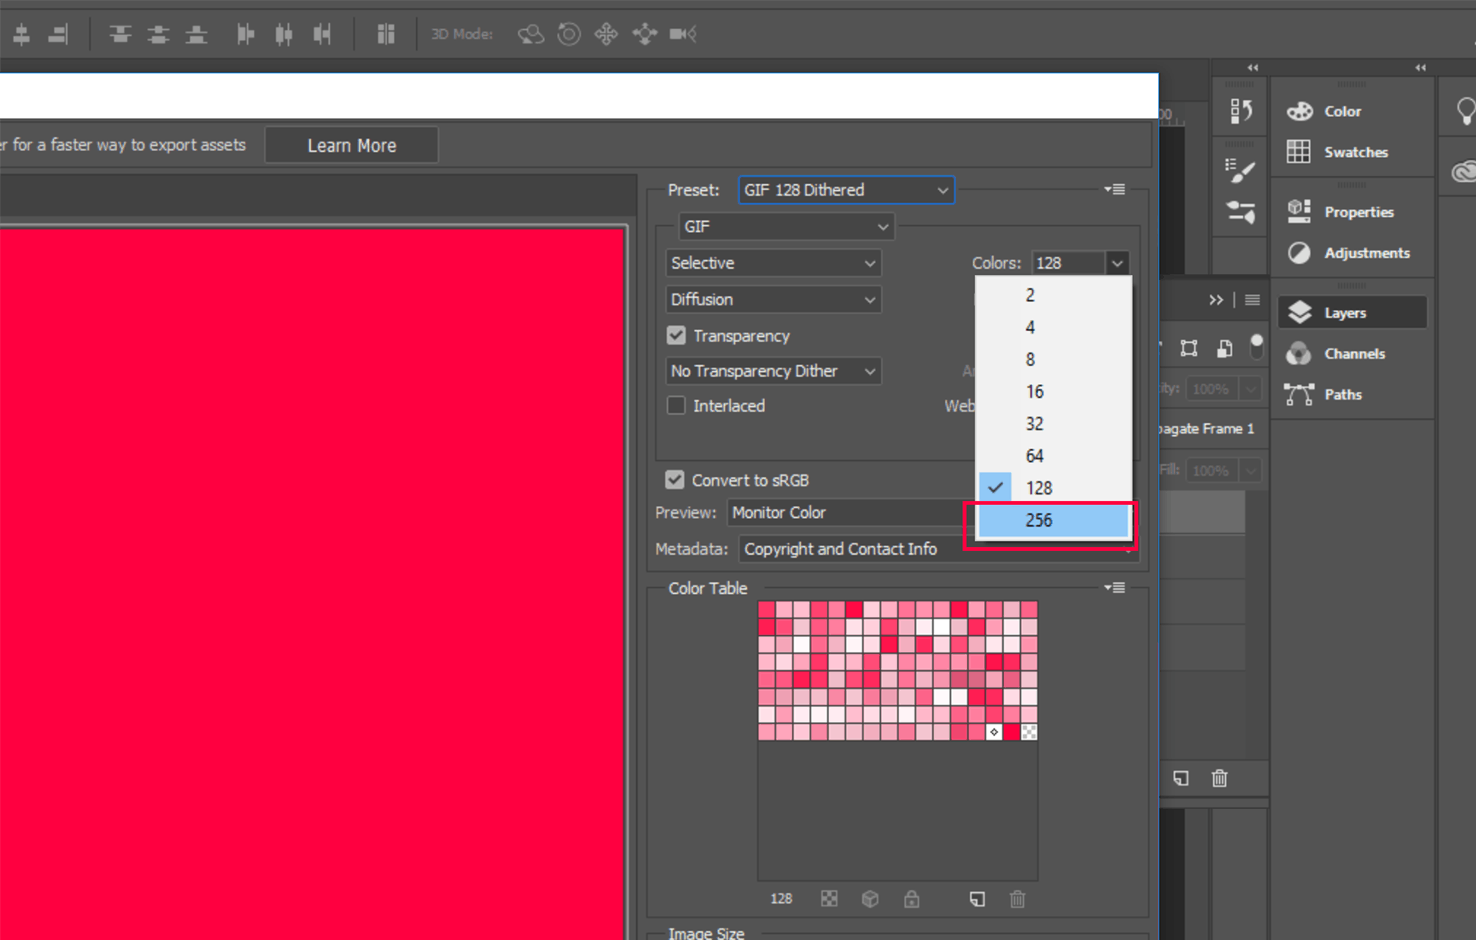
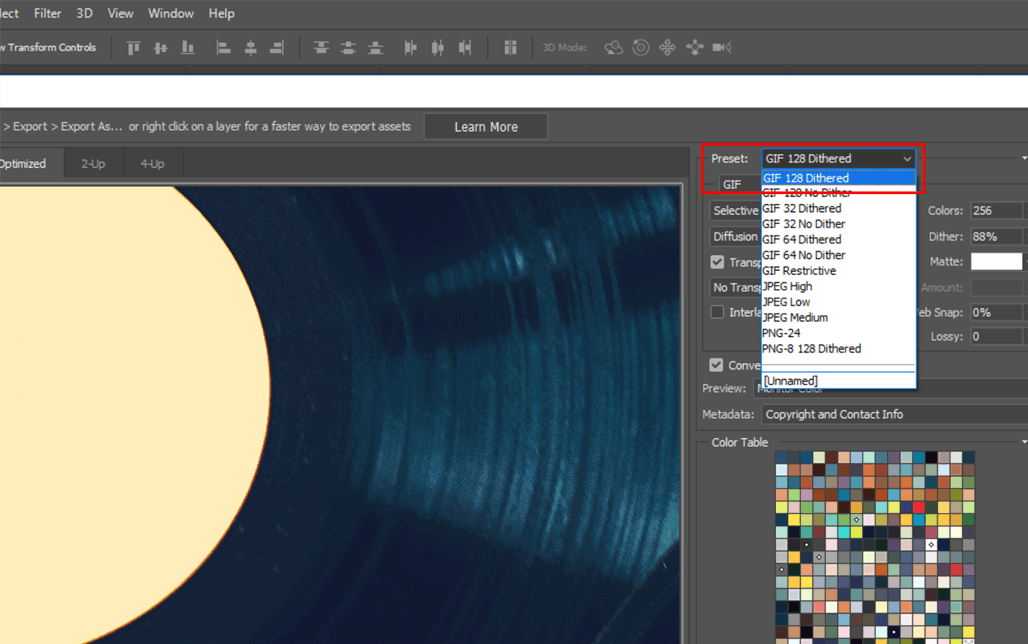
17. Once you are happy with your frames, go to File > Export > Save For Web (Legacy). The following window will appear. Under the ‘Preset’ tab, select ‘GIF 128 Dithered’:

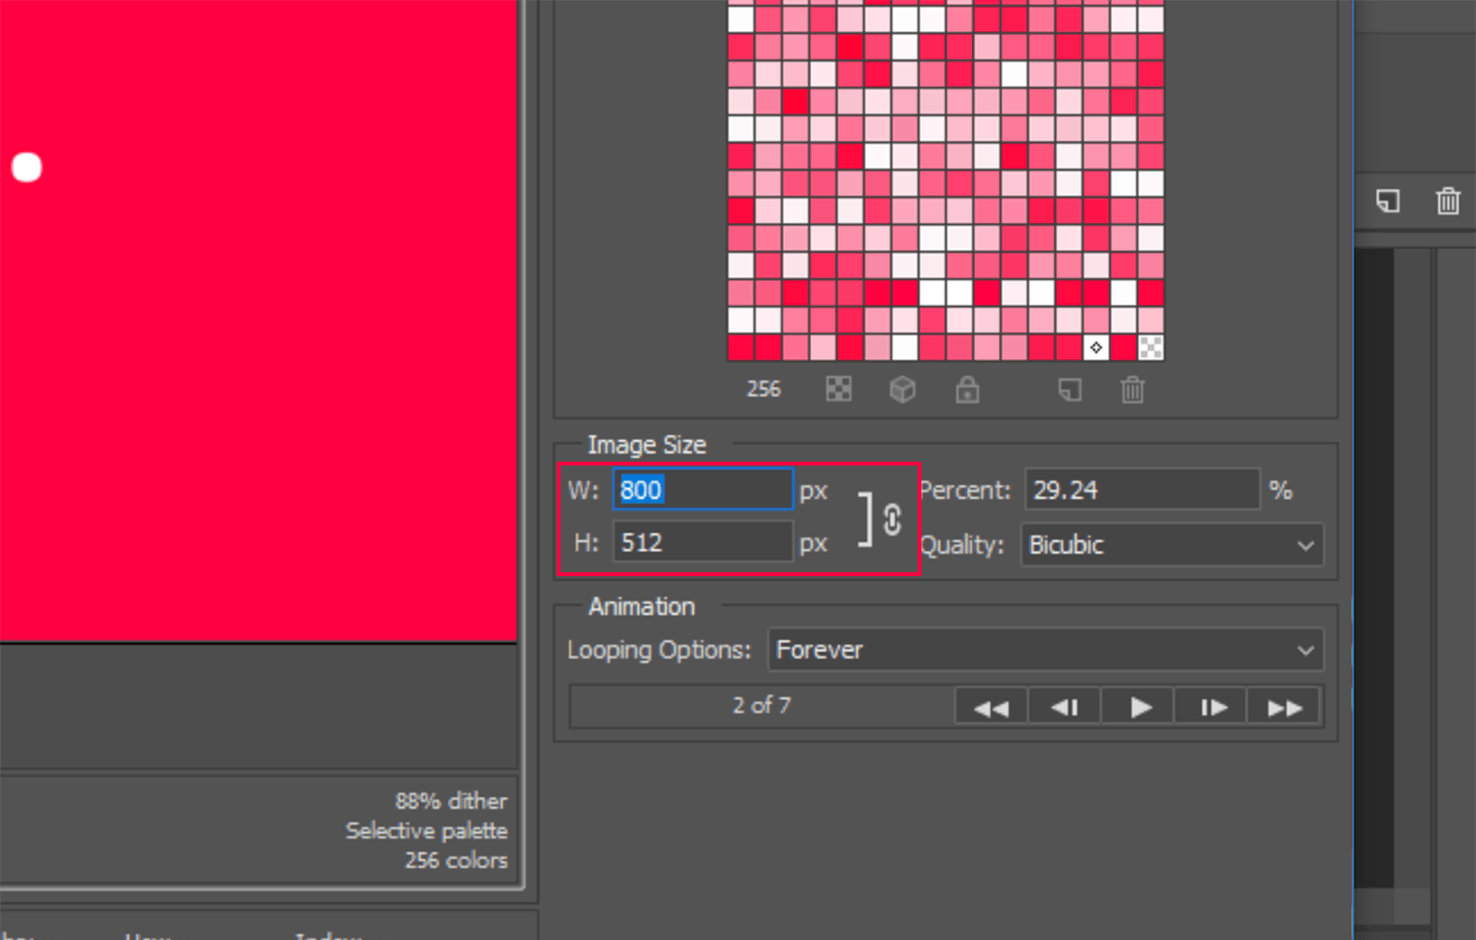
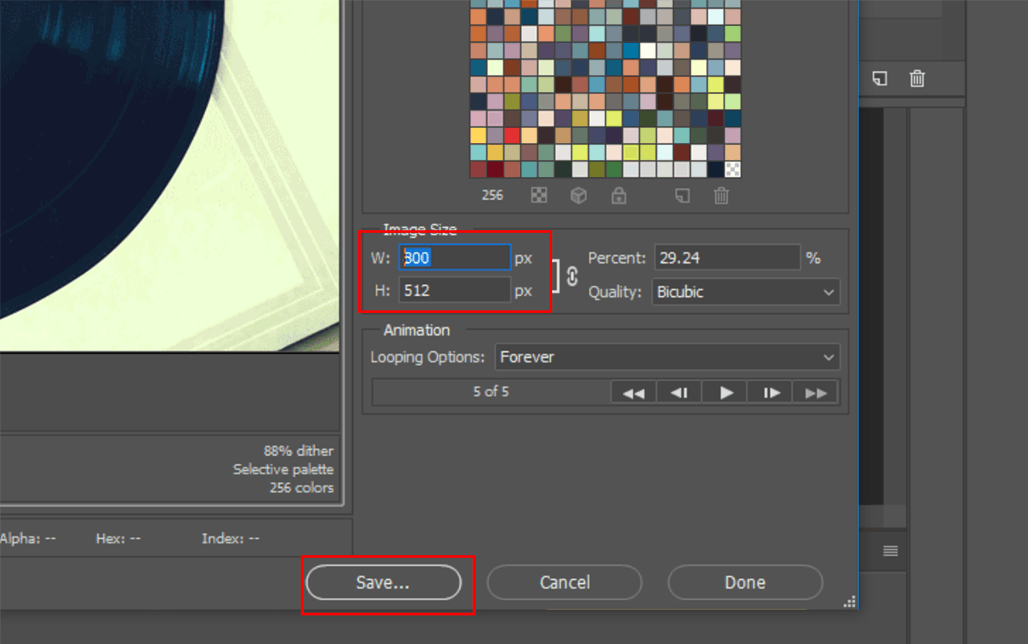
18. Under the ‘Colours’ tab, select ‘256’. You can also change the dimensions (if needed) under the ‘Image Size’ section. Once you are finished, click on ‘Save…’ and name your file.
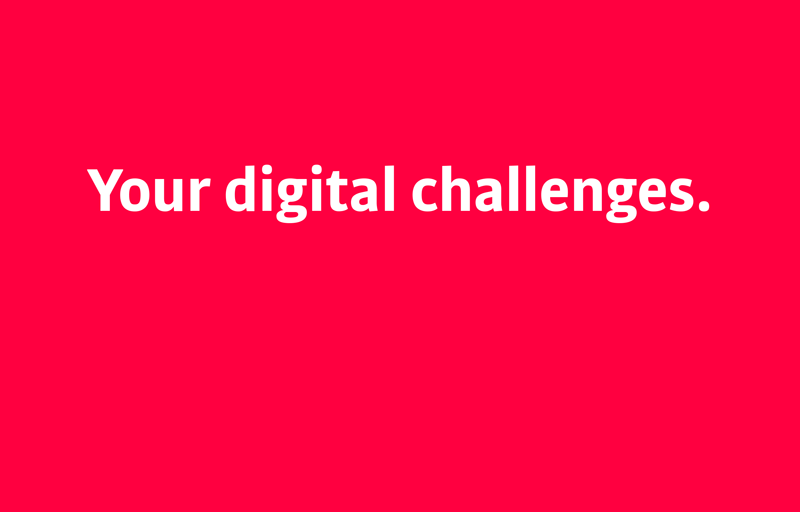
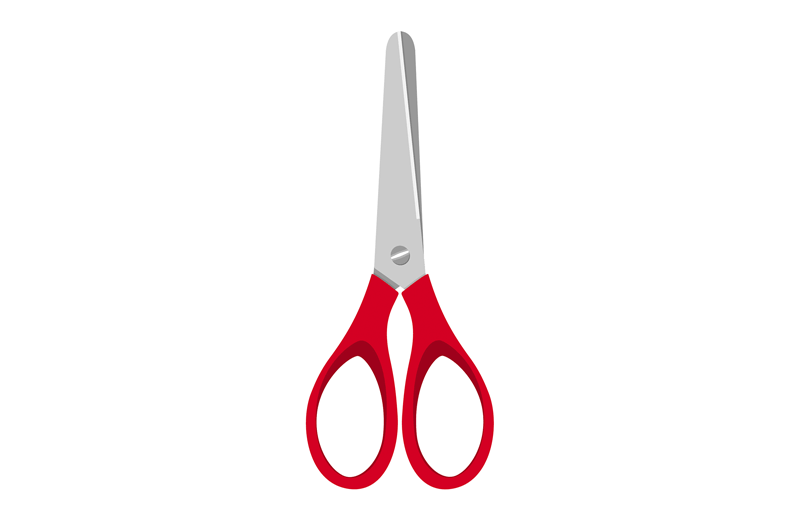
Your final GIF should look something like this!
Creating GIFs from videos
Perhaps you’ve already got an existing video ad for your brand or product, but you’d like to focus in on a certain part, rather than posting it in its entirety. Similarly, you might want to promote your new app or website with a short screen recording. Photoshop makes it very simple to turn your videos into looping GIFs, and allows you enough freedom to embellish them with some text or a logo as directed in the ‘Text-Only GIFs’ section above.
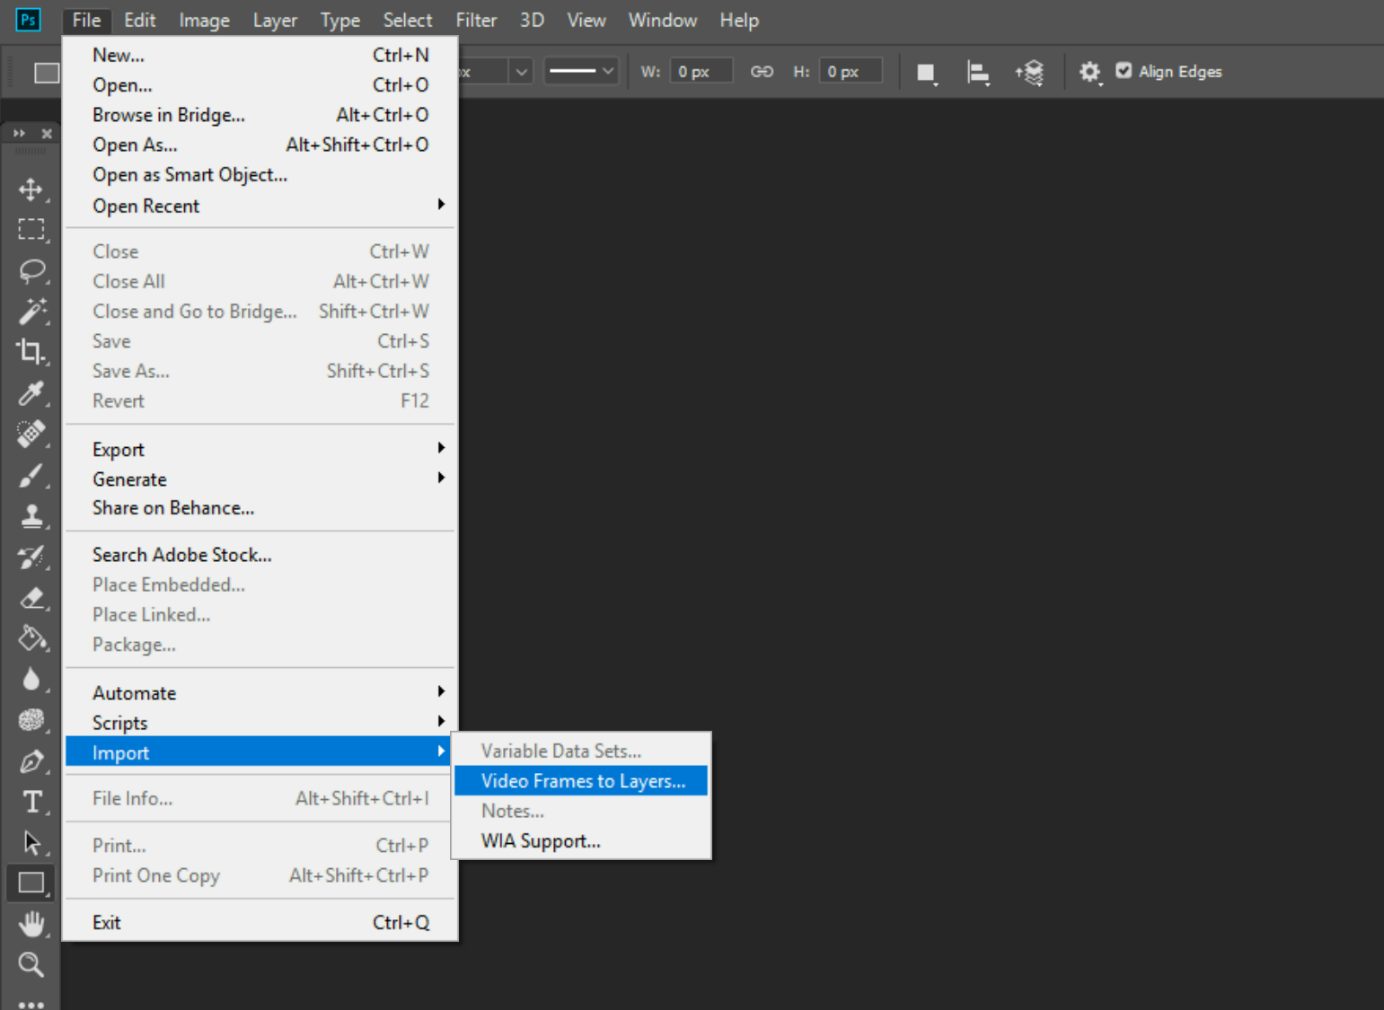
1. Open Photoshop. Go to File > Import > Video Frames to Layers. Find and select your video clip you’d like to use.
 2. Depending on the video, you may need to clip the length when importing. To do this, click on ‘Selected range only’ and drag the arrows underneath the video preview. Ensure ‘Make Frame Animation’ is selected, and press OK.
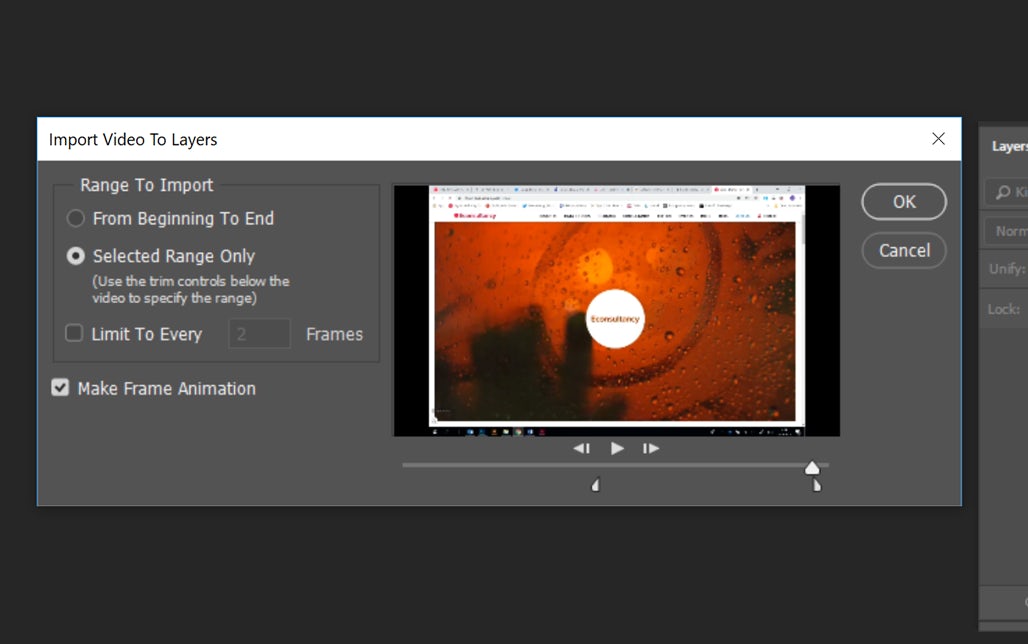
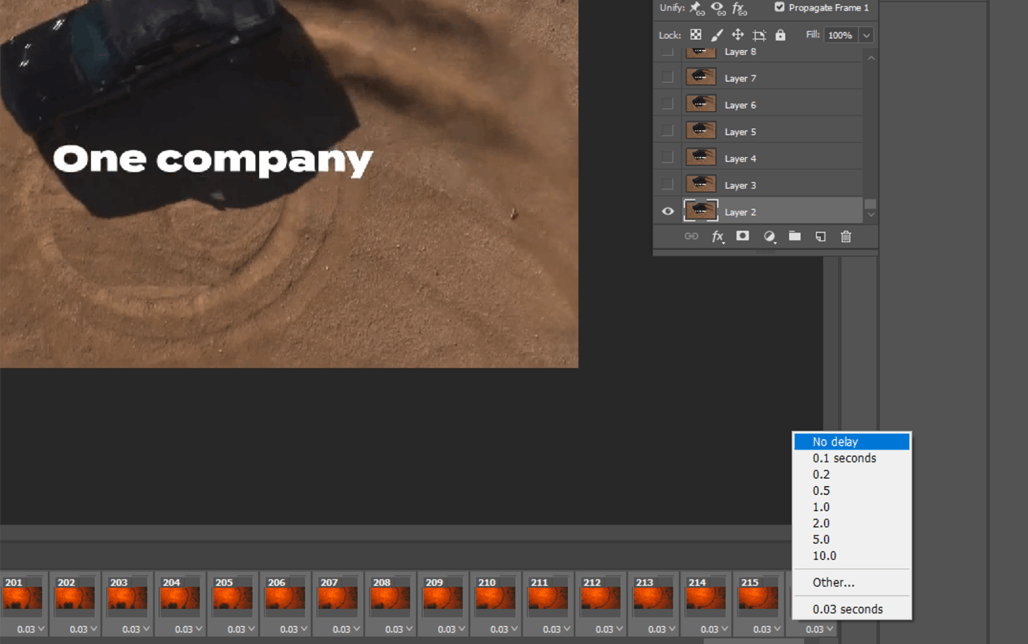
3. All the frames of your video will be added to both the layers window and the timeline at the bottom of the screen. Hold shift and select the first and last frames in the timeline to select them all, then right click and select ‘no delay’ from the pop out menu.
4. You are now ready to export. Go to File > Export > Save For Web (Legacy).
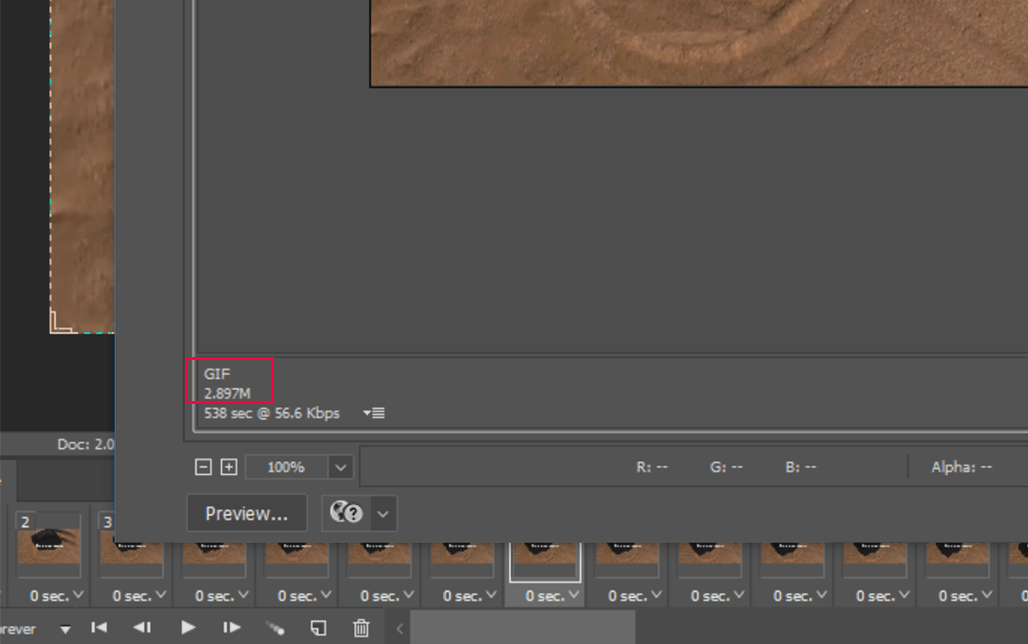
5. Select ‘GIF 128 Dithered’ from the Presets tab, ‘256’ from the Colours tab, and change the size if necessary, on the export menu that appears. Then click on ‘Save…’ and name your file. It is important to note the size of the exported GIF.
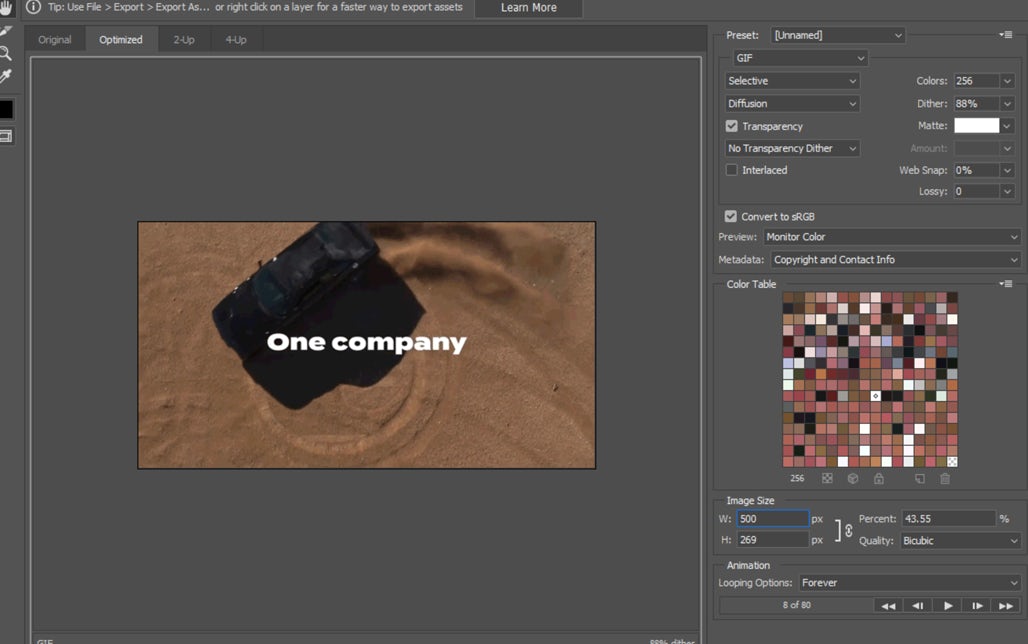
6. It is important to note the size of the exported GIF, which can be seen on the bottom left hand side. I recommend that video GIFs stay below 3MB so that they load quickly and effectively on your platform.
6. Click ‘Save…’ and name your file.
Your final GIF should look something like this!

You can add text/logo elements to the end of your video animations, if necessary, by following the steps from the ‘Text-only GIFs’ tutorial above.
If you do not have any existing video and do not have the time to create one, it is useful to consider the Boomerang app, which can be downloaded on iOS and Android. Boomerang allows you to record up to 20 frames of video on a mobile device and applies an automatic infinite loop to the result. It has limits, and can take a bit of time to perfect, but it requires very little editing once recorded. The best part about Boomerang is that you can upload it to Instagram, Facebook and Twitter instantly, however the content will remain in video format and won’t necessarily play automatically.
Stop-motion GIFs from photographs
Stop-motion GIFs are certainly the most time-consuming method featured in this article, however the results, if executed cleanly, can really extend the boundaries of your creative content. This technique can enable you to produce anything from a slideshow of products to a miniature stop motion story using objects or people as subjects.
If you are photographing a subject for a stop-motion style animation, it is worth keeping the following tips in mind:
- Plan out your sequence in advance, perhaps by sketching out a short storyboard.
- Ensure that the subject/object is photographed in natural light (ideally in the middle of the day) to avoid harsh shadows.
- Wherever possible, photograph the entire sequence of images on the same day, within a few hours. Not doing so may cause a discrepancy halfway through your GIF (e.g. angle of the camera/tripod, changes in the amount of natural light dependent on the time of day).
- Use a simple background to minimise distractions. A colourful background can work particularly well when photographing objects on a surface – for example, you could source a large piece of paper in a colour that matches your brand styling.
If you would like to use photographs in your animation but do not have the time or space to take these yourself, try a stock photo website such as istockphoto.com (pay as you go or subscription) or unsplash.com (100% free) to find images that you feel match your branding.
Slideshows
I have used a series of circular stock images for this example, but you can use existing product photography.
1. Open a new document in Photoshop and type in your desired dimensions
2. Select any saved images that you would like to include in your slideshow, and open them in Photoshop. They should appear in different windows along the top of the screen, next to your blank file:
3. In the order you would like the images to appear, click and drag the images from each tab into the original blank file you made, so they appear as layers in the layers tab (to access the layers tab, go to window>layers)
4. If you are happy with the order and alignment of your images, go to ‘Window’ > ‘Timeline’ to open the bottom window, as per previous methods.
5. Click on ‘Create Frame Animation’ and the last layer should appear in the timeline:
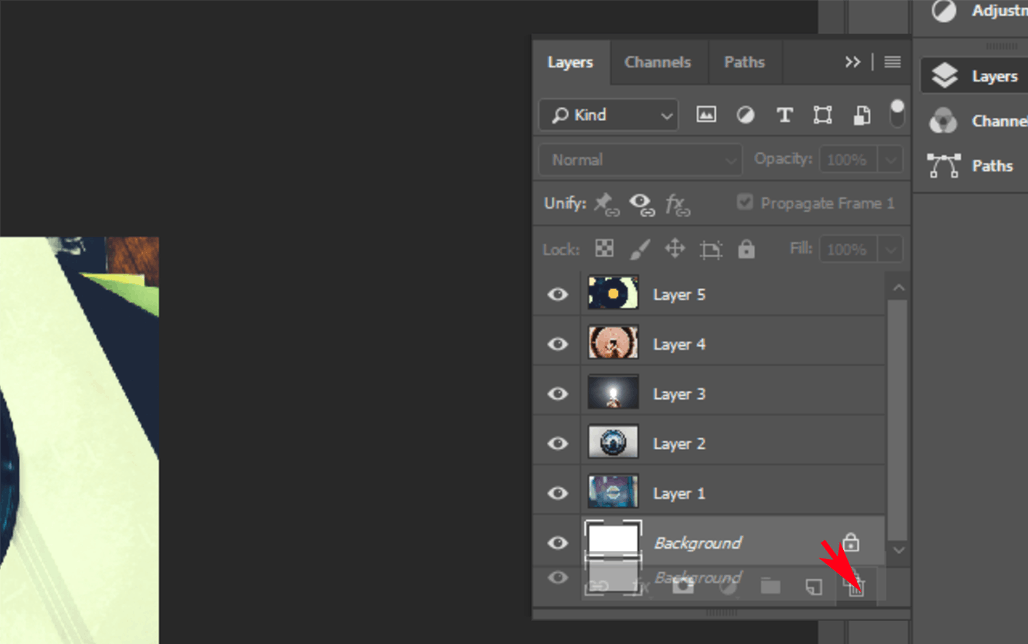
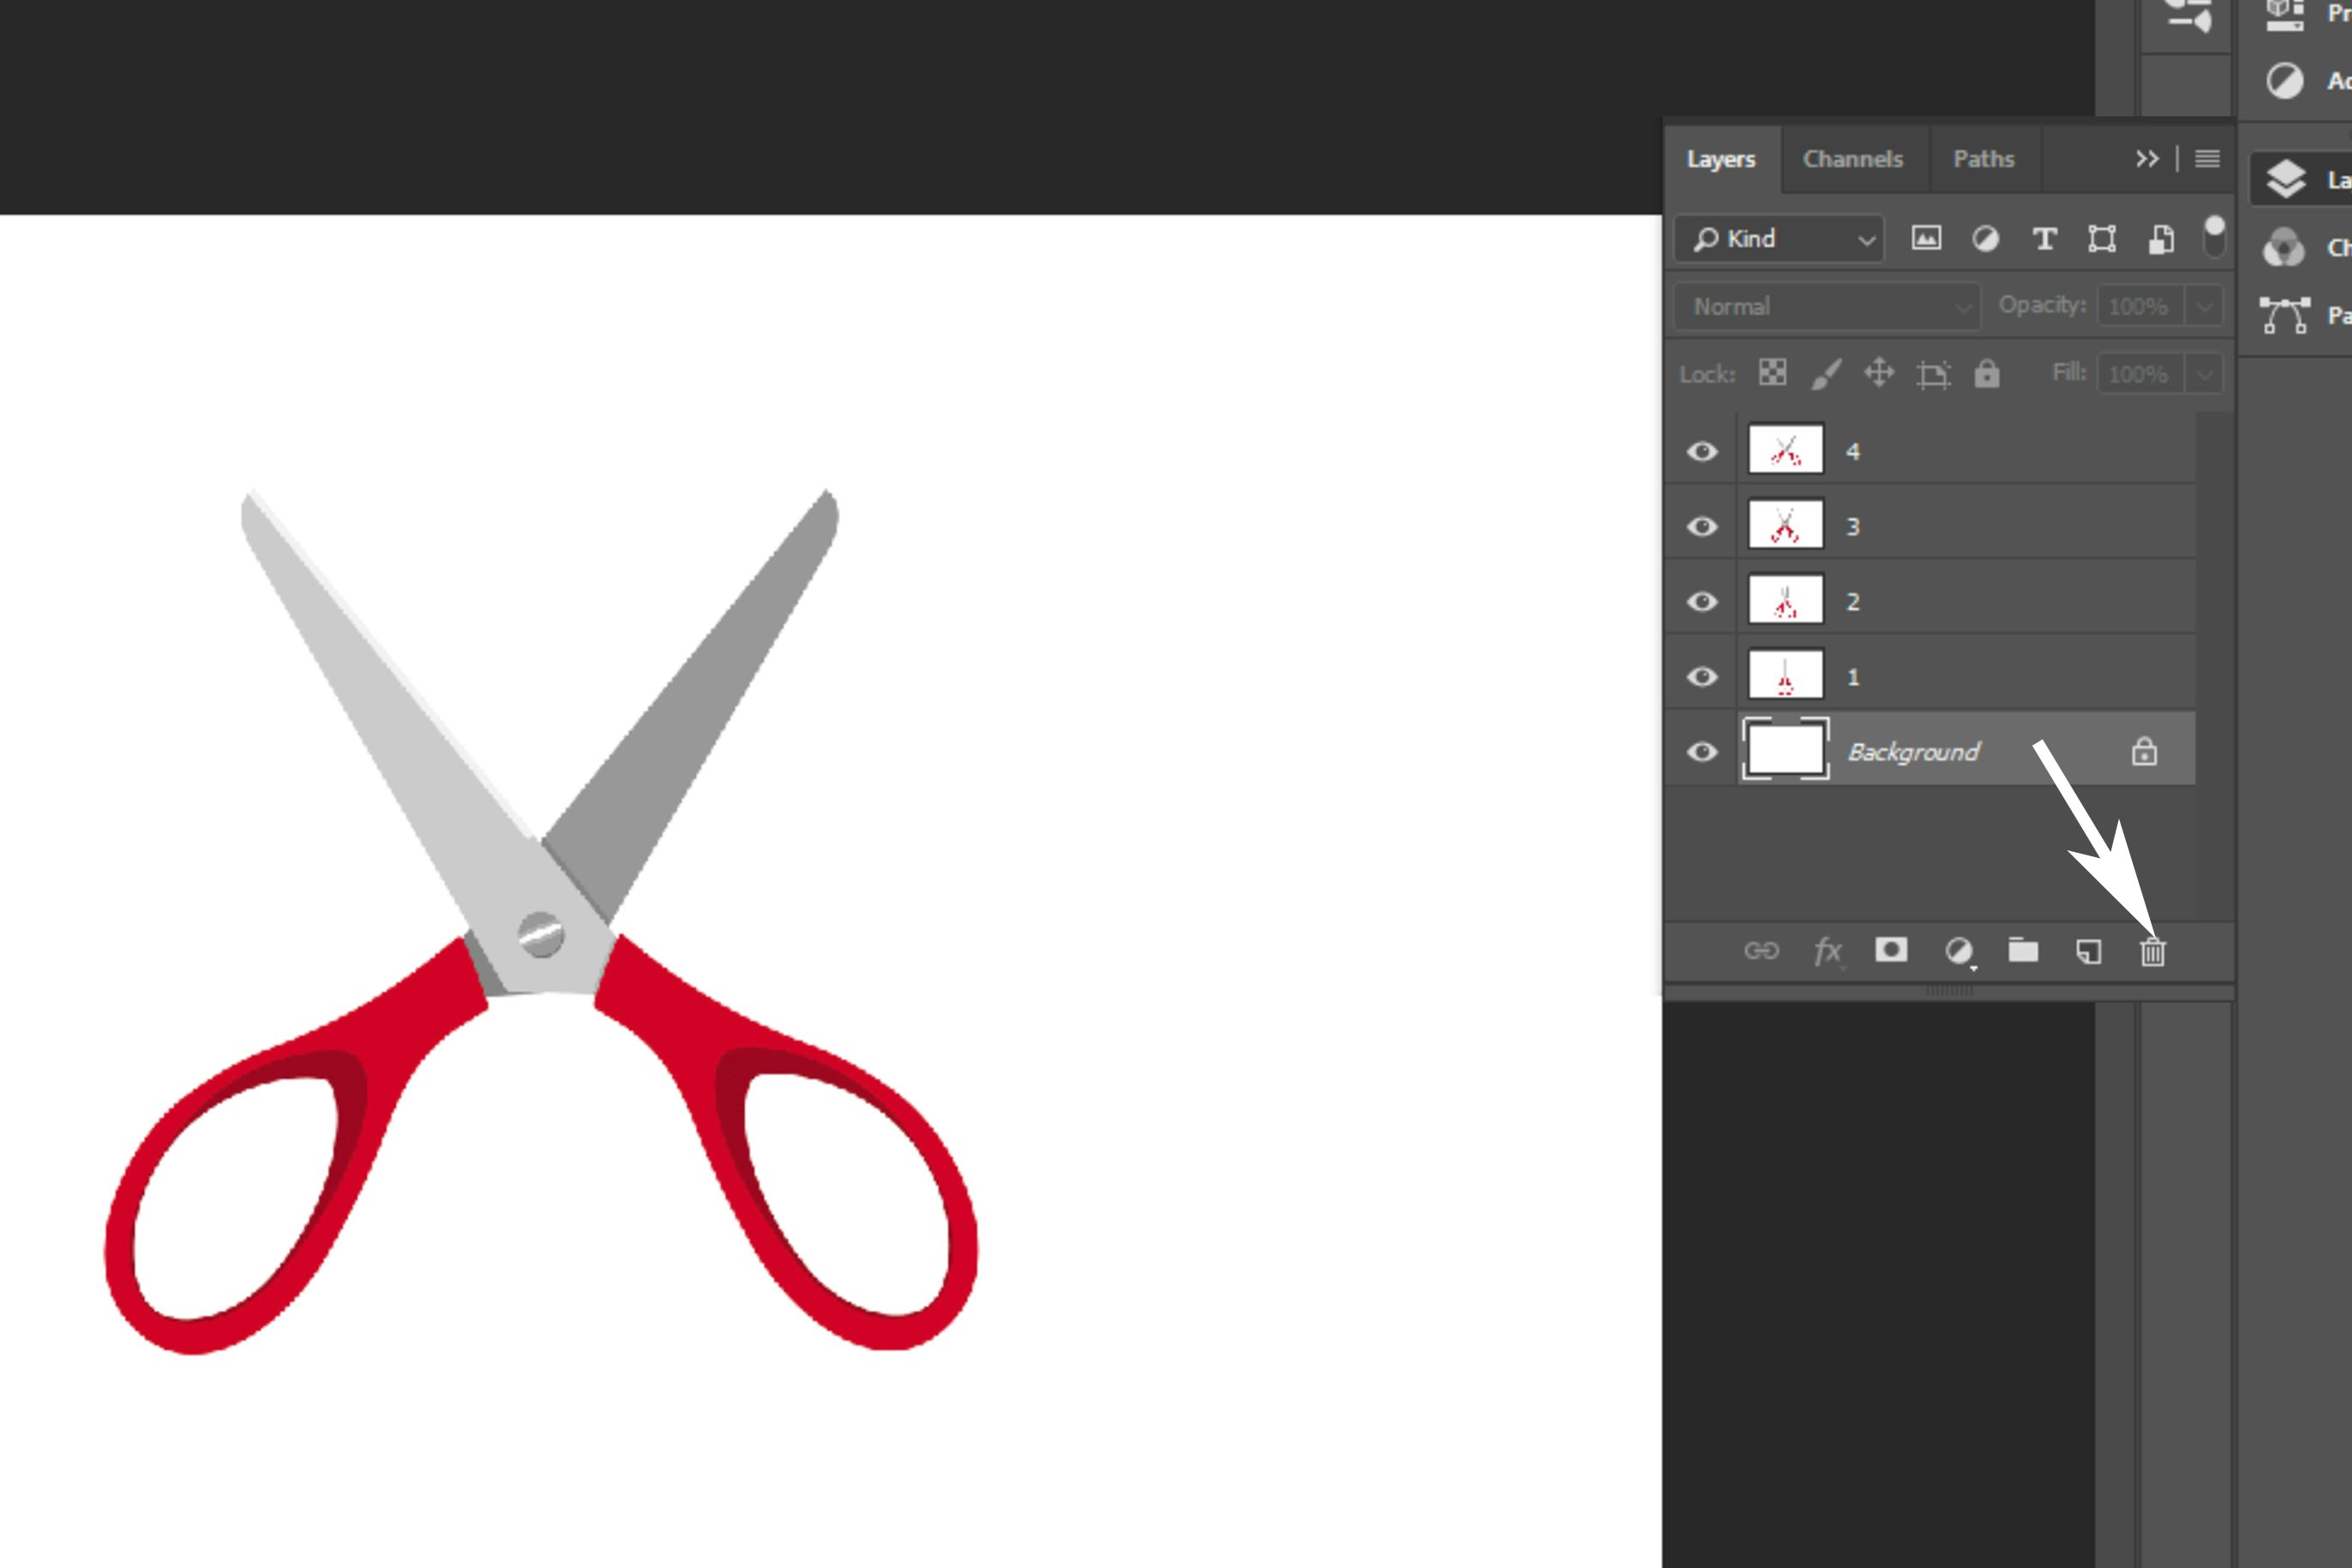
6. Drag the blank bottom layer named ‘Background’ into the bin on the layers panel:
7. Click on the small button on the top right hand side of the timeline window and select ‘Make Frames From Layers’:
8. Holding the shift button, select all of your layers in the timeline panel, then right click and choose your desired delay time between frames
9. You can now export your file. Go to File > Export > Save For Web (Legacy). In the window that appears, select ‘GIF 128 Dithered’ under the Preset drop down menu.
10. Under the ‘Colours’ tab, ensure that ‘256’ is selected:

11. Change the dimensions if necessary, using the ‘Image Size’ section. Once you are happy with the preview on the left hand side, click ‘Save…’ and name your file.
Your slideshow GIF will look something like this!

Stop motion storytelling
For this section, I will be using a set of images from iStock as an example.
1. Open a new file in Photoshop, with the dimensions required.
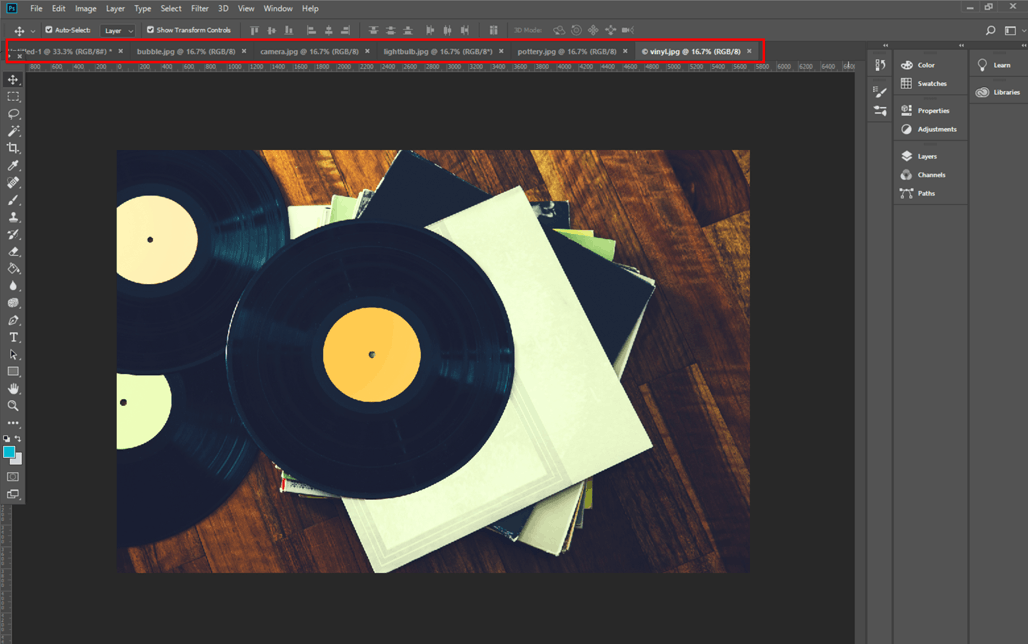
2. Select the images from your computer folder and open them in Photoshop, so they appear in separate tabs along the top toolbar, alongside the blank file you just created.
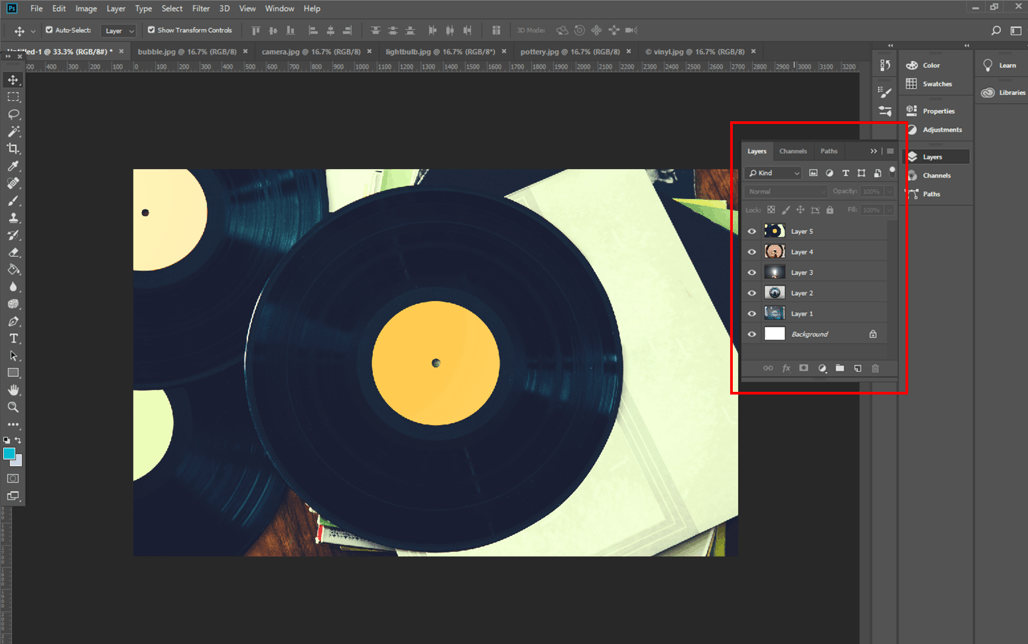
3. Drag your images onto the blank file in the order you would like them to appear. Place them in the centre of the file with plenty of room around the edges. Then drag the background layer onto the bin icon.
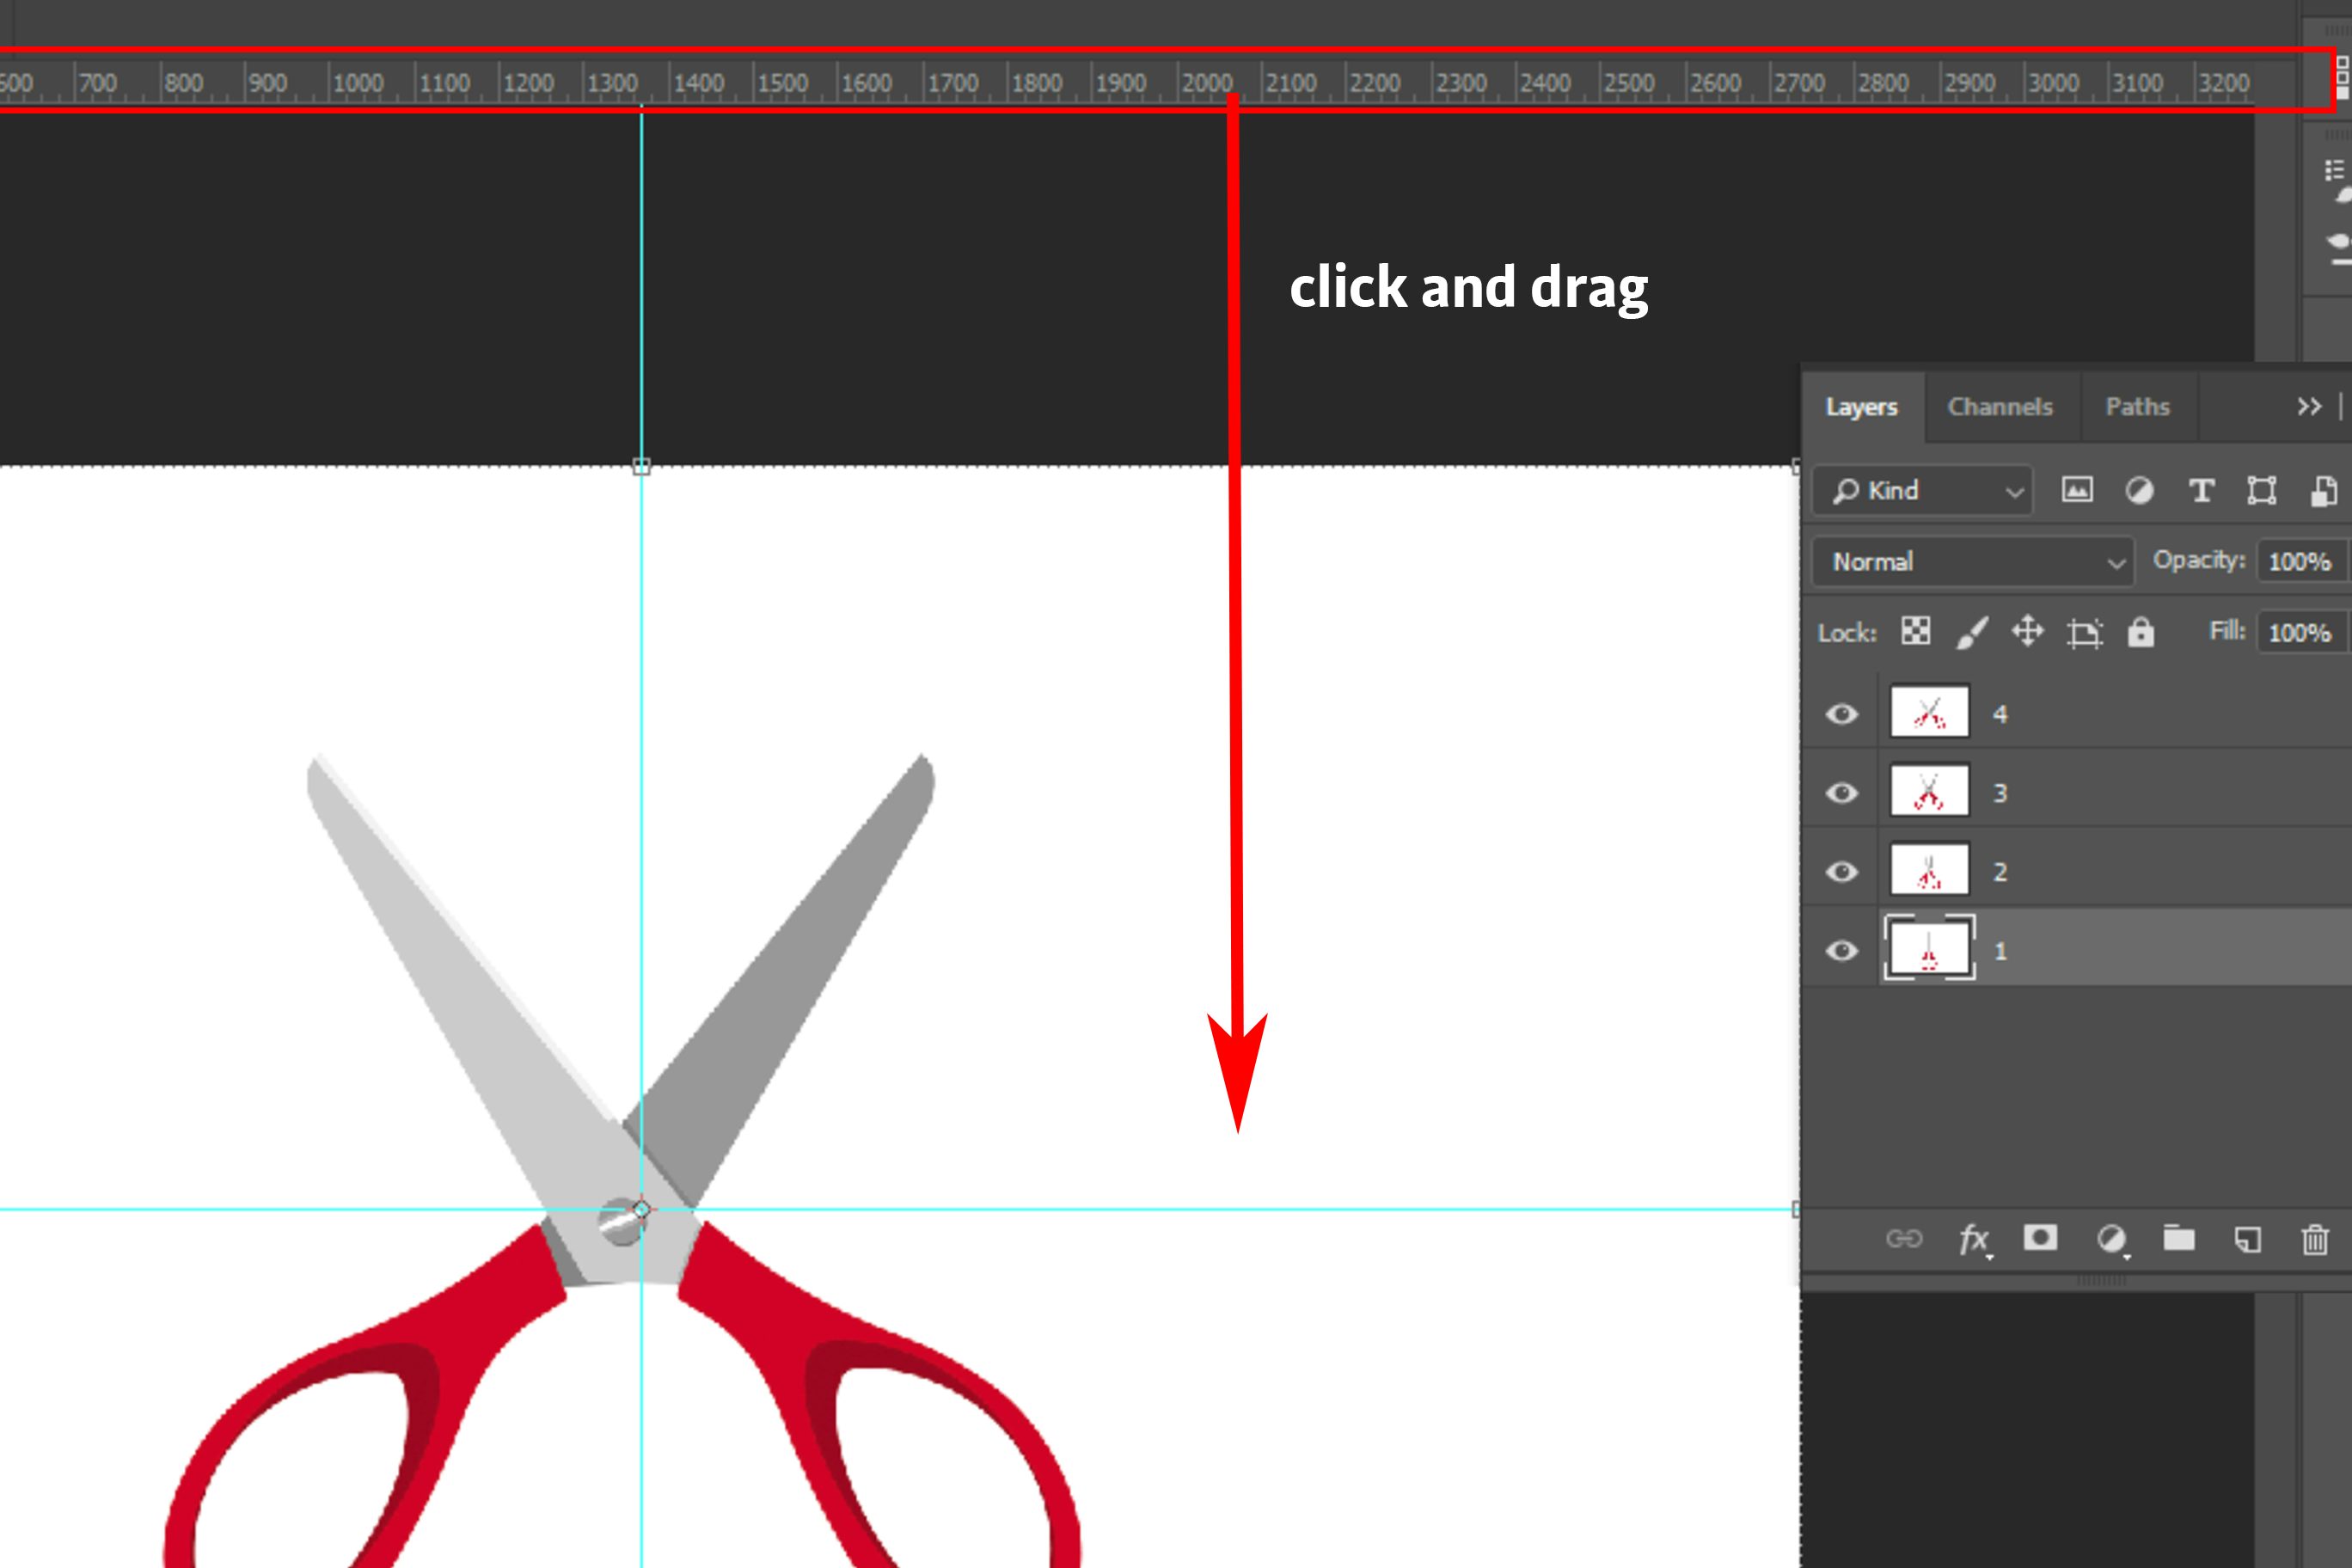
4. Using the rulers around the edge of the work area, click and drag two guides across your canvas until you find the centre. If you cannot see the rulers, go to View > Rulers and they should appear.
 5. Align each image to the centre, according to where your two guides meet.
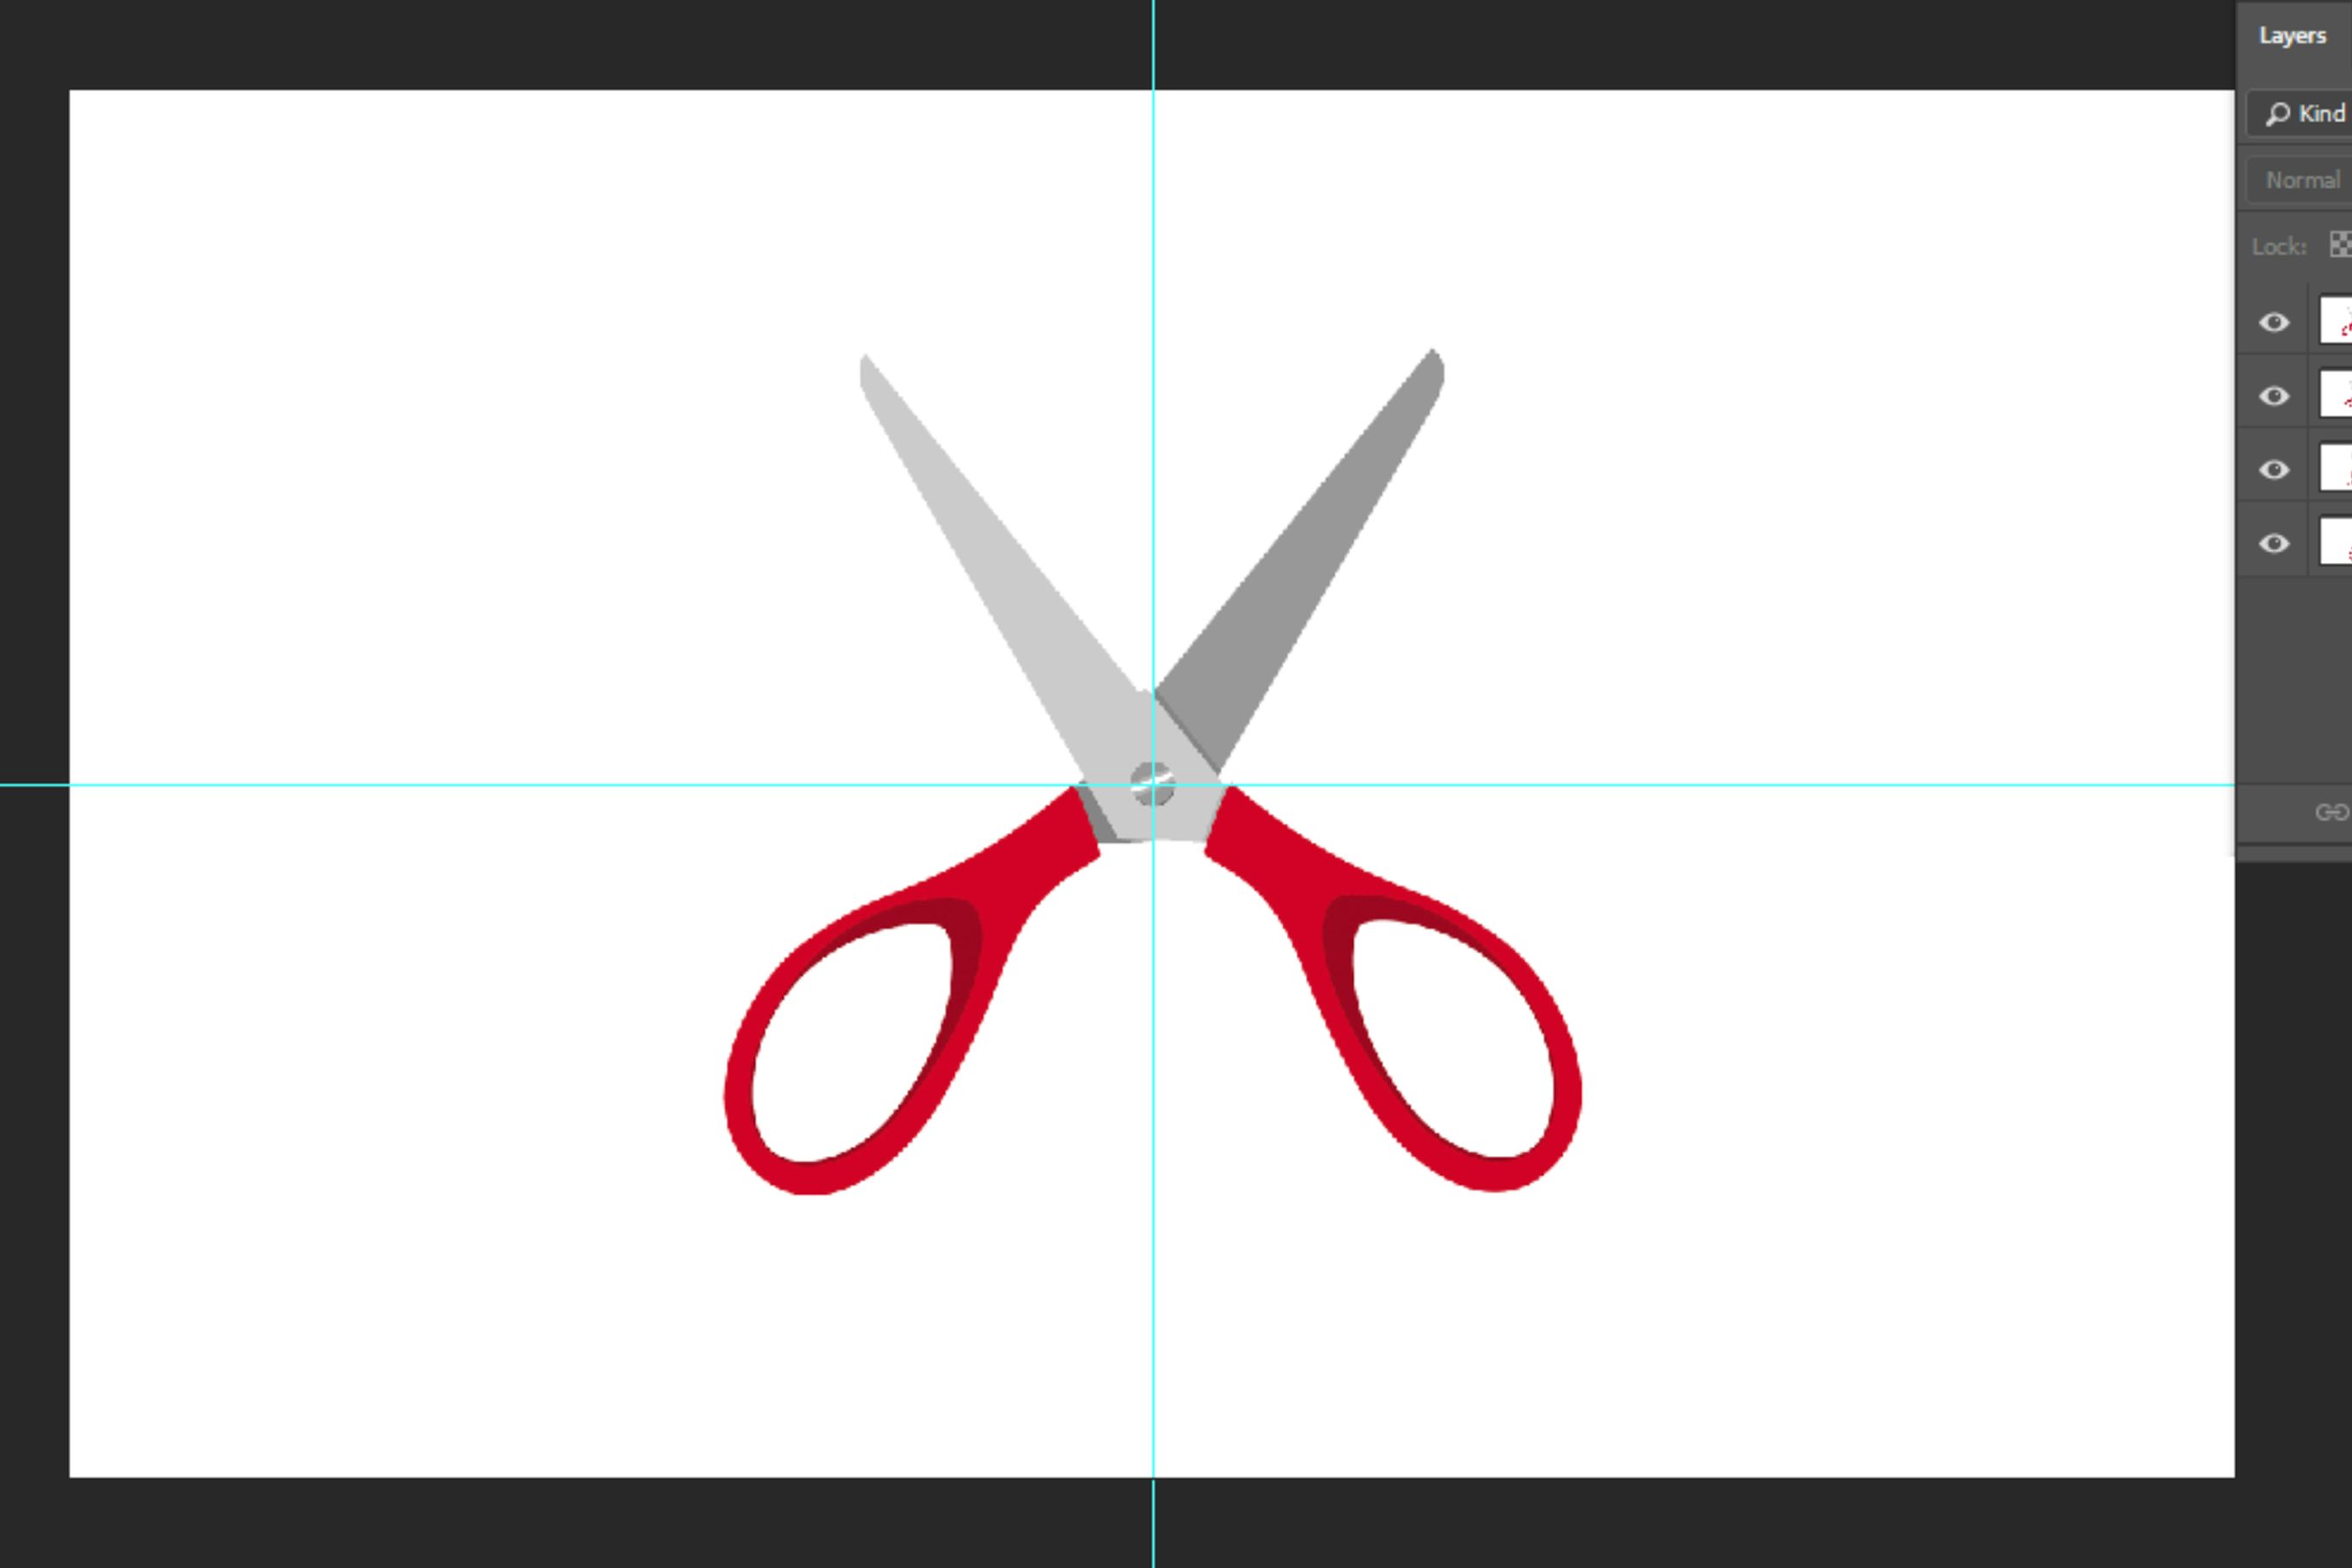 6. Click on ‘Window’ from the top toolbar and select ‘Timeline’ to make the timeline tab appear at the bottom of the screen. Then choose ‘Create Frame Animation’.
7. Select the top right icon on the Timeline window and click ‘Make Frames From Layers’. All of your layers should now appear in the timeline.
 8. In order to make this short animation loop, I will need to duplicate the first, second and third frames and add them to the end of the timeline, so that it looks symmetrical at a glance. This may differ dependent on the number of frames in your animation.
Hold shift, select all the frames that need duplicating and drag them to the new layer icon:
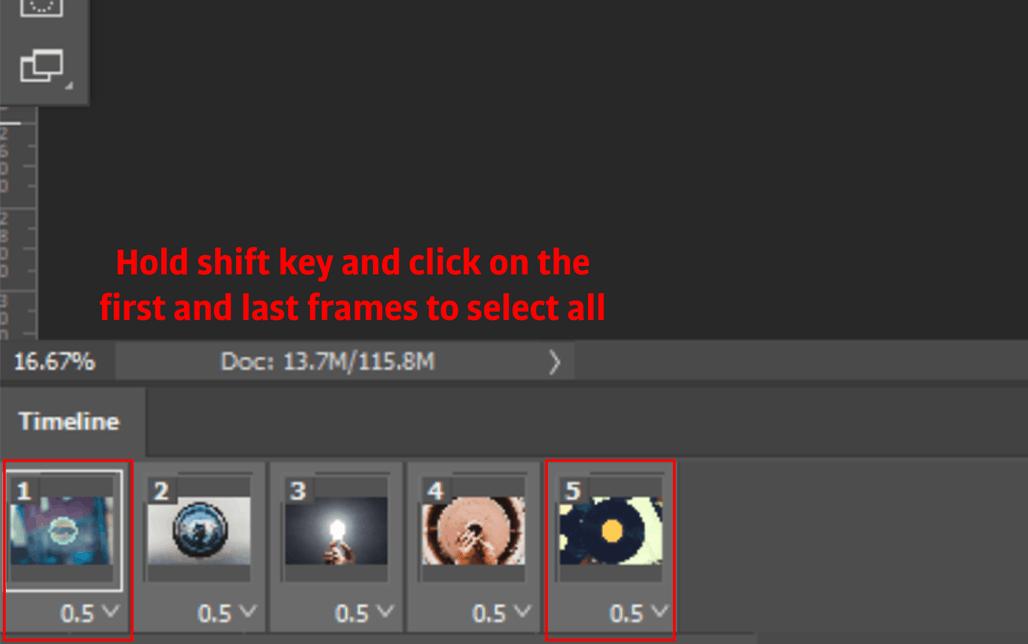
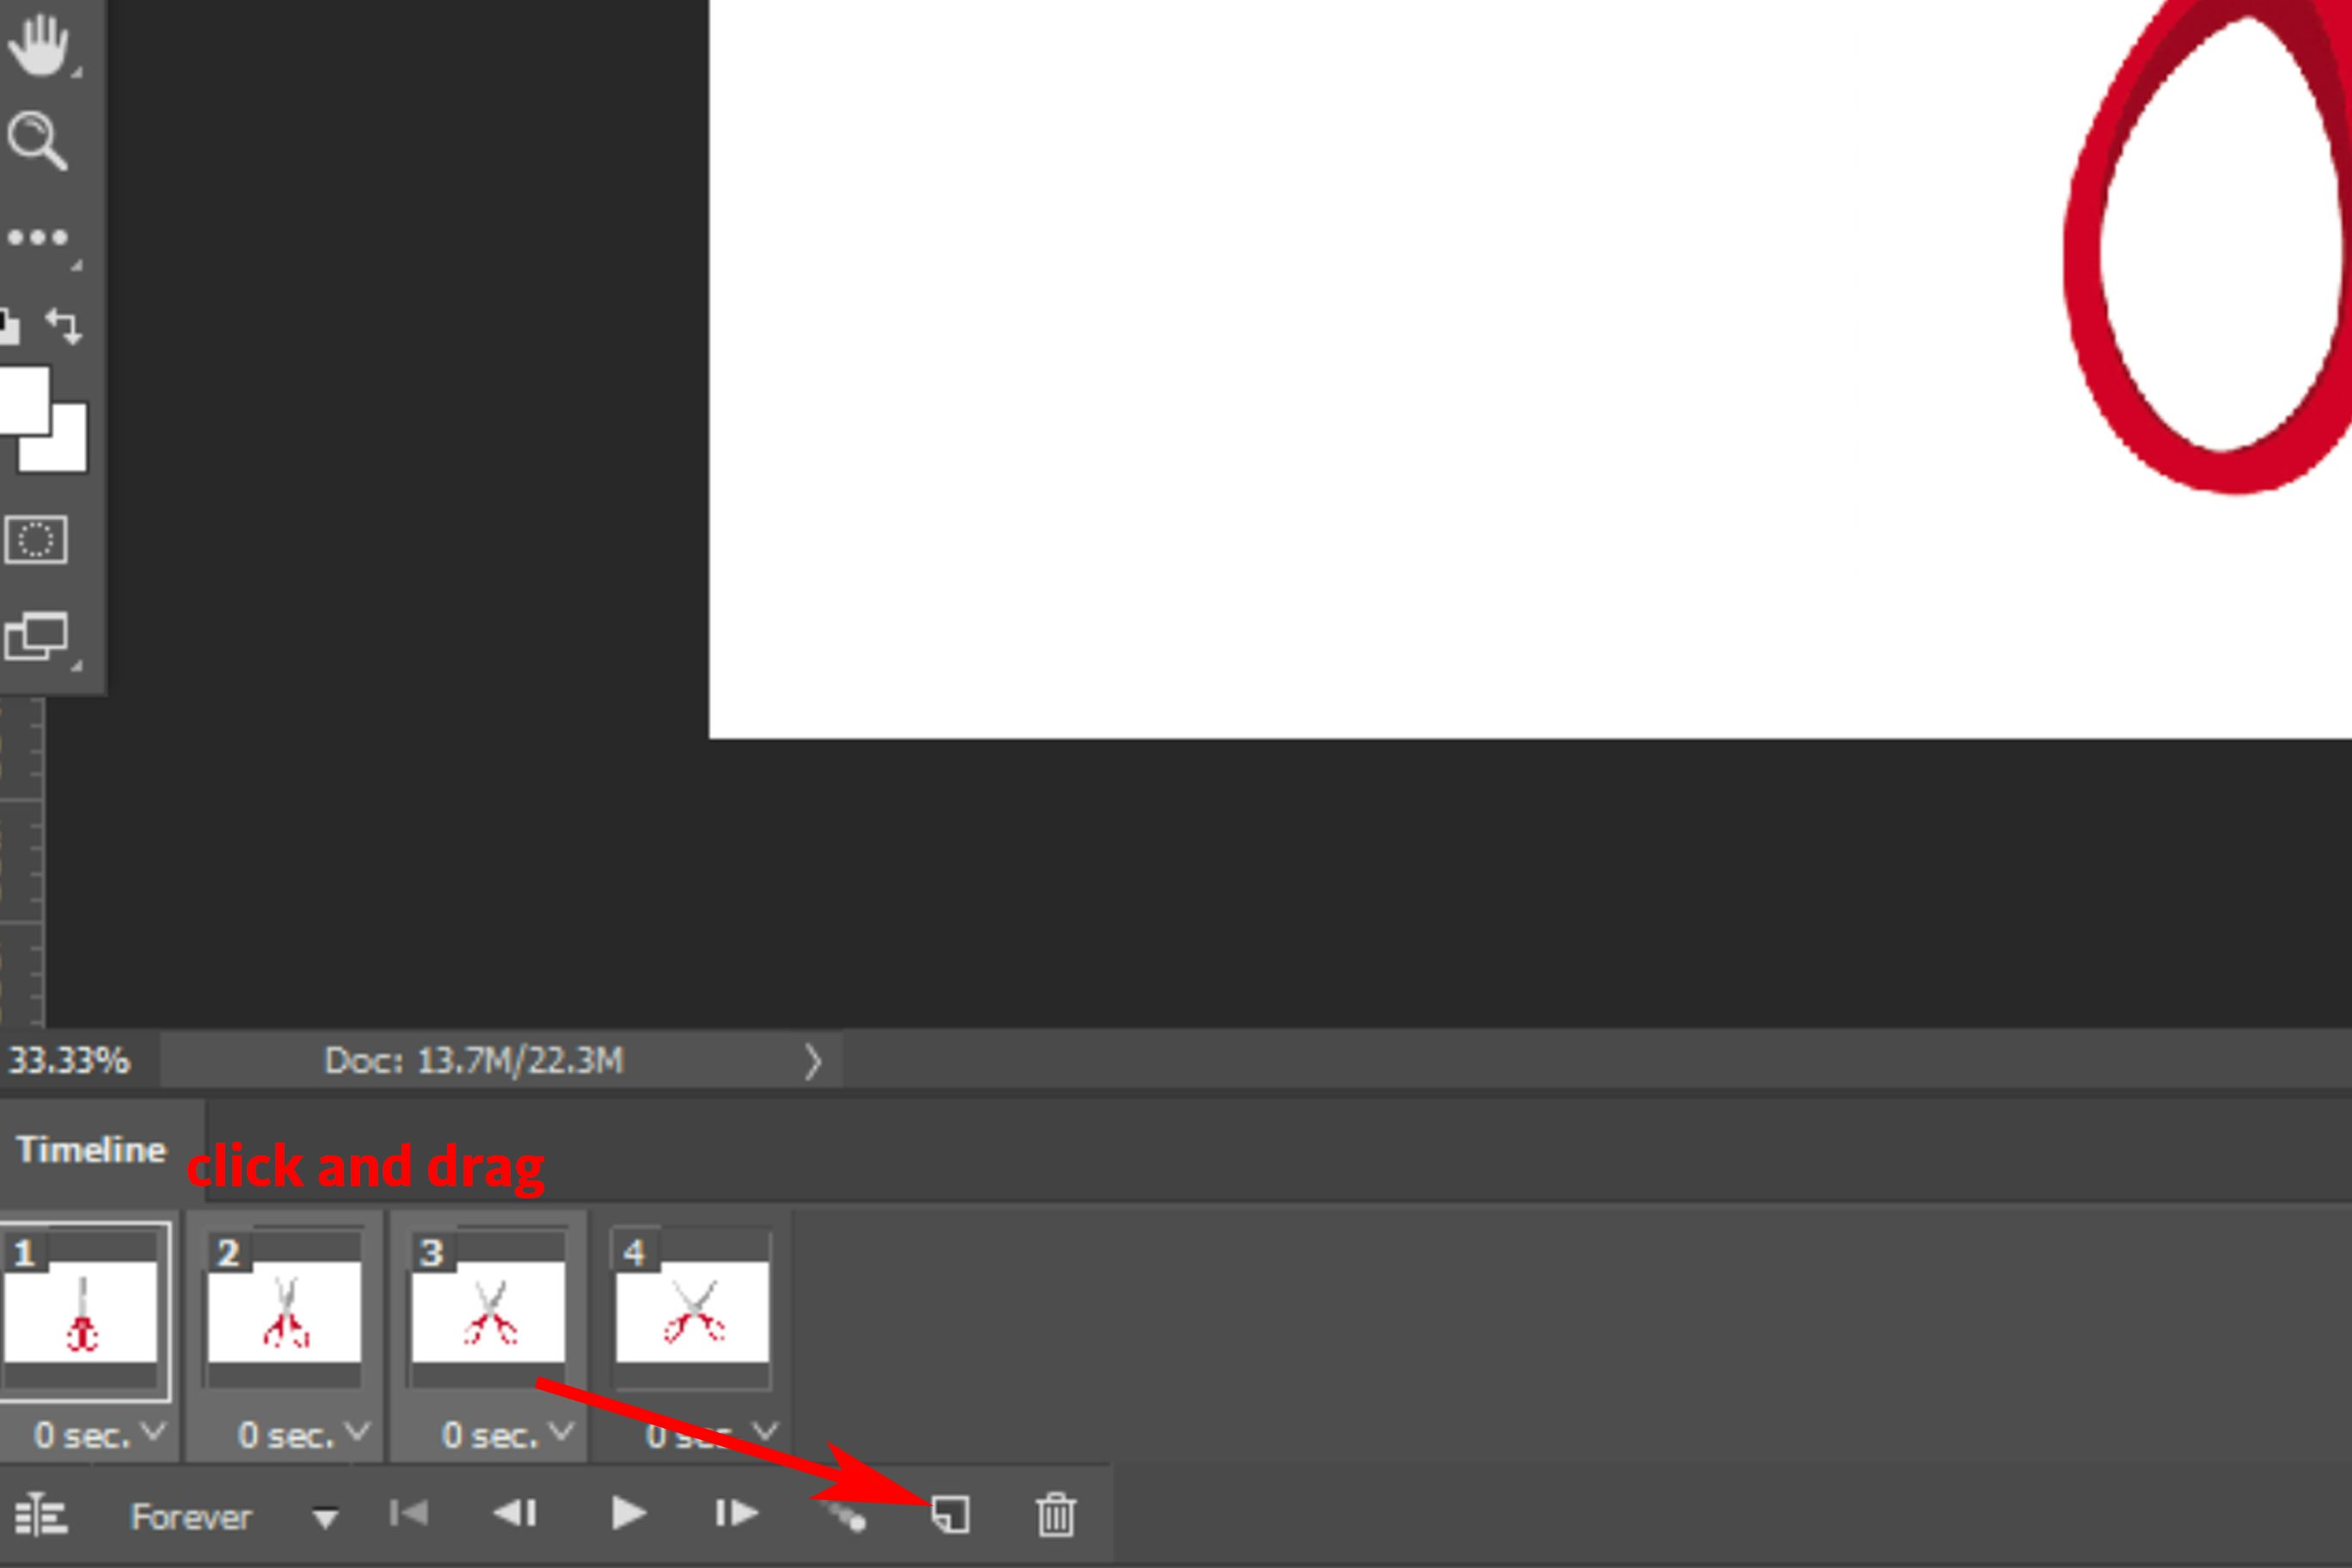 9. Reorder the frames so that they are symmetrical at a glance. Then select all frames (using the shift and click method), right click and choose a frame delay as per previous methods. The shorter the delay, the smoother the final result.
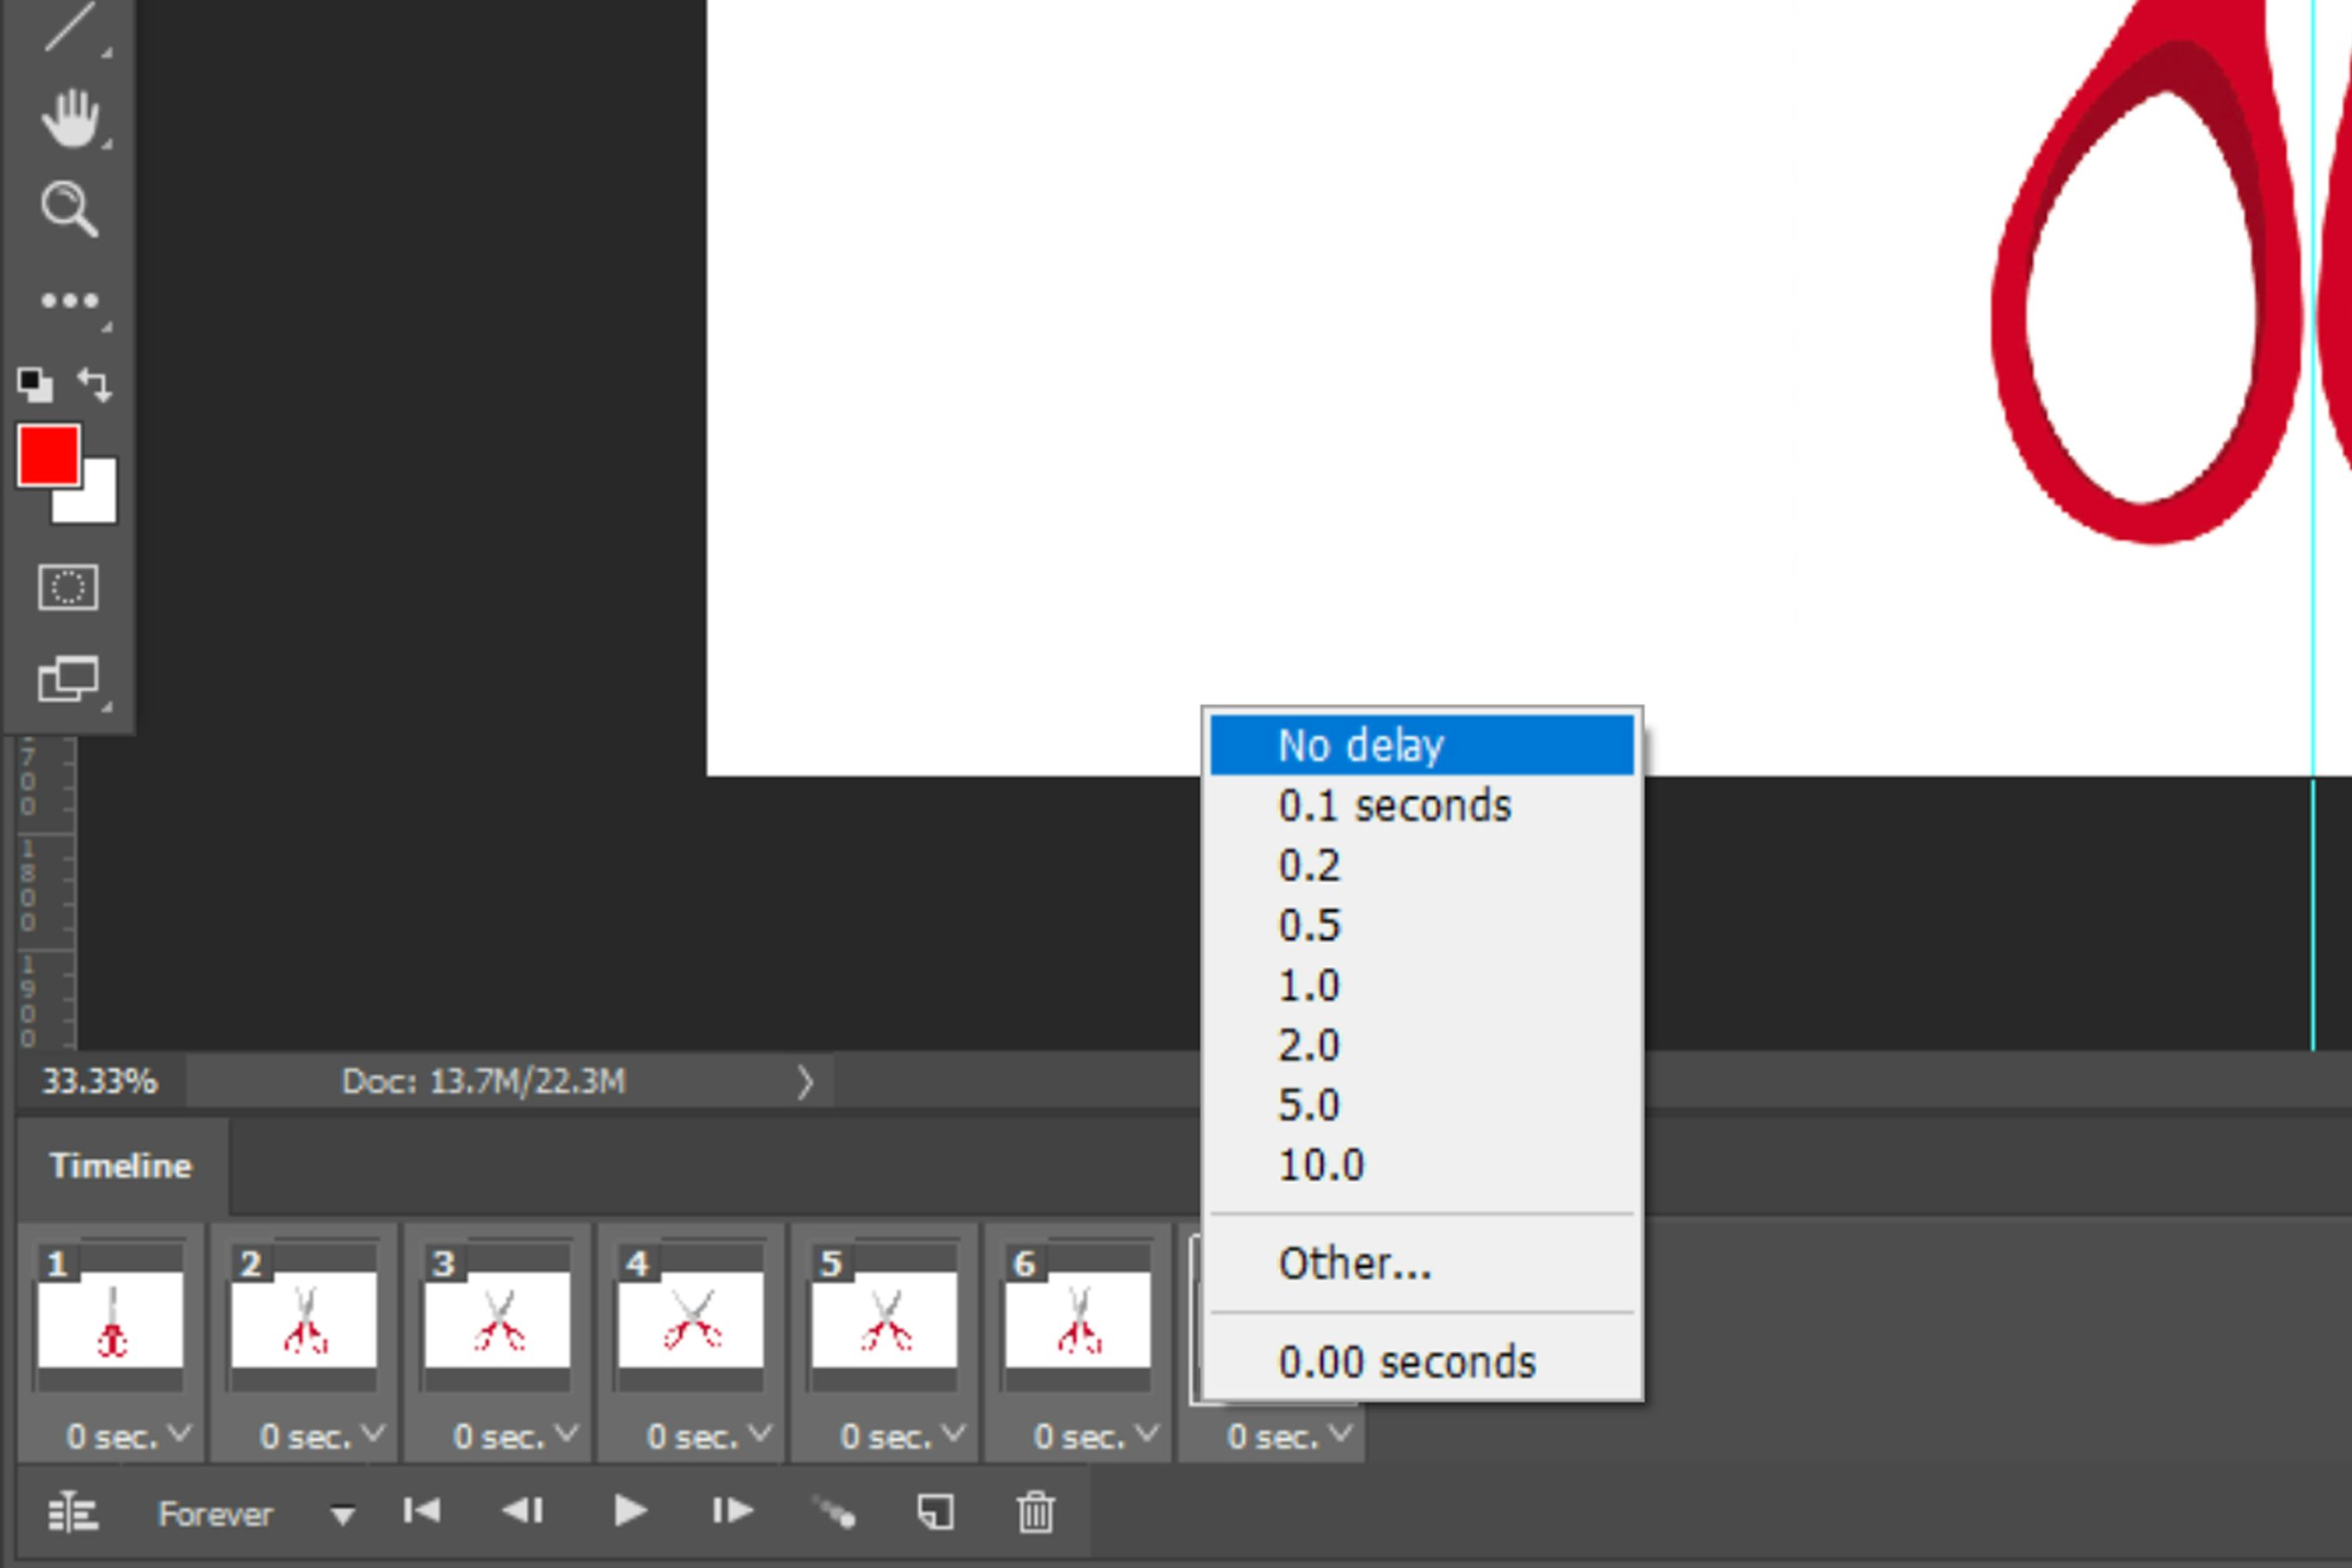 10. Go to File > Export > Save For Web (Legacy). Select ‘GIF 128 Dithered’ under the Presets tab, ‘256’ under the Colours tab, and change the dimensions if necessary. Then click ‘Save…’ and name your file.
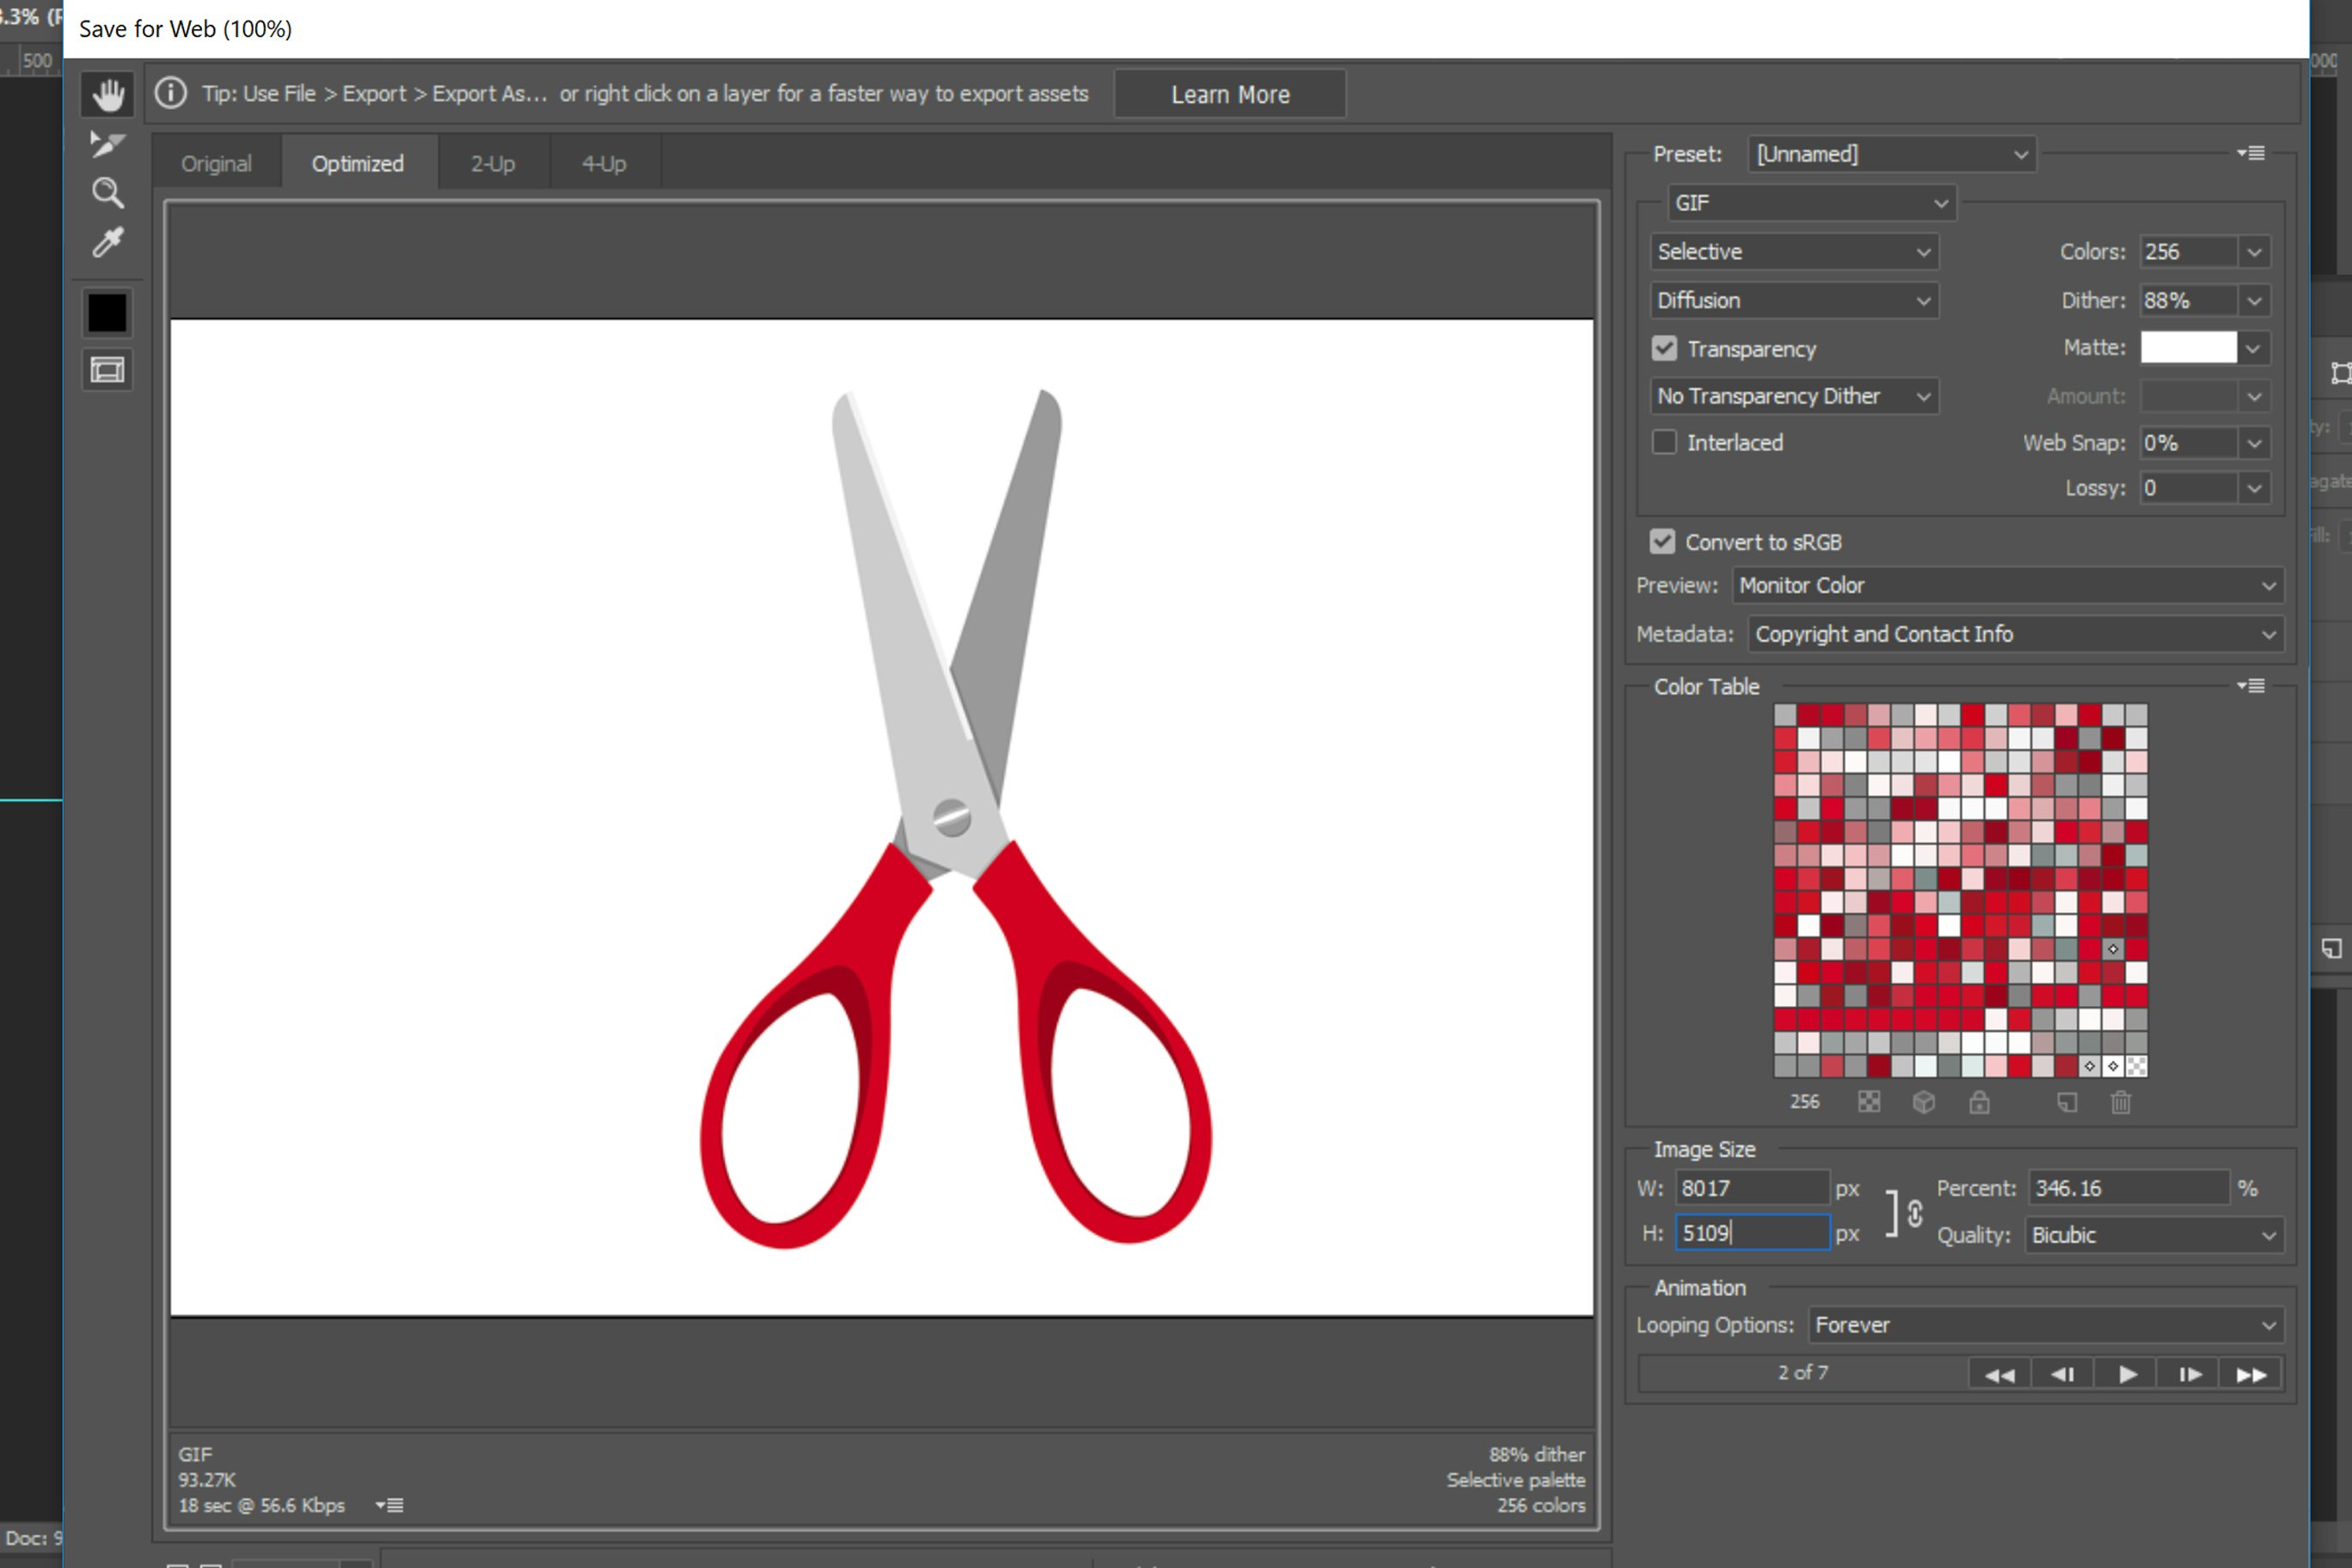
Your finished GIF should look something like this!
Comments
Post a Comment