With Adobe Photoshop, you can easily create an original animated GIF file (graphics interchange format) from a series of photos. In this tutorial, we’ll break down the step-by-step process of how to make an animated GIF in Photoshop.
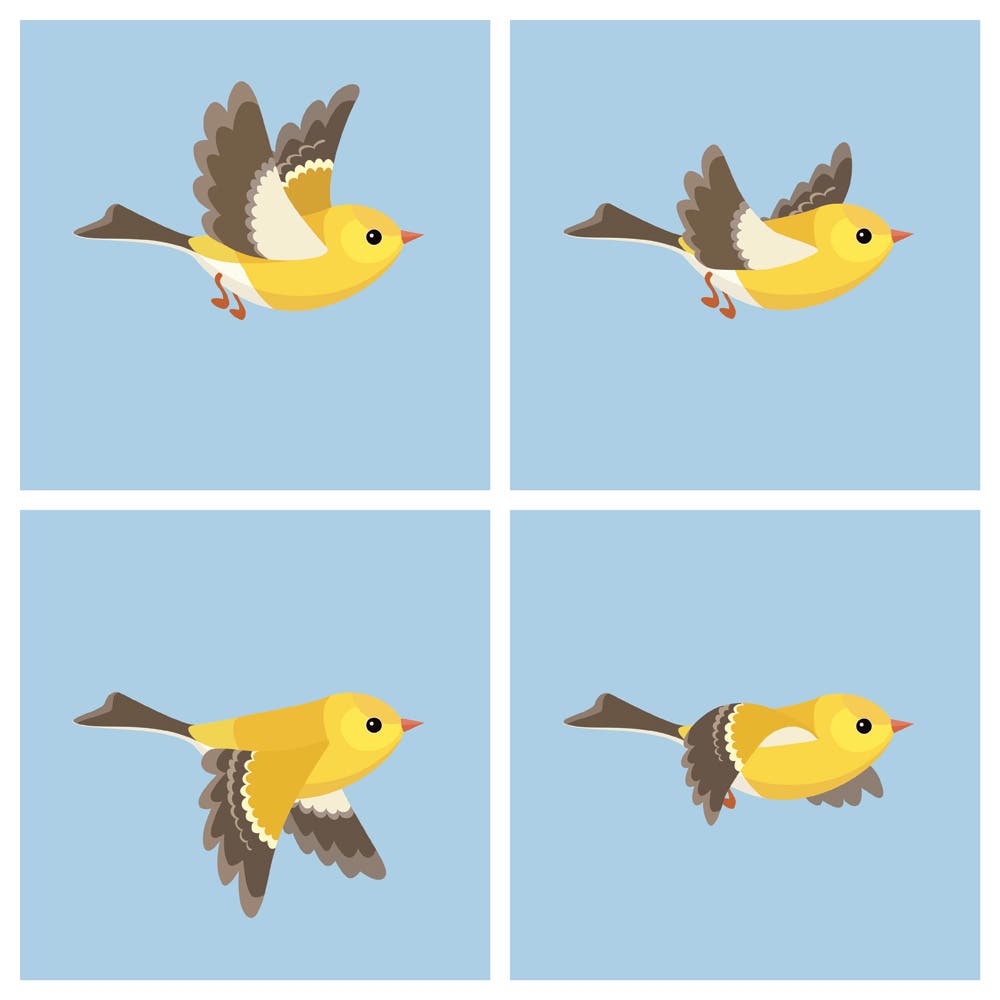
1. Select which photos you want to use for your GIF
For the best GIF possible, use a series of images taken in rapid succession. Time lapse images or images shot in burst mode work the best. That’s because they make your GIF feel like a short looping video. The more frames you use in your GIF, the smoother the animation effect will be.
A total of 15-24 still images usually work best. Make sure the image size for each of your frames is the same, so double check the pixel count. Put all of the frames you want to use in a folder on your desktop or a hard drive. That will make it easier to find them easily in Photoshop.
2. Import your photos into Adobe Photoshop
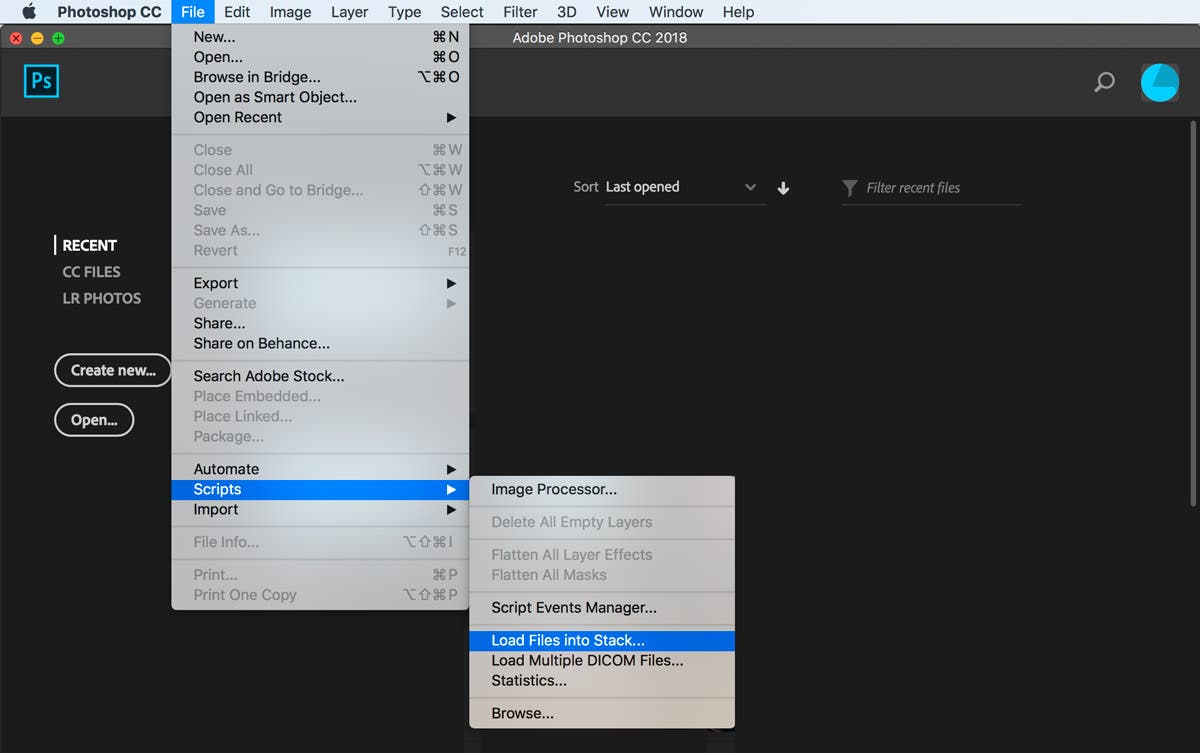
Open Adobe Photoshop. From the File menu, select Scripts > Load Files into Stack. This will open a new dialogue box. Click Browse to find the folder you created on your desktop or hard drive that contains the images you want to include in your GIF.
Press the Shift key to select multiple images. Once all the image files you want to use are highlighted, click OK. Next you’ll see all the files you selected, listed in the Load Layers dialog box.
Click OK, and Photoshop will then open the selected images as individual layers in a new document.
3. Access the Timeline panel
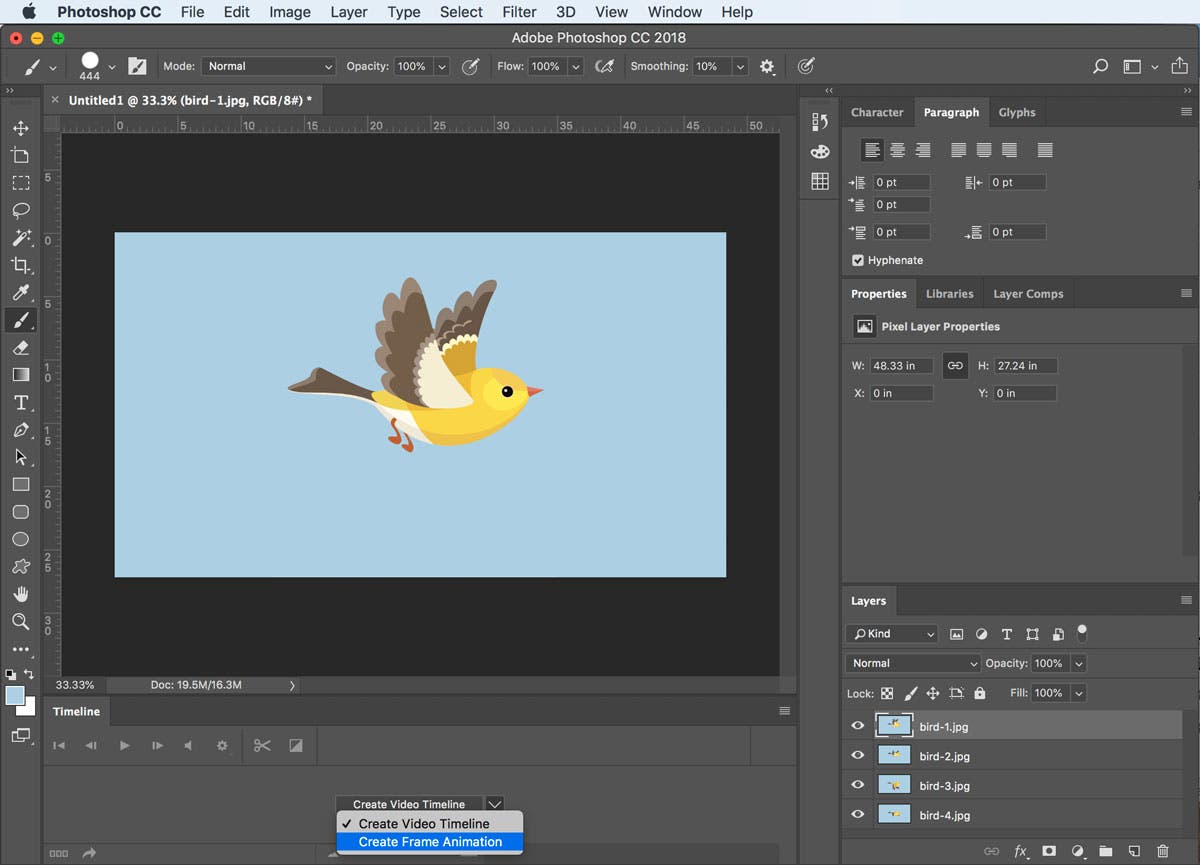
From the Window menu, select Timeline to open the Timeline panel in your workspace. By default, the Timeline panel will open at the bottom of your screen.
In the center of the Timeline panel, you’ll see a button that says Create Video Timeline, with an arrow next to it. Click the arrow, and select Create Frame Animation from the drop-down menu.
Now the button will say Create Frame Animation. Click that button.
4. Convert your image layers into animation frames
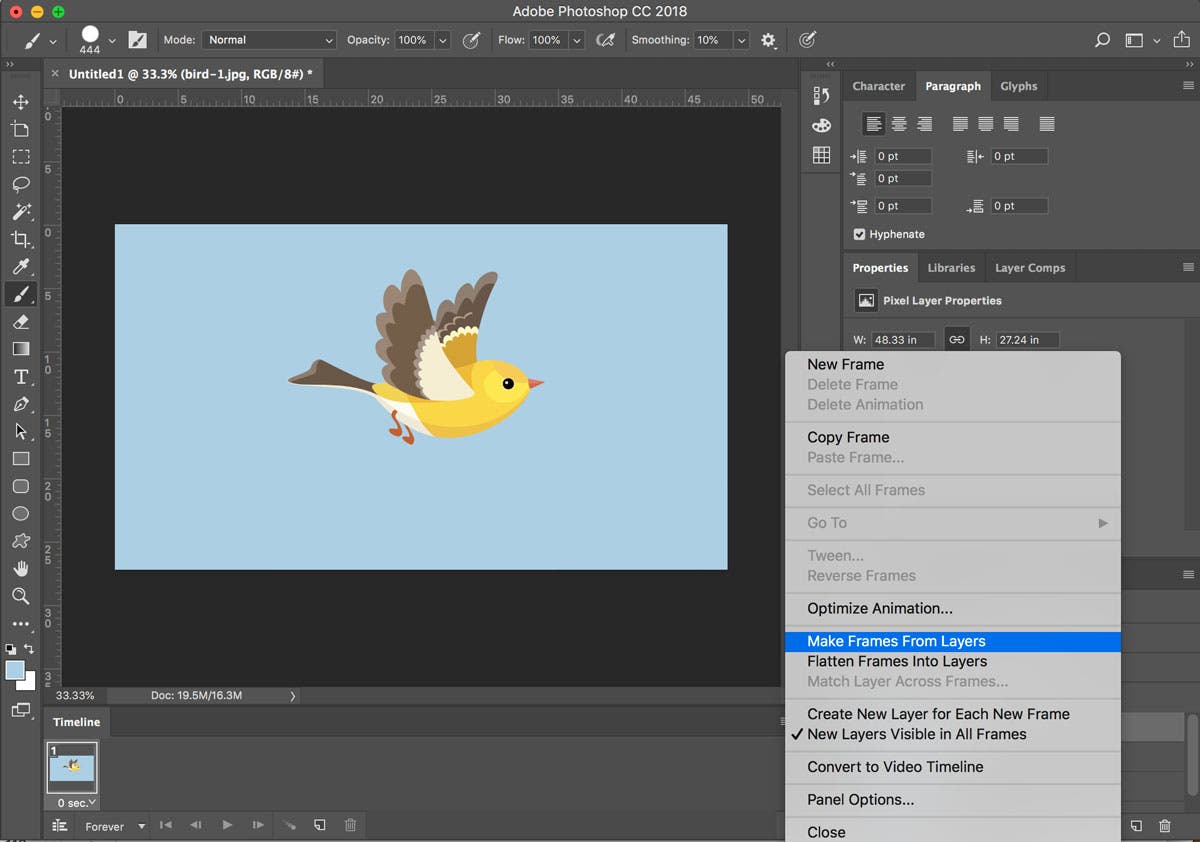
In the top right corner of the Timeline panel, you’ll see a menu icon (four horizontal lines). Click that menu icon to bring up a drop-down menu with animation options.
Click Make Frames From Layers. This will convert the images in the Layers panel into individual frames in your GIF.
Now you should see a thumbnail of each of your image layers in the Timeline panel. Click the Play button to preview how your GIF animation will look.
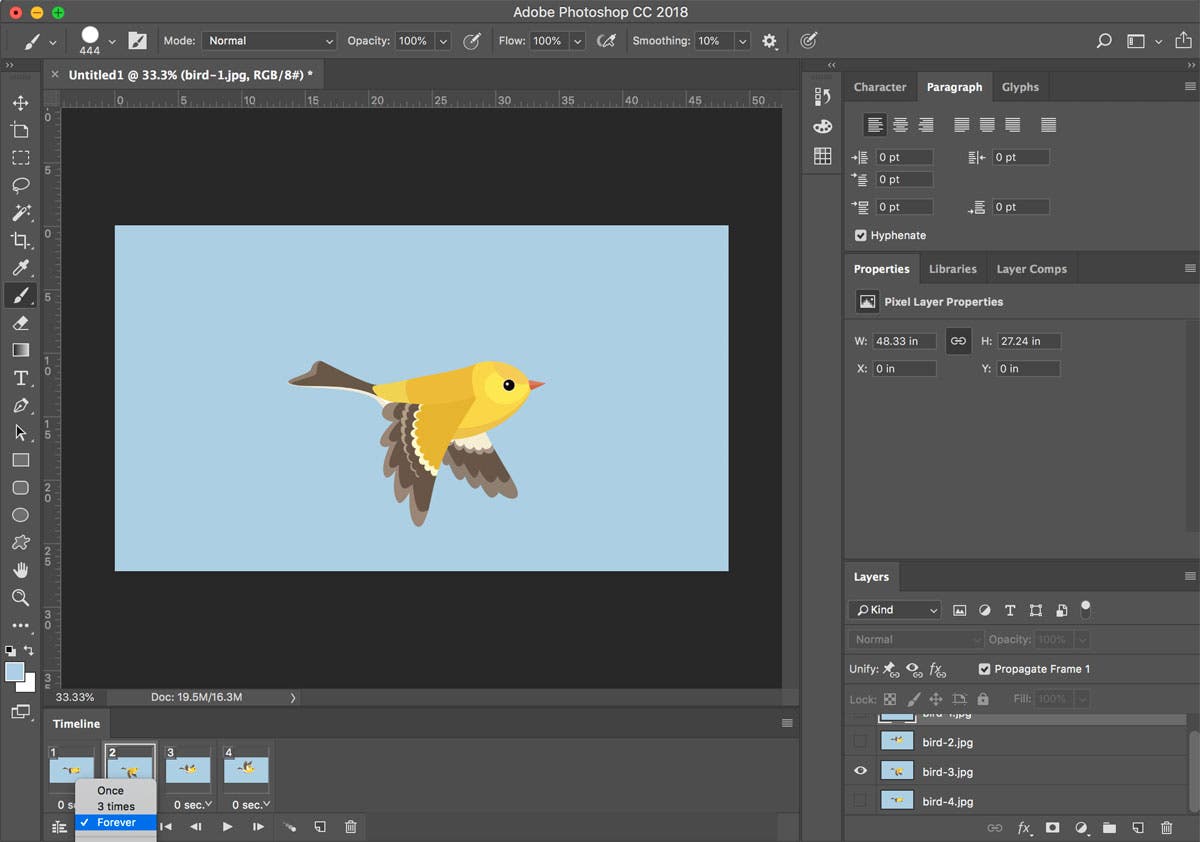
5. Loop your animation
In the bottom left of the Timeline panel, you’ll see a few choices for looping options. Adobe Photoshop lets you decide if you want your GIF to play through once, three times, or forever. You can select other looping options manually by selecting Other.
Forever is often selected by default. If one of the other options is selected, click the arrow next to the listed duration. Then select Forever from the drop-down menu.
Click the Play icon one more time to make sure you like how the animated GIF looks.
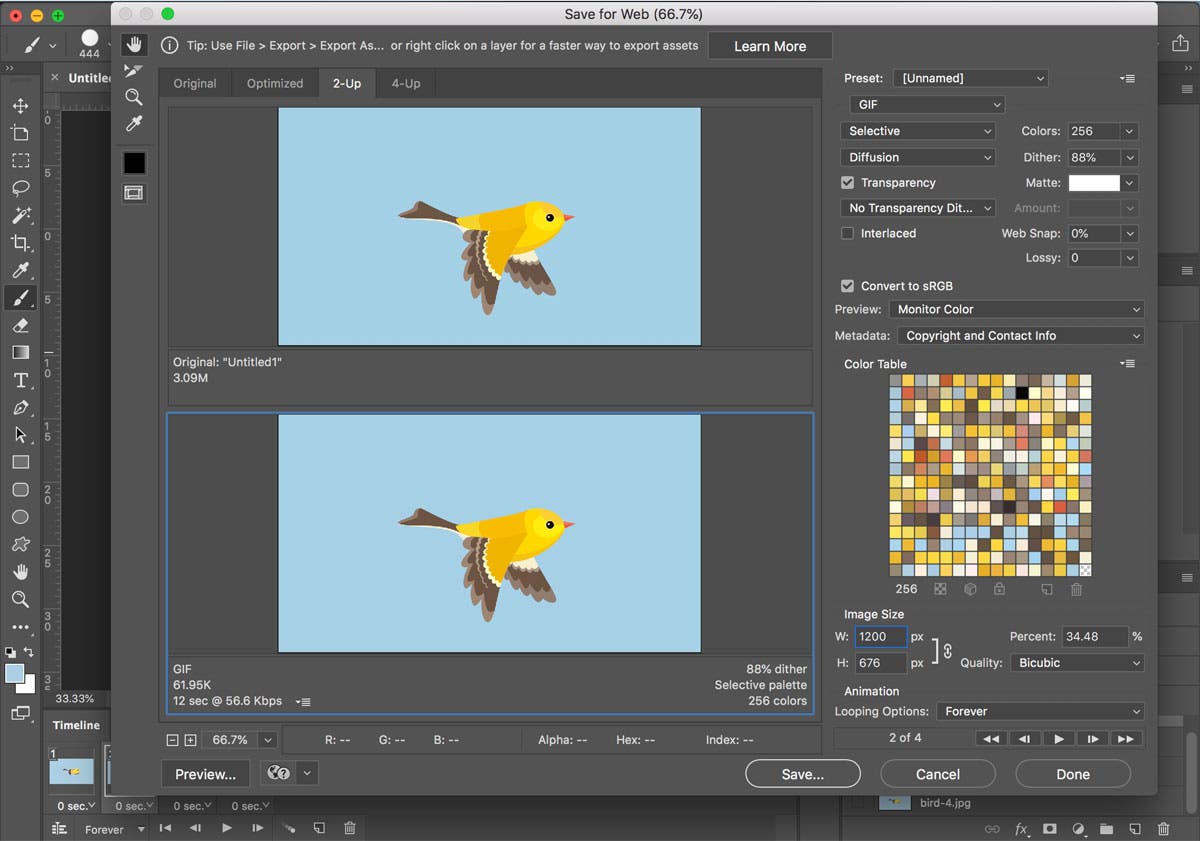
6. Export your animation as a GIF file
From the File menu, select Export > Save for Web (Legacy). This will bring up a new settings dialogue box. Here are the ideal settings to choose when saving your work in the GIF file format:
- Under Preset, select GIF 128 Dithered.
- In Colors, select 256.
- Under Image Size, you can adjust the physical dimensions of your GIF. If your original image files were very large, you should reduce the dimensions of your GIF for better online viewing. As you adjust the dimensions, you’ll see the estimated file size change in the bottom left corner of the GIF preview.
- Under Looping Options, make sure Forever is still selected.
Click Preview in the bottom left corner of the dialogue box to see how your GIF will look in a web browser window.
Click Save, which will open a new save options dialog box. Name your file, choose a destination, and click Save. That’s it! You’ve made your own quick and easy GIF in Adobe Photoshop. Now you can upload it to social media, add it to websites, or do anything else you want with it!
See the final GIF:


Comments
Post a Comment