Photo Manipulation in photoshop

Preview of Final Results
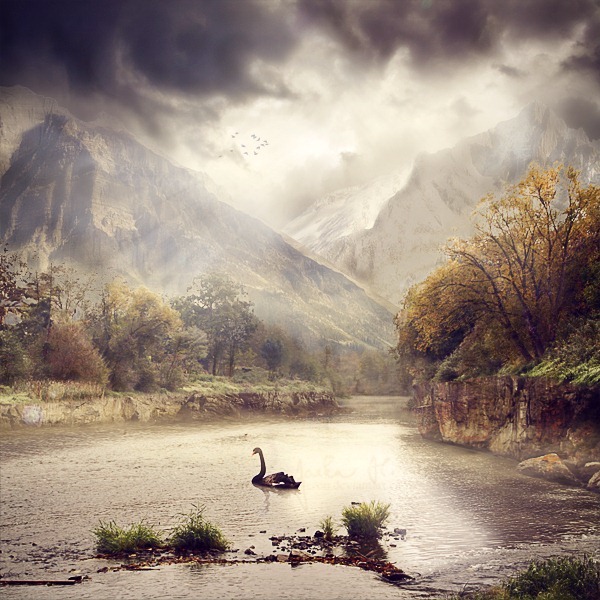

preview

Serene Fantasy Photo Manipulation Photoshop Tutorial


Resources


Step 1 – Removing the Sky from the Background

Open the background picture in Photoshop. Right click on the layer and select the option Layer from background.
First thing you need to do with the picture is to remove the uninteresting sky to be able to add the more dramatic one. You can easily do that with Channels.
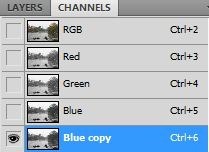
If you don’t have the palette Channels visible go to Window > Channels and it will appear. On this palette you can see four different layers – RGB, Red, Green and Blue.
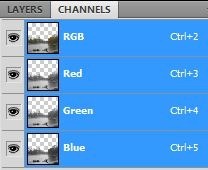
01_1
Right click on the Blue channel and select the option Duplicate Channel… Make visible only this duplicated Channel.
01_2
Go to Image > Adjustments > Levels or press Ctrl + L on your keyboard. Set the Input Levels on 128; 1,00; 232 and press OK. You should get something like on the following picture.
01_3
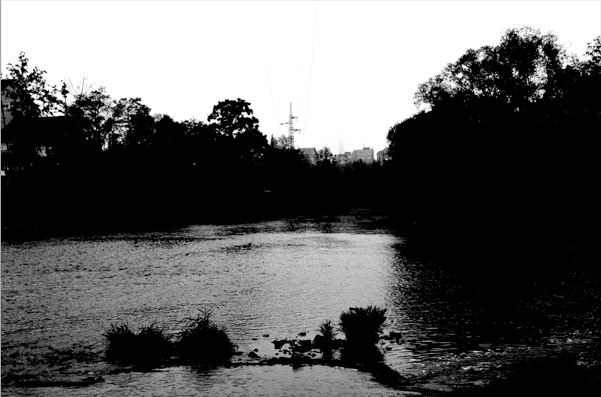
You want to make the picture only black and white without any shade of grey. Things you’ve done before leads to creating the mask for the sky. White color shows part of the picture which will be selected and black part stays unselected. If you let some grey colors in the picture they will be selected e.g. with 50% opacity.
To make the whole ground black grab the Brush Tool (B), pick black color and simply paint over the grey areas of the water.
On the horizon there are some buildings which shouldn’t be in the final picture. Carefully paint over them with white brush. You should get something like on the picture below. On the following picture you can see how the channel should looks like.
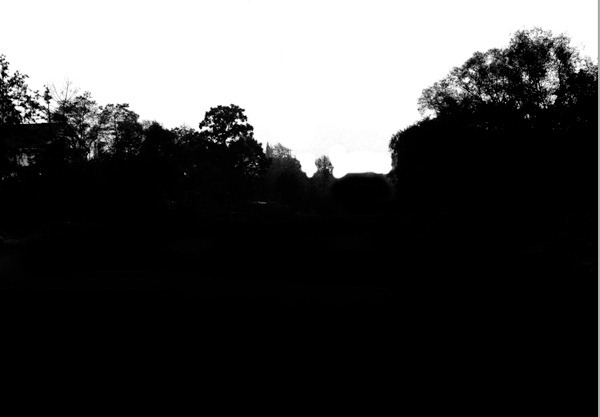
01_4
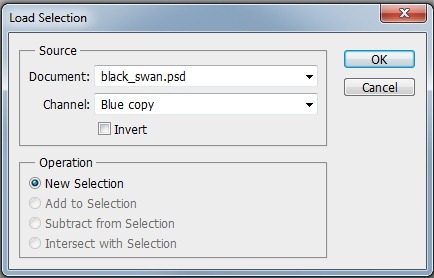
Once you’re finished make visible all channels except the one named “Blue Copy”. Go to Select > Load Selection and set the window which appear as on the picture below. Press OK.
01_5
It activates the mask based on the Blue copy Channel.
The sky is selected and you want to hide it. First you need to invert the selection. Do that by pressing Ctrl + Shift + I on your keyboard or go to Select > Invert. Then click on the button Add layer mask which can be found in the bottom part of Layers palette.
01_6
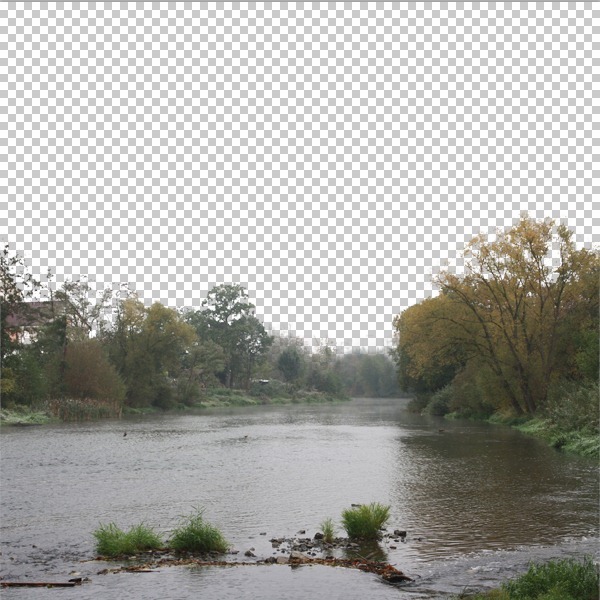
Thanks to it the sky disappears and you’re able to add another, more dramatic. Below you can see how the picture looks without the sky.
01_7

Step 2 – Removing the Cottage

There are fragments of the cottage in the left part of the picture and it doesn’t look nice.
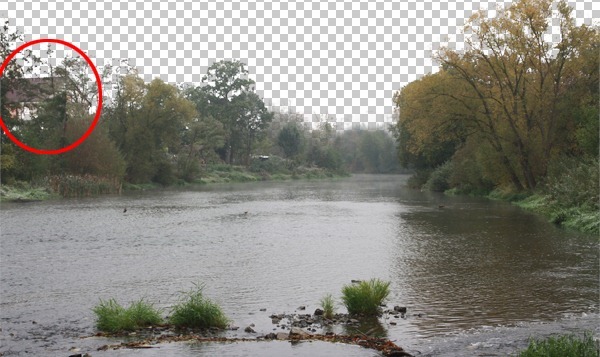
02_1
To remove it grab the Brush Tool (B), select one of the round brushes and set the Hardness on 100%. Set the Master Diameter on 5 pixels. Higher the opacity of the brush on 100% too and pick black color.
02_2
Click on the layer mask, zoom in and paint over the cottage to make it invisible.
02_3

Comments

Popular posts from this blog

Use x-ray techniques in Photoshop to show naked skin through clothing

    Do those new naked body scanners have you freaked out at the airports? As far as the TSA is concerned, those x-ray machines are here to stay, but you might as well take comfort in knowing that airport security guards aren't the only ones looking at your private parts. Practically anyone with a computer can manage to see through your clothes, and it's all thanks to a little program called Photoshop. Thanks, Adobe. With a few tweaks using the tools in Photoshop, you can see those boobs in no time, male or female. The video is in German, but it's not hard to figure our what's going on, especially if you're familiar with Photoshop. First, create a few duplicate layers, then get a handle on some of these tools to make the naked body through the clothes: * Auswahl erstellen (Create Selection) * Tonwertspreizung (Input Levels) * Belichtung (Exposure) You can also do this see-through clothing effect in free design programs, such as  GIMP .

40 latest creative photoshop text effects

Create a Glowing Liquid Text with Water Splash Effect in Photoshop In this tutorial, we will show you the steps we took to create a Glowing Liquid Text Effect in Photoshop. We will be practising the use of liquify filter, layer blending options, as well as some image adjustments. Create a Realistic Wooden 3D Text Image In this tutorial we are going to take a few 2D textures as well as a few Photoshop techniques to create a realistic 3D text image. Easy X-Ray Typography In Photoshop In this tutorial we will show you how to create a simple x-ray effect of a letter, in this case the Abduzeedo logo A. The whole process is quite simple but it will require a couple of hours to pull it off. Easy Furry Text In Photoshop In this tutorial we will show you how to create a really cool and super simple furry text in Photoshop CS6. We will use basic filters and tools but it’s nice to say that we took advantage of the a new feature in Photoshop CS6 that is to apply layer...

Royal 3D Text Effect in Photoshop CS6

  Just make sure to check the 3D settings under Edit -> Preferences -> Performance, and Edit -> Preferences -> 3D. Default values should work fine, but if anything seems to be not working properly you can always check those settings. Step 1 - Create a new 1600 x 1200 px document and Fill the Background with black. Create the text in white using the font Dunkin Sans. The font size is 400 pt and the text is better written in All Caps (if you’re not using only numbers). Step 2 - With the text layer selected, go to 3D -> New Extrusion from Selected Layer. This will instantly convert the text layer into a 3D layer. All the 3D scene elements can be found in the 3D panel (Window -> 3D). Click the main mesh name to edit its settings. - The 3D Mesh settings and attributes can be accessed and modified through the Properties panel (Window -> Properties). If you scroll down the Properties panel you’ll find the Character Panel button, which ...