Step 1
Start by creating a new document, width: 1440px, height: 900px, resolution: 72. Name it 3D Neon.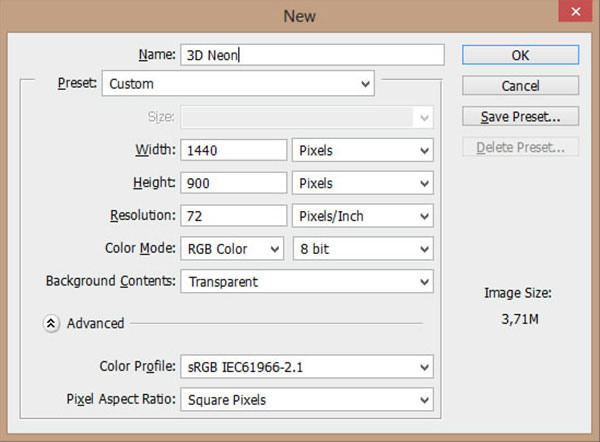
Step 2
Fill the background layer with a solid color, #15243b. Name it Background. Now, download the font “You’re Gone”, and type PARTY! with a white color. Size 250 pt. With the text selected open Character window and set the tracking value to 60.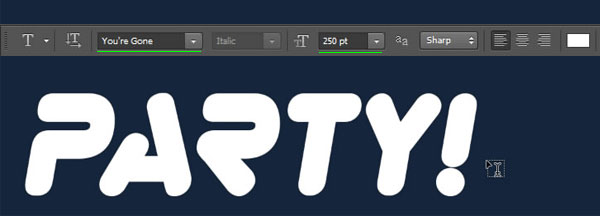


Step 3
With the text layer selected go to menu Type and click on Convert to Shape. Now, select the Pen tool and with the layer still selected we are going to make some change because we’re only interested on the stroke shape. Set Fill to No Color and for stroke use #488dc6 color. Size 10 pt. Press the shape stroke type button, then click on More Options… button and the Stroke dialog box is open.Set the following values like I show you on the image below:
- Align: Center
- Caps: Round
- Corners: Round
- Dashed Line: Checked
- Dash: 38
- Gap: 3

Yours should looks like this:

Step 4
Duplicate the layer and name it Party! Black. This time we will just modify the shape of the stroke to a continuous line, set align to center and Caps and Corners to Round. See the image below.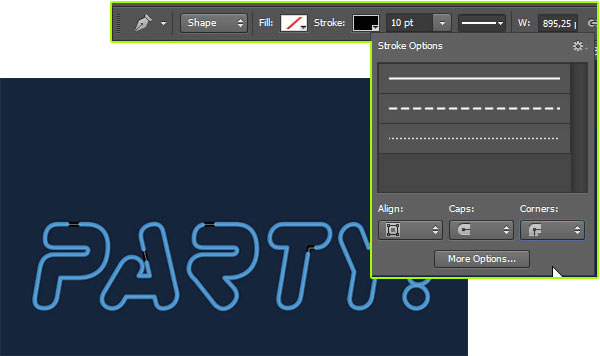
Step 5
Duplicate the black layer and name it support. This time we will just modify the shape of the stroke to a dotted one. Following the path indicated on step 3 open the Stroke dialogue box. Change this values:- Preset: select the dotted line
- Align: Inside
- Caps: Round
- Corners: Round
- Dashed Line: Checked
- Dash: 0
- Gap: 18

Step 6
This sign needs electricity so let’s create the cable. Using the Pen tool with no color fill and an almost black color for the stroke (#081a2b) and size 5 pt draw the cable through letters. Remember you can add anchor point to modify the flow of your path.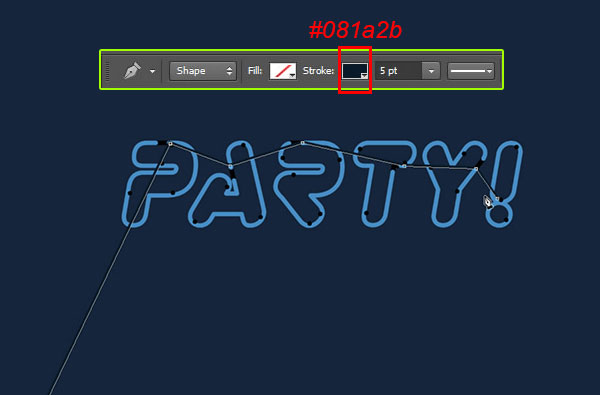
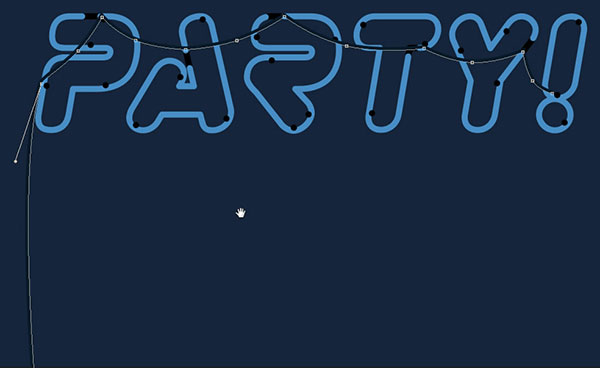
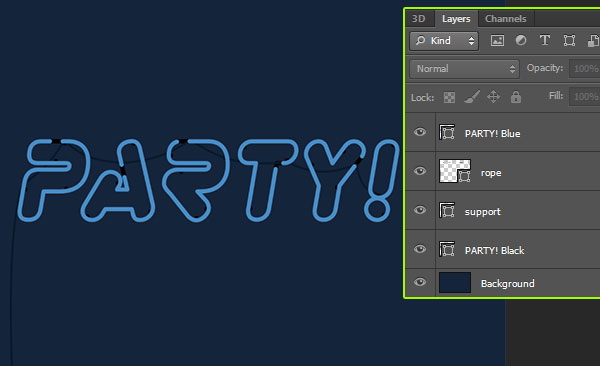
This is how your layers should looks like:
Step 7
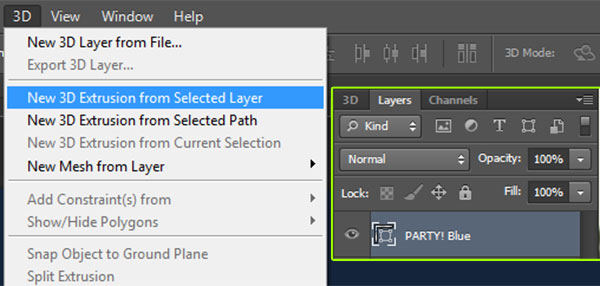
Start working with the 3D!Now we are going to convert all this layers into a 3D extrusion. We can’t do it all at the same time, must be one by one; so repeat this step for all layers except for the Background layer. Select the layer and go to Menu 3D>New 3D Extrusion from Selected Layer. Tip: you can do the same thing just right click on the layer you wish to convert and select the New 3D Extrusion from Selected Layer option from the contextual menu.
Step 8
For the background go to menu 3D>New Mesh from Layer>Postcard or right click on the layer and select Postcard. Your text should looks like this, nothing fancy… for now.

Step 9
Select all layers and go to menu 3D>Merge 3D Layers.

Step 10
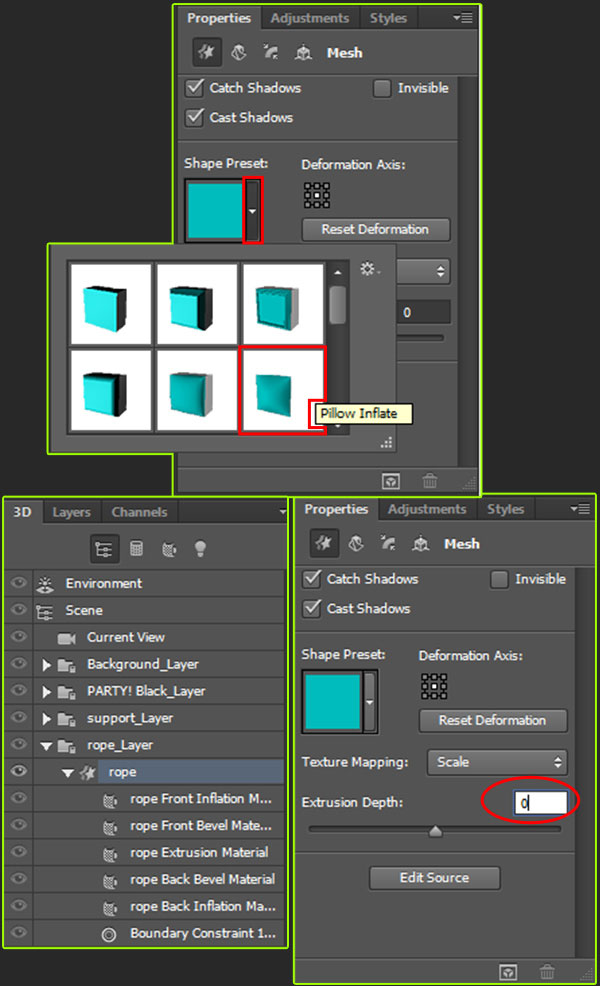
From now on we’ll change the depth of all ours 3d extrusions. First select the rope layer on the 3D panel and the Properties panel automatically change. Go there and set the Extrusion Depth to 0. Then click on the Shape Preset and select Pillow Inflate.Doesn’t matter the order the result will be the same.

Step 11
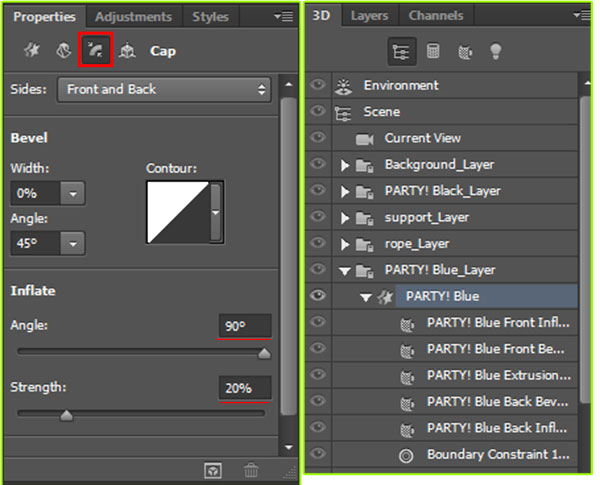
On the Properties panel with the Party! Blue layer selected, set the Extrusion Depth to 0; click on the Shape Preset and select Pillow Inflate. Now click on Cap icon in at the top of this panel. Set the Angle to 90º and the Strength to 20%, below you can see the panels.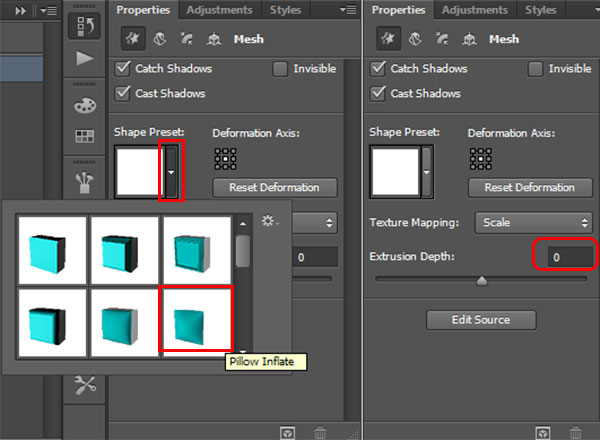

Repeat this step for the Party! Black layer.

Step 12
Change the Extrusion Depth of support layer to 35.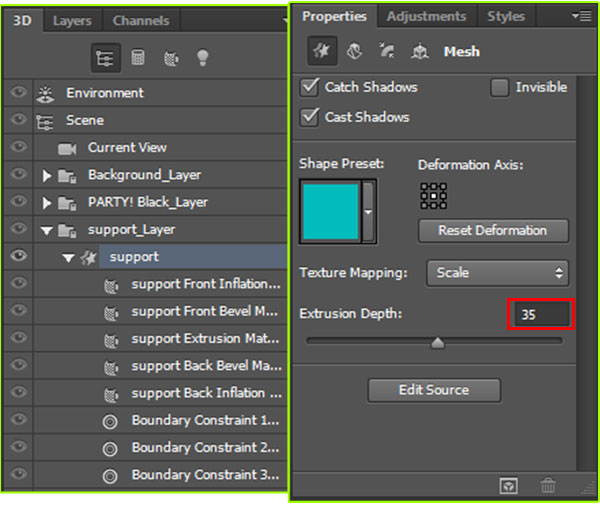

Step 13
Now we’re going to align the layers to make it look good. On your 3D panel select Scene and on the Properties panel, change Presets values to Hidden Wireframe. Right click on the axes at the bottom left corner of the stage and select left. Then using the controls move each element along the z exe until you get the desire position.

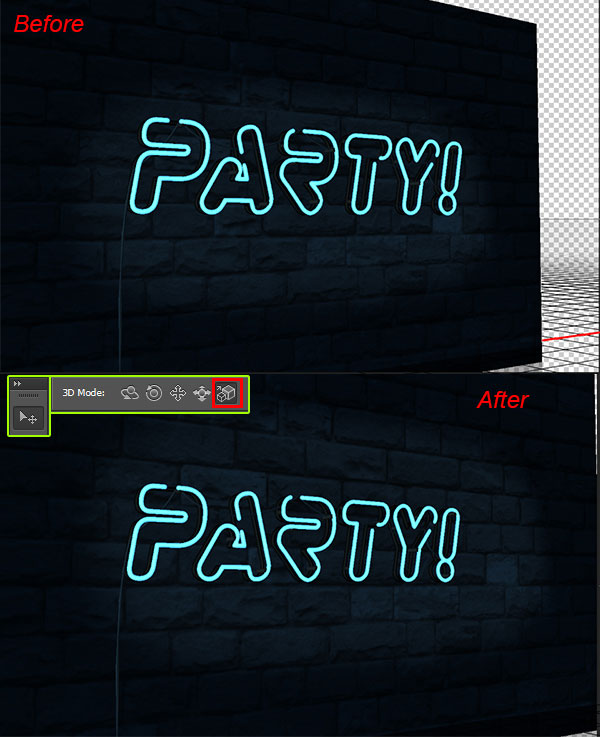
Step 14
Change the angle. Using the move tool with the rotate the 3d Object option activated grab into the stage until you get the desired position of the object. These are my View coordinates:
Save your Current view for further usage. Tip: With the Current View selected on the 3D panel click on View>Save; name it final, you can move you 3D object every time you need and get back to this menu and select it to came back to the exact position.

Step 15
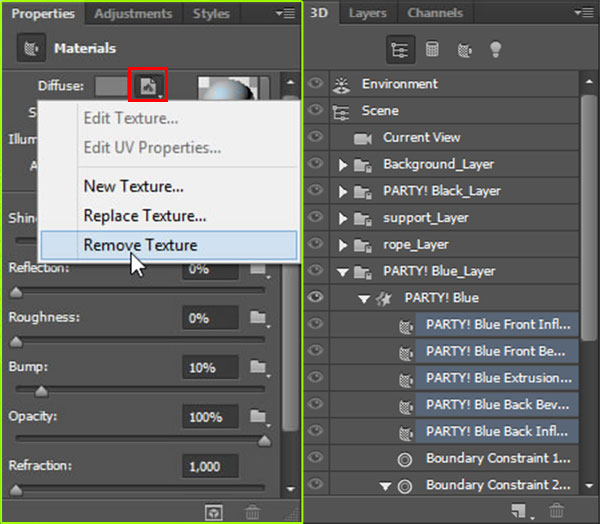
Adding materials.Select all the material layers from the Party! Blue layer. On the Properties panel remove the texture by click on the icon right next to the Diffuse color.
Set the following values:
- Diffuse: #a0d6ff
- Specular: #348bcd
- Illumination: #3ba6f8
- Ambient: #454545
- Shine: 80%
- Reflection: 17%
- Roughness: 0%
- Bump: 0%

Step 16
Select all the material layers from the Party! Black layer. Set the following values:- Diffuse: # 7f7f7f
- Specular: # 333333
- Illumination: #000000
- Ambient: #000000
- Shine: 20%
- Reflection: 20%
- Roughness: 7%
- Bump: 10%

Step 17
Select all the material layers from the support layer. Set the following values:- Diffuse: # 7f7f7f
- Specular: # 333333
- Illumination: #000000
- Ambient: #0167a1
- Shine: 20%
- Reflection: 10%
- Roughness: 5%
- Bump: 10%

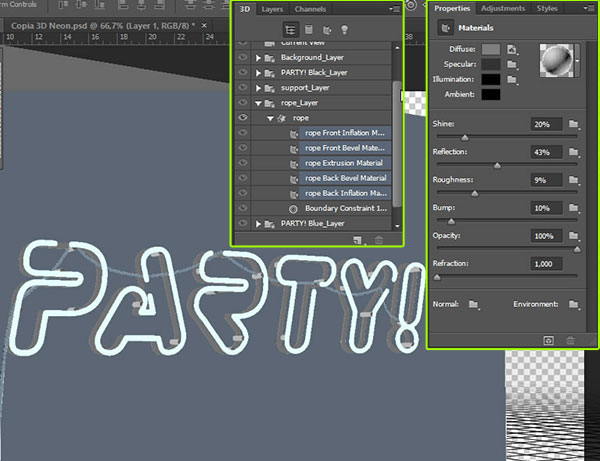
Step 18
Select all the material layers from the rope layer. We are going to use the same colors used on the Party! Black layer just change the following values:- Shine: 20%
- Reflection: 43%
- Roughness: 9%
- Bump: 10%
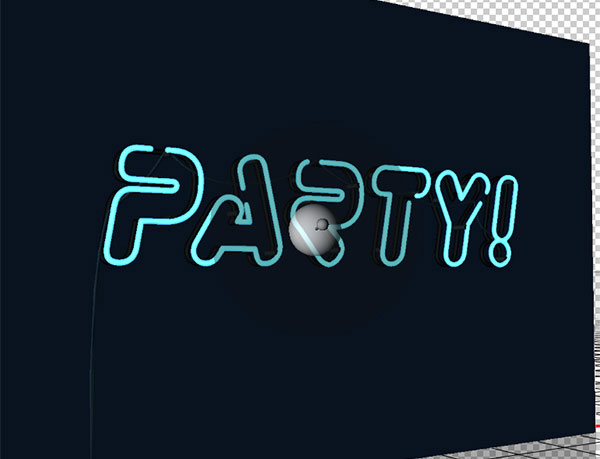
Step 19
Let’s make some change to the environment. Click on the Environment layer. On the Properties panel uncheck IBL option. Unchecking this option will help when we work on the background layer in the further step. Under Reflections set Opacity to 60% and Roughness to 20%.
At this point yours should look like this:

Step 20
Let’s add a cold light. In your 3D panel go to the Bottom and click on the file icon to Add a new Light to Scene. Select New Infinite Light. Change the color to #b4f2ff, set Intensity to 60% and Shadow Softness to 11%.
Step 21
Now we are going to make more credible the background layer. Go and select it. On the Properties panel set the following values:- Diffuse: # 023963
- Specular: # 333333
- Illumination: #000000
- Ambient: #0167a1
- Shine: 23%
- Reflection: 89%
- Roughness: 47%
- Bump: 10%

Step 22
Let’s add a wall texture. With the Background layer selected, go to the Properties panel and click on the file icon right next to Diffuse color. Select Edit Texture. A message will be open warning you that every change you made to this texture will appear in all places. Press ok and a new document will be open just with the Background original layer.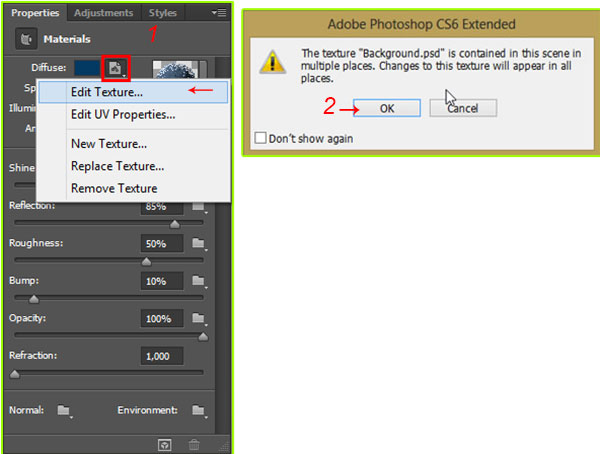

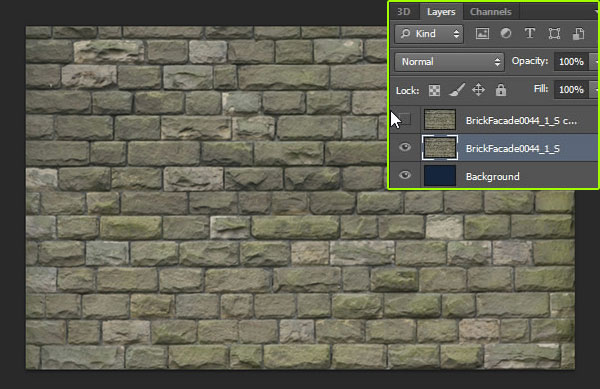
Step 23
Insert into this new document the downloaded texture. Resize it to fill all the area, leave the two column out of the picture. Rasterize it and them duplicate it and hide the new one.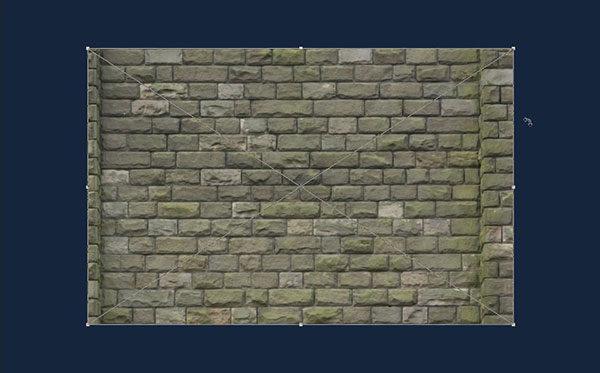

Step 24
Delete the Background layer we don´t need it anymore. Open the Hue/Saturation dialog box by pressing Ctrl+U or selected from menu Image>Adjustment>Hue/Saturation. Check Colorize checkbox, set Hue to 213; Saturation to 54 and Lightness to -67.
Also open Levels dialog box by pressing Ctrl+L or selected from menu Image>Adjustment>Levels…. Just adjust the midtones to 0,93 and the highlight in Output Levels box to 197 as I show you below.

You can switch between document to see what you are doing on this document how is affecting your 3D composition. At the instant you switch to the original document Photoshop will automatically update the object. Look:

Step 25
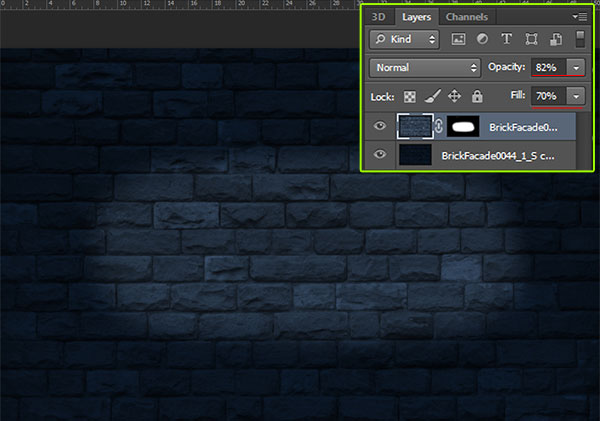
Let’s add a touch of light. Back to the background document with the wall texture, unhide the duplicated layer. Again open the Hue/Saturation dialog box. Check Colorize checkbox, set Hue to 213; Saturation to 25 and Lightness to -40
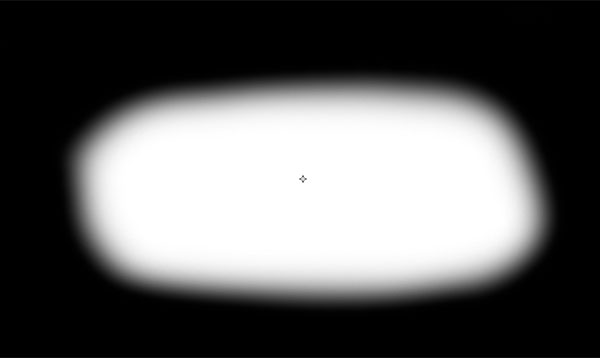
Add a mask revealing just the middle of it. Set Opacity to 82% and Fill to 70%. This is how your mask should look like:
Step 26
Select again the darker layer and let’s darker a little bit more. Open the Levels dialog box and just change, in Output Levels section, the highlight option to 191. Save changes and close it.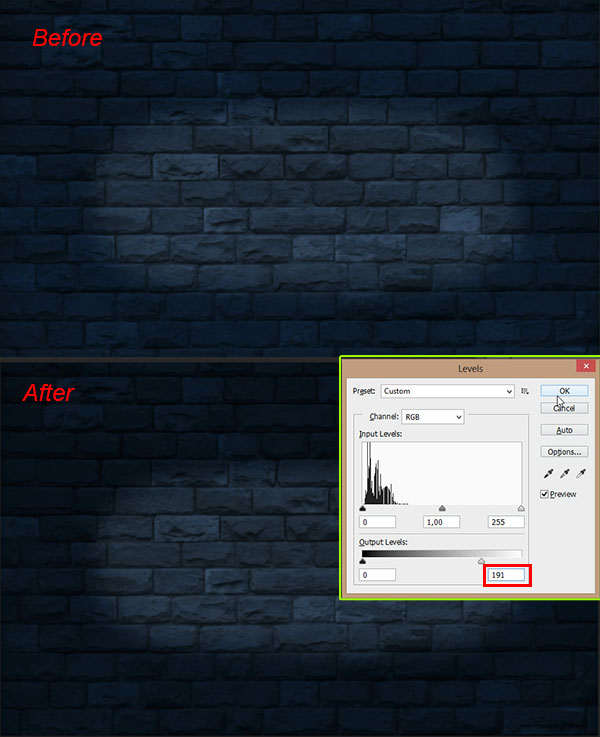
At this point you must have this:

Step 27
Final Adjustments.You can scale the background layer to fill the blank space on the right or simply crop the image, I scale the background layer using the scale option inside the move tool.
When you fill happy with it RENDER the file by clicking the render icon at the bottom of the Properties panel, by pressing Alt+Shift+Ctrl+R or go to Menu 3D>Render.

Step 28
As you can see the glow of the letters by itself is poor. So let’s add a glow to the letters. Go back to the Layer panel and create a new layer, name it Glow. Using a soft brush size 28 and using #00ccff as color draw along the letters. Change the blending mode to Screen and opacity to 85%.
And We’re Done!
You can view the final outcome below. I hope that you enjoyed this tutorial and would love to hear your feedback on the techniques and outcome.
Congratulations, You’re All Done!
Awesome job making it this far! You should be proud of what you’ve created. Show it off to your friends and colleagues and get some feedback.You can also comment here with your version, or any questions you had about the techniques used. We love to see what you guys create and we’re always here to give helpful feedback and tips to help you to improve.
Comments
Post a Comment