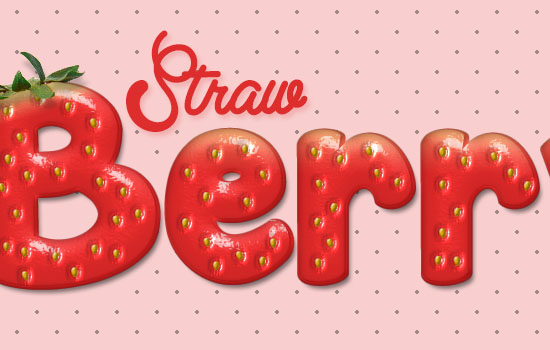
his tutorial will show you how to create a delicious
strawberry-inspired text effect. Many layer style will be used to
achieve the main shape and texture, a simple brush will be created for
the seeds, and a stock image will be used to add the leaves.
This was suggested by Ivana (IvaxXx on DeviantArt). Thank you for the awesome suggestion, Ivana : )
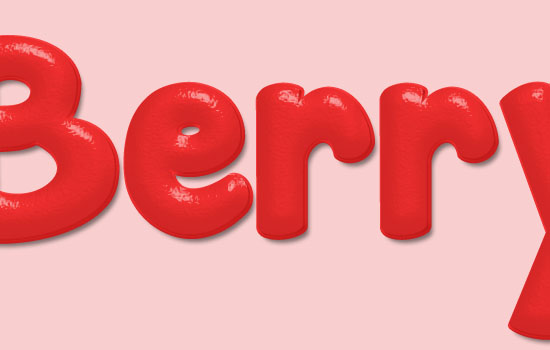
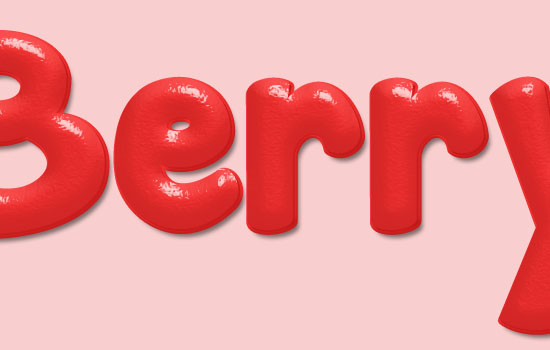
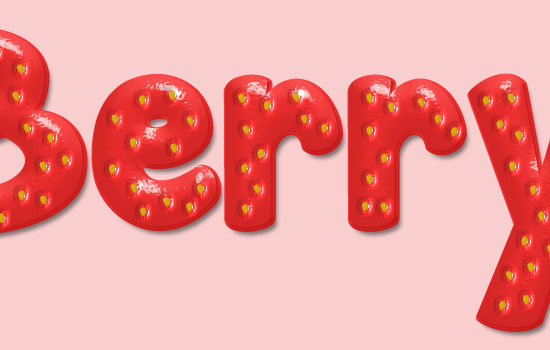
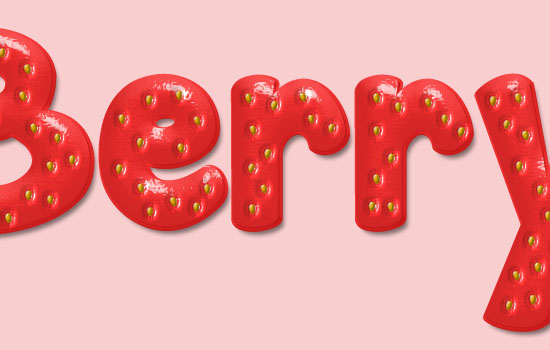
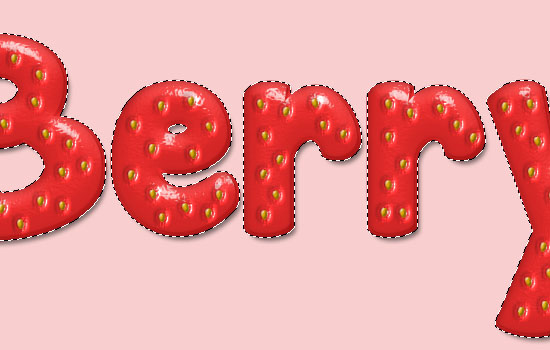
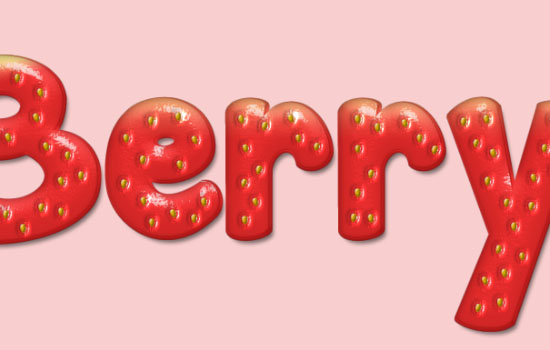
The Final Result:
 Notes:
* the software used in this tutorial is Adobe Photoshop CS6, but you can use CS3+ versions as well.
* you might want to check the Basix Page to see some useful topics on dealing with Photoshop basics, such as loading palettes and some shortcuts.
Note: You might need to load the Contours used in the tutorial, so check this image to see how to do so.
Step 1
- Create a new 1024 x 768 px document. Set the Foreground color to #f8cece, then use the Paint Bucket Tool to fill the canvas with that color.
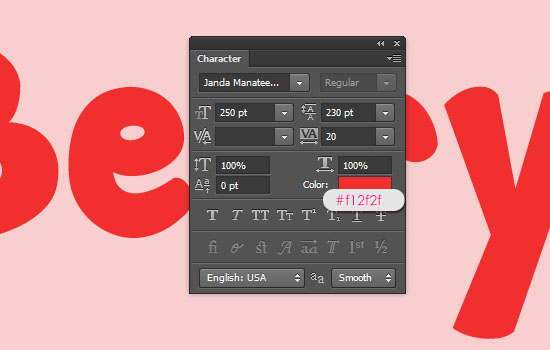
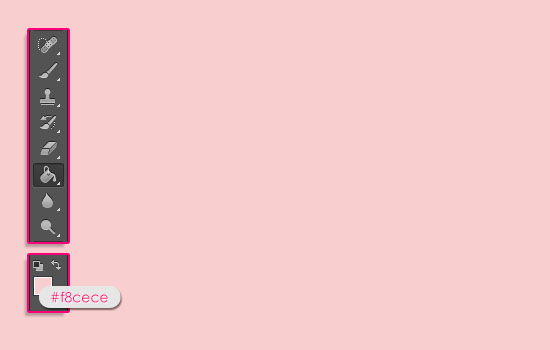 - Create the text using the font Janda Manatee.
Set the font color to #f12f2f, the font size to 250 pt, and the
Tracking value to 20 to increase the spacing between the letters.
- Create the text using the font Janda Manatee.
Set the font color to #f12f2f, the font size to 250 pt, and the
Tracking value to 20 to increase the spacing between the letters.
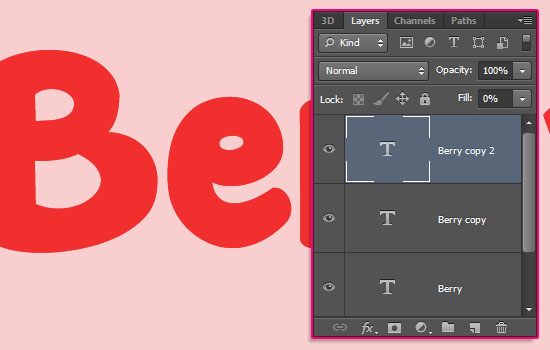
 - Duplicate the text layer twice so that you have 2 more copies. Change the second copy layer’s Fill value to 0%.
 Step 2
Double click the original text layer to apply the following Layer Style:
- Bevel and Emboss: Change the Style to Stroke Bevel, the Size to 10, check the Anti-aliased box, change the Highlight Mode to Overlay, the Shadow Mode color to #b64a4a, and its Opacity to 56%.
You’ll see the difference when you apply the Stroke effect in a minute.
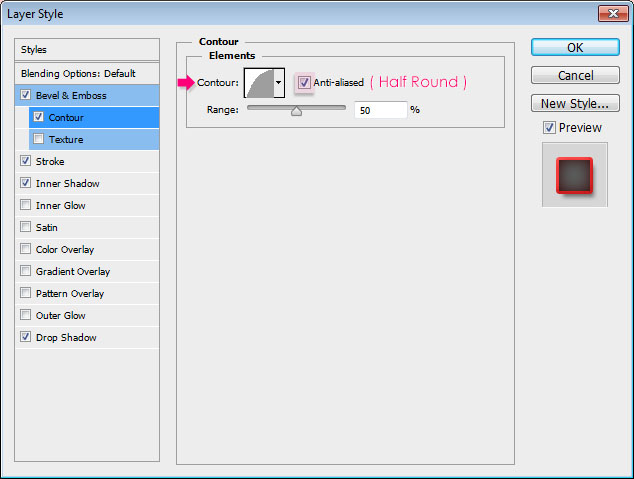
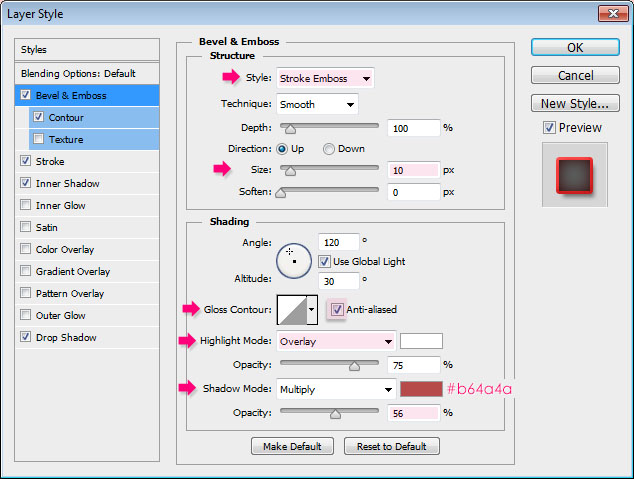 - Contour: Choose the Half Round contour, and check the Anti-aliased box.
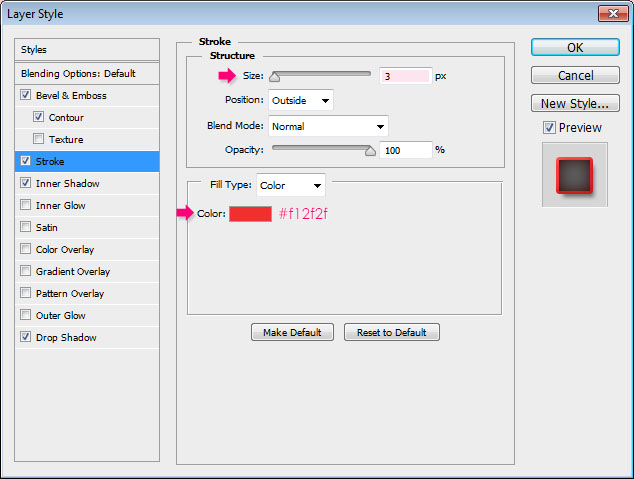
 Stroke: Change the Size to 3, and the color to #f12f2f.
 - Inner Shadow: Change the color to #9b1a1a, the Opacity to 100%, the Distance to 0, and the Size to 15.
 - Drop Shadow: Change the color to #5b5b5b, and the Distance to 7.
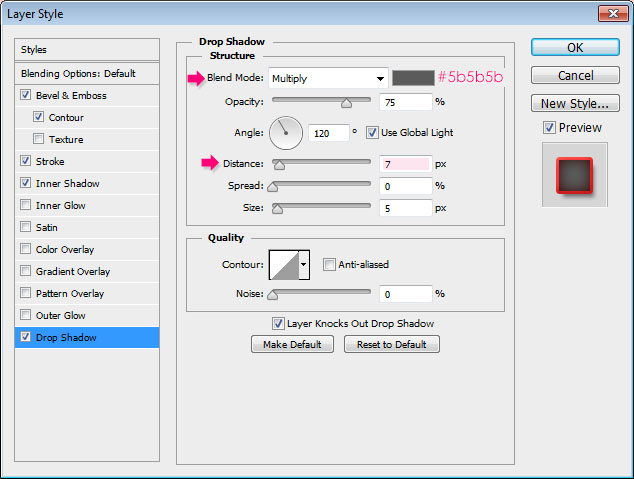 - This will add an outer stroke that we’re going to use to add dimension, and some subtle shadow.
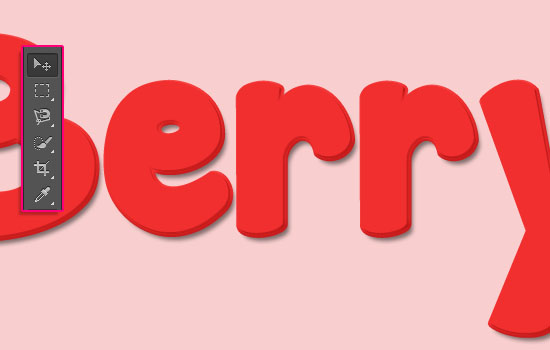
 - Pick the Move Tool, then press the Right Arrow key twice, and the
Down Arrow key twice, to move the stroke 2 pixels to the right and two
pixels down.
- Pick the Move Tool, then press the Right Arrow key twice, and the
Down Arrow key twice, to move the stroke 2 pixels to the right and two
pixels down.
 Step 3
Double click the first copy text layer to apply the following Layer Style:
- Bevel and Emboss: Change the Size to 21, uncheck the Use Global Light box, change the Angle to 68, the Altitude to 64, the Gloss Contour to Log, check the Anti-aliased box, the Highlight Mode Opacity to 50%, the Shadow Mode color to #742b2b, and its Opacity to 25%.
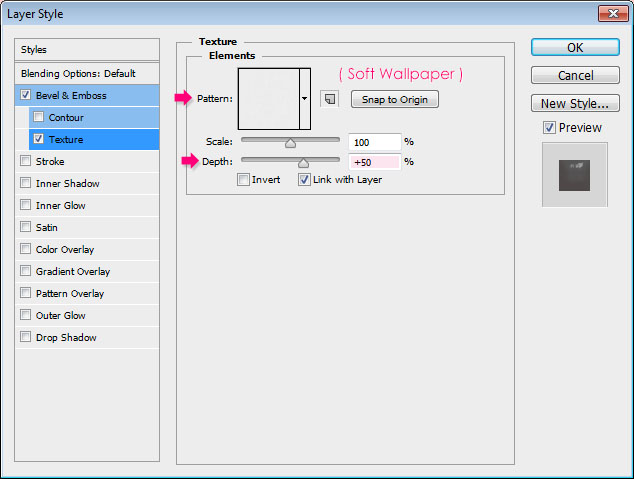
 - Texture: Choose the “Soft Wallpaper” Pattern, and change the Depth to 50%.
 - This will create the first layer of the strawberry texturing.
 Step 4
Double click the second copy text layer to apply the following Layer Style:
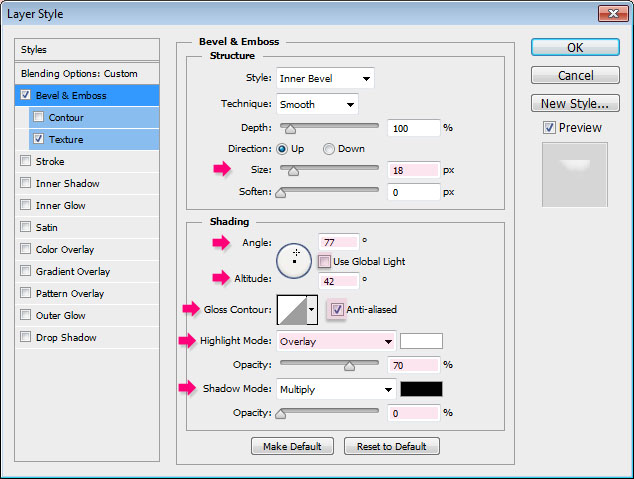
- Bevel and Emboss: Change the Size to 18, uncheck the Use Global Light box, change the Angle to 77, the Altitude to 42, check the Anti-aliased box, change the Highlight Mode to Overlay, its Opacity to 70%, and the Shadow Mode Opacity to 0%.
 - Texture: Choose the “Soft Wallpaper” Pattern, and change the Depth to 20%.
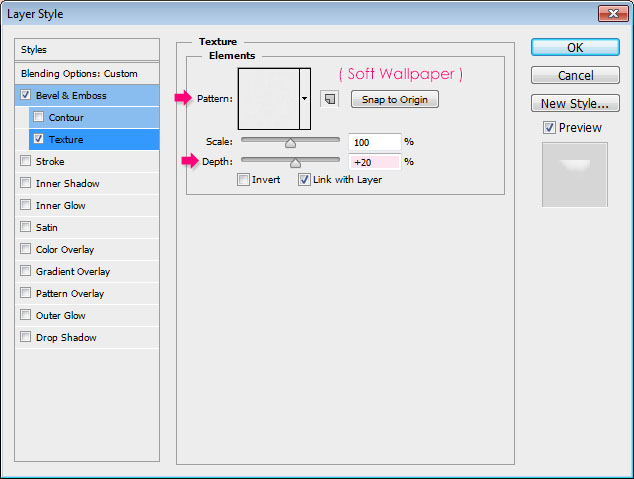 - This will create the second layer of the strawberry texturing.
 Step 5
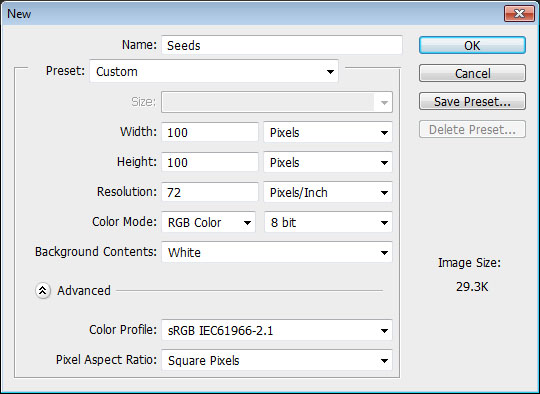
- Create a new 100 x 100 px document.
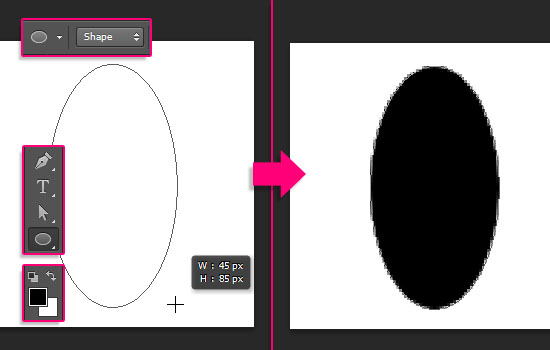
 - Pick the Ellipse Tool, and choose Shape in the Options bar. Set the
Foreground color to black, then click and drag to create a 45 x 85 px
ellipse.
- Pick the Ellipse Tool, and choose Shape in the Options bar. Set the
Foreground color to black, then click and drag to create a 45 x 85 px
ellipse.
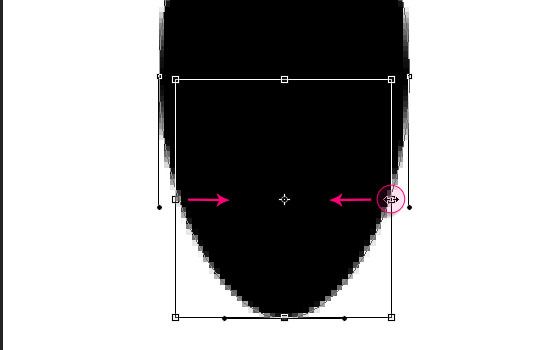
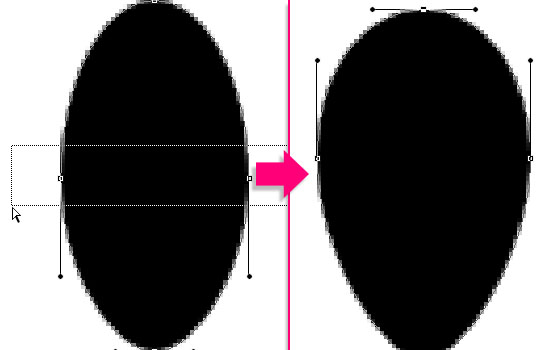
 - Pick the Direct Selection Tool, then click the ellipse path to view the anchor points. Then, click the point at the bottom.
 - Go to Edit -> Free Transform Points. Then, press and hold the
Alt and Shift keys, and click and drag the right side of the transform
box towards the center.
- Go to Edit -> Free Transform Points. Then, press and hold the
Alt and Shift keys, and click and drag the right side of the transform
box towards the center.
Because of the Alt key, both sides will be transformed together.
Once you like how that part looks, hit the Enter/Return key to accept the changes and get out of the Free Transform Mode.
 - With the Direct Selection Tool still active, click and drag to
select the two points on the ellipse’s sides. Go to Edit -> Free
Transform Points, press and hold the Alt + Shift keys, then click and
drag outwards to widen that part. Hit Enter, then press the Up Arrow key
to move those points a little bit upwards.
- With the Direct Selection Tool still active, click and drag to
select the two points on the ellipse’s sides. Go to Edit -> Free
Transform Points, press and hold the Alt + Shift keys, then click and
drag outwards to widen that part. Hit Enter, then press the Up Arrow key
to move those points a little bit upwards.
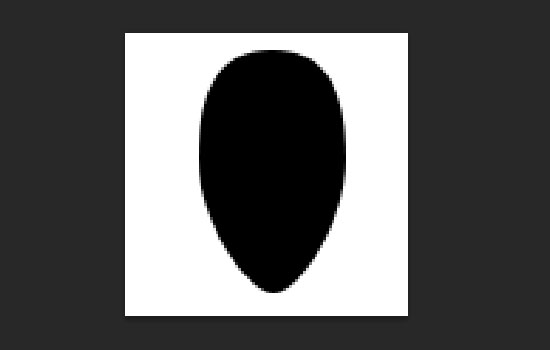
 - Continue modifying the seed shape until you like it.
 - When done, go to Edit -> Define Brush Preset, and type in a name for the brush.
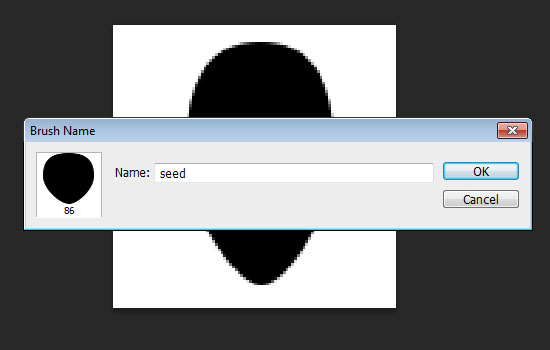 You can save the file if you like, then close it and go back to the original document.
Step 6
Open the Brush panel (Window -> Brush), then choose the seed brush and modify its settings as shown below:
- Brush Tip Shape:
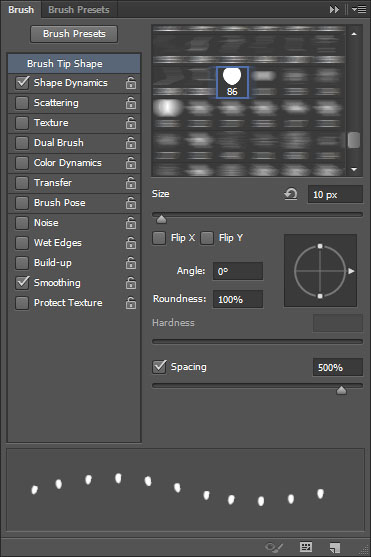 - Shape Dynamics:
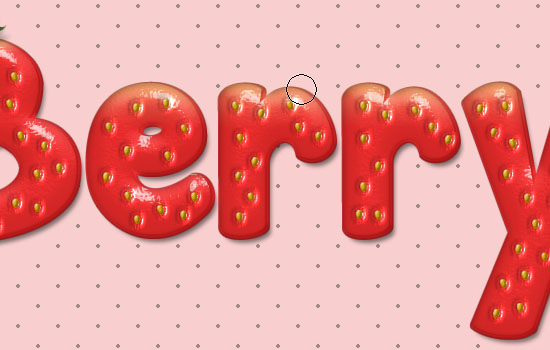
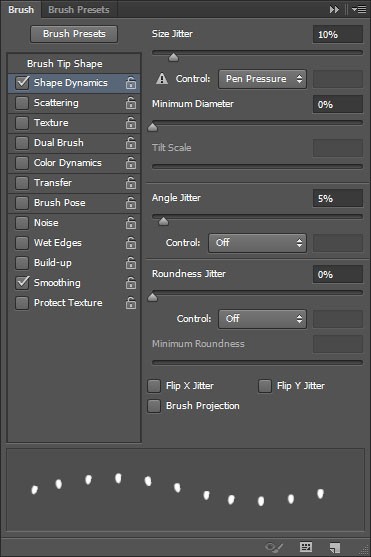 - Create a new layer on top of all layers, call it “Seeds”, set the
Foreground color to #d9a907, then start adding the seeds inside the
text.
- Create a new layer on top of all layers, call it “Seeds”, set the
Foreground color to #d9a907, then start adding the seeds inside the
text.
Here’s an interesting fact: The seeds are the actual fruit, not the red part, and they are called “called “achenes”!
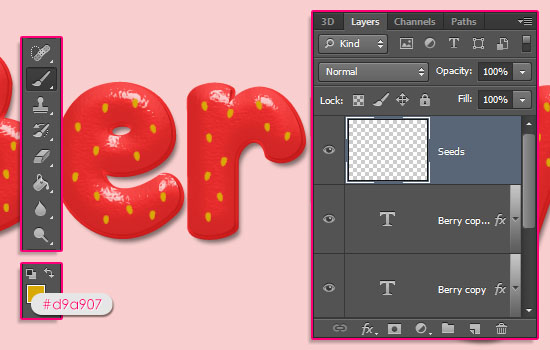 - Make sure the seeds are spread evenly, and that they are not very
close to each other. Once you’re done, duplicate the “Seeds” layer, and
change its Fill value to 0%.
- Make sure the seeds are spread evenly, and that they are not very
close to each other. Once you’re done, duplicate the “Seeds” layer, and
change its Fill value to 0%.
 Step 7
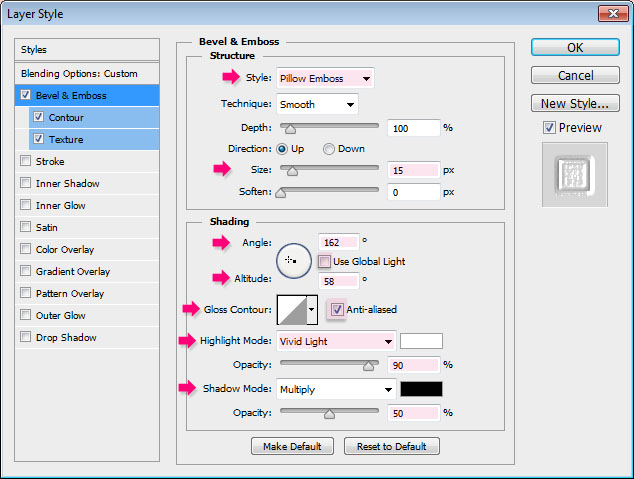
Double click the “Seeds” layer to apply the following Layer Style:
- Bevel and Emboss: Change the Style to Pillow Emboss, the Size to 15, uncheck the Use Global Light box, change the Angle to 162, the Altitude to 58, check the Anti-aliased box, change the Highlight Mode to Vivid Light, its Opacity to 90%, and the Shadow Mode Opacity to 50%.
 - Contour: Choose the Rounded Steps contour, and check the Anti-aliased box.
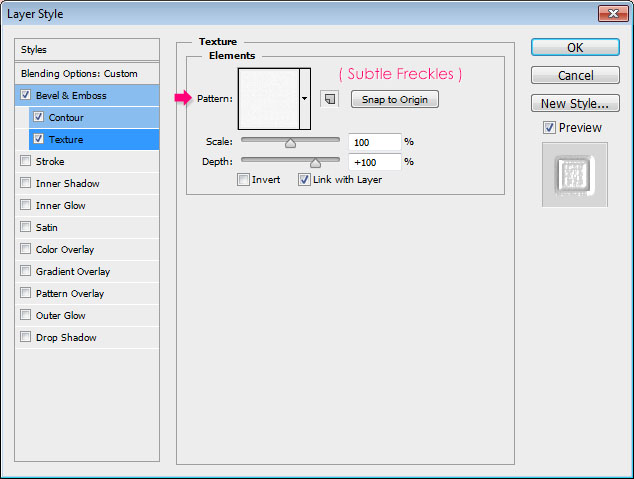
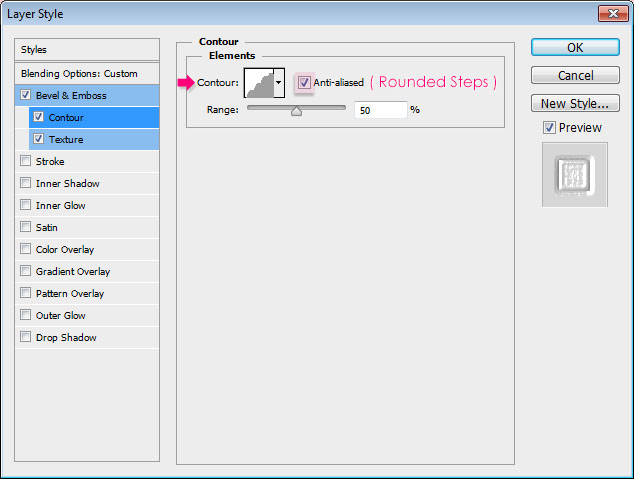 - Texture: Just choose the “Subtle Freckles” Pattern.
 This will create the area that surrounds the seeds (the cortex).
 Step 8
Double click the copy “Seeds” layer to apply the following Layer Style:
- Bevel and Emboss: Change the Size to 2, uncheck the Use Global Light box, change the Angle to 130, the Altitude to 48, check the Anti-aliased box, and change the Shadow Mode color to #68671c.
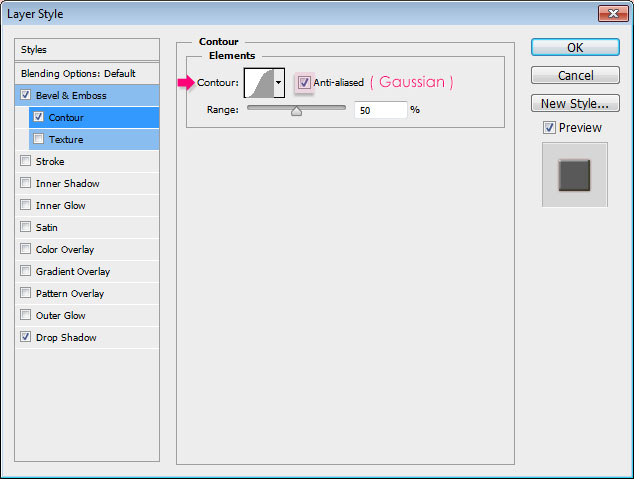
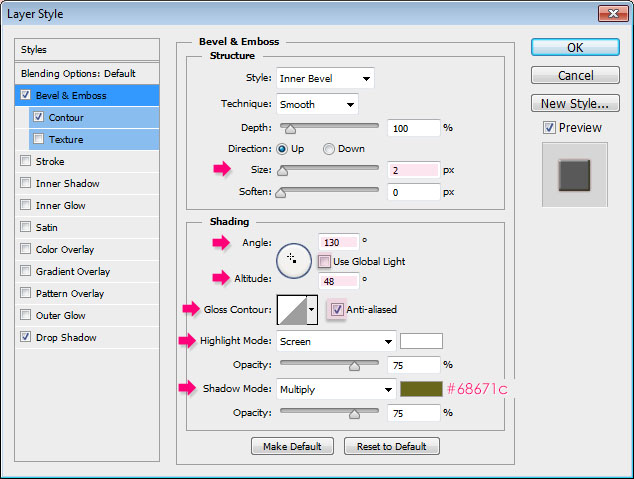 - Contour: Choose the Gaussian contour, and check the Anti-aliased box.
 - Drop Shadow: Change the color to #771e1e, the Distance to 0, the Spread to 3, and the Size to 3.
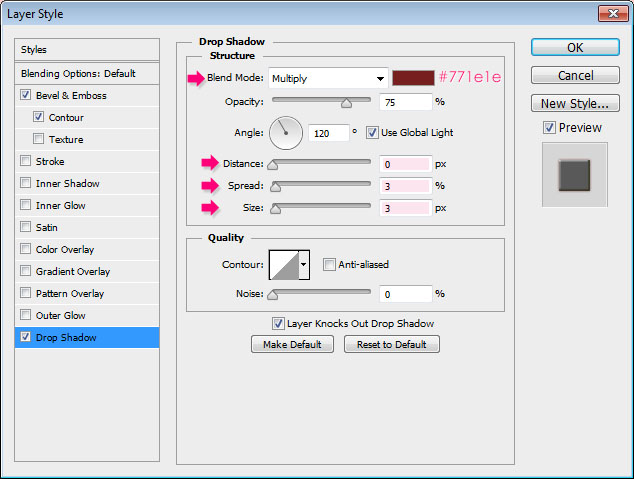 This will style the seeds.
 Step 9
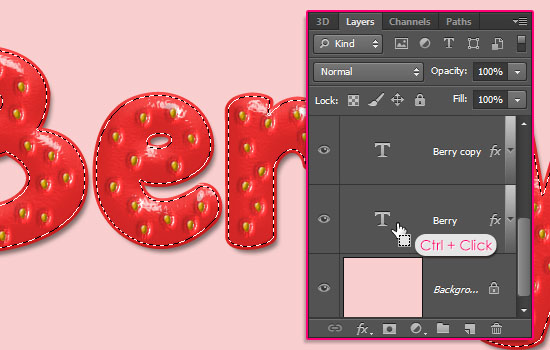
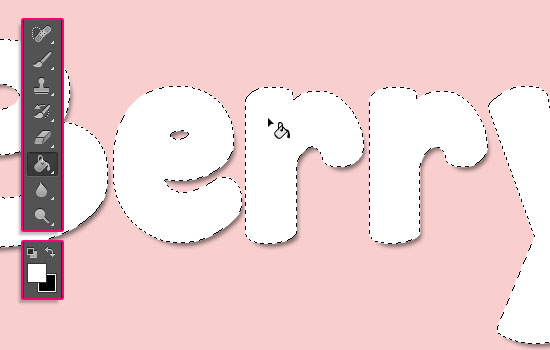
- Ctrl + Click the original text layer thumbnail to create a selection.
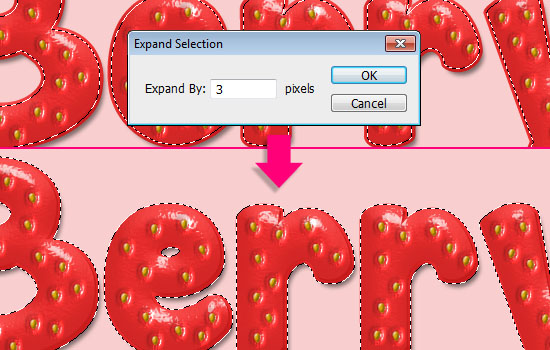
 - Go to Select -> Modify -> Expand, and type in the value 3. It
is the same “Stroke” value applied to the original text layer. So we’re
basically creating a selection based on that stroke.
- Go to Select -> Modify -> Expand, and type in the value 3. It
is the same “Stroke” value applied to the original text layer. So we’re
basically creating a selection based on that stroke.
 - Create a new layer on top of all layers and call it “Inner Shadow”.
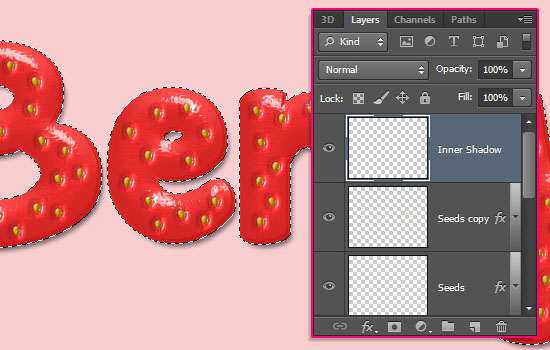 - Fill the selection with white.
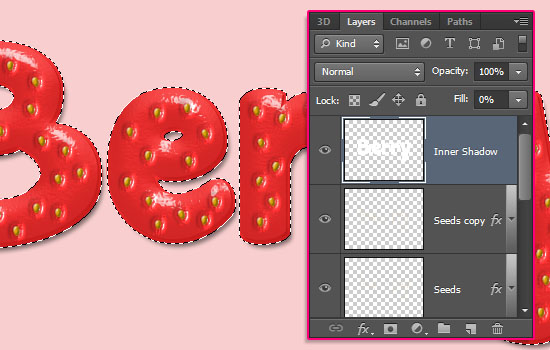
 - Change the “Inner Shadow” layer’s Fill value to 0, then double click it to add an Inner Shadow effect.
 - Change the Opacity to 50%, the Distance to 0, and the Size to 10.
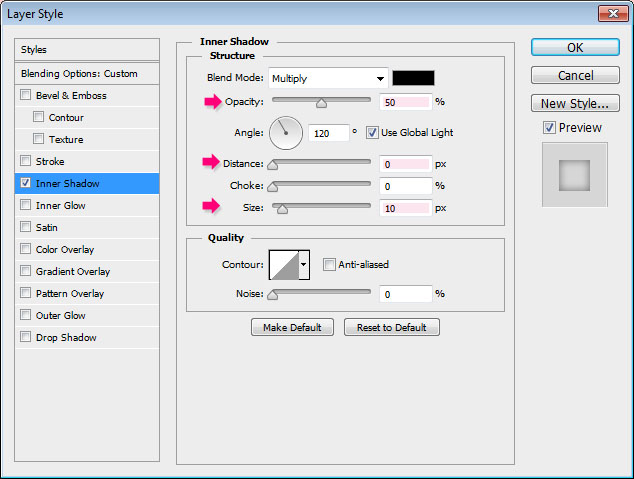 - This will add an inner shadow to the text, which helps add depth and define the edges a bit more.
 Step 10
This step is optional, as we’re going to create some unripe parts at the top.
- Create a new layer between the two text layer copies and call it “Top Gradient”, then fill it with white.
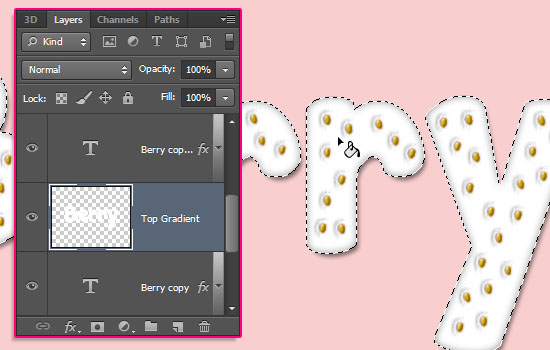 Since a Gradient Overlay effect will be used to create the unripe
parts, different settings will be used for the upper case and lower case
letters. So it’s better to separate the letters first.
Since a Gradient Overlay effect will be used to create the unripe
parts, different settings will be used for the upper case and lower case
letters. So it’s better to separate the letters first.
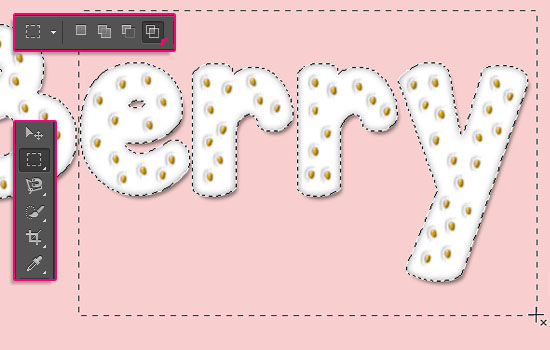
- Pick the Rectangular Marquee Tool, and click the “Intersect with selection” icon in the Options bar. Click and drag to create a rectangle around the lower case letters.
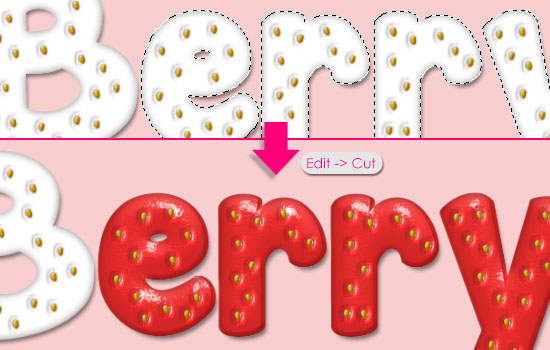
 - The upper case letter will be deselected. Go to Edit -> Cut to remove the lower case letters.
 - Go to Edit -> Paste Special -> Paste in Place, to paste the
lower case letters in their original position, but in a different layer,
called “Layer 1″.
- Go to Edit -> Paste Special -> Paste in Place, to paste the
lower case letters in their original position, but in a different layer,
called “Layer 1″.
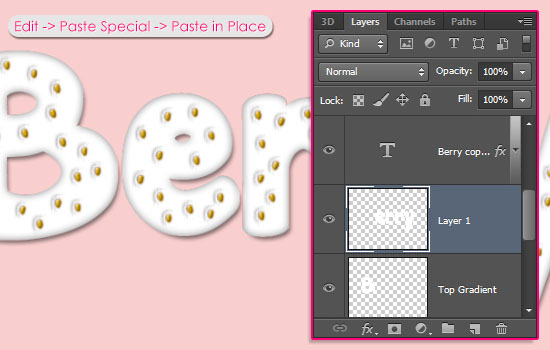 - Change both layers’ Fill values to 0.
 Step 11
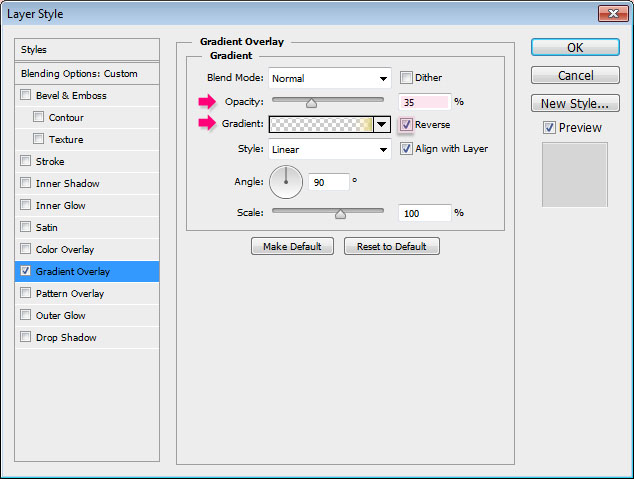
- Double click the “Top Gradient” layer to apply a Gradient Overlay effect. Change the Opacity to 75%, the Angle to 103, and check the Reverse box. Then click the Gradient box to create the gradient used.
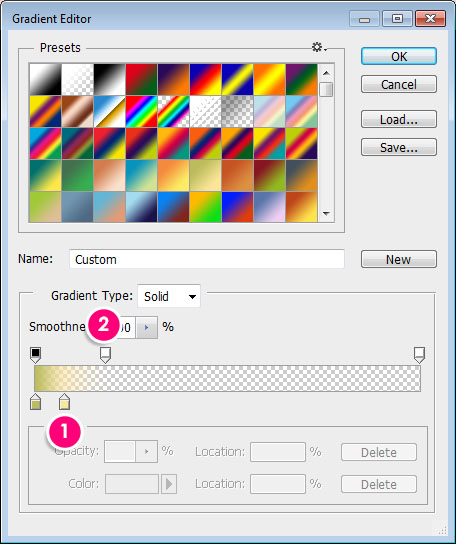
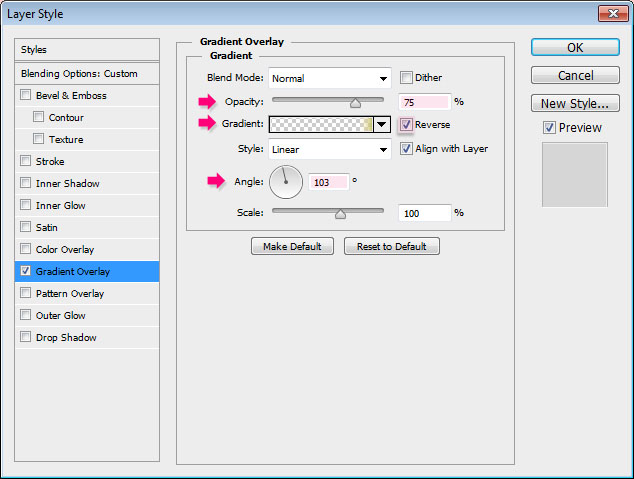 - You can add and Opacity Stop by clicking over the gradient bar, and a Color Stop by clicking below it.
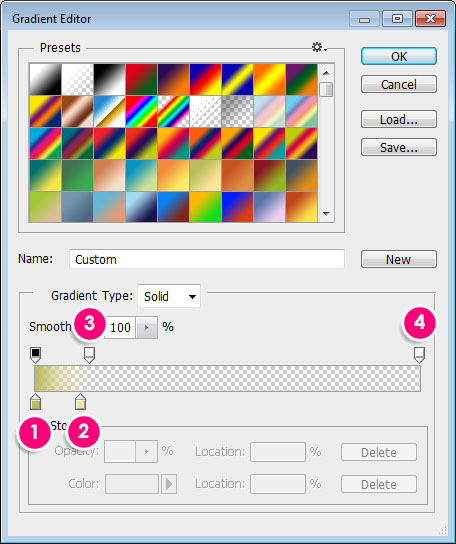
Start by choosing the Foreground to Transparent gradient preset, then modify it and add more stops as below:
- Color Stops:
# – Color – Location
1 – #bcbc5c – 0
2 – #fbe599 – 12
- Opacity Stops:
# – Opacity – Location
3 – 0 – 14
4 – 0 – 100
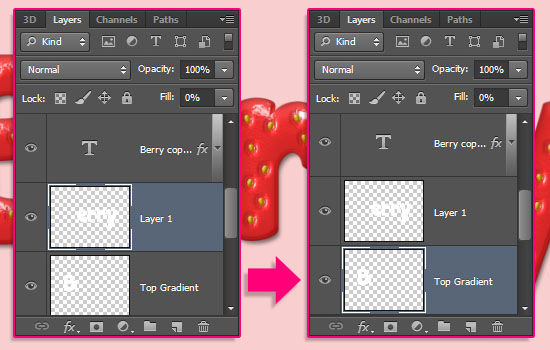
 - This will apply the gradient to the upper case letter. Notice that
the Angle value is the one responsible for slightly tilting the gradient
to the left. This is where we’re planning to add the leaf later. So you
might want to try different values if you have different letters or
want to place the leaf somewhere else.
- This will apply the gradient to the upper case letter. Notice that
the Angle value is the one responsible for slightly tilting the gradient
to the left. This is where we’re planning to add the leaf later. So you
might want to try different values if you have different letters or
want to place the leaf somewhere else.
 - Now right click the “Top Gradient” layer, choose Copy Layer Style, then right click “Layer 1″, and choose Paste Layer Style.
Double click “Layer 1″ then change the Opacity to 35% and the Angle to 90. Click the Gradient box to modify some values.
 - Change the Location of #1 to 8, and #2 to 18.
 - This will apply a lighter gradient to the lower case letters.
 Step 12
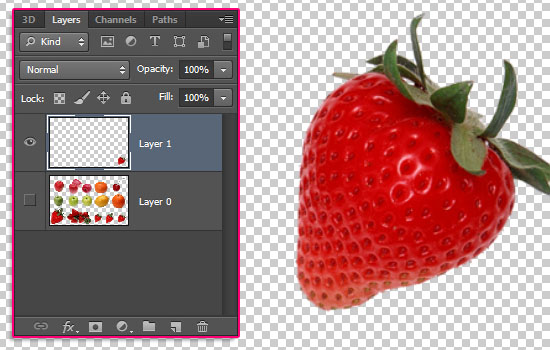
- Open the fruits sen pngs image, then use the Rectangular Marquee Tool to select the first strawberry from right (or any other one you prefer).
 - Press Ctrl + J to duplicate the selected strawberry in a separate
layer. You can make the original image invisible by clicking the eye
icon next to its layer.
- Press Ctrl + J to duplicate the selected strawberry in a separate
layer. You can make the original image invisible by clicking the eye
icon next to its layer.
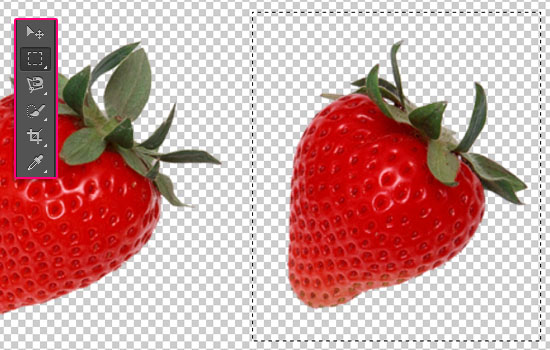
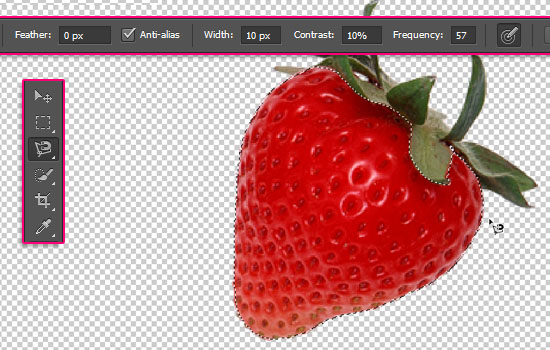
 - Pick the Magnetic Lasso Tool, then select the Strawberry (as it’s much easier than selecting the leaf part).
Just click once on the edge, then drag, and the points will be added automatically. If needed, you can click to add points manually. Finish at the start point to create the selection.
Go to Edit -> Copy, then back to the original document.
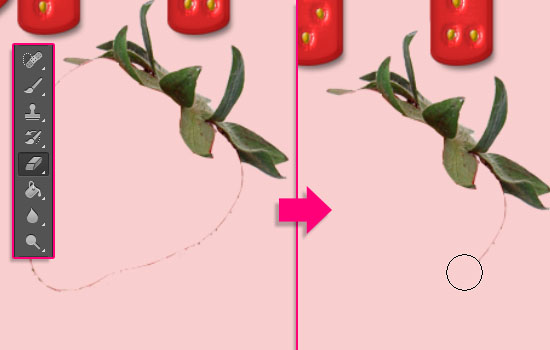
 - Go to Edit -> Paste. You might see that there are still some
parts of the strawberry, just use the Eraser Tool to remove them.
- Go to Edit -> Paste. You might see that there are still some
parts of the strawberry, just use the Eraser Tool to remove them.
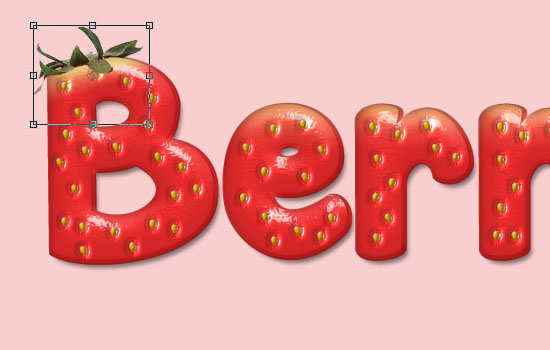
 - Go to Edit -> Free Transform, then resize, rotate, and place the
leaf on the first letter. Hit Enter to accept and get out of the Free
Transform Mode.
- Go to Edit -> Free Transform, then resize, rotate, and place the
leaf on the first letter. Hit Enter to accept and get out of the Free
Transform Mode.
 - Double click the leaf layer and apply a Drop Shadow effect. Change
the Opacity to 23, uncheck the Use Global Light box, change the Angle to
106, and the Distance to 10.
- Double click the leaf layer and apply a Drop Shadow effect. Change
the Opacity to 23, uncheck the Use Global Light box, change the Angle to
106, and the Distance to 10.
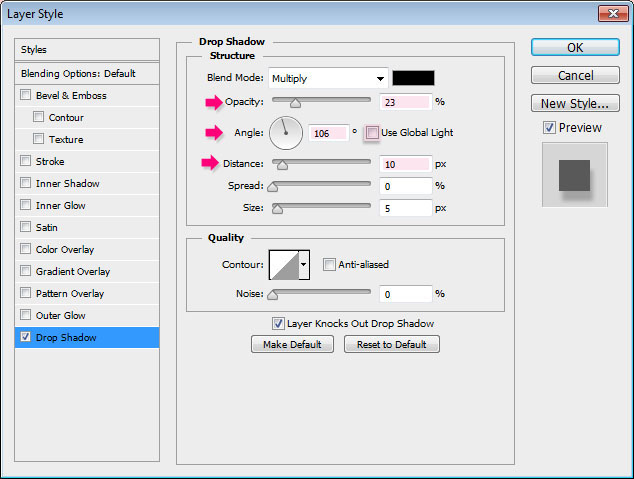 - This will add some shadow to the leaf.
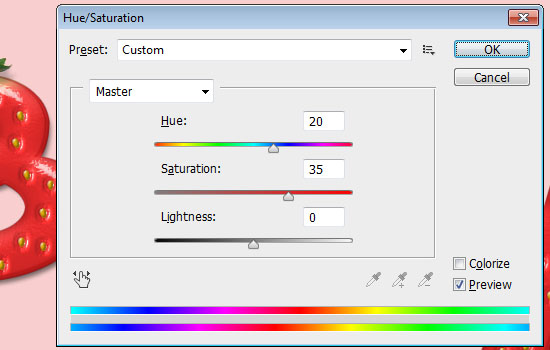
 - Go to Image -> Adjustments -> Hue/Saturation, change the Hue to 20, and the Saturation to 35.
 Step 13
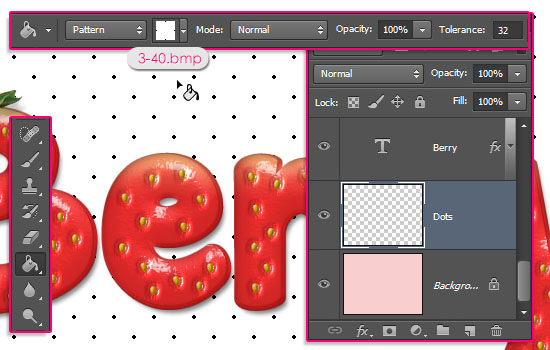
- Create a new layer right on top of the Background layer, call it “Dots”, pick the Paint Bucket Tool, choose Pattern in the Options bar, then fill the background with one of the “Dots and Screentones – Print” patterns. The one used here is “3-40.bmp”.
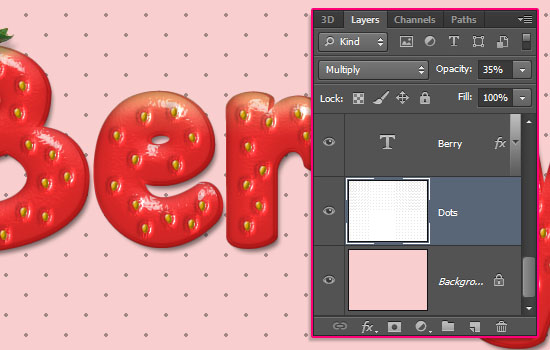
 - Change the “Dots” layer’s Blend Mode to Multiply, and its Opacity to 35%.
 - If you like, you can use the Eraser Tool to remove the dots that
touch the text’s edges. Don’t delete so many to avoid creating so many
empty areas.
- If you like, you can use the Eraser Tool to remove the dots that
touch the text’s edges. Don’t delete so many to avoid creating so many
empty areas.
 Step 14
- Finally, you can add the “Straw” word on top using a different font, like Clear Line.
The color is #de2d2d and the size is 100 pt.
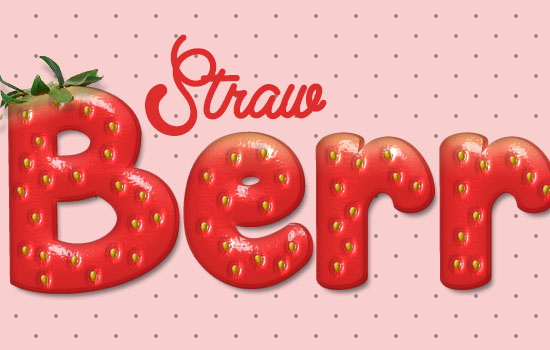 - Double click the “Straw” text layer and apply a simple Drop Shadow by changing the color to #f8cece.
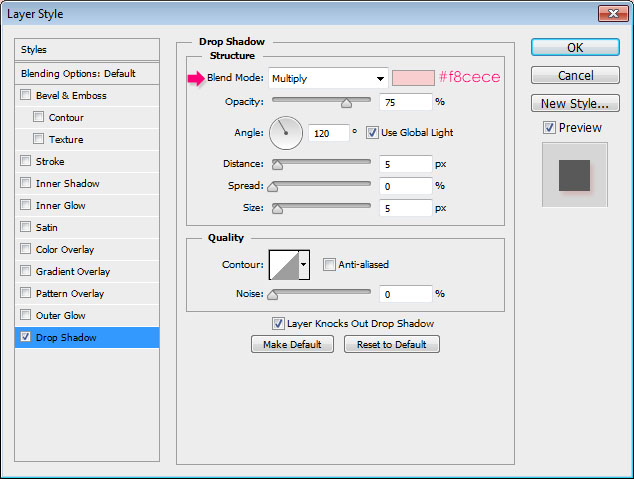 - The pink shadow adds a nice touch instead of a dark one, since the font size is small compared to the main “Berry” text.
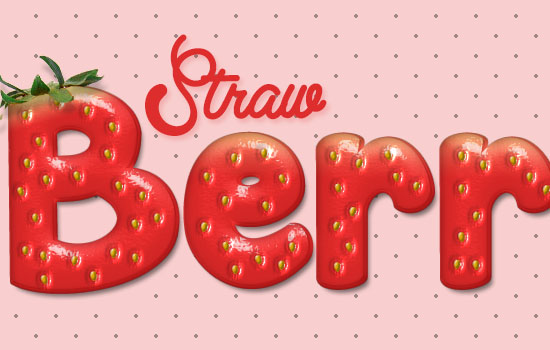 - You can erase the dots around the word “Straw” as well.
 And that’s it! Hope you enjoyed the tutorial, and found the tips and tricks helpful.
Feel free to leave a comment telling us what your favorite fruit is,
we’d like to create some more fruity text effects inspired by your
answers.
Thanks once again to Ivana
This was suggested by Ivana (IvaxXx on DeviantArt). Thank you for the awesome suggestion, Ivana : )
The Final Result:

* the software used in this tutorial is Adobe Photoshop CS6, but you can use CS3+ versions as well.
* you might want to check the Basix Page to see some useful topics on dealing with Photoshop basics, such as loading palettes and some shortcuts.
Note: You might need to load the Contours used in the tutorial, so check this image to see how to do so.
Step 1
- Create a new 1024 x 768 px document. Set the Foreground color to #f8cece, then use the Paint Bucket Tool to fill the canvas with that color.
Double click the original text layer to apply the following Layer Style:
- Bevel and Emboss: Change the Style to Stroke Bevel, the Size to 10, check the Anti-aliased box, change the Highlight Mode to Overlay, the Shadow Mode color to #b64a4a, and its Opacity to 56%.
You’ll see the difference when you apply the Stroke effect in a minute.
Double click the first copy text layer to apply the following Layer Style:
- Bevel and Emboss: Change the Size to 21, uncheck the Use Global Light box, change the Angle to 68, the Altitude to 64, the Gloss Contour to Log, check the Anti-aliased box, the Highlight Mode Opacity to 50%, the Shadow Mode color to #742b2b, and its Opacity to 25%.
Double click the second copy text layer to apply the following Layer Style:
- Bevel and Emboss: Change the Size to 18, uncheck the Use Global Light box, change the Angle to 77, the Altitude to 42, check the Anti-aliased box, change the Highlight Mode to Overlay, its Opacity to 70%, and the Shadow Mode Opacity to 0%.
- Create a new 100 x 100 px document.
Because of the Alt key, both sides will be transformed together.
Once you like how that part looks, hit the Enter/Return key to accept the changes and get out of the Free Transform Mode.
Step 6
Open the Brush panel (Window -> Brush), then choose the seed brush and modify its settings as shown below:
- Brush Tip Shape:
Here’s an interesting fact: The seeds are the actual fruit, not the red part, and they are called “called “achenes”!
Double click the “Seeds” layer to apply the following Layer Style:
- Bevel and Emboss: Change the Style to Pillow Emboss, the Size to 15, uncheck the Use Global Light box, change the Angle to 162, the Altitude to 58, check the Anti-aliased box, change the Highlight Mode to Vivid Light, its Opacity to 90%, and the Shadow Mode Opacity to 50%.
Double click the copy “Seeds” layer to apply the following Layer Style:
- Bevel and Emboss: Change the Size to 2, uncheck the Use Global Light box, change the Angle to 130, the Altitude to 48, check the Anti-aliased box, and change the Shadow Mode color to #68671c.
- Ctrl + Click the original text layer thumbnail to create a selection.
This step is optional, as we’re going to create some unripe parts at the top.
- Create a new layer between the two text layer copies and call it “Top Gradient”, then fill it with white.
- Pick the Rectangular Marquee Tool, and click the “Intersect with selection” icon in the Options bar. Click and drag to create a rectangle around the lower case letters.
- Double click the “Top Gradient” layer to apply a Gradient Overlay effect. Change the Opacity to 75%, the Angle to 103, and check the Reverse box. Then click the Gradient box to create the gradient used.
Start by choosing the Foreground to Transparent gradient preset, then modify it and add more stops as below:
- Color Stops:
# – Color – Location
1 – #bcbc5c – 0
2 – #fbe599 – 12
- Opacity Stops:
# – Opacity – Location
3 – 0 – 14
4 – 0 – 100
Double click “Layer 1″ then change the Opacity to 35% and the Angle to 90. Click the Gradient box to modify some values.
- Open the fruits sen pngs image, then use the Rectangular Marquee Tool to select the first strawberry from right (or any other one you prefer).
Just click once on the edge, then drag, and the points will be added automatically. If needed, you can click to add points manually. Finish at the start point to create the selection.
Go to Edit -> Copy, then back to the original document.
- Create a new layer right on top of the Background layer, call it “Dots”, pick the Paint Bucket Tool, choose Pattern in the Options bar, then fill the background with one of the “Dots and Screentones – Print” patterns. The one used here is “3-40.bmp”.
- Finally, you can add the “Straw” word on top using a different font, like Clear Line.
The color is #de2d2d and the size is 100 pt.
Thanks once again to Ivana
Comments
Post a Comment