Split
Frequency Healing is a technique that you can use in Photoshop that
will allow you retouch photos without affecting the photo’s respective
tone or texture. In this tutorial, commercial
retoucher,
Daniel Meadows, who has worked for clients such as Harper’s Bazaar,
Elle, Marie Claire, Chanel, and L’Oreal Paris, will explain this
technique and how it can be used in your workflow. Let’s get started!
Special thanks to Dubai Photographer,
Sherif Mokbel for providing the photography for this tutorial.
Tutorial Assets
The following assets were used during the production of this tutorial.
Before You Begin
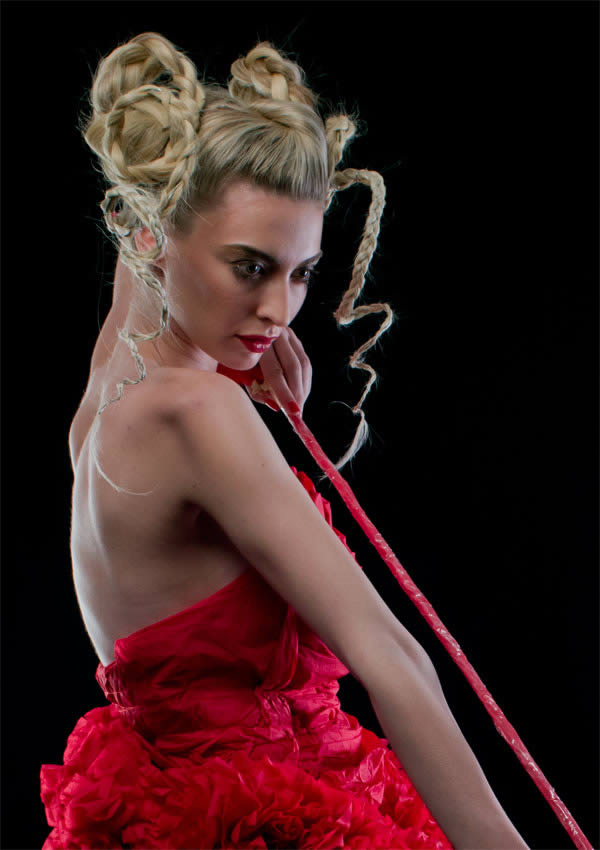
Let’s
take a look at the image that we’ll be using for this tutorial. Below
you’ll see a typical example of markup you might receive from a client.
It might be a jpeg like this, a scan of a pen-annotated print or simply a
set of instructions or suggestions, but ultimately you’ll be expected
to deliver on a set brief.
We
have instructions to clean up the image, a little liquify for a more
pleasing curve to the back and waist, and to remove the purple-blue tone
from the model’s legs. I’ll cover the techniques you’ll need to
complete the shot over the course of several tutorials. Remember not to
deviate too far from what your client is asking for, run it by them
first. If you think a background color change is really going to make
the subject pop, try discussing your ideas, especially if it’s for a
portfolio project. If it’s a commercial or editorial job however and the
art director wants neutral white, he or she of course, gets white.
There
are quite a few ways to achieve a similar result in Photoshop, and I’ll
be going through a number of them, often focusing on one in particular
and giving a couple of alternatives you might want to try.
The
first step we’re going to follow in completing this shot is the healing,
the ‘basic cleanup.’ For this we’re going to be mostly using the clone
stamp (S), but we’ll do it a little differently to the way the software
intended. Be sure to start off using the key commands for your tools,
you’ll save yourself a lot of time in the long run. When you’re trying
to meet an unreasonable deadline and your left hand is bringing up every
tool and command without giving it a thought you’ll thank me for it.
Take a look at the look at the shot we have to work with:
The
lighting’s a blessing, the well defined shadows and highlights give us a
great guide to follow when we come to carving, but we’ll get to that.
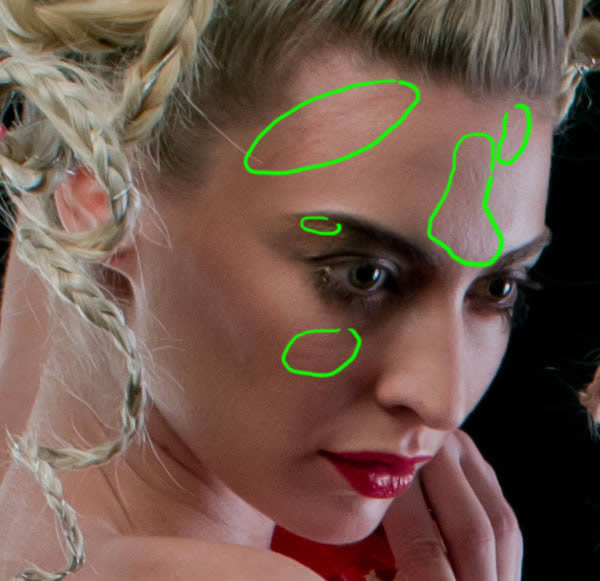
The skin is very good, with just enough marks and texture variance to
give us a good run at the exercise. Remember that with high end
commercial retouching you’re going to be getting professional models
with great skin, great lighting, make up, wardrobe etc. It isn’t about
changing the shot, or the model, it’s about perfecting it. Here’s a
close up of the kind of texture variations I mentioned:
It
might be instinctive to head straight for the clone stamp or healing
tools, but the clone stamp will carry luminosity and tone with it,
causing problems in light to shadow or vice versa. The healing tools
carry the texture and then attempt to approximate the tone and
luminosity with an algorithm. What if there was a way of cloning nothing
but the texture, ignoring the luminosity and tone, and simply replacing
a piece of texture elsewhere? Well we’ve got one, and it’s called
frequency separation.
You’ll
notice I’ve renamed them to ‘LF’ and ‘HF.’ As you might expect, to
achieve the low frequency image, we use a blur. Gaussian Blur the LF
layer at a radius of around 15.
The
interesting bit is how we turn the HF layer into one that contains only
the high frequency data, so we can view it together with the low
frequency layer as one composite image. For an 8bit image, select the HF
layer, head to Image > Apply Image, and use the following settings:
For 16bit images use the settings in this box:
Hit ok and you’ll have an image that looks like this:
In
that layer is all the sharp, high frequency texture detail we’ve been
hoping to isolate, against a neutral grey. To tell Photoshop to ignore
the unhelpful grey, set the Layer Mode to Linear Light:
Our
image should now look like the image below which is indistinguishable
from the original (the eagle-eyed amongst you might notice a barely
perceptible difference if you look very closely).
If
you switch off the Background layer for a moment and toggle the
visibility between just the LF and just the HF layers, you’ll notice
that the image we now have is a true composite, one layer without the
other doesn’t work.
But
together we get the full image. The benefit we have now is that we can
clone and heal on just the HF, or ‘texture’ layer without affecting the
tones, and we also have the opportunity to fix tones and luminosity on
the LF layer without ever affecting the texture.
Grab your Clone
Stamp (S), making sure it is set to ‘Current Layer’ (we don’t want to
carry any of the low frequency information onto the texture layer):
And
begin to remove any blemishes by Alt (Mac: Opt)-clicking an area of
good texture and painting over the areas of poor texture:
As
you can see, the overall tone and lighting has remained, with only the
texture affected. It’s not something we can usually do with the Clone
Stamp, and the Healing Brush can fall short.
You may notice that
this method fails when dealing with hard edges, and areas where there is
a dominant tone beneath the texture, such as the rather extreme example
below:
For
this reason, it’s necessary to start a new layer above your frequency
layers, and clone over any problem areas this way. Don’t forget to set
the Clone Stamp’s Sample back to Current & Below.
Healing Completed
And here’s a close up of the skin after nothing but some careful cloning, 95% of which was done on the high frequency layer:
Conclusion
At
this point, we’ve improved the condition of the model’s skin so we
don’t have to worry about print size, we know the blemishes are gone and
for many purposes this is far enough. Not for us of course, in the next
tutorial we’re going to head into dodging and burning, locally
adjusting luminosity to even out tones. Please share and post your
comments, and I’ll see you soon!


Photo retouching service is essential to make images eye-catching. Especiallly, online businesses need the service to attract customers. It is the process of editing images to enhance its quality in order to attract the market. It involves common enhancements such as color correction, background removal, and blemish removal, among many others.
ReplyDeleteRetouch A Photo In Photoshop >>>>> Download Now
ReplyDelete>>>>> Download Full
Retouch A Photo In Photoshop >>>>> Download LINK
>>>>> Download Now
Retouch A Photo In Photoshop >>>>> Download Full
>>>>> Download LINK yn
Your post is really knowledgeable. Your photo retouching guide is really helpful and I make my first retouching by following this guide. Thank you for sharing this post.
ReplyDelete