#1 - Basic Gif Making in CS6
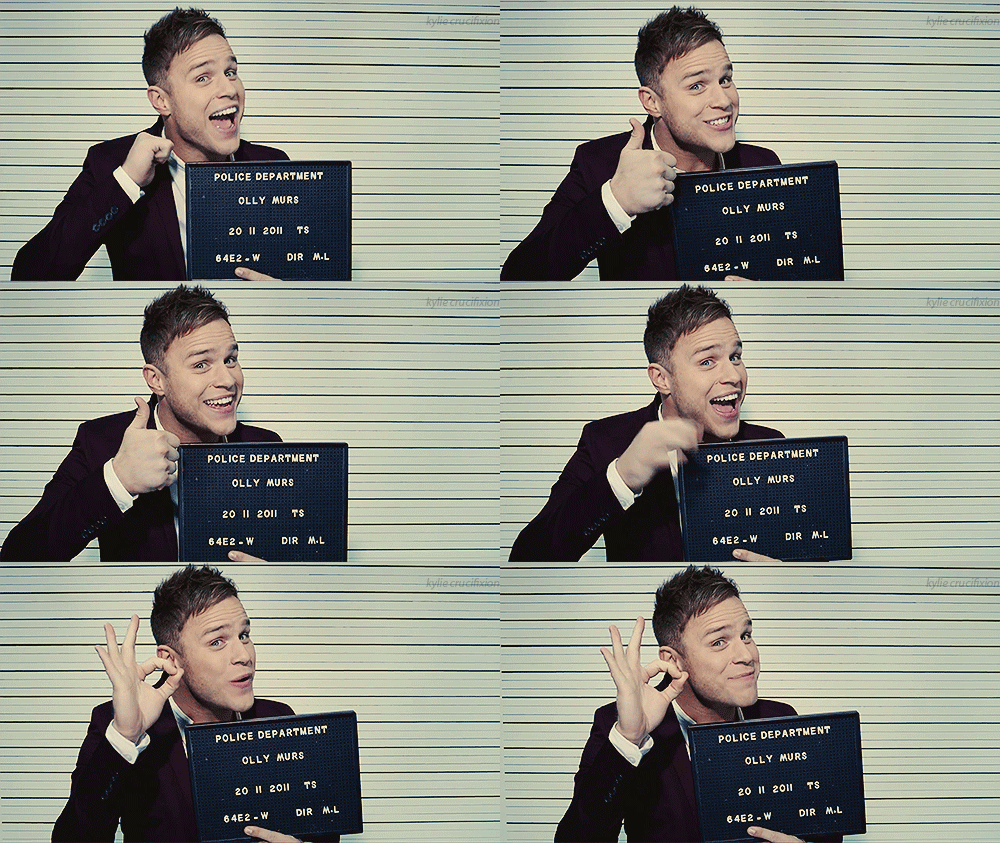
and the “fade” effect
Program: Photoshop CS6
Translatable? Yes, however the purpose of this tutorial is to teach with the new CS6 interface.
Difficulty: Easy/Medium (making any type of gifs can get very frustrating)
———————————————————————————————
#2 - Motion Transition Gifs
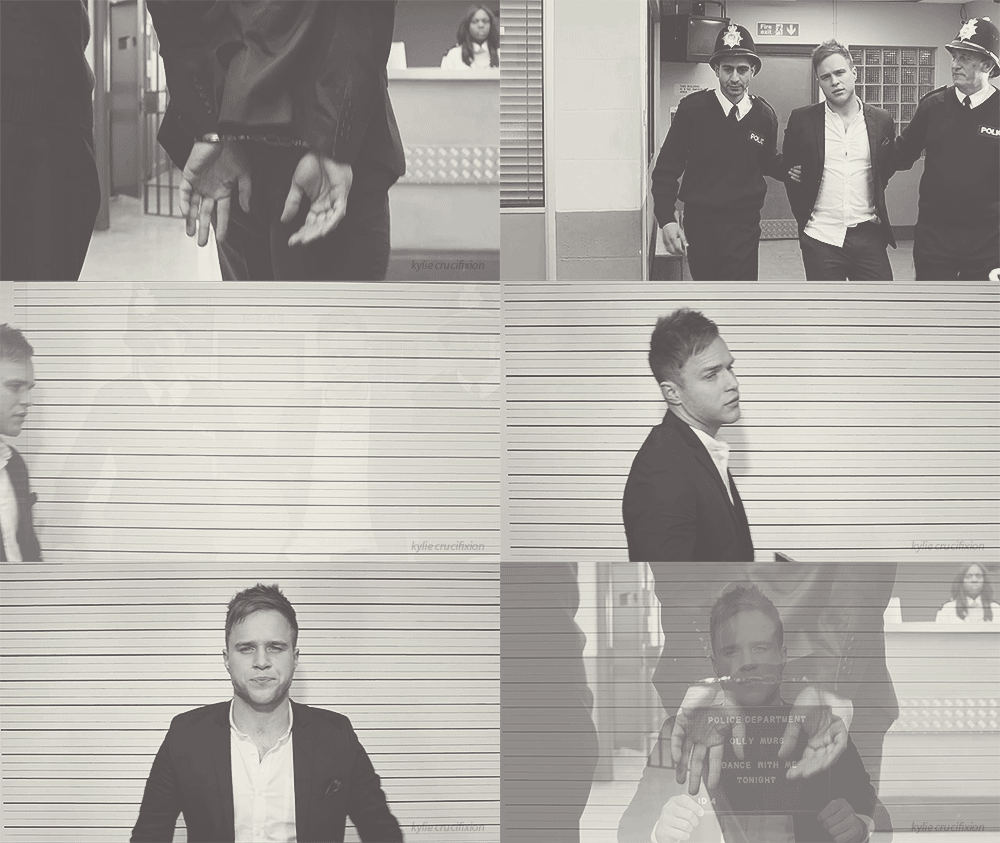
Now I’m going to show you how to make gifs like this:

Program: Photoshop CS6
Difficulty: Hard at first, medium/easy once you get the hang of it.
Requirements: Previous knowledge of gif making.
Translatable? Yes
————————————————————————————————————-
#3 - Pixel Transition Gifs
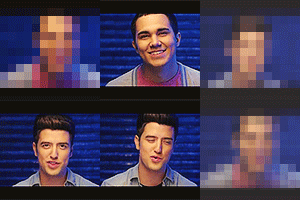
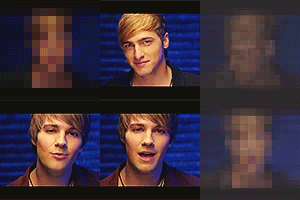
Program: Photoshop CS6
Difficulty: Medium/easy
Requirements: Previous knowledge of gif making.
Translatable? Yes
#1 - Basic Gif Making in CS6


Hello! I will be showing you my method of making gifs in Photoshop CS6. It may seem hard at first but will be simple once you get the hang of it! I have heard a lot of people are having trouble with the new CS6 interface, so here you go :) First rule—make sure your first frame is ALWAYS selected before doing anything (i.e. text, coloring, etc.) to the gif.
1. Making Frames
Before you can even begin this, you will need to have your video saved on your computer in the .mov format. I have a Google Chrome plugin that just downloads the videos automatically when you click the button. If you don’t have Chrome or don’t want a plugin, you can convert and download directly from youtube. I prefer convertfiles, because you can download any videos, even music videos. Zamzar is okay too, but it won’t let you download any files over 100MB. Just paste the video url, and in the drop down box that says either output or convert to depending on what website you use, change it to .mov (QuickTime Movie File) or .mp4. These are the only files that are supported directly with Photoshop. The better thing about the Chrome plugin as opposed to converter sites is that the videos are HD quality and really clear.
Try and use HD videos if at all possible. SD will not look as good, even with sharpening (the Chrome plugin almost always has an HD option).
Now if you’re using another program to make your screencaps/frames, I guess you don’t have to convert to .mov or .mp4, but I find doing everything directly in Photoshop is easiest instead of having a bunch of programs using disk space on your computer.
Before you start, make sure the animation frame box is at the bottom. In CS5 it is Window>Animation. However, in CS6 you have to go to Window>TIMELINE. It is the exact same animation frame box, just a new name. (Make sure the checkmark by timeline is checked.) It will look like this:

And then the timeline will be at the bottom:

Now if you have the animation frame up, you’re going to start making your frames. Go to File>Import>Video Frames to Layers. I’m using the “Dance With Me Tonight” music video by Olly Murs for this tut.

Pick your video you want to make a gif of and a popup box will come up. Change your settings to Limit every 3 frames (you can do 2, but you may have to delete more frames later, so 3 is safer). And click selected range only.

Now you have to select the range for your gif. DO NOT WORRY ABOUT GETTING A LITTLE EXTRA AT THE BEGINNING OR END THAT YOU DON’T WANT ON YOUR GIF! That’s okay, and you can delete the frames later. Also, DO NOT DELETE ANY FRAMES YET. WAIT UNTIL I GO OVER SHARPENING.
Already this looks different from CS5. In CS6 you don’t have to hold Shift and select a range, you move the little black things at the beginning and end to wherever the range of the scene you want to gif is.

Rule of thumb: If you need to delete a lot of frames within the gif, ALWAYS DELETE EVERY THIRD FRAME.
2. Size and Sharpening
Okay, if you need to crop your image go ahead and do it but DON’T DELETE ANY FRAMES. Go toImage>Image Size and change the width to 500 for the best Tumblr size. Make sure constrain proportions ischecked; the height doesn’t matter as long as the width is 500, and constrain proportions will automatically change the height to where it will look good (usually it will be around 281, for music videos anyway).
Now to sharpen! Use notliketheother’s Sharpen action for gifs here and READ THEIR TUTORIAL here in order to sharpen properly. I am not going to rehash THEIR tutorial for THEIR action since this is my tutorial but be sure to read it. Depending on the quality of the gifs I may sharpen it up to 2 times using this method. Again, DO NOT DELETE FRAMES BEFORE SHARPENING. But please sharpen your gif; if it’s an HD video though 1 time is enough, 2 looks oversharpened.
3. Timing
Now you can delete any unwanted frames from the beginning and end. To delete frames click on the littletrash can at the bottom of the timeline. Also, if you feel your gif still has too many frames, you can delete every 3 frames within the gif.
Now your gif will be automatically set at a time. It will most likely be way too fast. You can change it to any time you want, just test out the times. Make sure it’s not too fast, but not too slow either. To change all layers at once, select all by clicking the little box with the arrow and the timeline and click select all.

All of the frames will be highlighted. Then go on any of the frames and click the number with the down arrow to change the timing (I prefer .1 seconds usually, but just see what works best).

So this is what my gif looks like now with the timing at .1 (sorry, had to watermark it, obviously yours won’t have text at this point lol).

4. Coloring
Once you’ve got the timing how you like, you can color it. You can do the coloring yourself or you can drag and drop a .psd.
You can also have text (if you’re using text effects such as drop shadow, make sure your first frame is selected) you’re going to have to convert the text to a smart object Right Click>Convert To Smart Object in order for it to appear on each frame.
5. Optimizing and Saving
Before I show you the completed gif with the coloring, it needs to be optimized and saved. To optimize for Tumblr, it has to be less than 1000 M. (If you’re doing it for an LJ icon, it will already be a small size, which will help, but it has to be less than 40KB, which will really wash out the coloring and look kind of fuzzy sigh.)
If you’re optimizing and it starts to look fuzzy and crappy, you may have to go back and delete frames, and tone down the coloring. Or you can cheat and put a gradient map to only make it more or less 2 colors. To save go to File>Save For Web.

This goes for ANY gif, whether a Tumblr gif or LJ icon.

Make sure all of your settings are like this (set to Selective, Diffusion, etc.) this way your gif will look good. Always start on 256 colors. Now click the little box with the arrow and click Optimize to File Size.

A popup box will come up. In the desired file size put 999 K (for an LJ icon 39 K, yes, make sure the gif is VERY small or it will look like utter crap without all the colors).

Now as you can see the colors have gone down (I had to delete a few frames, to get the colors to be this good).

The way you can tell how big your file is is by looking underneath the preview of your gif where it says a number by K. If it’s less than 1000K it’s good. If not you need to go into the colors box and lessen them more until it’s less. If you try putting it on Tumblr while it’s more it won’t move (or if you’re putting it in the text box it won’t show up).
Optimizing tip: use a gradient map to make your gif black and white or gray and white or whatever so it doesn’t need to use as many colors and will still look clear and quality!
And you’re done!

You could add subtitle text if you want. (Myriad Pro bold and italic is best for this. Again with the first frame selected set the stroke to 2 and add a drop shadow at a fairly low opacity. Then convert to smart object for the effects to show on all frames.)

You could do the whole overlay text thing that’s popular now.

6. Tweening (extra help)
Tweening is the faded effect between different scenes in one gif.

So you’re obviously gonna be working with several gifs at first, just have them all open (try not to have too many so you don’t have too many frames). I only used two for this to not use up as much disk space.
Make your separate gifs, resize, sharpen, delete unwanted frames, etc. Try to have a minimal amount of frames, since the tween will add frames (I went ahead and made this gif black and white to make the file as small as possible).
Then take the second gif, hit the little box with the arrow on the timeline, and click Copy Frames.

Then go back to the first gif, select the last frame, and click the little box again, then Paste Frames. Make SURE to click Paste After Selection on the popup.

Do this for however many scenes you’re putting together, selecting the last frame of the previous gif before pasting the new one.
Now you’re going to select the last frame of the first gif. Click the little icon at the bottom of the timeline that looks like a bunch of circles (you can always click the box and arrow, then click Tween, but the button goes a lot faster). It’s next to the duplicate frame button (the square with a folded corner).

The Popup comes up. Make sure Next Frame is selected under Tween With. Then add 3 frames (this gives the right amount of fade). Under Layers select All Layers, and then under Parameters make sure all of them are checked (Position, Opacity, Effects). It will look like this:

Now. This is important so pay close attention. The Tween frames will look pretty transparent in the timeline. You’re going to delete the frame right before the tween and the one directly after. So basically the last frame of the first gif (which you just had selected) and the very first frame of the next gif.
Select the three Tween frames and set the timing to No Delay (0 sec). (For this gif I actually had the gif slower than .1 sec, so I set the tween frames to .1. For most normal gifs though you’ll set it to 0, but if it doesn’t look right or it’s not faded enough for you you can change it.)
Now repeat this process for every separate scene/gif.
Go to the very last frame. Hit the Tween button. We want the end to fade into the beginning so it loops. So this time instead of tweening with next frame (which isn’t even an option now since there is no next frame) tween with First Frame.

Now since we’ve tweened them you’re obviously going to delete the very first frame of the whole thing and the very last frame of the whole thing (the reason we delete the frames is since it fades we don’t want a disconnect of duplicated frames).
Color, save for web, optimize, and you’re done!

Hope this helps! If you have any questions at all about gif making or the new CS6 interface, don’t be afraid to ask!
——————————————————————————————————————————————
#2 - Motion Transition Gifs
Now I’m going to show you how to make gifs like this:

(I’m doing this icon-sized for LJ, for Tumblr it will be bigger, about 245x245px, and the colors are not optimized for LJ on this icon.)
This is compatible with other versions, I just will be using tools in CS6 so you might not know what that tool is in the other version of PS.
Note: I am not posting the .psd, even though it might help you because I don’t want my gifs stolen. If you get stuck just ask for help.
First follow the steps for a normal gif, opening your video, making the frames, sharpening, adding a psd/coloring, etc. But for the sizing, you’re going to have to size it as 100x100. I’m using One Direction’s “One Thing” music video.
Now I wanted my icon to be Liam and Harry, so to do this I actually made two different gifs since their parts are at different times, but this is kind of the point.
Since Liam is first we’ll start with his gif.
Once you have your frames, resize and crop to 100x100, sharpen (see first gif tutorial for easy sharpening), and color. Then delete all unwanted frames (try to only have 12 or preferably less. This may mean going through and deleting every third frame, and then again—as long as they’re not crucial frames—until you have the correct amount).
Next duplicate the first frame (select it, then click the little paper/post it looking icon on the bottom of the timeline).

Now we’re going to start adding the effect at the beginning. We’ll be doing them at both the beginning and end of each separate gif before putting them together to make it look like they’re zooming in and the next one zooms in after that one zooms out.
Go to Layer>New Fill Layer>Solid Color and add a black layer (you can do whatever color you want the background of the gif while it’s “zooming” in or out). Select all the frames, then deselect only the first frame. Go to the layers and click the eye next to the black layer to make it only visible on the first duplicated first frame.

Now copy the first frame of the actual gif (so the now first frame of Liam, not the black frame)

Make a new document sized 100x100. Make sure the timeline is still up, then again click the little box with the arrow and this time click paste frame. Be sure to put Paste Over Selection so you don’t have a random white frame. Or, you can just duplicate the frame again in your first image, open a new image, and drag the duplicate to the new one.

Now you’re going to resize it to 20px smaller than whatever your image is. So my image is 100x100, so I’m just going to go to Image>Image Size (make sure Constrain Proportions is checked) and set to 80x80px. (If my image for tumblr was 160x160 I would make it 140x140, etc.)
Go to Filter>Blur>Motion Blur and use these settings:

These are the settings for making your image go sideways. I’ll get to up and down later. Now you just drag this image over to the first image. It will be visible on all frames, so select all but the first frame and click the eye so that you only see it on the black frame. Position it right in the center.

Now you’re going to Duplicate that frame so that you have about 6. Then, starting from the first frame, make the image barely visible on the side, like so.

For the next frame, inch it out slightly more, and continue this process until it reaches the one right before the actual gif starts. THIS ONE MUST BE IN THE CENTER.


Hopefully you get the idea. Here’s what my frames look like:

So here’s what it looks like after this:

Now for the end, for it to “exit”, we’re going to repeat the process of duplicating the last frame, adding a black layer, and making a small version of our last frame. HOWEVER, I want this one to exit DOWN since I want Harry to enter from up. So to do this set the motion blur to Radius: 90 instead of 0. Now it’s just the same concept, except the frame right after your last frame will be the one with the blurred image in the center. Then just slowly edge it down from there, and leave a blank black frame before adding the next gif.
Here’s what the frames should look like:

Gif:

Now make the second gif on a different file, since the part of the video of Harry is a little later. Since our last one left through the bottom, this one should enter through the top to make it flow.
So repeat the steps, using the motion blur set at Radius: 90 since it’s up/down (to clarify, all going off the side are set at a radius of 0, and all going up or down 90). Here’s the frames:

Here’s the beginning of the gif:

Now since Liam enters from left to right, we want Harry to exit to the right so it will flow. So repeat the end steps (using the motion blur at 0).
Frames:

Make sure to add another blank black frame at the end so when we put the two together there’s that transition between Harry and Liam again. Here’s this one finished:

Now to put them together. Select all the frames from the Harry gif and copy. Then go back to the Liam gif and select the VERY last frame (which is the blank black frame). Go to Paste Frames, and then make sure to click Paste AFTER Selection, not paste over.
You may have to delete frames to get a decent file size as this will make quite a lot of frames, but the good thing about icons is they have a relatively small size since they’re small (still big for LJ though).

And you’re done!

Kind of time-consuming, but worth it :)
To do photosets on tumblr with these, they would be bigger and you would leave the 2 gifs separate, hence the photoset, but I just wanted to show how to make an icon with both :)
——————————————————————————————————————————————-
#3 - Pixel Transition Gifs


Make your frames, sharpen, color as normal, etc. You will have to put 2-3 gifs together, so you should have 3 different gifs open. I’m using Big Time Rush’s “Music Sounds Better With U” music video. Luckily each part I’m giffing doesn’t have many frames to begin with.
Change the size to 100x100. Try having at most 12 frames for each.
Note: I am not posting the .psd, even though it might help you because I don’t want my gifs stolen. If you get stuck just ask for help.
Note: This is WAY different for photosets for Tumblr, you have to make a bigger background and then position slightly smaller gifs in the center.
I decided I wanted a Cargan gif (all of them was too many frames, and I almost did Kames, but Carlos lookedso adorable) anyway, not that you care :p
Now make a new image, sized 100x100. Then, select all the frames of the first gif, and paste into the new image, clicking Paste OVER selection so you don’t have a random white frame.
Then do the second gif the same, but instead click paste AFTER selection. Continue this for how ever many gifs you are putting together. Now you just have gifs playing one right after the other.

Now you’re going to select the very first frame and also select the corresponding layer in the layer pallet (the only layer with the open eye next to it). Go to Filter>Pixelate>Mosaic and set cell size to 8.

Now you’re going to repeat with the first frame/layer in each “separate” gif. Then select the last frame&layer of the first gif, and go to Mosaic again, but this time change cell size to 5.
Now I wanted more of a transition, so I added a 4 frame Tween (see my basic gif making tutorial for tweening). Then I added a Tween on the very last frame of the entire thing, but I selected tween with First Frame. I found making the Tween time less (but not 0) than the time on the normal frames looked best.
And done!

Okay, so I went ahead and made the Kames one(for another example not because of feels or anything).

The second one I changed the tween timing, the first one I didn’t. Like I said, I think it looks better set to a less time.

and the “fade” effect

Program: Photoshop CS6
Translatable? Yes, however the purpose of this tutorial is to teach with the new CS6 interface.
Difficulty: Easy/Medium (making any type of gifs can get very frustrating)
———————————————————————————————
#2 - Motion Transition Gifs
Now I’m going to show you how to make gifs like this:

Program: Photoshop CS6
Difficulty: Hard at first, medium/easy once you get the hang of it.
Requirements: Previous knowledge of gif making.
Translatable? Yes
————————————————————————————————————-
#3 - Pixel Transition Gifs


Program: Photoshop CS6
Difficulty: Medium/easy
Requirements: Previous knowledge of gif making.
Translatable? Yes
#1 - Basic Gif Making in CS6


Hello! I will be showing you my method of making gifs in Photoshop CS6. It may seem hard at first but will be simple once you get the hang of it! I have heard a lot of people are having trouble with the new CS6 interface, so here you go :) First rule—make sure your first frame is ALWAYS selected before doing anything (i.e. text, coloring, etc.) to the gif.
1. Making Frames
Before you can even begin this, you will need to have your video saved on your computer in the .mov format. I have a Google Chrome plugin that just downloads the videos automatically when you click the button. If you don’t have Chrome or don’t want a plugin, you can convert and download directly from youtube. I prefer convertfiles, because you can download any videos, even music videos. Zamzar is okay too, but it won’t let you download any files over 100MB. Just paste the video url, and in the drop down box that says either output or convert to depending on what website you use, change it to .mov (QuickTime Movie File) or .mp4. These are the only files that are supported directly with Photoshop. The better thing about the Chrome plugin as opposed to converter sites is that the videos are HD quality and really clear.
Try and use HD videos if at all possible. SD will not look as good, even with sharpening (the Chrome plugin almost always has an HD option).
Now if you’re using another program to make your screencaps/frames, I guess you don’t have to convert to .mov or .mp4, but I find doing everything directly in Photoshop is easiest instead of having a bunch of programs using disk space on your computer.
Before you start, make sure the animation frame box is at the bottom. In CS5 it is Window>Animation. However, in CS6 you have to go to Window>TIMELINE. It is the exact same animation frame box, just a new name. (Make sure the checkmark by timeline is checked.) It will look like this:

And then the timeline will be at the bottom:

Now if you have the animation frame up, you’re going to start making your frames. Go to File>Import>Video Frames to Layers. I’m using the “Dance With Me Tonight” music video by Olly Murs for this tut.

Pick your video you want to make a gif of and a popup box will come up. Change your settings to Limit every 3 frames (you can do 2, but you may have to delete more frames later, so 3 is safer). And click selected range only.

Now you have to select the range for your gif. DO NOT WORRY ABOUT GETTING A LITTLE EXTRA AT THE BEGINNING OR END THAT YOU DON’T WANT ON YOUR GIF! That’s okay, and you can delete the frames later. Also, DO NOT DELETE ANY FRAMES YET. WAIT UNTIL I GO OVER SHARPENING.
Already this looks different from CS5. In CS6 you don’t have to hold Shift and select a range, you move the little black things at the beginning and end to wherever the range of the scene you want to gif is.

Rule of thumb: If you need to delete a lot of frames within the gif, ALWAYS DELETE EVERY THIRD FRAME.
2. Size and Sharpening
Okay, if you need to crop your image go ahead and do it but DON’T DELETE ANY FRAMES. Go toImage>Image Size and change the width to 500 for the best Tumblr size. Make sure constrain proportions ischecked; the height doesn’t matter as long as the width is 500, and constrain proportions will automatically change the height to where it will look good (usually it will be around 281, for music videos anyway).
Now to sharpen! Use notliketheother’s Sharpen action for gifs here and READ THEIR TUTORIAL here in order to sharpen properly. I am not going to rehash THEIR tutorial for THEIR action since this is my tutorial but be sure to read it. Depending on the quality of the gifs I may sharpen it up to 2 times using this method. Again, DO NOT DELETE FRAMES BEFORE SHARPENING. But please sharpen your gif; if it’s an HD video though 1 time is enough, 2 looks oversharpened.
3. Timing
Now you can delete any unwanted frames from the beginning and end. To delete frames click on the littletrash can at the bottom of the timeline. Also, if you feel your gif still has too many frames, you can delete every 3 frames within the gif.
Now your gif will be automatically set at a time. It will most likely be way too fast. You can change it to any time you want, just test out the times. Make sure it’s not too fast, but not too slow either. To change all layers at once, select all by clicking the little box with the arrow and the timeline and click select all.

All of the frames will be highlighted. Then go on any of the frames and click the number with the down arrow to change the timing (I prefer .1 seconds usually, but just see what works best).

So this is what my gif looks like now with the timing at .1 (sorry, had to watermark it, obviously yours won’t have text at this point lol).

4. Coloring
Once you’ve got the timing how you like, you can color it. You can do the coloring yourself or you can drag and drop a .psd.
You can also have text (if you’re using text effects such as drop shadow, make sure your first frame is selected) you’re going to have to convert the text to a smart object Right Click>Convert To Smart Object in order for it to appear on each frame.
5. Optimizing and Saving
Before I show you the completed gif with the coloring, it needs to be optimized and saved. To optimize for Tumblr, it has to be less than 1000 M. (If you’re doing it for an LJ icon, it will already be a small size, which will help, but it has to be less than 40KB, which will really wash out the coloring and look kind of fuzzy sigh.)
If you’re optimizing and it starts to look fuzzy and crappy, you may have to go back and delete frames, and tone down the coloring. Or you can cheat and put a gradient map to only make it more or less 2 colors. To save go to File>Save For Web.

This goes for ANY gif, whether a Tumblr gif or LJ icon.

Make sure all of your settings are like this (set to Selective, Diffusion, etc.) this way your gif will look good. Always start on 256 colors. Now click the little box with the arrow and click Optimize to File Size.

A popup box will come up. In the desired file size put 999 K (for an LJ icon 39 K, yes, make sure the gif is VERY small or it will look like utter crap without all the colors).

Now as you can see the colors have gone down (I had to delete a few frames, to get the colors to be this good).

The way you can tell how big your file is is by looking underneath the preview of your gif where it says a number by K. If it’s less than 1000K it’s good. If not you need to go into the colors box and lessen them more until it’s less. If you try putting it on Tumblr while it’s more it won’t move (or if you’re putting it in the text box it won’t show up).
Optimizing tip: use a gradient map to make your gif black and white or gray and white or whatever so it doesn’t need to use as many colors and will still look clear and quality!
And you’re done!

You could add subtitle text if you want. (Myriad Pro bold and italic is best for this. Again with the first frame selected set the stroke to 2 and add a drop shadow at a fairly low opacity. Then convert to smart object for the effects to show on all frames.)

You could do the whole overlay text thing that’s popular now.

6. Tweening (extra help)
Tweening is the faded effect between different scenes in one gif.

So you’re obviously gonna be working with several gifs at first, just have them all open (try not to have too many so you don’t have too many frames). I only used two for this to not use up as much disk space.
Make your separate gifs, resize, sharpen, delete unwanted frames, etc. Try to have a minimal amount of frames, since the tween will add frames (I went ahead and made this gif black and white to make the file as small as possible).
Then take the second gif, hit the little box with the arrow on the timeline, and click Copy Frames.

Then go back to the first gif, select the last frame, and click the little box again, then Paste Frames. Make SURE to click Paste After Selection on the popup.

Do this for however many scenes you’re putting together, selecting the last frame of the previous gif before pasting the new one.
Now you’re going to select the last frame of the first gif. Click the little icon at the bottom of the timeline that looks like a bunch of circles (you can always click the box and arrow, then click Tween, but the button goes a lot faster). It’s next to the duplicate frame button (the square with a folded corner).

The Popup comes up. Make sure Next Frame is selected under Tween With. Then add 3 frames (this gives the right amount of fade). Under Layers select All Layers, and then under Parameters make sure all of them are checked (Position, Opacity, Effects). It will look like this:

Now. This is important so pay close attention. The Tween frames will look pretty transparent in the timeline. You’re going to delete the frame right before the tween and the one directly after. So basically the last frame of the first gif (which you just had selected) and the very first frame of the next gif.
Select the three Tween frames and set the timing to No Delay (0 sec). (For this gif I actually had the gif slower than .1 sec, so I set the tween frames to .1. For most normal gifs though you’ll set it to 0, but if it doesn’t look right or it’s not faded enough for you you can change it.)
Now repeat this process for every separate scene/gif.
Go to the very last frame. Hit the Tween button. We want the end to fade into the beginning so it loops. So this time instead of tweening with next frame (which isn’t even an option now since there is no next frame) tween with First Frame.

Now since we’ve tweened them you’re obviously going to delete the very first frame of the whole thing and the very last frame of the whole thing (the reason we delete the frames is since it fades we don’t want a disconnect of duplicated frames).
Color, save for web, optimize, and you’re done!

Hope this helps! If you have any questions at all about gif making or the new CS6 interface, don’t be afraid to ask!
——————————————————————————————————————————————
#2 - Motion Transition Gifs
Now I’m going to show you how to make gifs like this:
(I’m doing this icon-sized for LJ, for Tumblr it will be bigger, about 245x245px, and the colors are not optimized for LJ on this icon.)
This is compatible with other versions, I just will be using tools in CS6 so you might not know what that tool is in the other version of PS.
Note: I am not posting the .psd, even though it might help you because I don’t want my gifs stolen. If you get stuck just ask for help.
First follow the steps for a normal gif, opening your video, making the frames, sharpening, adding a psd/coloring, etc. But for the sizing, you’re going to have to size it as 100x100. I’m using One Direction’s “One Thing” music video.
Now I wanted my icon to be Liam and Harry, so to do this I actually made two different gifs since their parts are at different times, but this is kind of the point.
Since Liam is first we’ll start with his gif.
Once you have your frames, resize and crop to 100x100, sharpen (see first gif tutorial for easy sharpening), and color. Then delete all unwanted frames (try to only have 12 or preferably less. This may mean going through and deleting every third frame, and then again—as long as they’re not crucial frames—until you have the correct amount).
Next duplicate the first frame (select it, then click the little paper/post it looking icon on the bottom of the timeline).

Now we’re going to start adding the effect at the beginning. We’ll be doing them at both the beginning and end of each separate gif before putting them together to make it look like they’re zooming in and the next one zooms in after that one zooms out.
Go to Layer>New Fill Layer>Solid Color and add a black layer (you can do whatever color you want the background of the gif while it’s “zooming” in or out). Select all the frames, then deselect only the first frame. Go to the layers and click the eye next to the black layer to make it only visible on the first duplicated first frame.

Now copy the first frame of the actual gif (so the now first frame of Liam, not the black frame)

Make a new document sized 100x100. Make sure the timeline is still up, then again click the little box with the arrow and this time click paste frame. Be sure to put Paste Over Selection so you don’t have a random white frame. Or, you can just duplicate the frame again in your first image, open a new image, and drag the duplicate to the new one.

Now you’re going to resize it to 20px smaller than whatever your image is. So my image is 100x100, so I’m just going to go to Image>Image Size (make sure Constrain Proportions is checked) and set to 80x80px. (If my image for tumblr was 160x160 I would make it 140x140, etc.)
Go to Filter>Blur>Motion Blur and use these settings:

These are the settings for making your image go sideways. I’ll get to up and down later. Now you just drag this image over to the first image. It will be visible on all frames, so select all but the first frame and click the eye so that you only see it on the black frame. Position it right in the center.

Now you’re going to Duplicate that frame so that you have about 6. Then, starting from the first frame, make the image barely visible on the side, like so.

For the next frame, inch it out slightly more, and continue this process until it reaches the one right before the actual gif starts. THIS ONE MUST BE IN THE CENTER.


Hopefully you get the idea. Here’s what my frames look like:

So here’s what it looks like after this:

Now for the end, for it to “exit”, we’re going to repeat the process of duplicating the last frame, adding a black layer, and making a small version of our last frame. HOWEVER, I want this one to exit DOWN since I want Harry to enter from up. So to do this set the motion blur to Radius: 90 instead of 0. Now it’s just the same concept, except the frame right after your last frame will be the one with the blurred image in the center. Then just slowly edge it down from there, and leave a blank black frame before adding the next gif.
Here’s what the frames should look like:

Gif:

Now make the second gif on a different file, since the part of the video of Harry is a little later. Since our last one left through the bottom, this one should enter through the top to make it flow.
So repeat the steps, using the motion blur set at Radius: 90 since it’s up/down (to clarify, all going off the side are set at a radius of 0, and all going up or down 90). Here’s the frames:

Here’s the beginning of the gif:

Now since Liam enters from left to right, we want Harry to exit to the right so it will flow. So repeat the end steps (using the motion blur at 0).
Frames:

Make sure to add another blank black frame at the end so when we put the two together there’s that transition between Harry and Liam again. Here’s this one finished:

Now to put them together. Select all the frames from the Harry gif and copy. Then go back to the Liam gif and select the VERY last frame (which is the blank black frame). Go to Paste Frames, and then make sure to click Paste AFTER Selection, not paste over.
You may have to delete frames to get a decent file size as this will make quite a lot of frames, but the good thing about icons is they have a relatively small size since they’re small (still big for LJ though).

And you’re done!
Kind of time-consuming, but worth it :)
To do photosets on tumblr with these, they would be bigger and you would leave the 2 gifs separate, hence the photoset, but I just wanted to show how to make an icon with both :)
——————————————————————————————————————————————-
#3 - Pixel Transition Gifs
Make your frames, sharpen, color as normal, etc. You will have to put 2-3 gifs together, so you should have 3 different gifs open. I’m using Big Time Rush’s “Music Sounds Better With U” music video. Luckily each part I’m giffing doesn’t have many frames to begin with.
Change the size to 100x100. Try having at most 12 frames for each.
Note: I am not posting the .psd, even though it might help you because I don’t want my gifs stolen. If you get stuck just ask for help.
Note: This is WAY different for photosets for Tumblr, you have to make a bigger background and then position slightly smaller gifs in the center.
I decided I wanted a Cargan gif (all of them was too many frames, and I almost did Kames, but Carlos lookedso adorable) anyway, not that you care :p
Now make a new image, sized 100x100. Then, select all the frames of the first gif, and paste into the new image, clicking Paste OVER selection so you don’t have a random white frame.
Then do the second gif the same, but instead click paste AFTER selection. Continue this for how ever many gifs you are putting together. Now you just have gifs playing one right after the other.

Now you’re going to select the very first frame and also select the corresponding layer in the layer pallet (the only layer with the open eye next to it). Go to Filter>Pixelate>Mosaic and set cell size to 8.

Now you’re going to repeat with the first frame/layer in each “separate” gif. Then select the last frame&layer of the first gif, and go to Mosaic again, but this time change cell size to 5.
Now I wanted more of a transition, so I added a 4 frame Tween (see my basic gif making tutorial for tweening). Then I added a Tween on the very last frame of the entire thing, but I selected tween with First Frame. I found making the Tween time less (but not 0) than the time on the normal frames looked best.
And done!
Okay, so I went ahead and made the Kames one
The second one I changed the tween timing, the first one I didn’t. Like I said, I think it looks better set to a less time.
Comments
Post a Comment