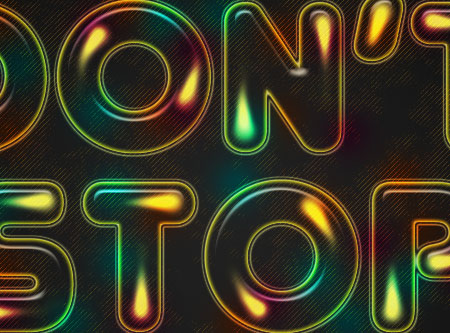
This tutorial will show you how to use Photoshop brushes and layer styles to create an awesome colorful retro text effect.
The Final Result:
 Notes:
* the software used in this tutorial is Adobe Photoshop CS5 Extended
* the size of the final result image is 1024 * 768
* you might want to check the Basix Page to see some useful topics on dealing with Photoshop basics, such as loading palettes and some shortcuts.
Step 1:
- Set the Foreground color to #212121 and the Background color to #000000 (Black). Create a Radial Gradient from the center of the document to one of the corners.
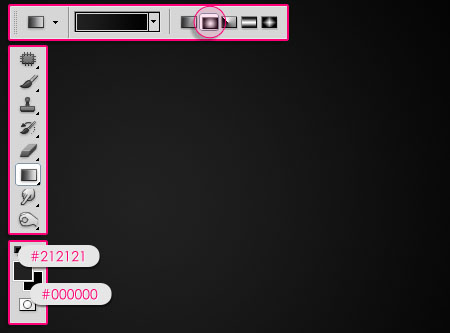
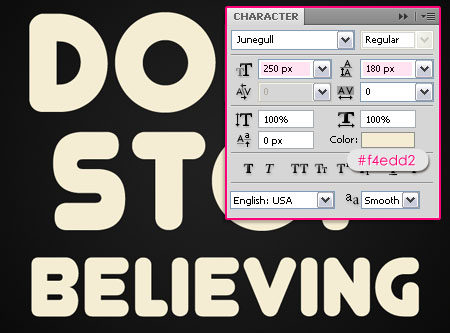
- Create the text using the color #f4edd2, and the font Junegull. In this effect, there will be two different sizes for the text. So if you want that as well, create the text on separate layers. The Larger size is 250px, and the Leading is 180 (to modify the vertical distance between the lines if necessary).
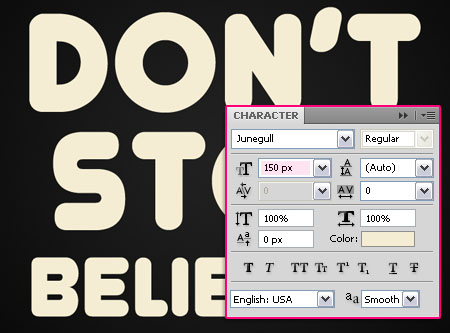
- The smaller size is 150. You can modify the sizes as you like, but these are the values used here.
Step 2:
Double click on the text layer to apply the following styles:
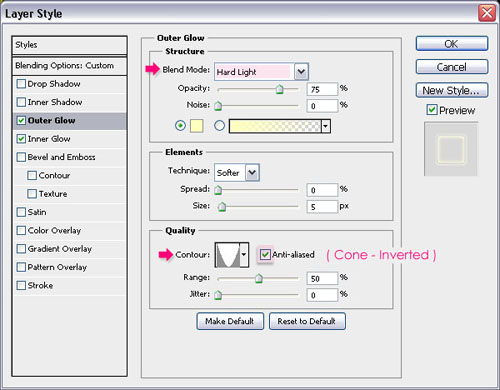
- Outer Glow: Change the Blend Mode to Hard Light, the Contour to Cone – Inverted and check the Anti-aliased box.
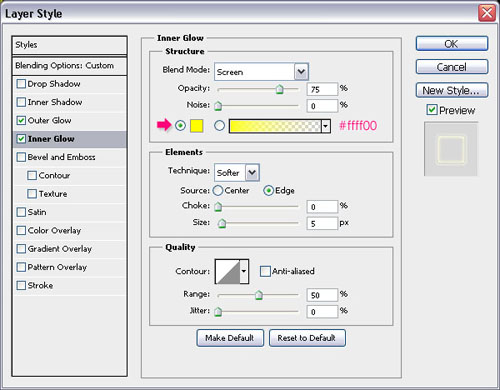
- Inner Glow: Just change the color to #ffff00.
- Change the Fill value to 0.
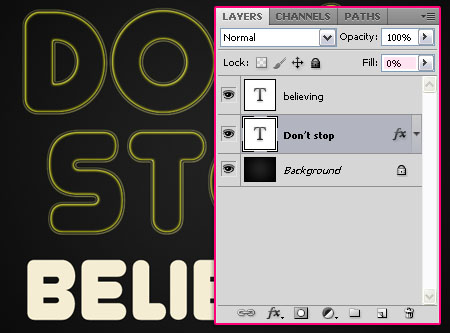
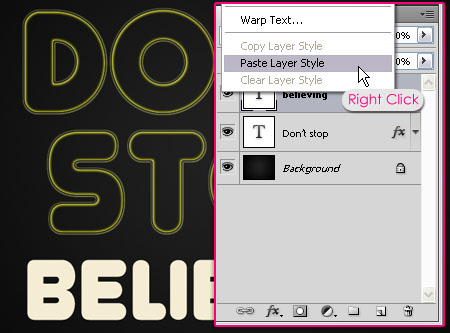
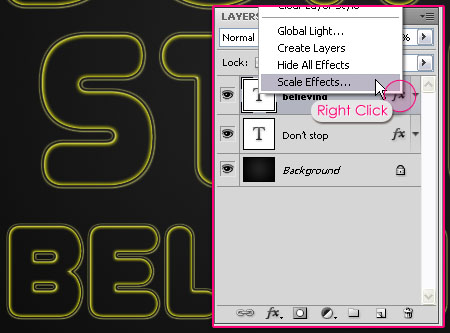
- If you have a smaller text size, you need to scale the effect in order to suit the new size. So Right Click on the original text layer, and choose Copy Layer Style.
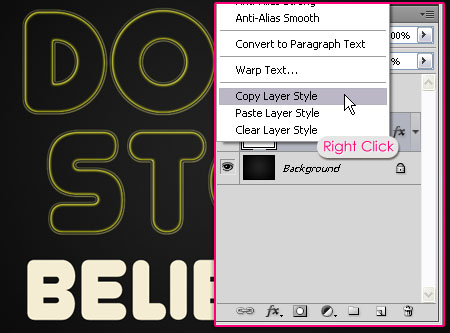
- Right Click on the other text layer and choose Paste Layer Style. This will apply the same layer styles to the new text layer, with the same values.
- To scale the styles, Right Click on the Layer Effects icon, and choose Scale Effects.
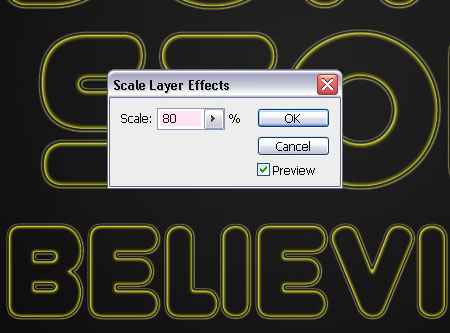
- Change the Scale value so that the style suits the text size.
Step 3:
- Set the Foreground color to #e5dfc9. Create a new layer on top of all layers and call it “Light”.
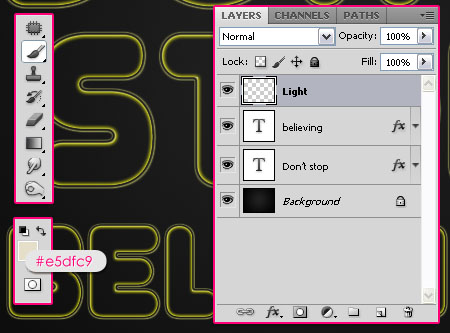
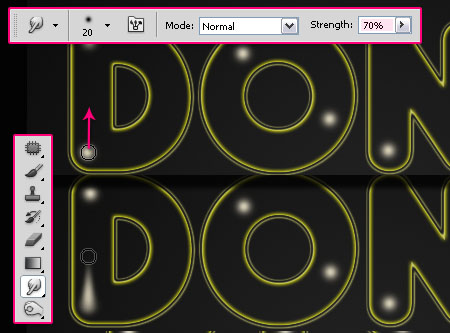
- Using the Brush Tool, start drawing dots in the tips of the letters. Use a soft round brush, and set its size to 20 for the larger text size, and 10 for the smaller one.
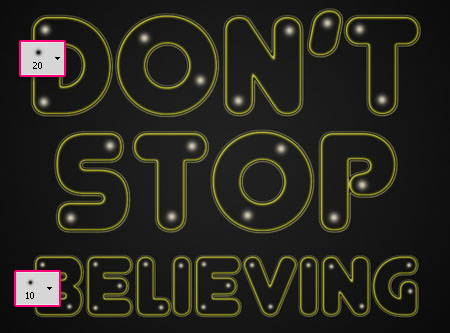
- Once you’re done drawing the dots, select the Smudge Tool, and set the Strength value to 70%. Start smudging the dots in different directions. Use the same brush sizes (20 and 10).
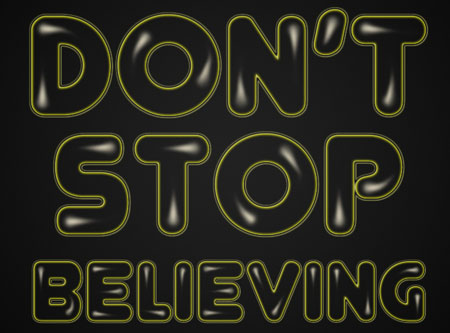
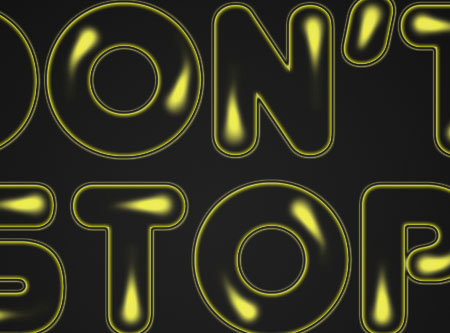
- This is what the text should look like:
Step 4:
Double click the “Light” layer to apply the following styles:
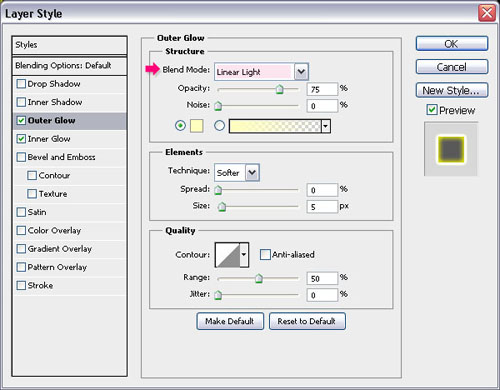
- Outer Glow: Change the Blend Mode to Linear Light.
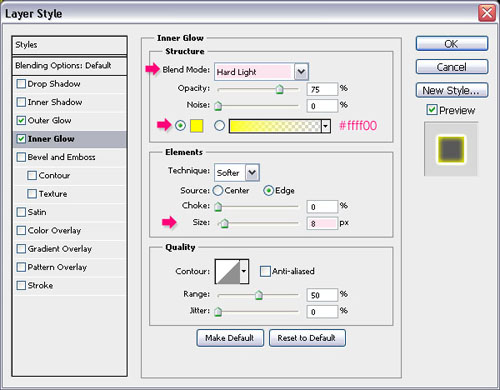
- Inner Glow: Change the Blend Mode to Hard Light, the color to #ffff00 and the Size to 8.
- This will add some glow to the smudged dots.
Step 5:
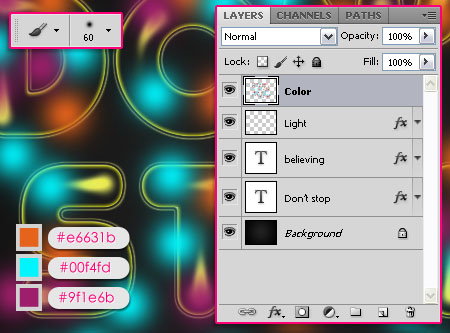
- It’s time to add some bright colors! So create a new layer on top of all layers and call it “Color”. Use a soft round brush, and set its size to something around 60px, to paint small colored circles all over the text. Don’t over do it, and leave some empty spaces.
The colors used are #e6631b, #00f4fd, and #9f1e6b. But you can choose the colors you like.
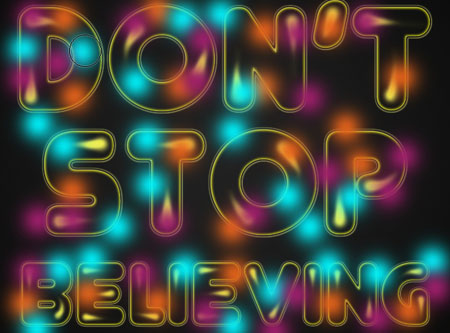
- You should get something like this.
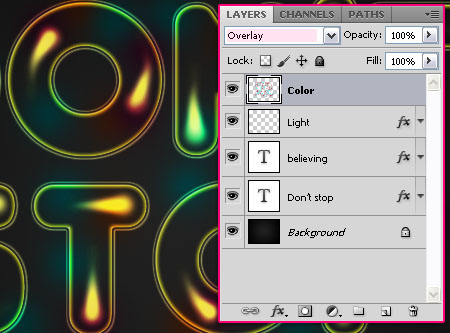
- Change the “Color” layer’s Blend Mode to Overlay.
Step 6:
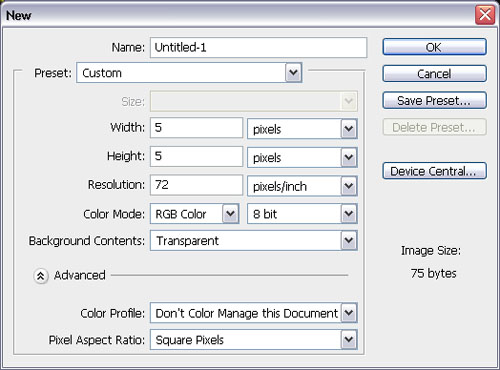
- Now, we are going to create the Diagonal Lines Pattern used in this tutorial. This is very simple. Create a new document that is 5 x 5 px, and set the Background Contents to Transparent.
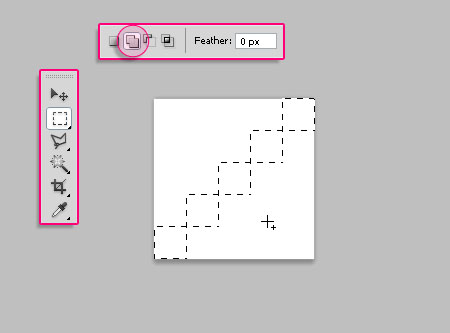
- Use the Rectangular Marquee Tool and click the Add to Selection icon to create 5 diagonal squares (1 px for each square – you can zoom in to see the pixels more clearly).
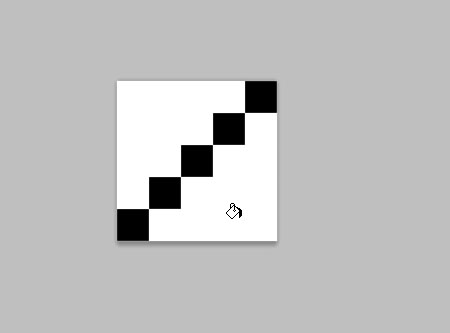
- Once you’re done, fill the selection with Black, and press Ctrl + D to get rid of the selection.
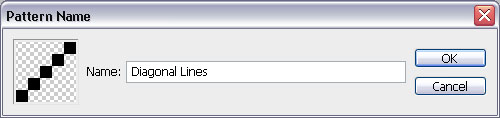
- Go to Edit -> Define Pattern, and type in Diagonal Lines. That’s it for the pattern!
Step 7:
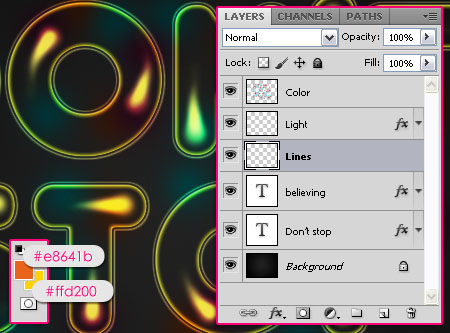
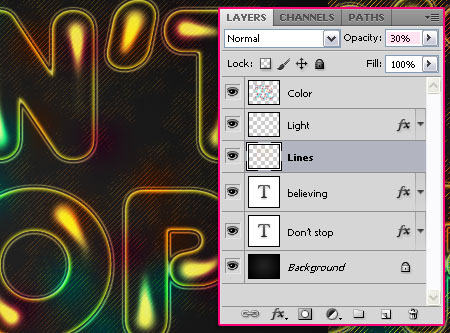
- Back to the original document, create a new layer on top of the text layer(s), and under the “Color” and “Light” layers, and call it “Lines”. Set the Foreground color to #e8641b, and the Background color to #ffd200.
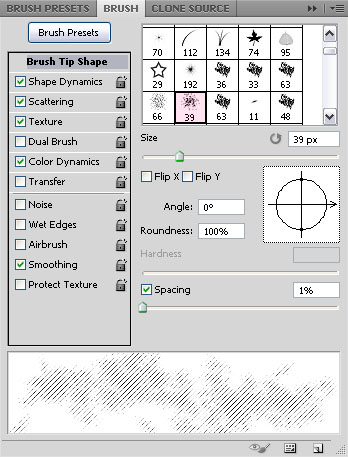
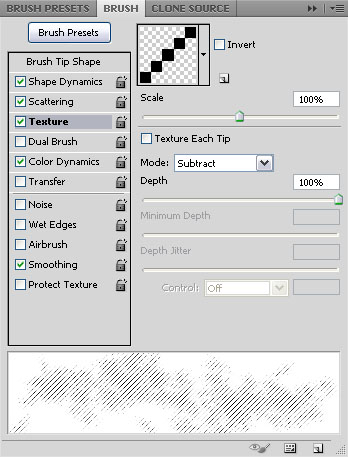
- Open the Brush panel (Window -> Brush), and choose the Dry Brush (size 39). Change the Settings as shown below:
- Brush Tip Shape:
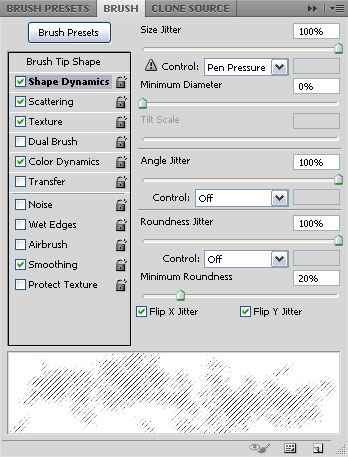
- Shape Dynamics:
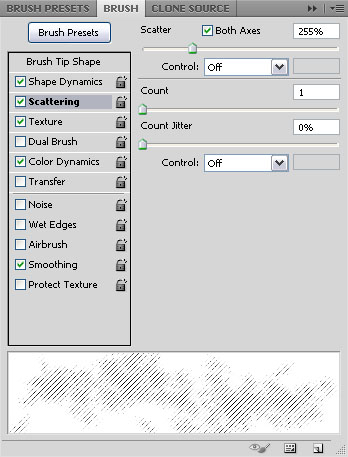
- Scattering:
- Texture: (Use the “Diagonal Lines” pattern you’ve just created).
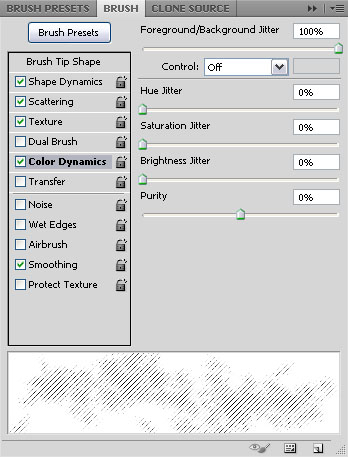
- Color Dynamics:
That’s it for the Brush.
Step 8:
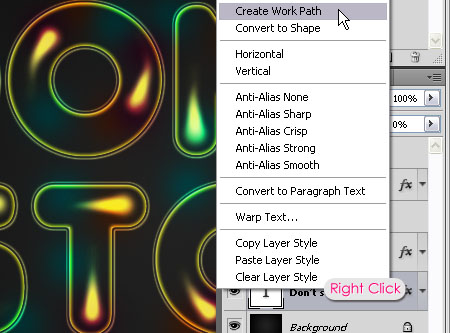
- Right Click on the text layer and choose Create Work Path.
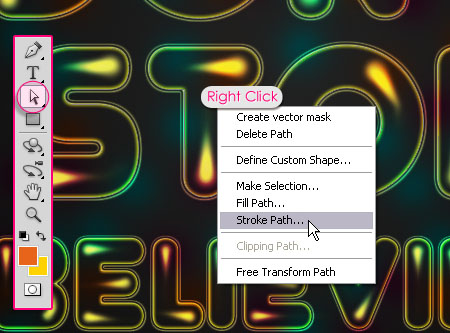
- Select the “Lines” layer so that it is the active layer, then, grab the Direct Selection Tool, Right Click on the path, and choose Stroke Path.
- Choose Brush from the Tool drop down menu, and check the Simulate Pressure box.
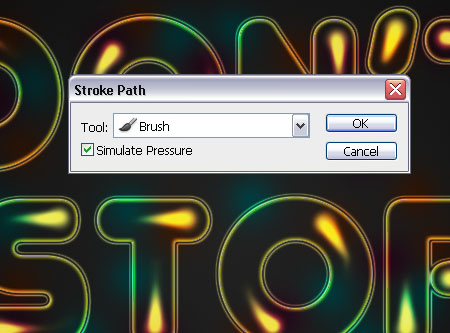
- This will stroke the path with the brush you’ve modified. Hit Enter to get rid of the path. (Repeat the same steps to stroke the other text layers you have).
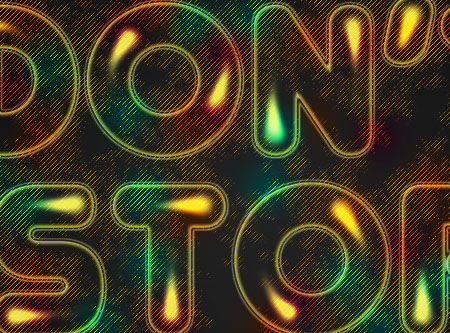
- Change the “Lines” layer’s Opacity value to 30%, or any other value you like, depending on how transparent you want the lines to be.
You can stop here if you like the effect this way, or you can follow the next step to add a glossy effect.
Step 9:
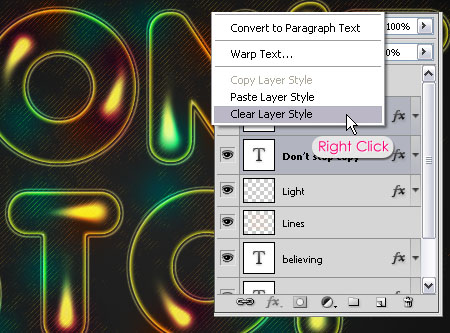
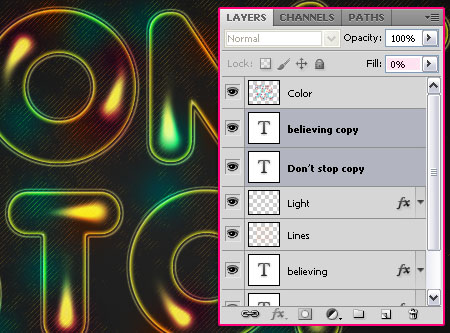
- Ctrl + Click to select all the text layers you have, and duplicate them placing the duplicated layers right under the “Color” layer and on top of the “Light” layer. Then, Right Click on one of them and choose Clear Layer Style.
- Set the duplicated text layers’ Fill value to 0.
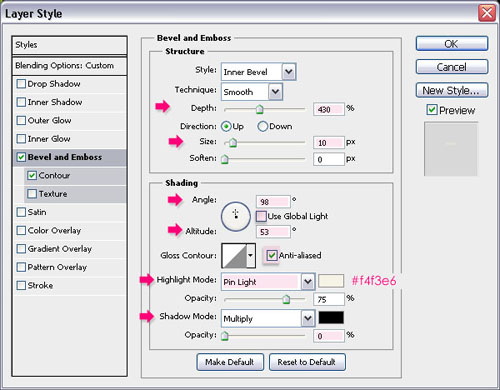
- Double click on the larger size text layer to apply a Bevel and Emboss layer style. Change the Depth to 430 and the Size to 10. Remove the check next to Use Global Light, and change the Angle to 98 and the Altitude to 53. Check the Anti-aliased box, change the Highlight Mode to Pin Light and its color to #f4f3e6, and set the Shadow Mode Opacity value to 0.
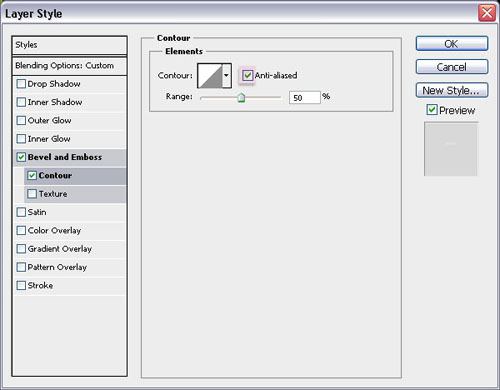
- As for the Contour, just check the Anti-aliased box.
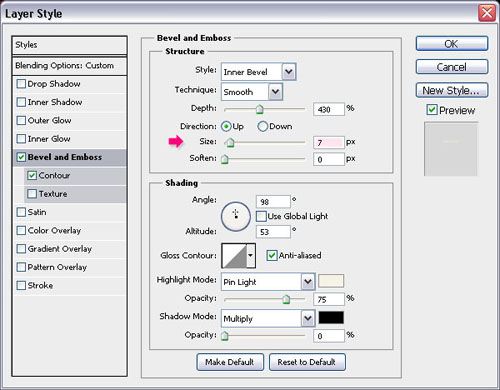
- Copy and Paste the same style to the other text layers, and just change the Bevel and Emboss Size value to 7 for the smaller text size.
- This will add a nice glossy effect to the text, and make it pop out even more.
And we’re done!
Hope you enjoyed this tutorial.
The Final Result:

* the software used in this tutorial is Adobe Photoshop CS5 Extended
* the size of the final result image is 1024 * 768
* you might want to check the Basix Page to see some useful topics on dealing with Photoshop basics, such as loading palettes and some shortcuts.
Step 1:
- Set the Foreground color to #212121 and the Background color to #000000 (Black). Create a Radial Gradient from the center of the document to one of the corners.
- Create the text using the color #f4edd2, and the font Junegull. In this effect, there will be two different sizes for the text. So if you want that as well, create the text on separate layers. The Larger size is 250px, and the Leading is 180 (to modify the vertical distance between the lines if necessary).
- The smaller size is 150. You can modify the sizes as you like, but these are the values used here.
Step 2:
Double click on the text layer to apply the following styles:
- Outer Glow: Change the Blend Mode to Hard Light, the Contour to Cone – Inverted and check the Anti-aliased box.
- Inner Glow: Just change the color to #ffff00.
- Change the Fill value to 0.
- If you have a smaller text size, you need to scale the effect in order to suit the new size. So Right Click on the original text layer, and choose Copy Layer Style.
- Right Click on the other text layer and choose Paste Layer Style. This will apply the same layer styles to the new text layer, with the same values.
- To scale the styles, Right Click on the Layer Effects icon, and choose Scale Effects.
- Change the Scale value so that the style suits the text size.
Step 3:
- Set the Foreground color to #e5dfc9. Create a new layer on top of all layers and call it “Light”.
- Using the Brush Tool, start drawing dots in the tips of the letters. Use a soft round brush, and set its size to 20 for the larger text size, and 10 for the smaller one.
- Once you’re done drawing the dots, select the Smudge Tool, and set the Strength value to 70%. Start smudging the dots in different directions. Use the same brush sizes (20 and 10).
- This is what the text should look like:
Step 4:
Double click the “Light” layer to apply the following styles:
- Outer Glow: Change the Blend Mode to Linear Light.
- Inner Glow: Change the Blend Mode to Hard Light, the color to #ffff00 and the Size to 8.
- This will add some glow to the smudged dots.
Step 5:
- It’s time to add some bright colors! So create a new layer on top of all layers and call it “Color”. Use a soft round brush, and set its size to something around 60px, to paint small colored circles all over the text. Don’t over do it, and leave some empty spaces.
The colors used are #e6631b, #00f4fd, and #9f1e6b. But you can choose the colors you like.
- You should get something like this.
- Change the “Color” layer’s Blend Mode to Overlay.
Step 6:
- Now, we are going to create the Diagonal Lines Pattern used in this tutorial. This is very simple. Create a new document that is 5 x 5 px, and set the Background Contents to Transparent.
- Use the Rectangular Marquee Tool and click the Add to Selection icon to create 5 diagonal squares (1 px for each square – you can zoom in to see the pixels more clearly).
- Once you’re done, fill the selection with Black, and press Ctrl + D to get rid of the selection.
- Go to Edit -> Define Pattern, and type in Diagonal Lines. That’s it for the pattern!
Step 7:
- Back to the original document, create a new layer on top of the text layer(s), and under the “Color” and “Light” layers, and call it “Lines”. Set the Foreground color to #e8641b, and the Background color to #ffd200.
- Open the Brush panel (Window -> Brush), and choose the Dry Brush (size 39). Change the Settings as shown below:
- Brush Tip Shape:
- Shape Dynamics:
- Scattering:
- Texture: (Use the “Diagonal Lines” pattern you’ve just created).
- Color Dynamics:
That’s it for the Brush.
Step 8:
- Right Click on the text layer and choose Create Work Path.
- Select the “Lines” layer so that it is the active layer, then, grab the Direct Selection Tool, Right Click on the path, and choose Stroke Path.
- Choose Brush from the Tool drop down menu, and check the Simulate Pressure box.
- This will stroke the path with the brush you’ve modified. Hit Enter to get rid of the path. (Repeat the same steps to stroke the other text layers you have).
- Change the “Lines” layer’s Opacity value to 30%, or any other value you like, depending on how transparent you want the lines to be.
You can stop here if you like the effect this way, or you can follow the next step to add a glossy effect.
Step 9:
- Ctrl + Click to select all the text layers you have, and duplicate them placing the duplicated layers right under the “Color” layer and on top of the “Light” layer. Then, Right Click on one of them and choose Clear Layer Style.
- Set the duplicated text layers’ Fill value to 0.
- Double click on the larger size text layer to apply a Bevel and Emboss layer style. Change the Depth to 430 and the Size to 10. Remove the check next to Use Global Light, and change the Angle to 98 and the Altitude to 53. Check the Anti-aliased box, change the Highlight Mode to Pin Light and its color to #f4f3e6, and set the Shadow Mode Opacity value to 0.
- As for the Contour, just check the Anti-aliased box.
- Copy and Paste the same style to the other text layers, and just change the Bevel and Emboss Size value to 7 for the smaller text size.
- This will add a nice glossy effect to the text, and make it pop out even more.
And we’re done!
Hope you enjoyed this tutorial.
This text effect looks great! If you don't have Photoshop or Illustrator you can make online text design with this free tool.
ReplyDelete