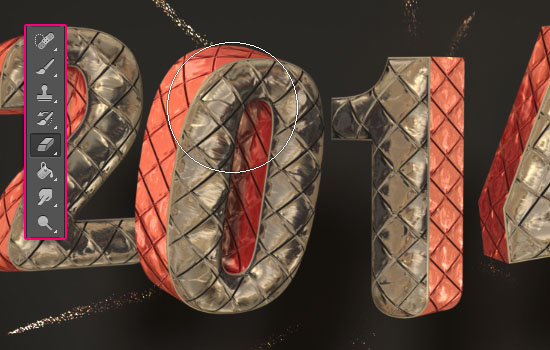
2014 Latest Text Effects

 
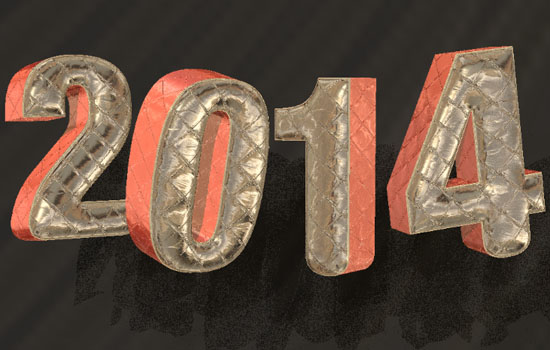
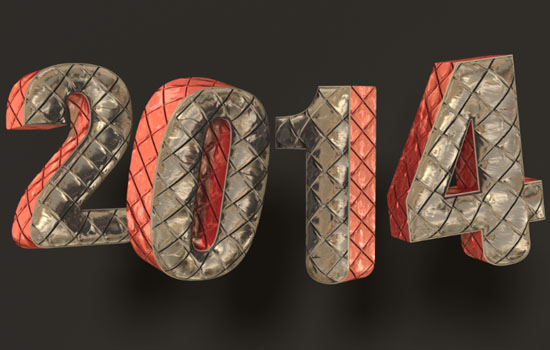
The many different 3D options, settings, and capabilities in Photoshop CS6 make creating dazzling 3D text effects an easy and fun job! This tutorial will show you how to play around with the material settings to create a puffy shiny foil-textured 3D text effect.

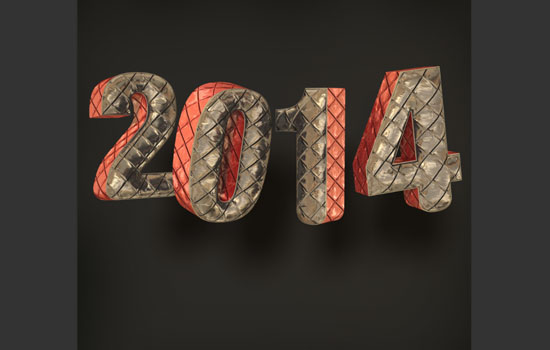
The Final Result:
 
Happy New Year! To all textuts‘ readers, followers, subscribers, and fans. Thank you for making 2013 an amazing year with all your support :)
Wishing you a very special, prosperous, and wonderful 2014.
Rose
.
Step 1
Create a new 1000 x 1000 document and fill the Background with the color #1c1c1c.
Then, create the text using the font Don’t Panic and the font Size 392.5 pt.
Inflated Foil Text Effect step 1
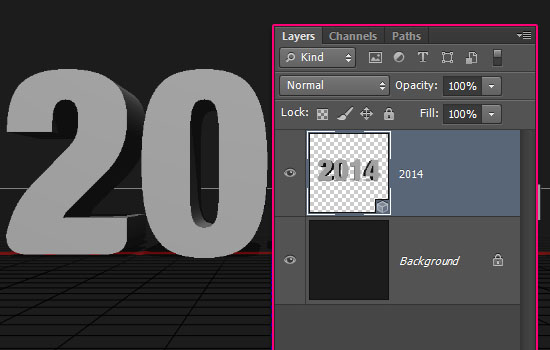
Go to 3D > New 3D Extrusion from Selected Layer to convert the text layer into a 3D layer.
Inflated Foil Text Effect step 1
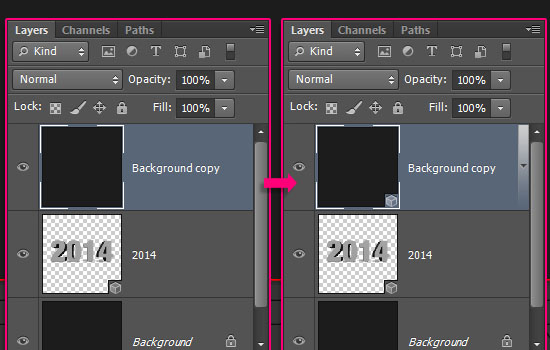
Duplicate the Background layer and drag the copy to the top. Then, go to 3D > New Mesh from Layer > Postcard. This will covert the duplicated layer into a 3D plane layer.
Inflated Foil Text Effect step 1
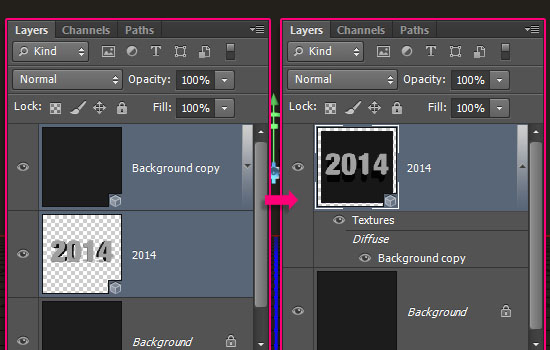
Select both 3D layers, then go to 3D > Merge 3D Layers.
Inflated Foil Text Effect step 1
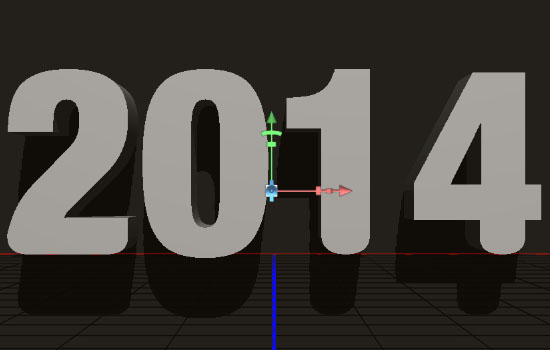
This will place both 3D meshes in the same scene.
Inflated Foil Text Effect step 1
Step 2
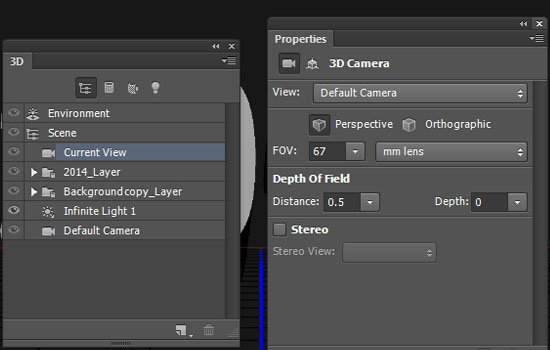
To access the 3D mesh settings and properties, you’ll need to open two panels: The 3D panel, and the Properties panel (both found under the Window menu).
The 3D panel has all the components of the 3D scene, and when you click the name of any of those, you’ll be able to access its settings in the Properties panel. So make sure to always select the name of the element you want to modify in the 3D panel before you change its settings in the Properties panel.
Inflated Foil Text Effect step 2
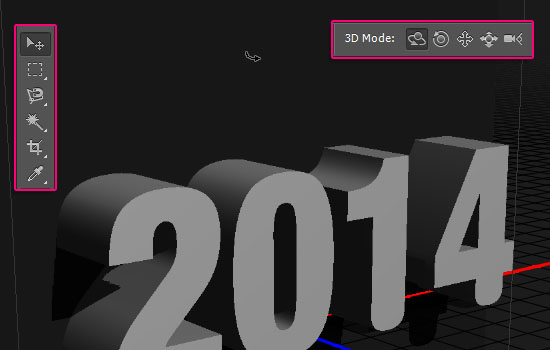
Select the Move Tool and check its Options bar. You’ll find a set of 3D Modes for the tool to the right of the bar. When you choose one of those, you can then click and drag to perform any changes (on the selected element in the 3D panel).
Inflated Foil Text Effect step 2
Step 3
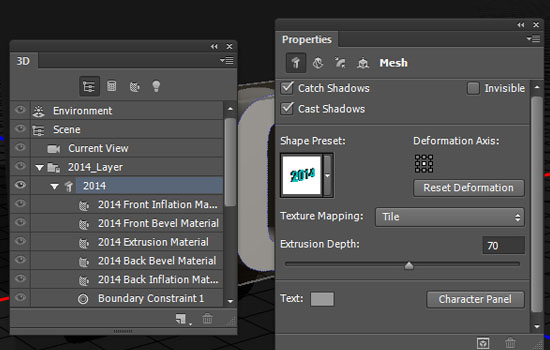
Click the text 3D mesh name in the 3D panel, then, in the Properties panel, change the Texture Mapping to Tile, and the Extrusion Depth to 70.
Inflated Foil Text Effect step 3
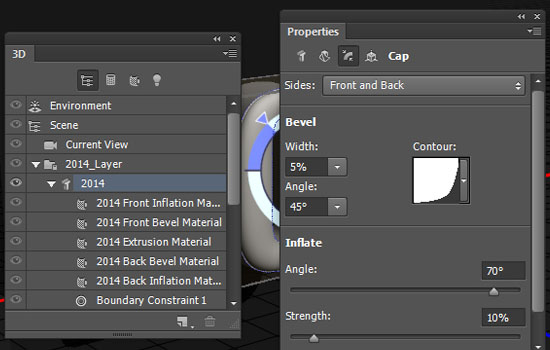
Click the Cap icon at the top of the Properties panel, then change the Sides to Front and Back, the Bevel Width to 5, the Contour to Log, the Inflate Angle to 70, and the Strength to 10.
Inflated Foil Text Effect step 3
Step 4
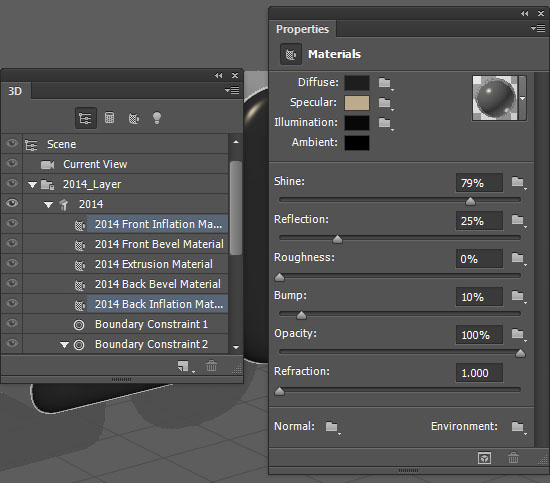
Select the 3D text mesh Front Inflation and Back Inflation Material tabs in the 3D panel (Ctrl/Cmd + click each), then change the values in the Properties panel as below:
Diffuse : #1e1e1e
Specular : #bbab8c
Illumination : #080808
Ambient : #000000
Shine : 79%
Reflection : 25%
Inflated Foil Text Effect step 4
Select the Front Inflation Material tab, click the Bump folder icon, and choose Load Texture. Then, open the “Bump Texture” image.
Inflated Foil Text Effect step 4
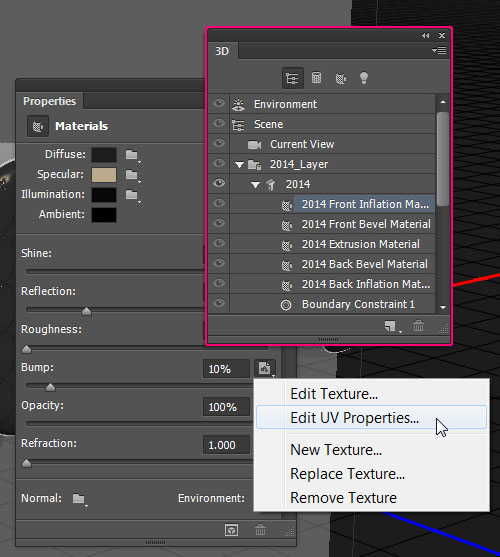
Click the Bump texture icon and choose Edit UV Properties.
Inflated Foil Text Effect step 4
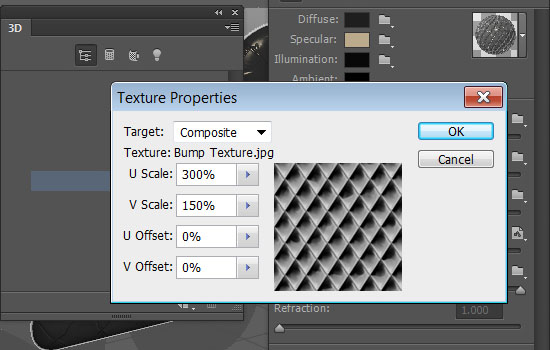
Change the U Scale to 300%, the V Scale to 150%, and the U Offset and V Offset to 0. You can use different values depending on how small or big you want the texture to be.
Inflated Foil Text Effect step 4
Step 5
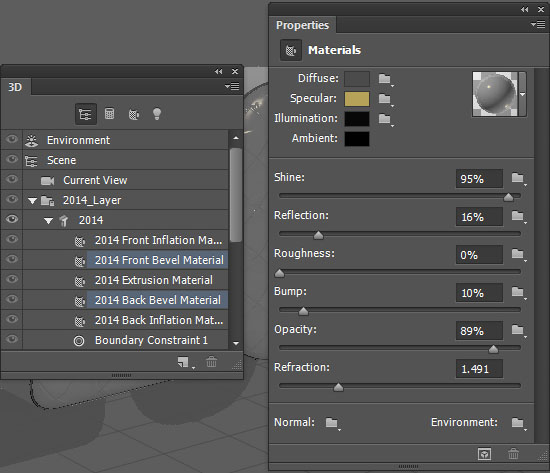
Select the Front Bevel and Back Bevel Material tabs, and change their values as below:
Diffuse : #4b4b4b
Specular : #b6a359
Illumination : #080808
Ambient : #000000
Shine : 95%
Reflection : 16%
Opacity : 89%
Refraction : 1.5
Inflated Foil Text Effect step 5
Select the Extrusion Material tab, and change its Settings as below:
Diffuse : #721010
Specular : #bbab8c
Illumination : #080808
Ambient : #000000
Shine : 79%
Reflection : 25%
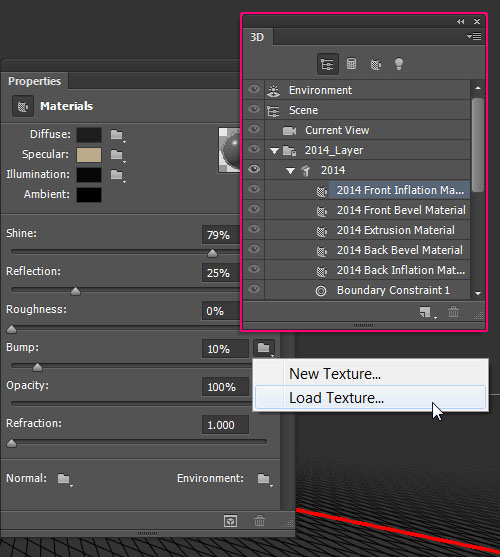
Bump : 5
Then, click the Bump folder icon, choose Load Texture, and open the “Bump Texture” image once again.
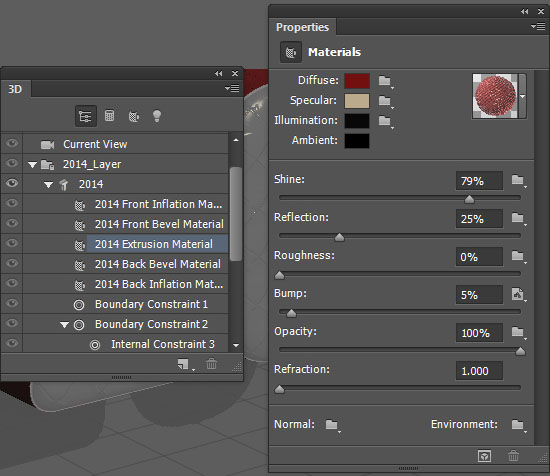
Inflated Foil Text Effect step 5
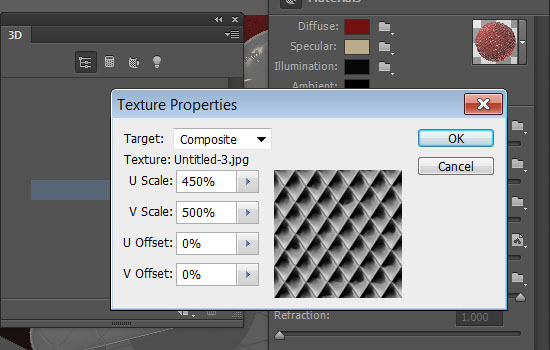
Click the Bump texture icon and choose Edit UV Properties. Change the U Scale to 450%, the V Scale to 500%, and the U Offset and V Offset to 0.
If these values don’t match the extrusion bump with the front and back one, then you can try different ones until you like the outcome.
Inflated Foil Text Effect step 5
Step 6
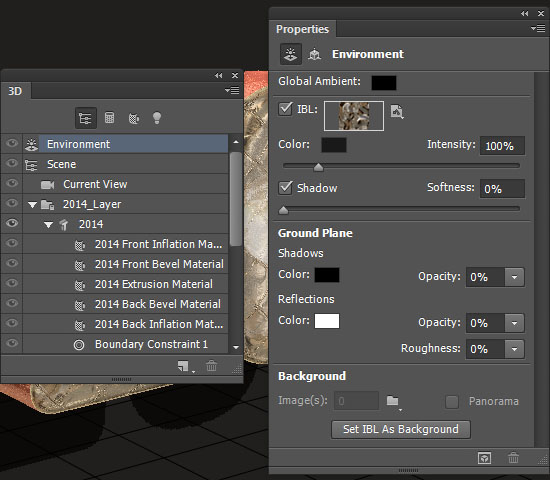
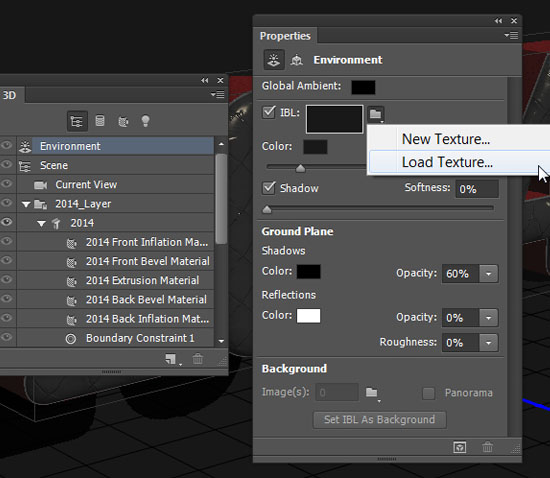
Click the Environment tab in the 3D panel, then click the IBL folder icon in the Properties panel and choose Load Texture to open the “Environment IBL” image.
Inflated Foil Text Effect step 6
Make sure that the Intensity is set to 100%, and under Ground Plane, set the Shadows and Reflections Opacity values to 0.
Inflated Foil Text Effect step 6
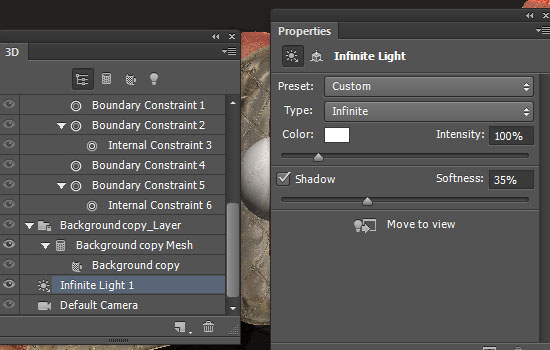
Select the Infinite Light 1 tab, and change its Intensity to 100% and its Shadow Softness to 35%.
Inflated Foil Text Effect step 6
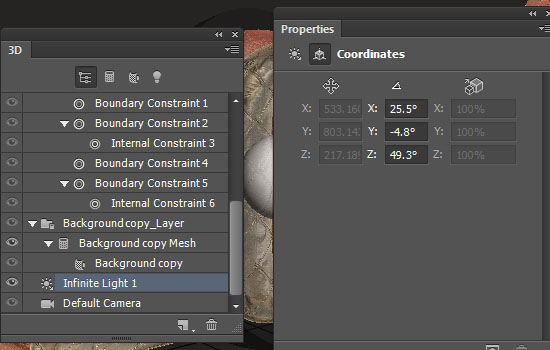
Click the Coordinates icon at the top of the Properties panel, and use the values below.
Inflated Foil Text Effect step 6
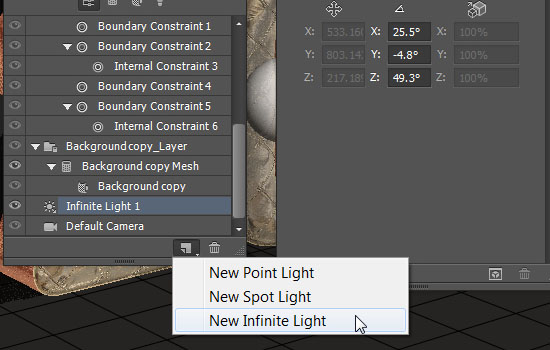
Click the Add new Light to Scene icon down the 3D panel and choose New Infinite Light.
Inflated Foil Text Effect step 6
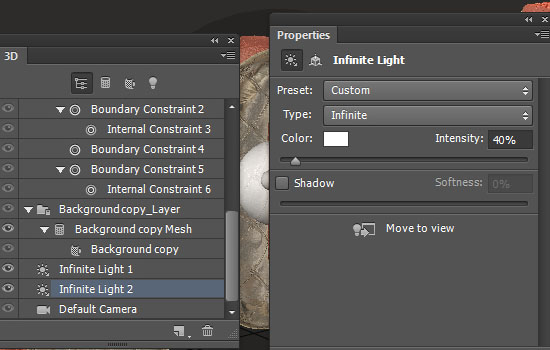
Change the Intensity to 40% and uncheck the Shadow box.
Inflated Foil Text Effect step 6
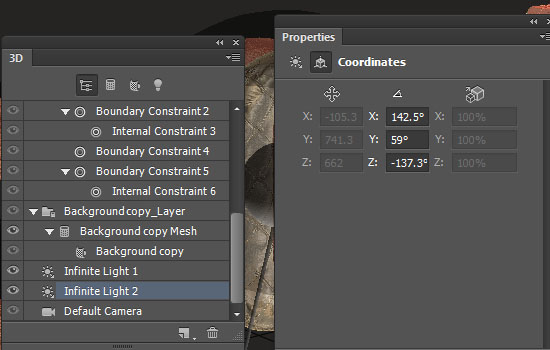
Modify the Coordinates values as below:
Inflated Foil Text Effect step 6
You can also use the Move Tool to move the light around if you want to change the lighting of the scene.
Step 7
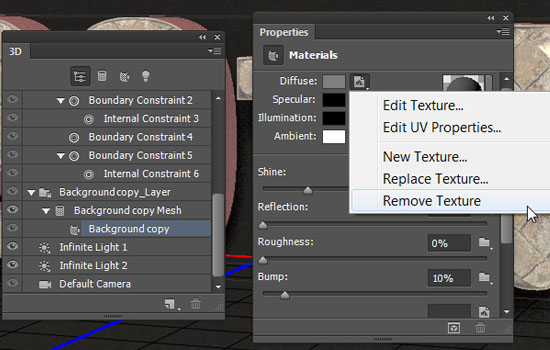
Click the plane mesh material tab, then click the Diffuse texture icon and choose Remove Texture. Remove the Opacity texture as well.
Inflated Foil Text Effect step 7
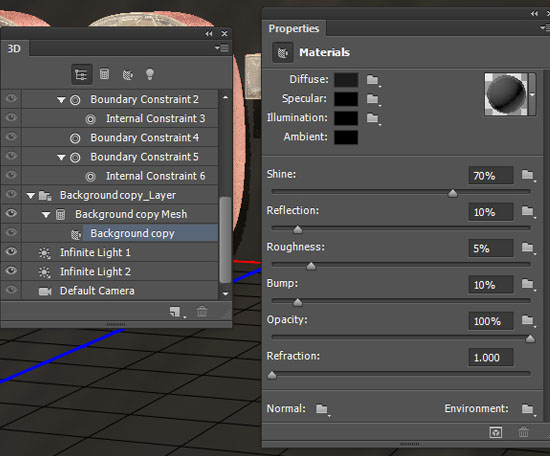
Change the rest of the values as follows:
Diffuse : #1c1c1c
Specular : #000000
Illumination : #000000
Ambient : #000000
Shine : 70%
Reflection : 10%
Roughness : 5
Inflated Foil Text Effect step 7
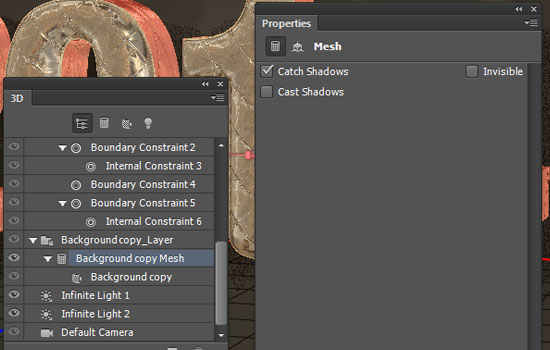
Click the plane’s mesh name, and uncheck the Cast Shadows box.
Inflated Foil Text Effect step 7
Step 8
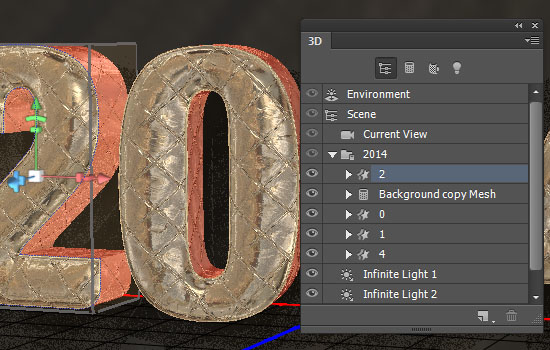
Select the 3D text mesh name, then go to 3D > Split Extrusion. This will split the text into separate letter meshes, which will allow you to move each one on its own.
You might need to adjust the Extrusion Bump UV Properties for some letters. Here, the U Scale and V Scale values of the “1″ mesh are changed to 300% and 450%.
After that, start moving and rotating the meshes you have, and change the camera view as needed, until you like the result.
You can use the 3D Axis to do that (with the Move Tool selected). The arrows at the ends of the 3D Axis move the mesh, the part below them is used for rotation, and the cubes are used for scaling. The cube in the center is used to scale the object uniformly. All you need to do is click and drag the part you need to perform the changes.
Inflated Foil Text Effect step 8
When you’re done, render the scene (3D > Render).
Inflated Foil Text Effect step 8
The rendering might take some time, but you can stop it anytime by pressing the Esc key.
Inflated Foil Text Effect step 8
Step 9
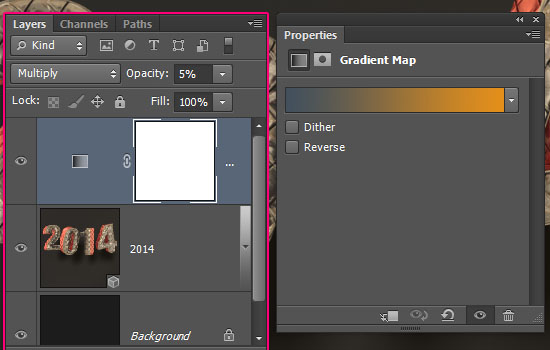
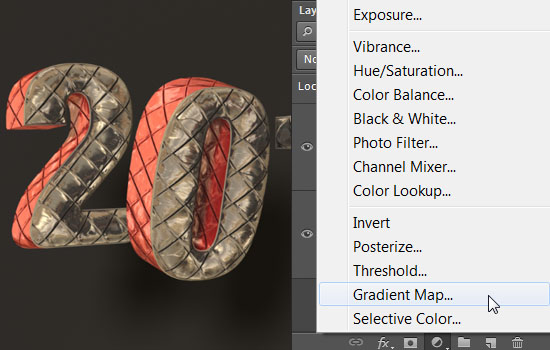
When the rendering is finished, click the ‘Create new fill or adjustment layer’ icon down the Layers panel and choose Gradient Map.
Inflated Foil Text Effect step 9
Change the Gradient Map layer’s Blend Mode to Multiply and it Opacity to 5%. Click the Gradient box to create the gradient using the colors #42505d to the left and #e38f1b to the right.
Inflated Foil Text Effect step 9
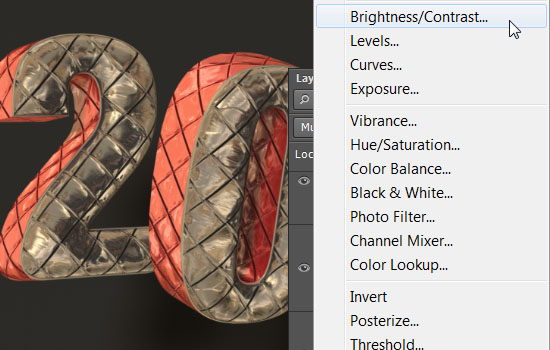
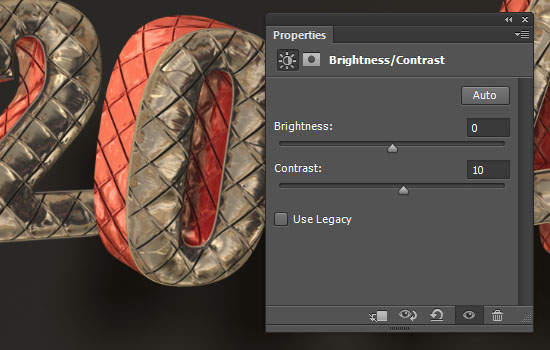
Click the ‘Create new fill or adjustment layer’ icon once again, and choose Brightness/Contrast.
Inflated Foil Text Effect step 9
Change the Contrast value to 10%.
Inflated Foil Text Effect step 9
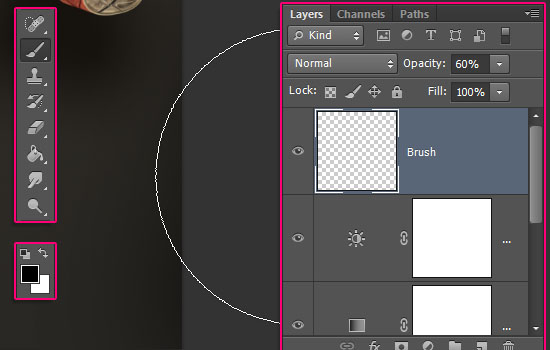
Set the Foreground color to Black, pick a big round soft brush, create a new layer on top of all layers, change its Opacity to 60%, then start clicking at the edges of the document to add a subtle vignette effect.
Inflated Foil Text Effect step 9
You can change the opacity value as you like.
Inflated Foil Text Effect step 9
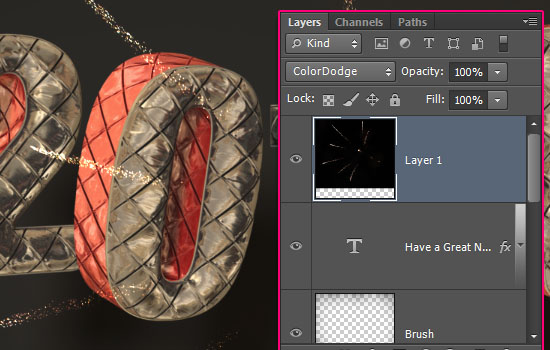
Place the “Fireworks Stock 18″ image on top of all layers, then change its layer’s Blend Mode to Color Dodge.
Inflated Foil Text Effect step 9
Pick the Eraser Tool, choose a hard round brush tip, then erase the parts of the image on top of the text, to make the fireworks look like they are actually behind the text.
Inflated Foil Text Effect step 9
And you’re done! Hope you enjoyed the tutorial and found it helpful.
Have a very Happy New Year :D

Comments

Popular posts from this blog

Use x-ray techniques in Photoshop to show naked skin through clothing

    Do those new naked body scanners have you freaked out at the airports? As far as the TSA is concerned, those x-ray machines are here to stay, but you might as well take comfort in knowing that airport security guards aren't the only ones looking at your private parts. Practically anyone with a computer can manage to see through your clothes, and it's all thanks to a little program called Photoshop. Thanks, Adobe. With a few tweaks using the tools in Photoshop, you can see those boobs in no time, male or female. The video is in German, but it's not hard to figure our what's going on, especially if you're familiar with Photoshop. First, create a few duplicate layers, then get a handle on some of these tools to make the naked body through the clothes: * Auswahl erstellen (Create Selection) * Tonwertspreizung (Input Levels) * Belichtung (Exposure) You can also do this see-through clothing effect in free design programs, such as  GIMP .

40 latest creative photoshop text effects

Create a Glowing Liquid Text with Water Splash Effect in Photoshop In this tutorial, we will show you the steps we took to create a Glowing Liquid Text Effect in Photoshop. We will be practising the use of liquify filter, layer blending options, as well as some image adjustments. Create a Realistic Wooden 3D Text Image In this tutorial we are going to take a few 2D textures as well as a few Photoshop techniques to create a realistic 3D text image. Easy X-Ray Typography In Photoshop In this tutorial we will show you how to create a simple x-ray effect of a letter, in this case the Abduzeedo logo A. The whole process is quite simple but it will require a couple of hours to pull it off. Easy Furry Text In Photoshop In this tutorial we will show you how to create a really cool and super simple furry text in Photoshop CS6. We will use basic filters and tools but it’s nice to say that we took advantage of the a new feature in Photoshop CS6 that is to apply layer...

Royal 3D Text Effect in Photoshop CS6

  Just make sure to check the 3D settings under Edit -> Preferences -> Performance, and Edit -> Preferences -> 3D. Default values should work fine, but if anything seems to be not working properly you can always check those settings. Step 1 - Create a new 1600 x 1200 px document and Fill the Background with black. Create the text in white using the font Dunkin Sans. The font size is 400 pt and the text is better written in All Caps (if you’re not using only numbers). Step 2 - With the text layer selected, go to 3D -> New Extrusion from Selected Layer. This will instantly convert the text layer into a 3D layer. All the 3D scene elements can be found in the 3D panel (Window -> 3D). Click the main mesh name to edit its settings. - The 3D Mesh settings and attributes can be accessed and modified through the Properties panel (Window -> Properties). If you scroll down the Properties panel you’ll find the Character Panel button, which ...