In this video and post I’ll cover 28 great features, tricks, hacks,
and more of Adobe Photoshop CC 2015. Some are simple, some are
difficult, some are well known, and some are more like Easter eggs.
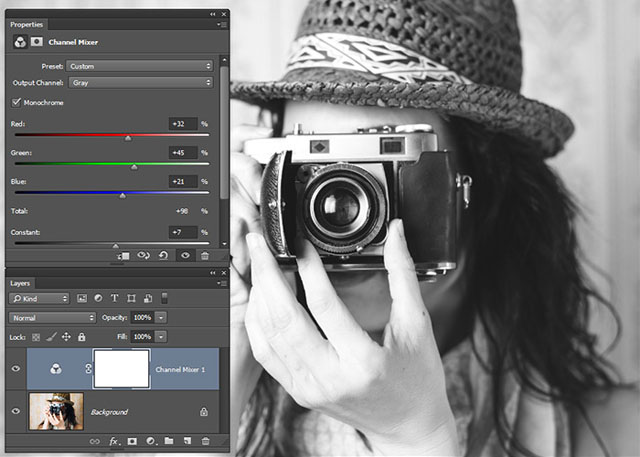
If you want to learn about multiple layer styles, layer mask tricks, whitening teeth, black and white photos, precision with the Brush tool, and a bunch more, this is the tutorial for you!
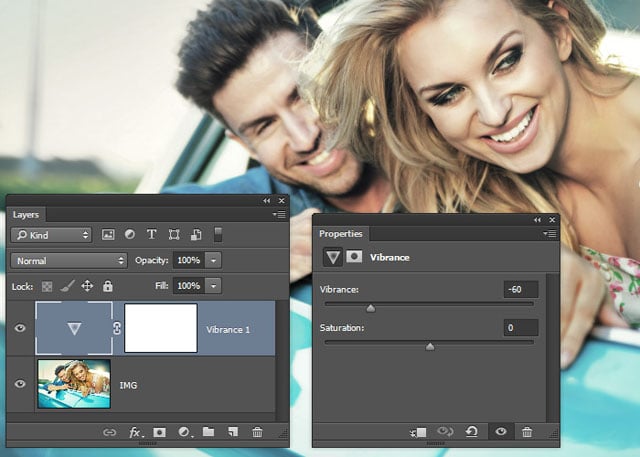 Next select the Vibrance layer in the layers panel and specifically
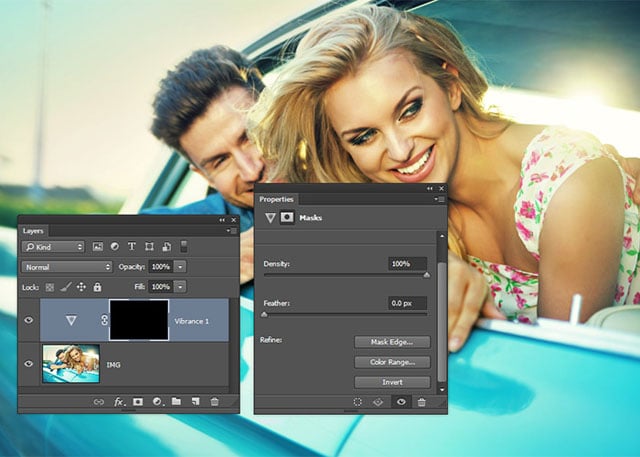
choose the layer mask. In the Properties Panel (Window->Properties)
select the “Invert” button to fill our mask with black to hide the
desaturation that we just imposed on the Vibrance layer.
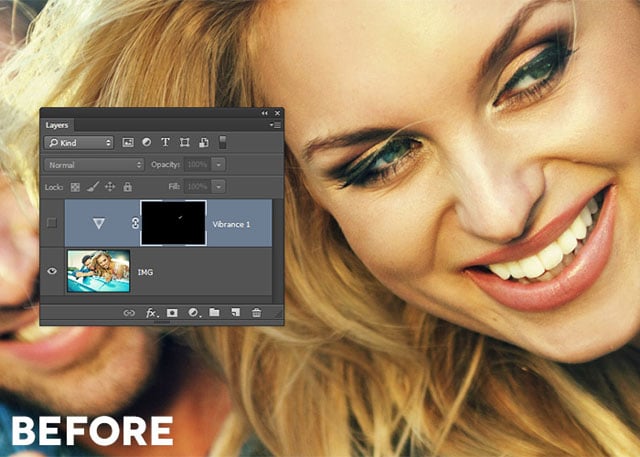
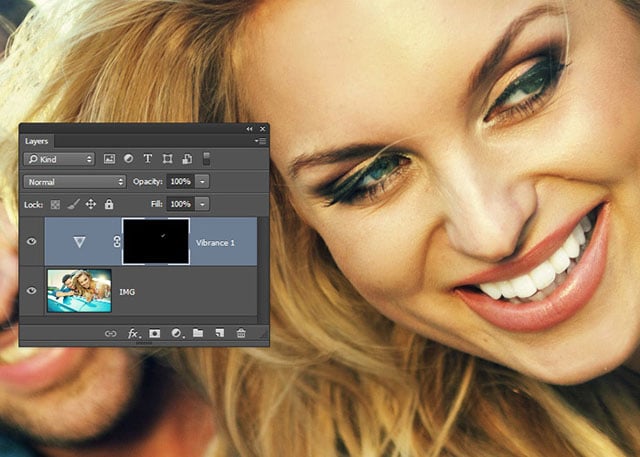
 Next select the Brush tool (B) and I’ll grab a small, soft edged
brush and look to the control bar across the top of the screen and set
the Opacity to “50%”. Paint over the teeth you’d like to whiten for a
realistic and beautiful smile!
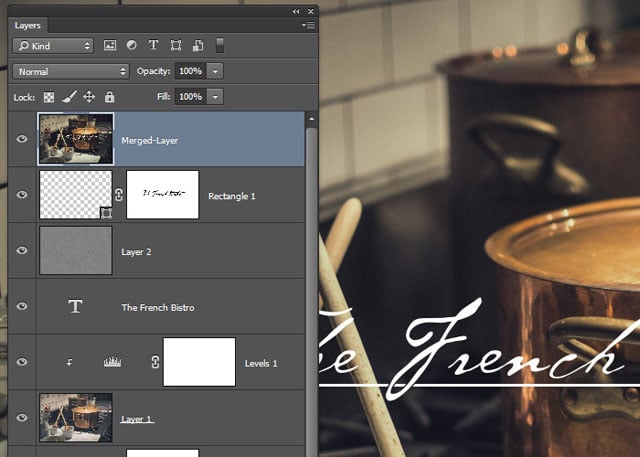
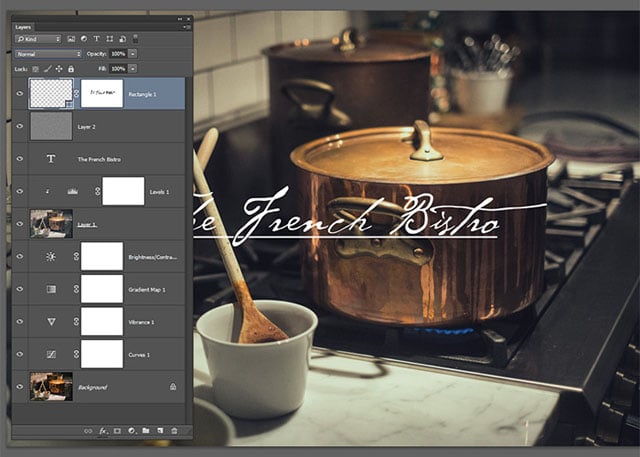 This will combine everything and pop it onto a new layer in one fell swoop.
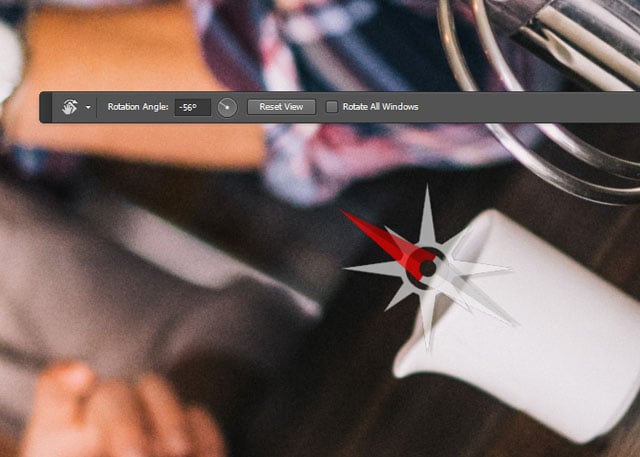
 Look to the toolbar and hit the “Reset View” button to instantly level off the image and bring things back to normal.
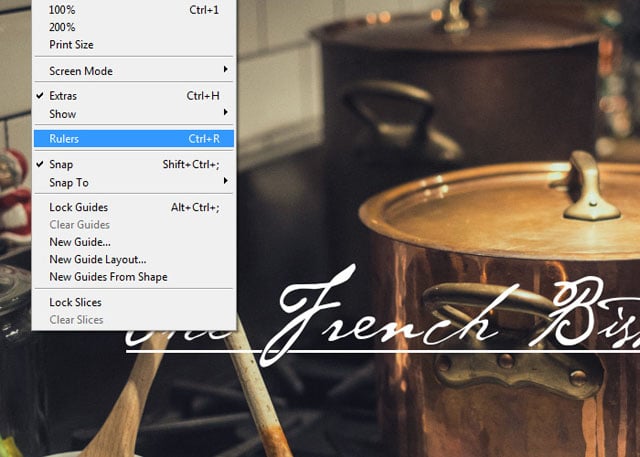
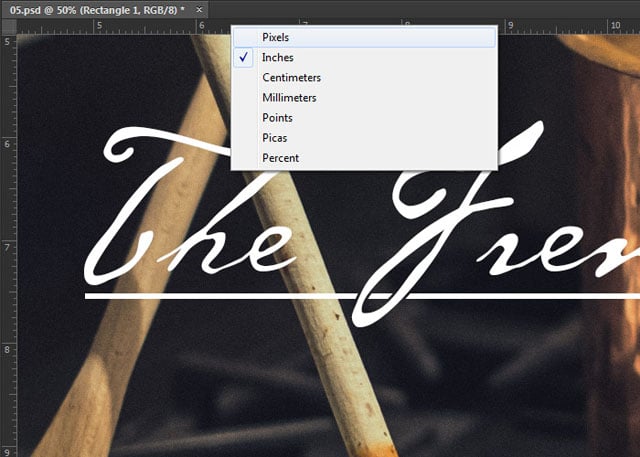
Turn the rulers on by going Window->Rulers and then simply right click the ruler anywhere and choose the unit of measure you prefer.
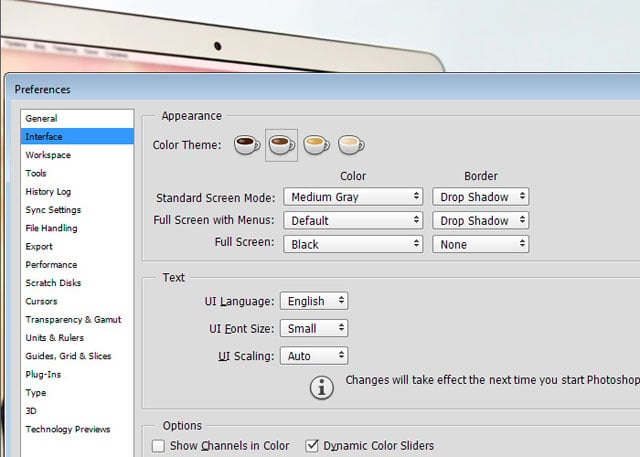
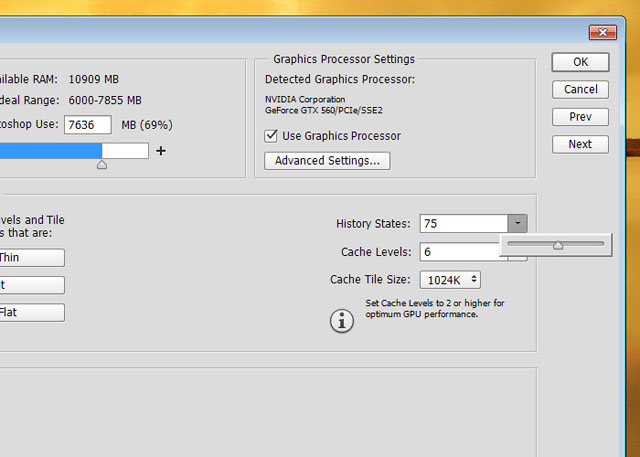 Choose “Performance” from the vertical menu on the left and drag the
“History States” slider to whatever number you like. NOTE: More history
states can slow down Photoshop. Use this feature wisely.
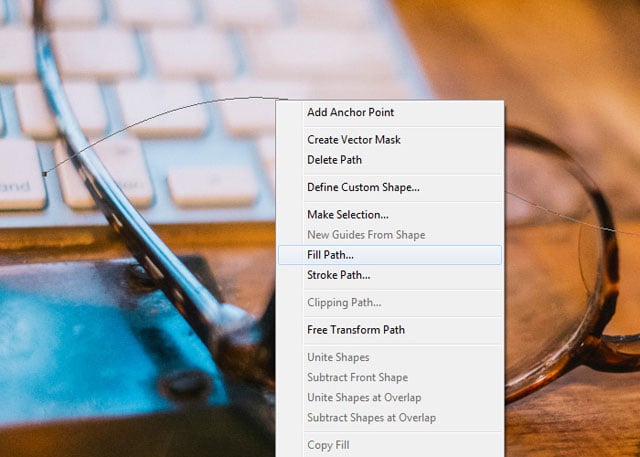 Set your “Contents” to “Pattern” and choose a pattern and then check on “Script:” and choose “Place Along Path” and hit “OK”.
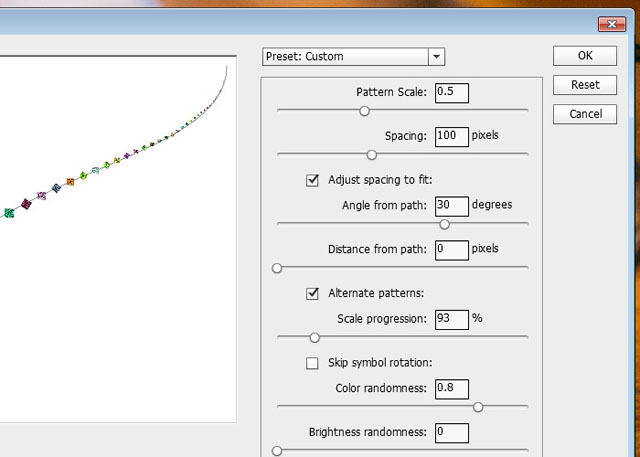
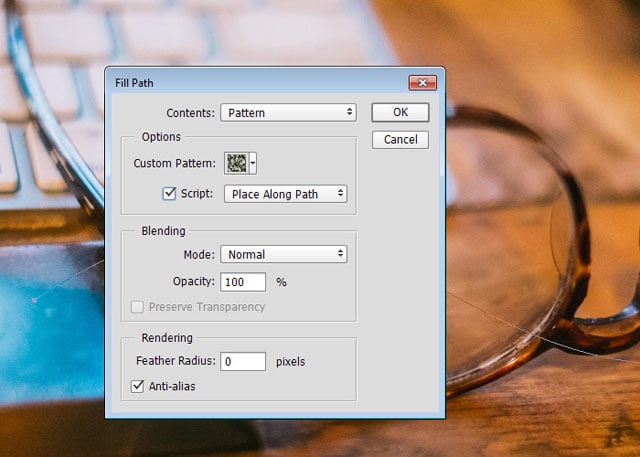 Next, the Place Along Path dialog box will pop up. Play around with
the settings (the choice of pattern is most important to getting an
amazing or usable result) and then hit “OK” when you like what you see.
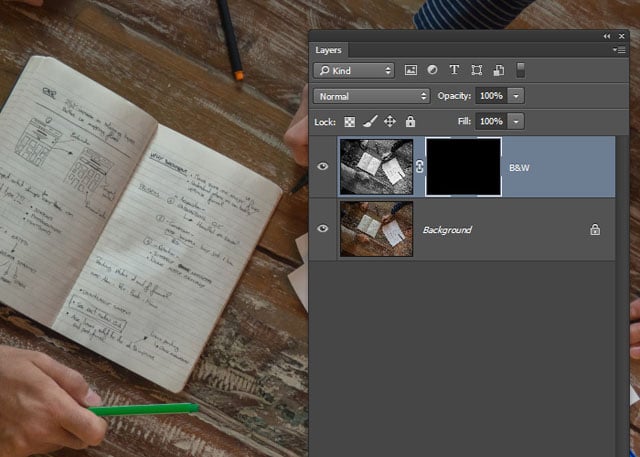 If we want the mask to be filled with black (and therefore hide the
layer it’s applied to) the trick is to simply hold the Alt/Opt key while
pressing the new layer mask button.
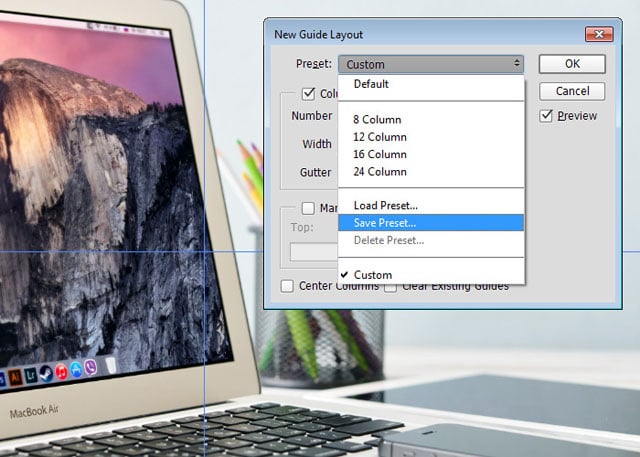
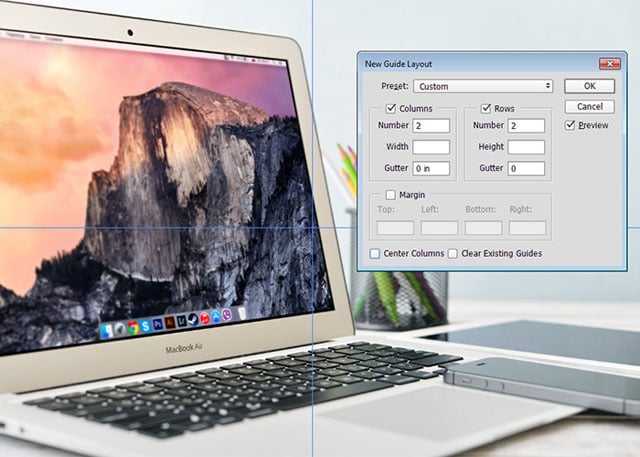 Lastly choose the “Preset” drop down menu and select “Save Preset”.
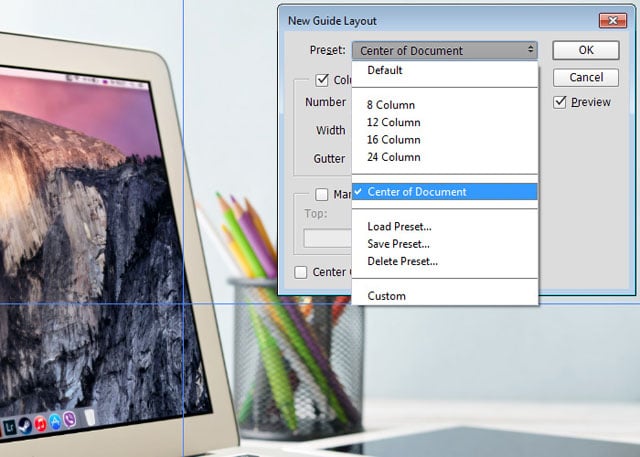
I’m going to name this preset “Center of Document”. Save the preset and
check out the drop down menu to see your sparkling new preset. You’re
now ready to use this in any document that you wish.
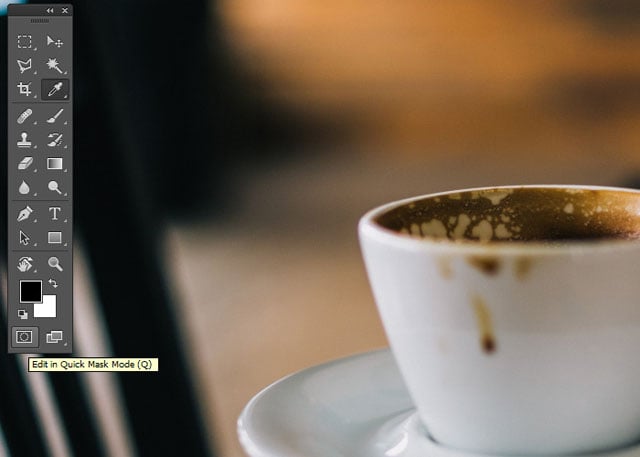
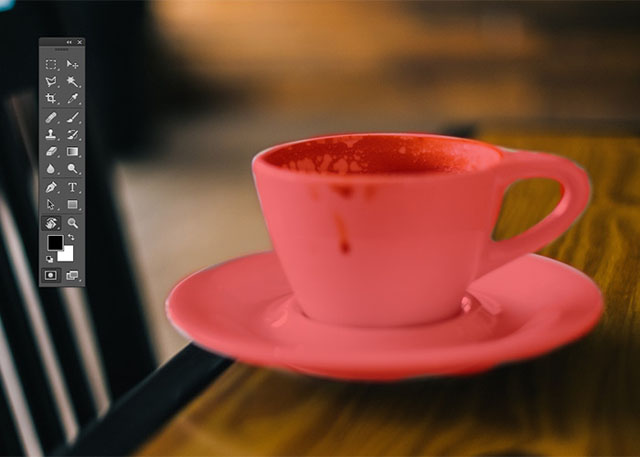
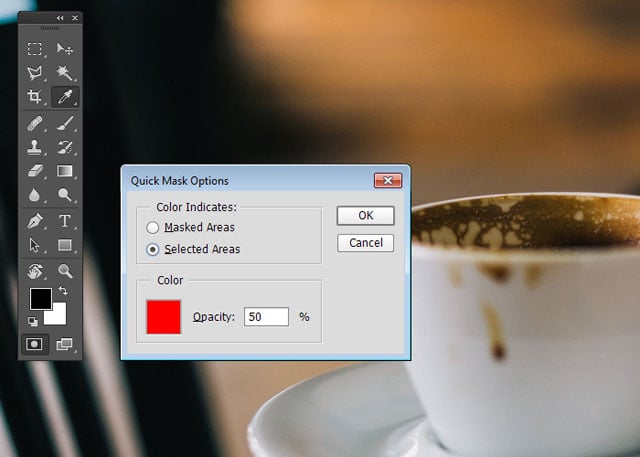 Choose “Selected Areas” in the “Color Indicates” section of the
dialog box. Hit “OK” and grab the brush tool and set your painting
foreground color to black. Paint over whatever you want to selection and
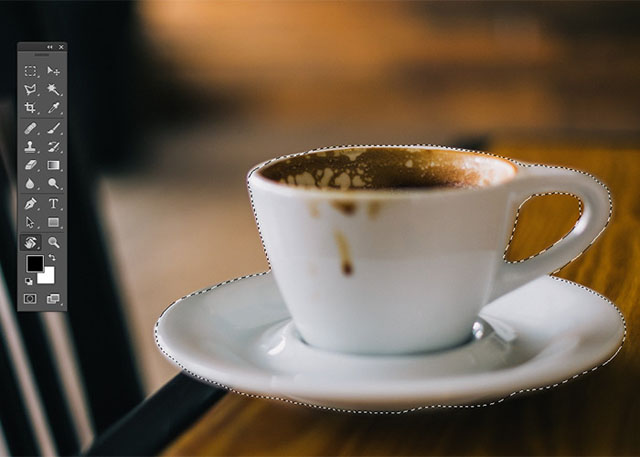
watch the pink/red color get painted onto your image. Hit the letter
“Q” to exit Quick Mask mode to convert your red paint to a selection.
Boom!
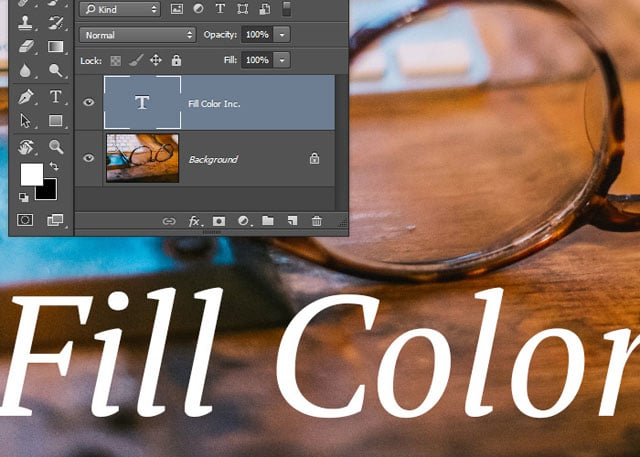
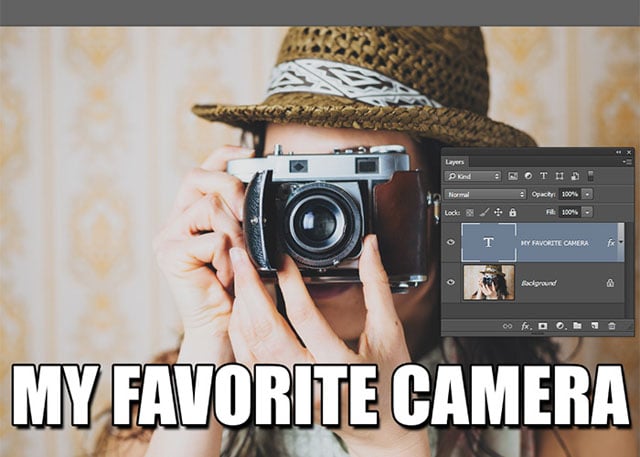
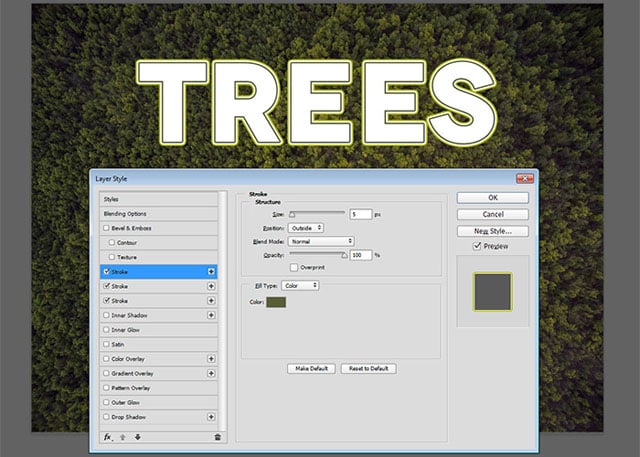
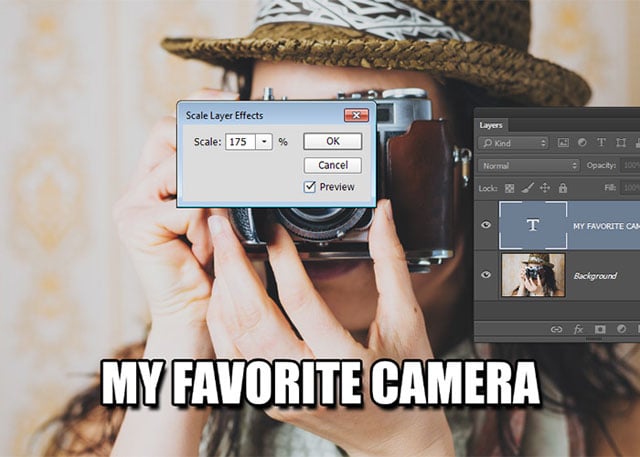 Next I’ll just free transform my text (Cmd/Ctrl + T) and set the
width and height to “175%” in the control bar across the top of my
screen and position my text where I want. Our styles will look just
perfect.
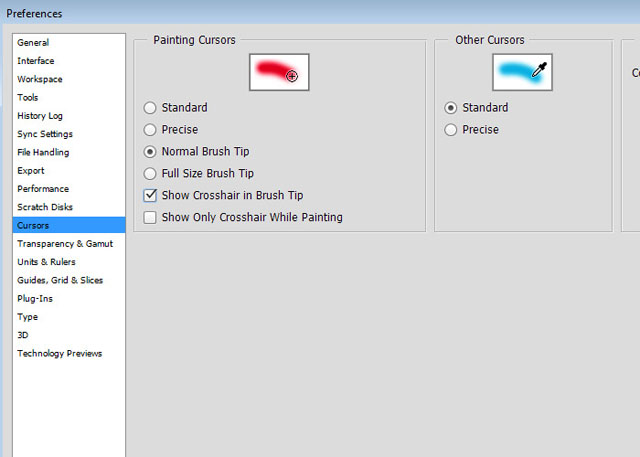 Select “Cursors” from the vertical menu on the left. Then choose “Normal Brush Tip” and check on “Show Crosshair in Brush Tip”.

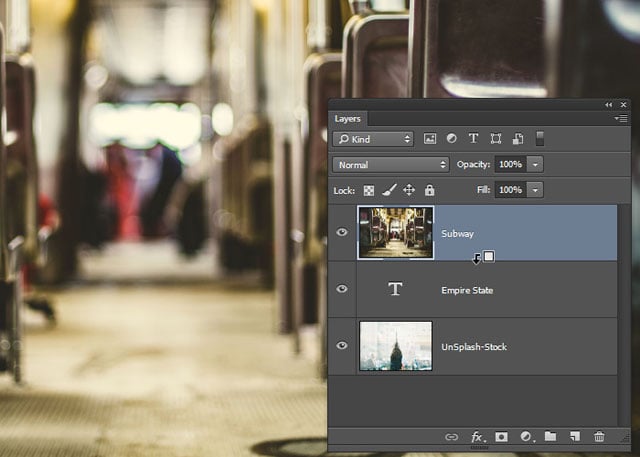
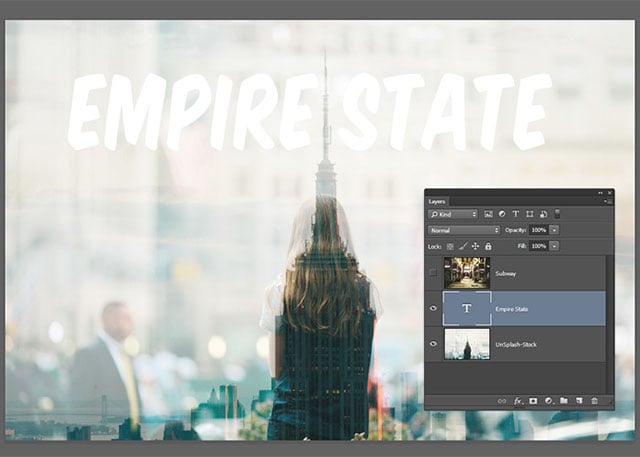 I’ll turn on the subway photo layer and then hold my Alt/Opt key as I
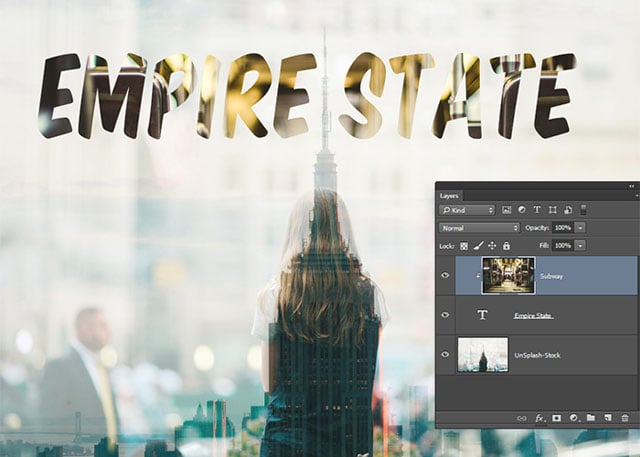
hover between the two layers. Notice the little icon that appears.
Click that to clip the photo to the shape of the type.

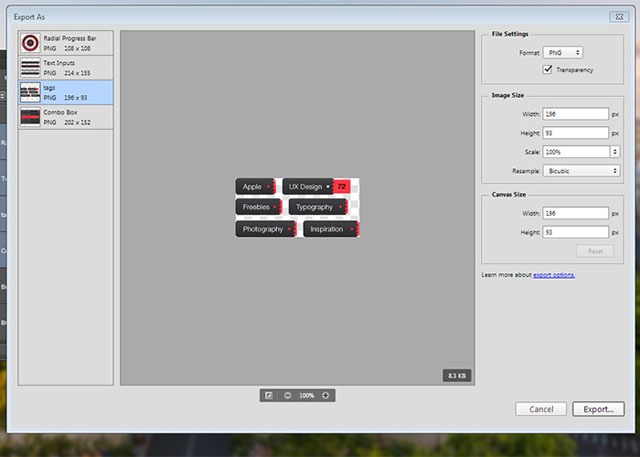
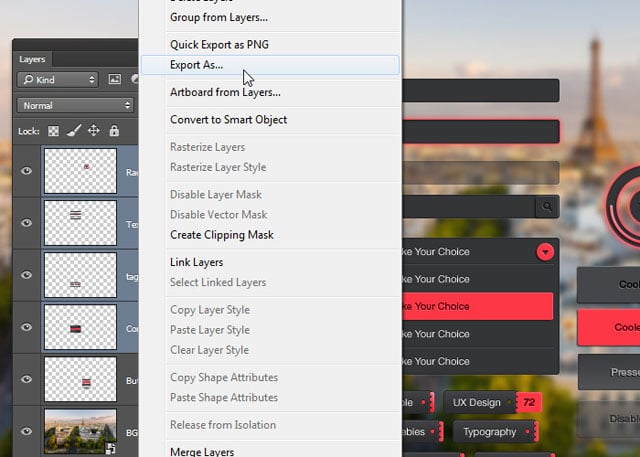 You can check out the individual layers in this dialog box and choose
the file format you wish to save with and then just hit the “Export”
button and choose the folder where you’d like to save the images.
 That’s it! Do you know any cool Photoshop CC tips or tricks that you
think need to be shared? Post a comment below and share them with the wo
If you want to learn about multiple layer styles, layer mask tricks, whitening teeth, black and white photos, precision with the Brush tool, and a bunch more, this is the tutorial for you!
1. Quickly Whiten Teeth
Go Layer->New Adjustment Layer->Vibrance and reduce the Vibrance to “-60”.2. Merge All Layers to New Layer
When we’ve got a Photoshop document with lots of layers — or even just a few layers — you may have the need to merge all of these layers into one layer while still retaining your original layer structure. There is no menu feature to do this in Photoshop, only a hidden hotkey. Cmd/Ctrl + Shift + Alt/Opt + E.3. The Rotate View Tool
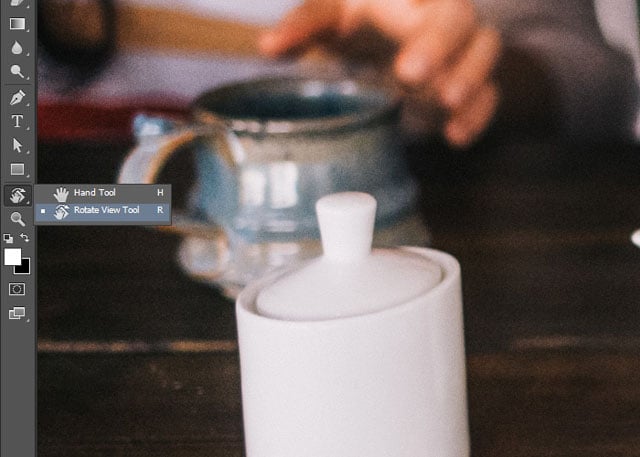
When retouching or any kind of shading, or dodging and burning, the Rotate View tool is one of the most useful little features I can think of in Photoshop. This tool will rotate the view of your image, but not actually flip the image. It’s quick and easy to use! Click and hold on the Hand tool in the tool box to reveal the Rotate View tool (R) and then drag side-to-side to rotate the image clockwise or counterclockwise.4. Change Layer Opacity Hotkey
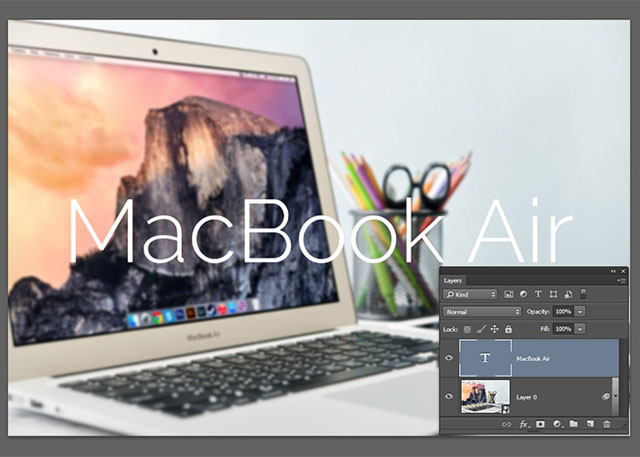
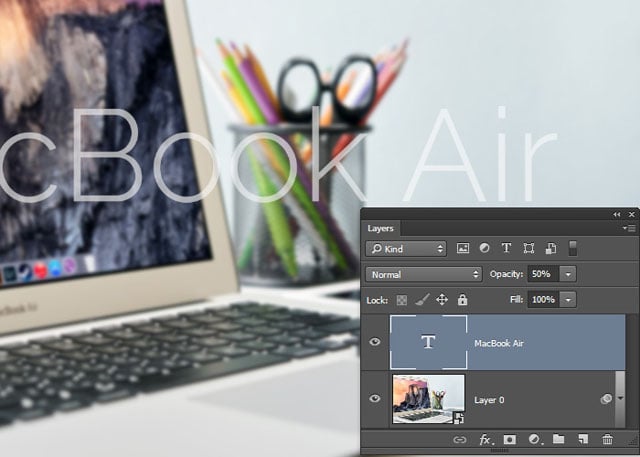
Instead of using the opacity slider in the layers panel, you can quickly change layer opacity by simply selecting the Move tool (V) and press any number on your keyboard. “1” will set the layer to “10%”, “5” will set it to “50%”, etc… hit “0” to reset the layer to “100%”. I set my text layer to “50%” opacity. TIP: Hold down the Shift key and press any number to adjust the fill opacity.5. Choose Layers Trick
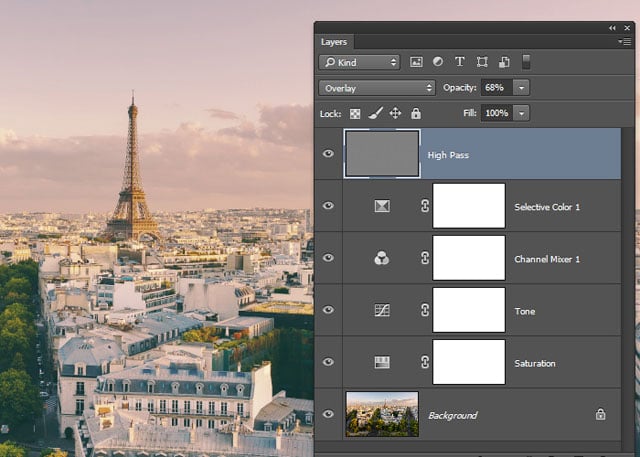
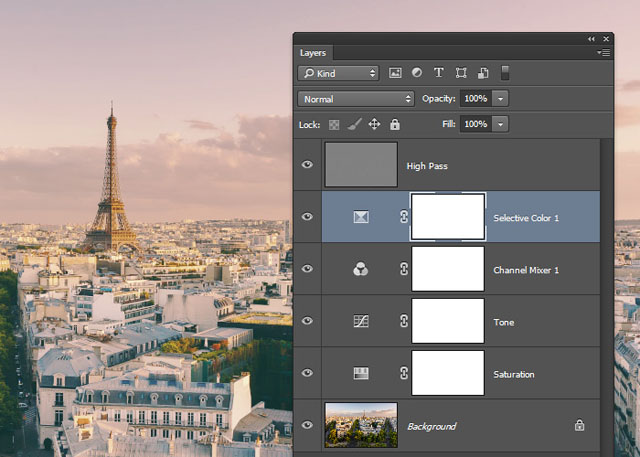
Look at your layers panel and choose any single layer. You can quickly choose any layer above or below the selected layer by holding down the Alt/Opt key and pressing the right square bracket to choose the layer above, or the left square bracket to choose the layer below.6. Move Layers Trick
Much like the last tip, you can move entire layers by holding the Cmd/Ctrl key while pressing either one of the square bracket buttons. Left square bracket moves the layer down in the stack and the right bracket moves the layer upward.7. Change Unit of Measure
You can change the units of measure that show up in your info panel, or that show up when you drag out a selection, or the units of measure in the rulers that you can pull up around your document (Cmd/Ctrl + R).Turn the rulers on by going Window->Rulers and then simply right click the ruler anywhere and choose the unit of measure you prefer.
Comments
Post a Comment