Photoshop Makeup Tutorial
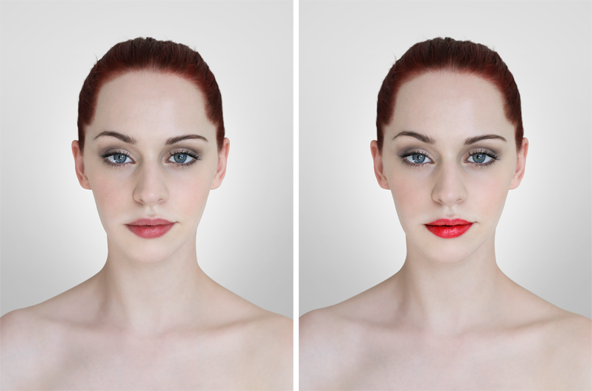
In this walkthrough we’ll be looking at various digital makeup techniques explored in previous articles, as well as a few new tricks thrown in for good measure! Once again some lighting trickery will be utilised to achieve high gloss lipstick, and we’ll also explore rouge and eyeliner effects. As there’s a broad range of tools used, this is a great advanced tutorial to refine your beauty retouch skillset.

Getting Started
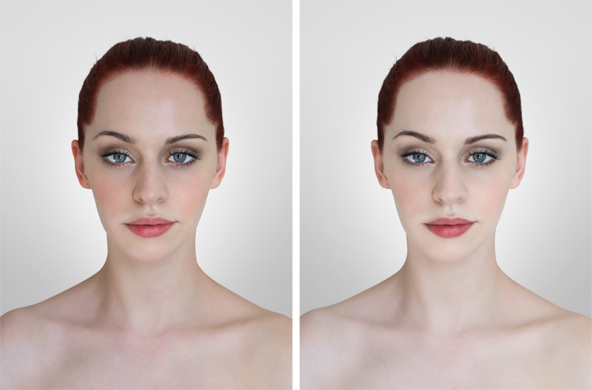
For the example piece, I have used the stock Clean by faestock (DeviantArt) – as it’s a lovely sharp image in a large size. Ive applied minimal retouch to begin with, just a subtle brighten of the eyes as well as a background removal for a more refined studio look.
Brighten Skin Tone
A subtle brightened skintone will provide a lighter base on which to apply the digital makeup effects. In this case the brighten will be applied to the entire face and upper torso to keep things uniform.
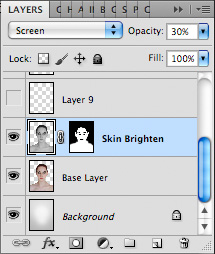
To brighten the skin duplicate your stock model layer ( Ctrl/Cmd + J ), and change the layer mode to Screen – it would be handy to name this layer ‘Brighten Skin’, keeps things organised. Desaturate your Brighten Skin layer ( Image > Adjustments > Desaturate ), this will knock out some of the reddish tones for a slightly porcelain look.
We’ll selectively apply this effect only to the areas it’s required. To do this add a Layer Mask to the Brighten Skin layer, invert the mask to Black ( Ctrl/Cmd + I ) – and then paint in over the skin areas using a Soft-Edged Brush (B). Avoid the hair, eyebrows, lips, eyes and any clothes. Once you are happy, reduce the Brighten Skin layer opacity to around 30% ( or whatever works best for your chosen image ).
Lip Colour
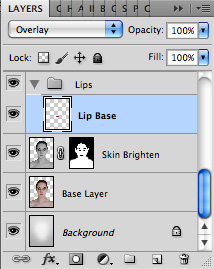
Working with the lips requires a few steps and layers, so it’s worth creating a layer group ( Ctrl/Cmd + G ) named lips to contain all the following adjustments.
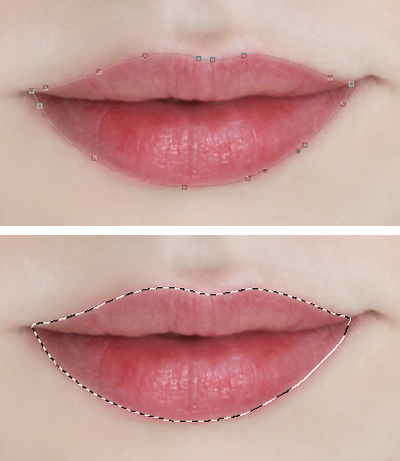
Using the Pen Tool (P) , create a closed path around the lips of your stock model – right-click on the path and select ‘Make Selection’. In the selection dialog, input Feather Radius 2px and hit ok. With the selection active, Copy Merged ( Shift, Ctrl/Cmd + C ), and then Paste ( Ctrl/Cmd+V ). This step basically creates a duplicate layer containing only the lips, with a slight feathered edge. Name this new layer ‘Lip Base’.
It is with this duplicate layer that we’ll apply the rich lip colour. A lot of walkthroughs rely on techniques that ‘wash out’ the highlights, but with the following approach we can keep the little speculars in place and retain a sense of realism.
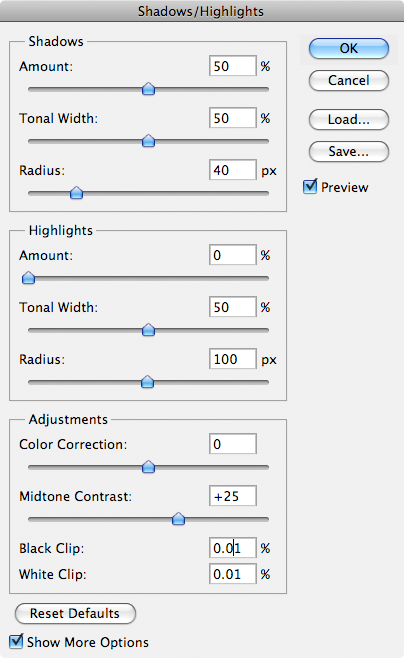
With the Lip Base layer active, select the adjustment Shadows/Highlights ( Image > Adjustments > Shadows/Highlights ). Within the dialog, input the following values:
Colour Tweak
A great method to change the lip colour is to use an Adjustment Layer – which will allow you to change the colour at will in a non-destructive manner. Create a selection of the Lip Base layer ( Ctrl/Cmd + click the Lip Base layer icon ), and add a Hue/Saturation Adjustment Layer ( Adjustment Layer icon, see below ). Tweak the Hue/Saturation settings until you get the tone that you desire.


Lip Gloss
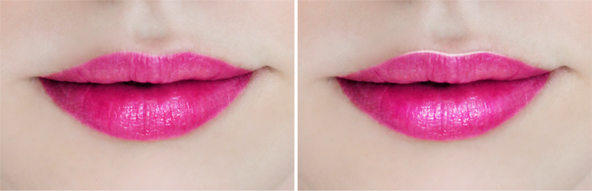
You can further enhance the appeal of the lips by manually adding gloss. In the example, a catch-light was added to the top lip and a subtle lightening effect on the bottom.
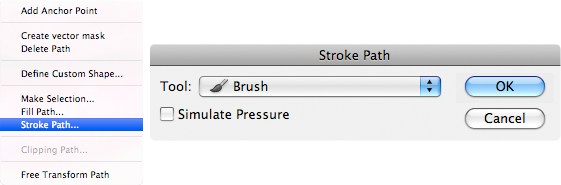
To create a catch-light at the top of the lip, set the brush to a Hard-Edged Brush (B) ( Hardness 0% ), 5px and the foreground colour to white. Select the Pen Tool (P), draw a path along the top of the lip, right-click the path and select ‘Stroke Path’ from the dialog using the Brush Tool. This will create a hard clean line along the top of the lip.
To make the line a little more natural, you can blend in the edges using a large Soft-Edged Eraser (E), and smear the line a little using the Smudge Tool ( Strength 20% ). Set this catch-light layer to Overlay and pull the opacity down to around 20%.
The gloss on the bottom lip was created using a Soft-Edged brush (set to white), tapered back using a large soft Eraser (E) and the layer mode set to Overlay 70%.

Eye Shadow / Rouge
There are a number of different approaches for achieving realistic looking eye shadow and rouge, however my favourite is to paint directly onto layers set to ‘Soft Light’. This method doesn’t drain the colour information underneath and allows the little highlights to come through moderately better than other means.
Create a new layer, and set the mode to Soft Light. Using a Soft-Edged Brush (B) and a colour of your choice, manually paint in your eye shadow. Pure black achieves a smoky / sultry effect, whereas bright vibrant colours will lighten and colour. When working, you may want to use a large Soft-Edged Eraser to taper back your brush strokes for smoother transitions and blends.
Here is a breakdown of the work done with the example piece – the top image representing all layers visible. The thumbnails to the left show the brush strokes in Normal layer mode, the thumbnails to the right show the layer mode set to Soft Light. The images are shown in the order that they appear in the layer stack workflow:
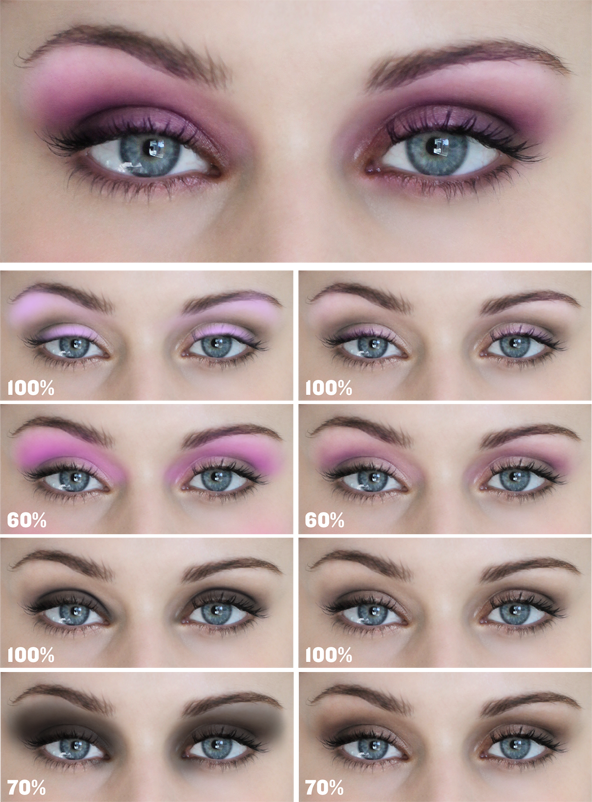
In the diagram above, you’ll notice that the highlight elements are positioned at the top of the layer stack. Ensure your colours don’t bleed into the eye area by erasing accordingly.
Use the same technique with a very large Soft Edged Brush to apply the rouge to the cheeks.
Eyeshadow Texture
When observed closely, many eye shadows contain small sparkles – this is an effect I’d like to achieve for the example piece.
To create an eyeshadow texture, Select All ( Ctrl/Cmd + A ), copy merged ( Shift, Ctrl/Cmd + C ) and paste at the top of the layer stack ( Ctrl/Cmd + V ). This will create a merged layer (name this layer Merged Layer) – with the Merged Layer active, launch the Unsharp Mask filter ( Filter > Sharpen > Unsharpen Mask ). These were the settings used for the example, the idea is to accentuate all the light pixels:

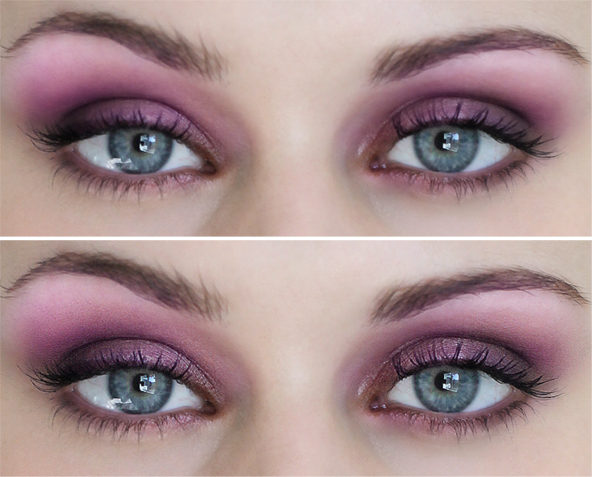
The next step is to selectively apply these ‘sparkles’ to the region above the eyes only. To do this, add a layer mask to the Merged Layer, and invert the mask to black ( Ctrl/Cmd + I ). Use a large Soft-Edged Brush (B) set to white, to paint in the merged layer at the relevant spots. If the sparkles are too sharp, you can use the Blur Tool to soften them up a bit. Heres a look at the eyes before and after the sparkle effect:
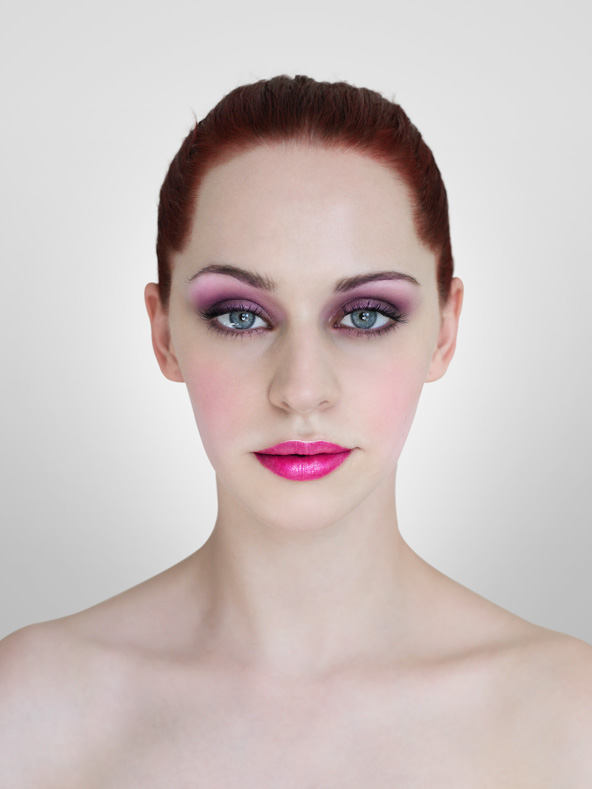
The Finished Article:
Review
With these techniques, there’s an infinite number of styles that you can achieve – Im sure the ladies have a better eye for this work than the guys! Once again it’s the speculars and highlights that make things look ‘tactile’ – something to keep in mind when you strive for photorealism. Have your own digital makeup techniques? Please feel free to share in the comments section below.
Comments
Post a Comment