
Animated GIF Tutorial for PS CS4


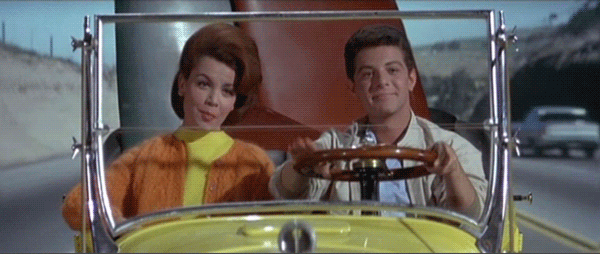
I’ve been fairly obsessed with animated gifs lately. My apologies. It was really If We Don’t, Remember Me that had me stuck in this loop. This person churns out such really interesting visuals, I couldn’t rest until I got something fairly close. I feel like the image above, while not perfect, is close enough to let things rest for a while1.
Initially, I just thought IWDRM was just a master of choosing just the right clip. Now, that part can’t be discounted but there’s a lot of other things that go on to improve the final product. While fairly simple, I’ll try to detail what I did and how I eventually learned to make it more economical time wise. I’m not a PS guy, so there may be even better ways. If you know them, let me know.
This is tilted towards CS4 but I imagine the concepts will make sense if you use other versions or other software.
  1. Clip your video down in Quicktime or something like that. You can edit in the PS import tool but it’s awkward.
  2. Import the video files to layers.
  3. The animation window will be at the bottom. Edit it until you’ve got a decent cycle going. The first frame will be the still portion of the image so choose one that is clear. Keep in mind you can change the speed of the frames. Sometimes slowing it down helps.
  4. With the second frame selected in the animation window. You’ll see that there is the eye icon on the corresponding frame in the Layers menu. Click on the first layer in the place where they eye should be. You should now see two eyes, indicating both layers are active. It should look like the image below.
  5. Now on the second layer, erase everything you want to be motionless. You’re going to have to repeat the process above for every frame in the animation and every related layer so it pays to keep the numbers down. It’s also much easier to use the lasso tool and select the portions you’d like to erase. If you hit delete instead of cut or some other option, the selection stays and you can pretty rapidly go through the steps where you activate the “eye” on the layer and then just hit delete again. You can see the start of that in the image below. I eventually selected everything except Ricky’s (?) head and his drumming arm.

  6. You can preview the animation by hitting the space bar at any time. This helps me immensely.
  7. Make sure when you go to delete, that you’ve selected the right layer in the layers panel or nothing will happen.

Comments

  1. Most of the website is full with grabege data but you have filled your website with Best tutorials great work i will keep visit your site for gettings these kind of post.
    clipping path

    ReplyDelete

Post a Comment

Popular posts from this blog

Use x-ray techniques in Photoshop to show naked skin through clothing

    Do those new naked body scanners have you freaked out at the airports? As far as the TSA is concerned, those x-ray machines are here to stay, but you might as well take comfort in knowing that airport security guards aren't the only ones looking at your private parts. Practically anyone with a computer can manage to see through your clothes, and it's all thanks to a little program called Photoshop. Thanks, Adobe. With a few tweaks using the tools in Photoshop, you can see those boobs in no time, male or female. The video is in German, but it's not hard to figure our what's going on, especially if you're familiar with Photoshop. First, create a few duplicate layers, then get a handle on some of these tools to make the naked body through the clothes: * Auswahl erstellen (Create Selection) * Tonwertspreizung (Input Levels) * Belichtung (Exposure) You can also do this see-through clothing effect in free design programs, such as  GIMP .

Photoshop Photo Effects Tutorials 2024

  Photoshop Photo Effects Tutorials Everyone loves Photoshop effects. Not only are photo effects fun to create, but they’re a great way to learn Photoshop since they often introduce us to tools, commands or other features we might otherwise never know about! All of our Photoshop effects tutorials are written with beginners in mind, with easy-to-follow, step-by-step instructions. See our complete list below, or download our tutorials as  print-ready PDFs ! Fade an Image to Color in Photoshop Faster with Live Gradients Learn how to fade an image to color with Photoshop the new and easy way using live gradients! How to Add Falling Snow to Photos with Photoshop Learn how to add realistic falling snow to your winter photos with Photoshop. Get Better Color Halftone Effects in Photoshop Learn how to create more realistic color halftone patterns using Photoshop’s Color Halftone filter and this simple trick. How to Create a Halftone Dot Pattern in Photoshop Learn how to turn your photo into a h

Ridiculously Cool Photoshop Text Effect Tutorials

  Easy Photoshop Text Tutorials for Beginners If you’re still learning the fundamentals of design or want some quick-and-easy text ideas to jazz up your print designs, these beginner tutorials will be a big asset. In your lessons you’ll learn how to apply texture and 3D effects, create logos, utilize masks and other simple techniques for enhancing your text. 1.  Using Text As A Container For More Text In Photoshop 2.  Glossy Emblem Text Effects 3.  Create a Realistic Emboss/Deboss Effect 4.  Icy Styles in Photoshop 5.  How To Create a Gold Text Effect in Photoshop 6. Moon Shine Text Effect 7. Simple Styled Text with Stars Effect 8.  Elegant Glossy Gold Text Effect 9.  Hipster Text Effect in Photoshop CS6 10.  The Sugar Bag Effect 11.  Easy Chalk Ornament Typography in Photoshop 12.  Abstract Shining Text Effect with Groovy Font 13.  Easy Plastic Text with Layer Styles In Photoshop 14.  Papercraft Text Effect 15.  Making a Clipping Mask With Text In Photoshop 16.  Simple Bokeh Text Effe