This entry is part 1 of 11 in the Intro to Photoshop Layer Styles Session - Show All
Next »
Photoshop
layer styles are a popular way to add effects, such as drop shadows
and strokes, to layers in a non-destructive way. With the right
knowledge and experience, any effect can be achieved. To achieve these
effects, however, you need to understand what each setting does and how
they can be combined to achieve a certain look. In this series by John
Shaver from Design Panoply, we will explain every aspect of Photoshop’s layer styles feature and show you how to unlock their potential. In this article, Part 1: Introduction to Photoshop Layer Styles we will explain how to get started with layer styles. Let’s take a look!Next »
What Are Layer Styles And How Are They Used?
Photoshop introduced layer styles way back in version 6 as a way to add effects to a layer without having to manually create them. You add effects using an interface of easy-to-use checkboxes, sliders, and more, which can be saved as presets to be reused later on.The "wow" factor quickly wore off as people grew tired of seeing the default presets used over and over again. It wasn’t until recently that the true power of layer styles was utilized, but it has quickly become a simple and effective way to instantly enhance your designs.

Getting Started With Layer Styles
Photoshop comes with a plethora of layer styles presets, all of which you should never use unless you are just learning to apply effects to your layers. Why? Because in addition to most of them just looking bad, they are instantly recognizable to other designers, and nothing screams "amateur" more than default program settings.How To Apply Layer Styles
There are two main ways to apply layer styles, both of which are quick and easy.Method 1 – Using A Preset
Create a new Photoshop document and in addition to the default background layer, create a new line of text. In the main menu, click Window > Styles to open the Styles Palette. With your text layer selected, simply click on one of the preset thumbnails within the Layers Palette and it you will see it automatically applied to your layer. The first time you click through and load each preset, you should experience an overwhelming feeling of happiness as you begin to understand all of the potential that layer styles hold.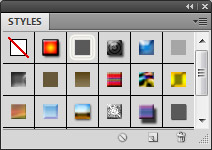
Method 2 – Starting From Scratch
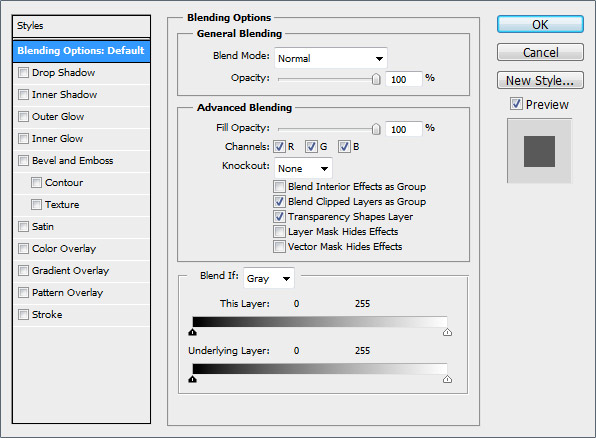
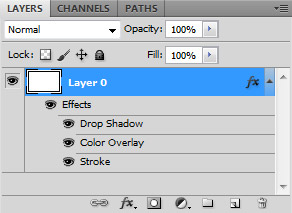
Create a new Photoshop document and in addition to the default background layer, create a new line of text. In the Layers Palette, right click the name of the layer you want to add effects to and click "Blending Options…" to bring up the Layer Style dialog box (you can also double click the name of the layer in the Layers Palette).We will go over each section of the Layer Styles dialog box in the latter parts of this guide, right now, we are just getting acquainted with how they are applied.
How To Save/Load Presets
Loading Presets
Like we mentioned above, we will get into creating your own custom layer styles in the following installments of our guide, but in the meantime I know you want to play around with layer styles while you wait. There are plenty of free and premium layer styles available for download (we will refrain from any bias recommendations), so we will look at how to load presets in Photoshop that you have downloaded online. See the end of the article for a bonus style that you can practice with.Navigate to your .ASL file and, with the Layers Palette open in Photoshop, drag the file from the folder on your computer into the Photoshop window and release the mouse button.
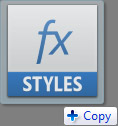
Dragging and dropping your styles file will append, or add, the imported file to the list of styles that are already visible in the Styles Palette.
You may notice multiple styles appear in your Styles Palette. Lucky you! Photoshop .ASL files can contain hundreds of different style presets, all within the same file, making it easy to share presets with others.
Saving Presets
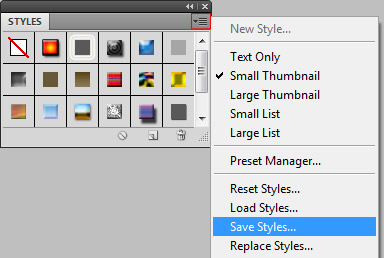
If you have created your own presets or want to save a bunch that you have collected, you can save them easily from the Styles Palette.To save a preset (or group of presets), open the dropdown menu from the Styles Palette and click "Save Styles…". You will be prompted to choose a name and location on your computer for your presets file, then simply click Save.
Tips And Tricks For Beginners
There are a few tricks to learn when becoming proficient with layer styles that only come with experience, unless of course you are reading this guide.- Layer styles cannot be added to locked layers. You may have created a new document, selected the background layer, and clicked a layer style preset, only to see a whole bunch of nothing happening. It is because the background layer is locked. You cannot add new layer styles to locked layers. You can, however, add layer styles to a layer prior to locking it to prevent editing of that layer. You can then unlock it later if you decide to change the settings of your layer style later.
- You can increase the size of the thumbnails in the Styles Palette by opening the Styles Palette dropdown menu and toggling the display type between Text Only, Small Thumbnail, Large Thumbnail, Small List, and Large List.
- Most layer styles are created to look their best on bolder fonts and/or at larger sizes. If you apply a style you found online and are unhappy with how it looks, you might want to try a different font or a larger text size.
- Layer styles themselves can be resized, so if you find a layer style that looks good at a certain size but want to shrink your text, you can resize the effect to match any size of text. Simply right click the list of effects that are applied to the layer in the Layers Palette and click "Scale Effects". You can then scale your effects using a percentage.
- You can copy and paste styles between layers in the same document as well as between layers in different documents. Right click the name of the layer in the Layers Palette and click "Copy Layer Style", then on another layer, right click again and select "Paste Layer Style".
- You can hide the layer contents while showing only the effects. Select the layer in the Layers Palette and change the Fill, located at the top of the Layers Palette, to 0%. You can then apply effects without the layer itself showing up. This is how many glass and other advanced effects are created.
One For The Road
Until next time, this free, exclusive layer style and accompanying .PSD will help you practice your loading, applying, and resizing skills until we get to the really good stuff.
Comments
Post a Comment