
Furry Text in Photoshop

We have been posting tutorials for almost 6 years and our goal here was and will always be trying to share easy techniques we've learned along the way. We try to make the tutorials short and open to adaptations so you can add your touch in order to create an unique result. That's the case of this week's tutorial. It's a simple Photoshop technique that can be applied to a wide variety of effects, from fur to grass, fire and pretty much anything.

So in this tutorial we will show you how to create a really cool and super simple furry text in Photoshop CS6. We will use basic filters and tools but it's nice to say that we took advantage of the a new feature in Photoshop CS6 that is to apply layer styles to folders.

Step 1

Open Photoshop CS6 and create a new document. I am using 2880x1800 pixels for the dimensions. After that with the Horizontal Type Tool (T) add a text. I used "CS6" for this tutorial.
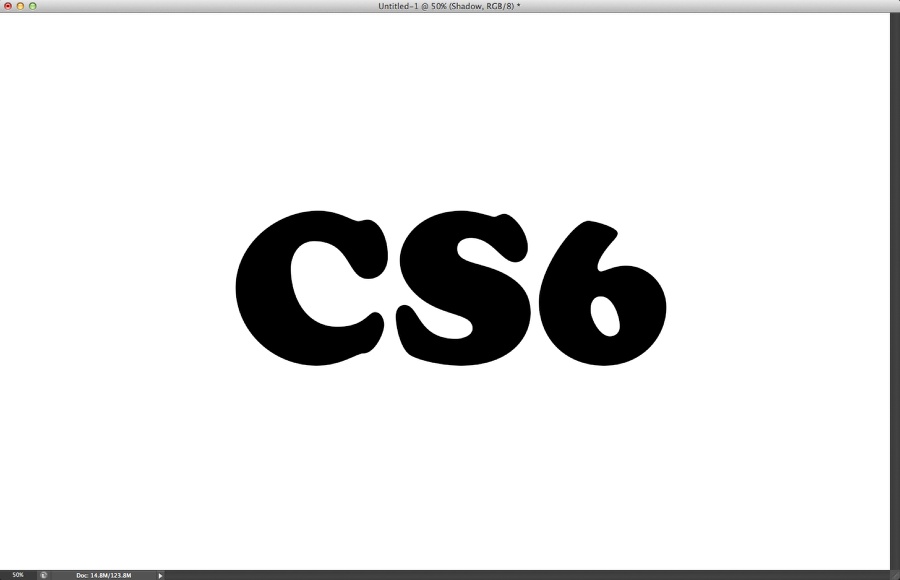
Easy Furry Text in Photoshop

Step 2

Let's use some real textures to make our design more realistic. I am using an image by Kieren Welch called Snow leopard close up abstract fur. Courtesy of Shutterstock. Place the texture on top of the text.
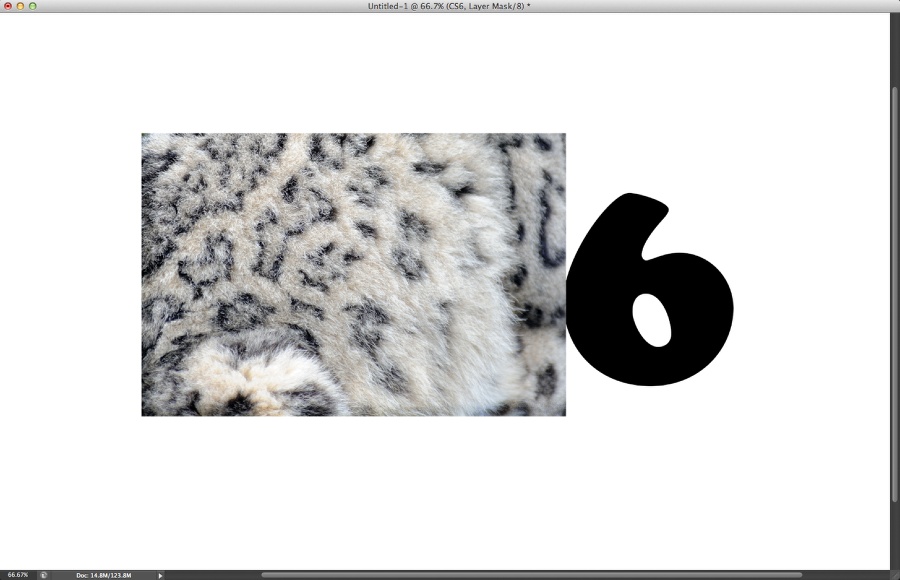
Easy Furry Text in Photoshop

Step 3

Duplicate the texture to cover the whole text.
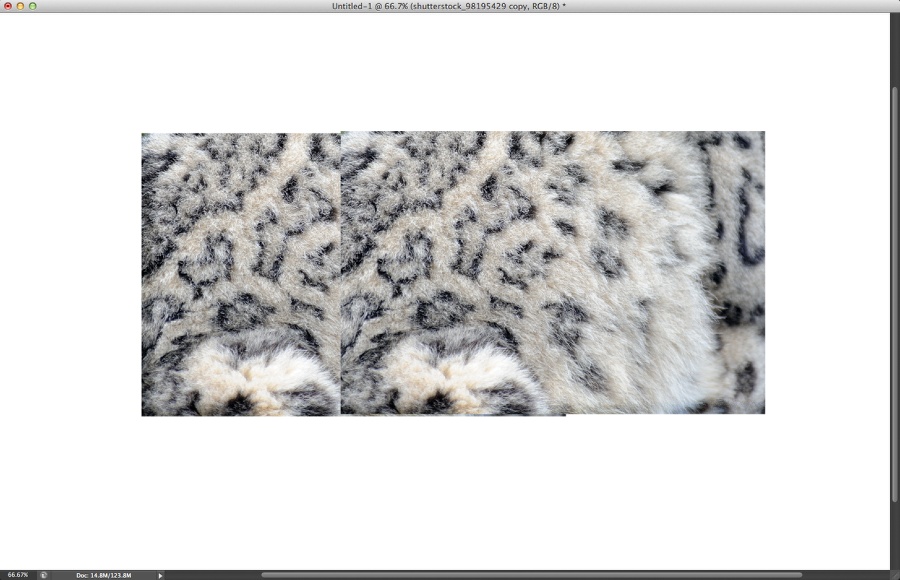
Easy Furry Text in Photoshop

Step 4

With the Erase Tool (E) delete some parts of the textures to make them blend together. It's important to pay attention to these small details.
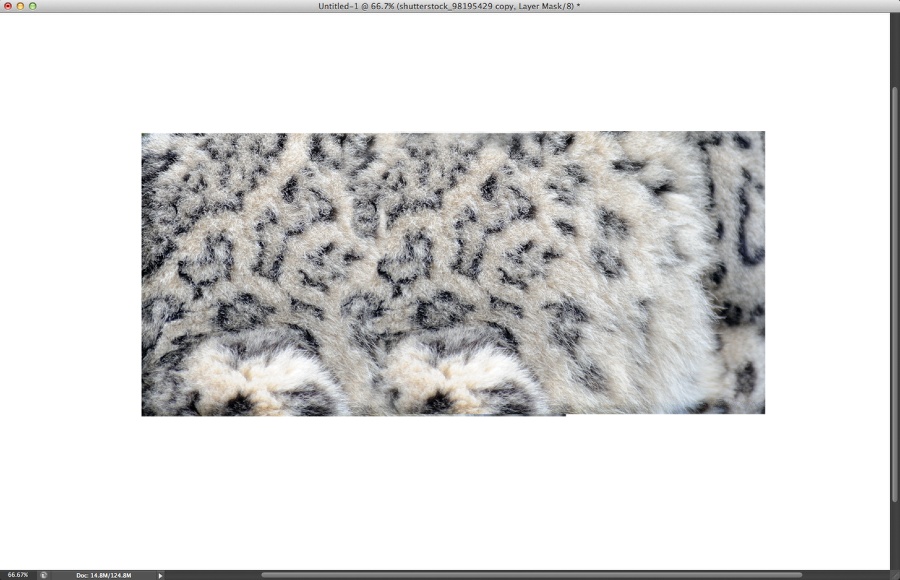
Easy Furry Text in Photoshop

Step 5

Go to the Layers Panel and select the text layer. Click on top of the thumbnail of the layer with the right button of the mouse and click on "Select Pixel". A marquee selection will be added using the text as reference.
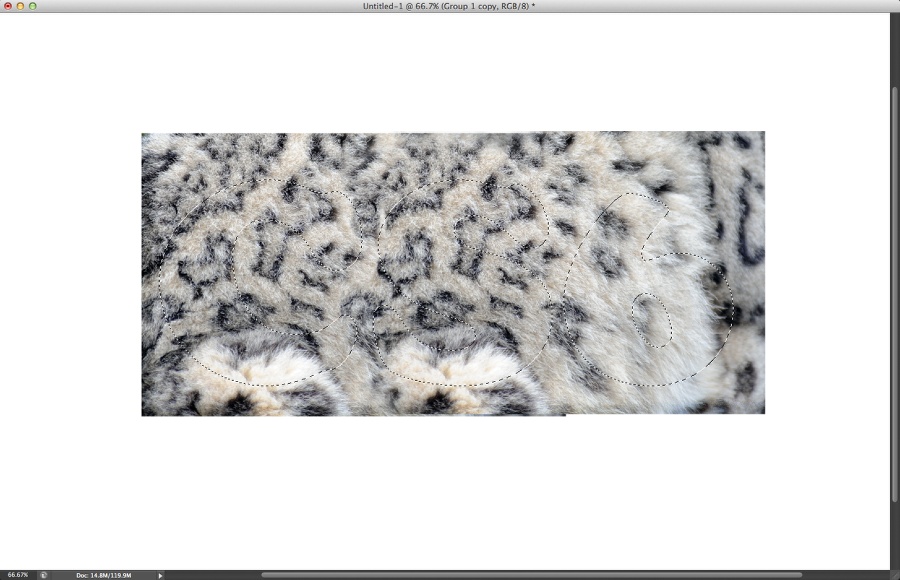
Easy Furry Text in Photoshop

Step 6

Select both texture layers and go to Layer>Group Layers. Select the folder created after grouping the layers and then go to Layer>Layer Mask>Reveal Selection.
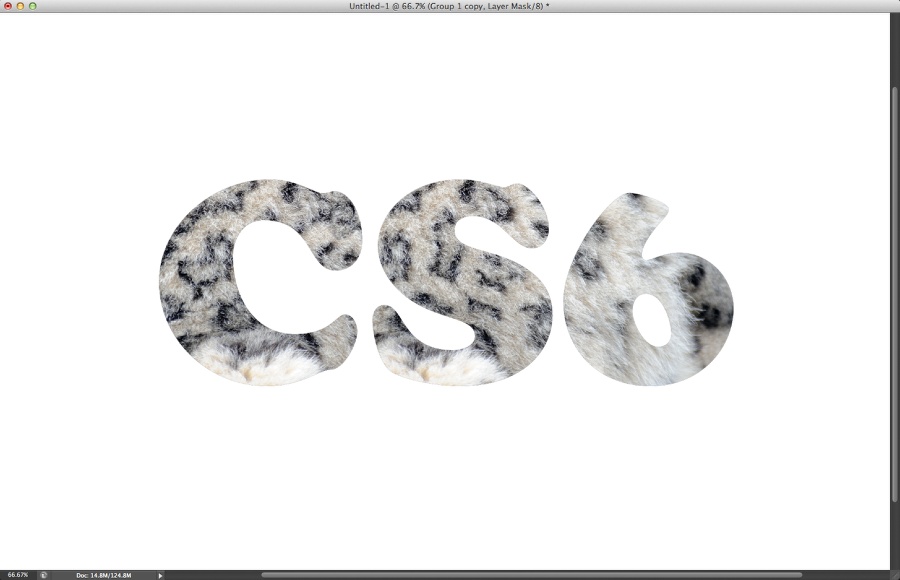
Easy Furry Text in Photoshop

Step 7

Let's create a brush to use in our design. The first one is a simple one that I created using a default brush and duplicating it to make something like the image below. Once you have a shape like that go to Edit>Define Brush. Name it "Fur".
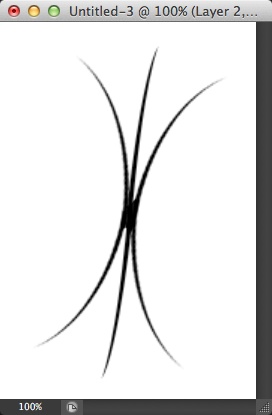
Easy Furry Text in Photoshop

Step 8

Go to Window>Brush. Then for the Brush Tip Shape select the "Fur" one we just created. After that just follow the settings below to create a really cool fur brush.
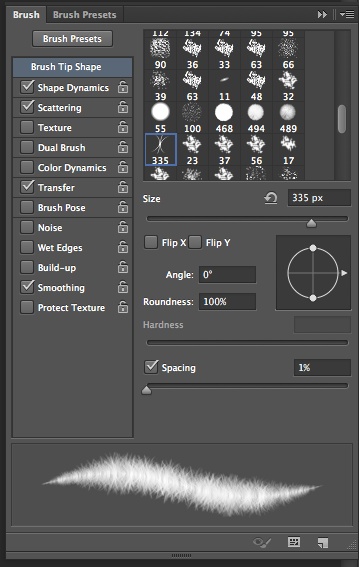
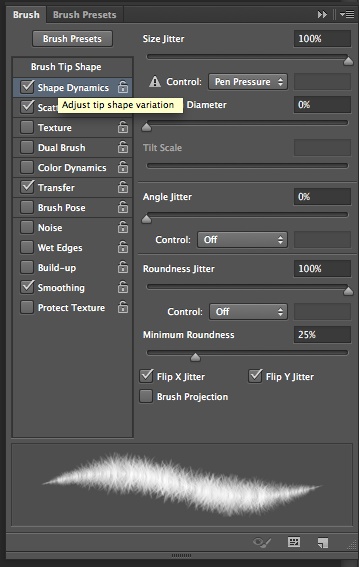
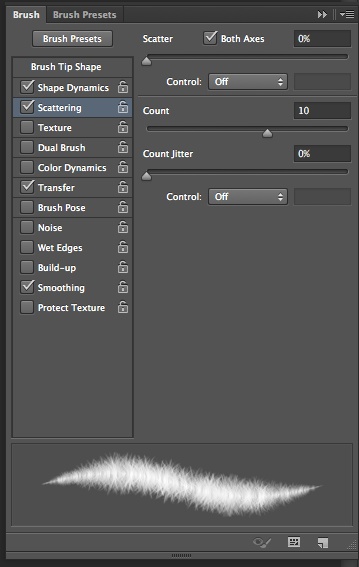
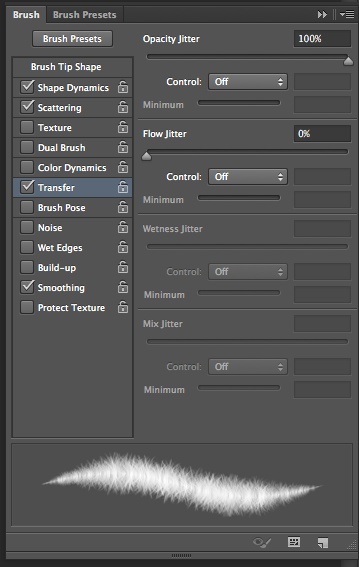
Easy Furry Text in Photoshop

Step 9

Select the mask of the folder and then with the Brush Tool (B), select the brush we just created and white for the color. Start painting on the edges of the letters to create a very realistic effect. Tip: Change the size of the brush frequently to make the effect more natural.
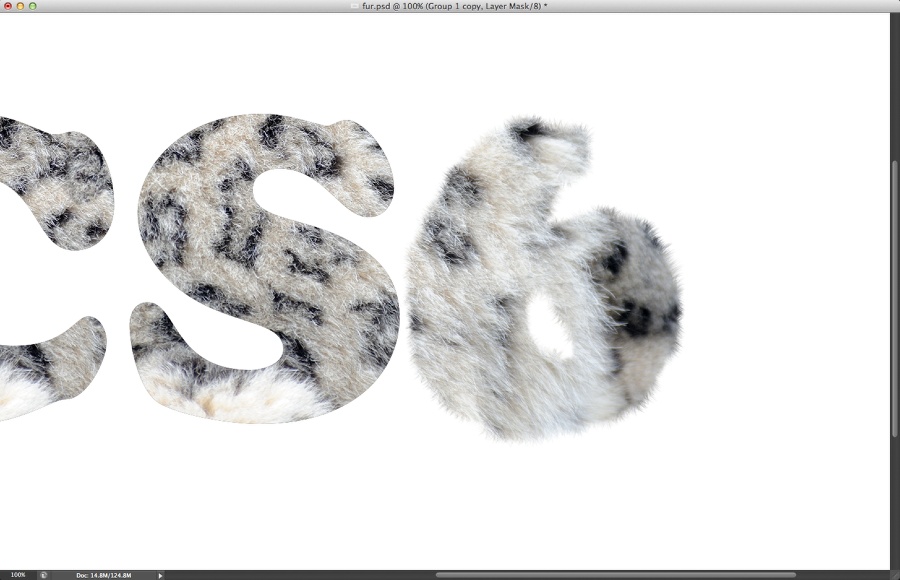
Easy Furry Text in Photoshop

Step 10

Repeating the process for all characters.
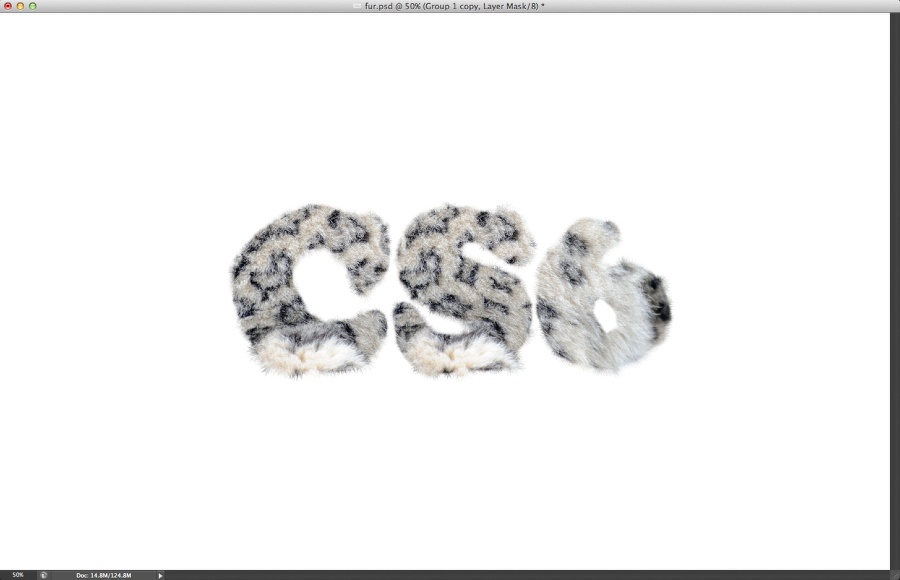
Easy Furry Text in Photoshop

Step 11

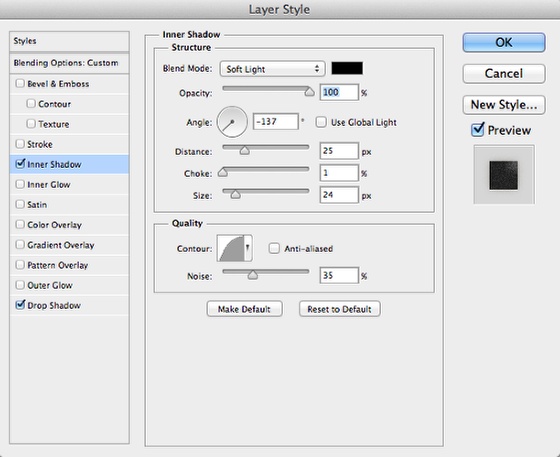
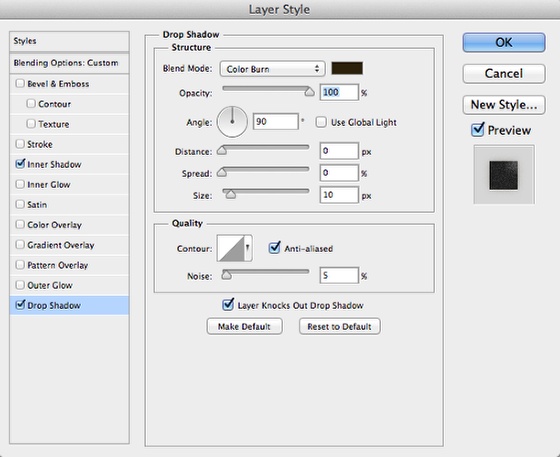
Select the folder and go to Layer>Layer Styles>Inner Shadow. We will apply layer styles to a folder and this is a nice new feature in the CS6 version of Photoshop. It's really useful because you can apply the same layer styles to multiple objects at once. Or you can extend the amount of effects by adding to multiple folders.
So for the Inner Shadow and the Drop Shadow we will add you can just use the values below.
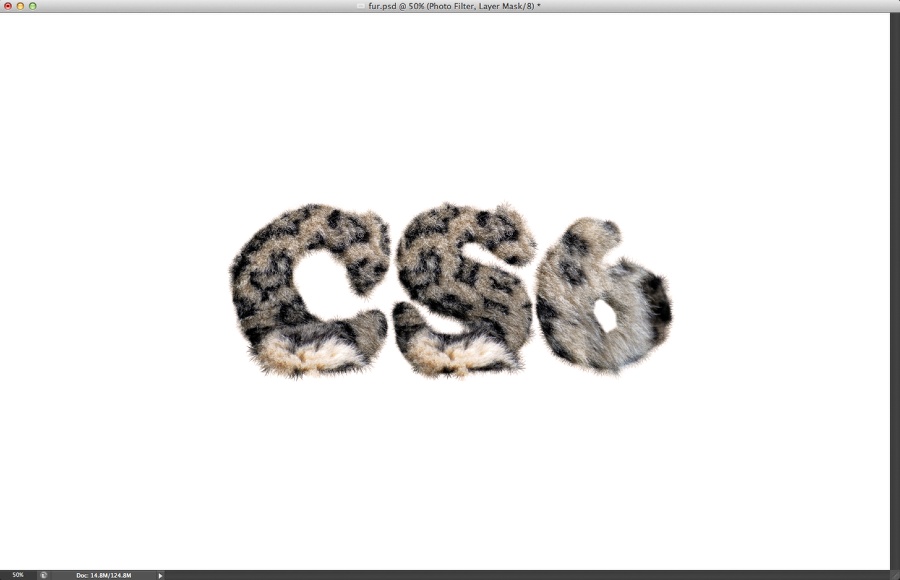
Easy Furry Text in Photoshop

Step 12

The layer styles gave some depth to our design as you can see in the image below.
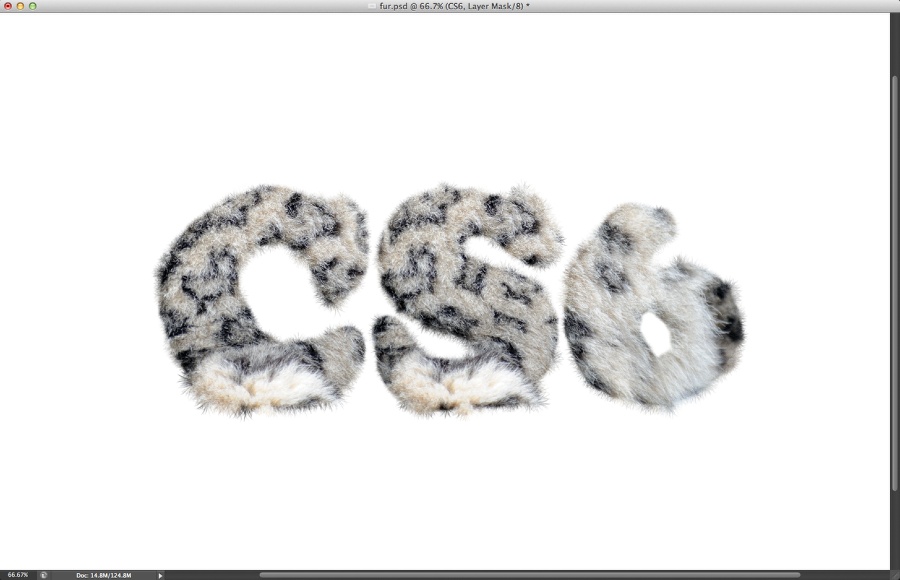
Easy Furry Text in Photoshop

Step 13

Go to Layer>New Adjustment Layer>Photo Filter. Use Warming Filter (85) with 20% Density. After that change the Blend Mode of the Photo Filter to Multiply.
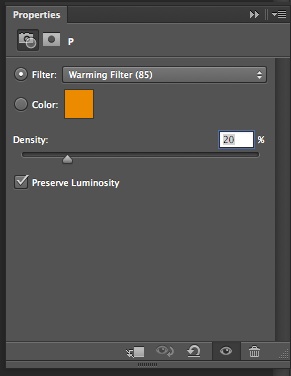
Easy Furry Text in Photoshop

Step 14

Now just add some nice shadows to make the letters standing on the page.
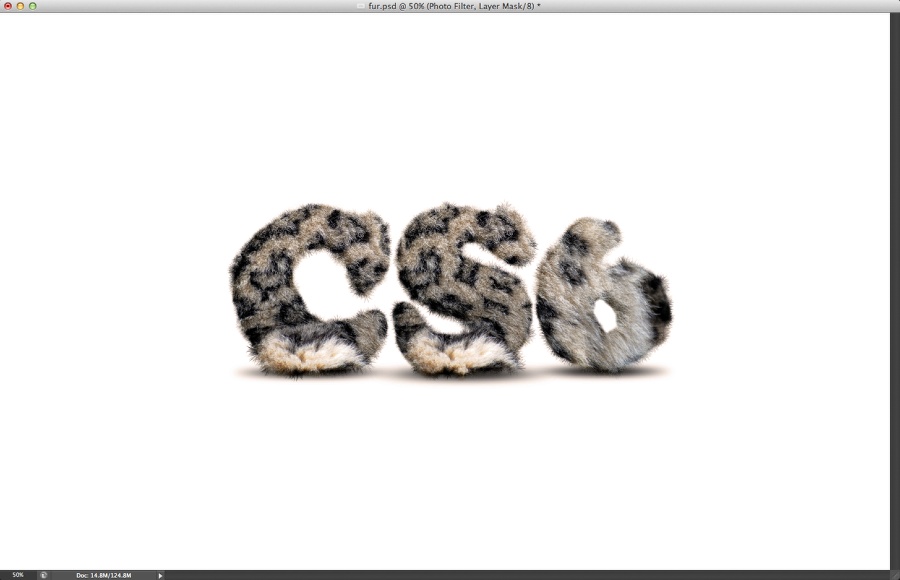
Easy Furry Text in Photoshop

Step 15

Add a subtle beige for the background using the Paint Bucket Tool (G)
Easy Furry Text in Photoshop

Step 16

With the Brush Tool (B) paint a nice white round spotlight in the center.
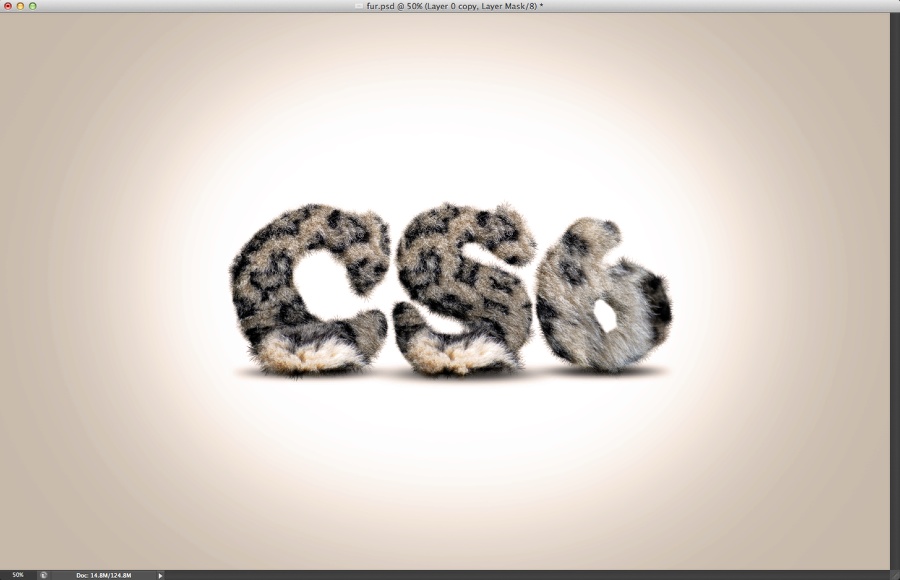
Easy Furry Text in Photoshop

Conclusion

Resize the white spotlight to an ellipse for to give some perspective and our design is pretty much done. As you can see this tutorial was very simple but it's a technique that I am sure you will use very often because it's very versatile. I hope you enjoy it and share with us your results and of course opinions and suggestions.
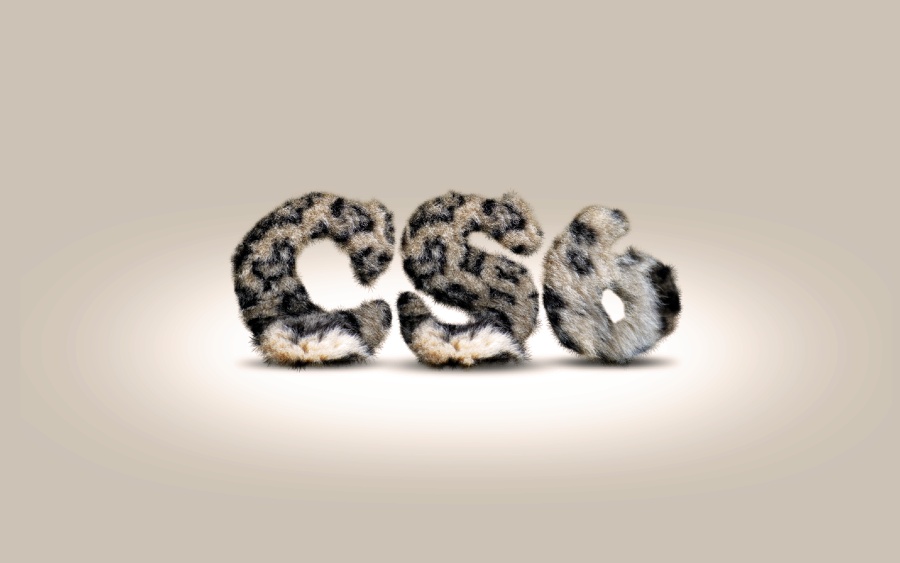
Easy Furry Text in Photoshop

Comments

Popular posts from this blog

Use x-ray techniques in Photoshop to show naked skin through clothing

    Do those new naked body scanners have you freaked out at the airports? As far as the TSA is concerned, those x-ray machines are here to stay, but you might as well take comfort in knowing that airport security guards aren't the only ones looking at your private parts. Practically anyone with a computer can manage to see through your clothes, and it's all thanks to a little program called Photoshop. Thanks, Adobe. With a few tweaks using the tools in Photoshop, you can see those boobs in no time, male or female. The video is in German, but it's not hard to figure our what's going on, especially if you're familiar with Photoshop. First, create a few duplicate layers, then get a handle on some of these tools to make the naked body through the clothes: * Auswahl erstellen (Create Selection) * Tonwertspreizung (Input Levels) * Belichtung (Exposure) You can also do this see-through clothing effect in free design programs, such as  GIMP .

Photoshop Photo Effects Tutorials 2024

  Photoshop Photo Effects Tutorials Everyone loves Photoshop effects. Not only are photo effects fun to create, but they’re a great way to learn Photoshop since they often introduce us to tools, commands or other features we might otherwise never know about! All of our Photoshop effects tutorials are written with beginners in mind, with easy-to-follow, step-by-step instructions. See our complete list below, or download our tutorials as  print-ready PDFs ! Fade an Image to Color in Photoshop Faster with Live Gradients Learn how to fade an image to color with Photoshop the new and easy way using live gradients! How to Add Falling Snow to Photos with Photoshop Learn how to add realistic falling snow to your winter photos with Photoshop. Get Better Color Halftone Effects in Photoshop Learn how to create more realistic color halftone patterns using Photoshop’s Color Halftone filter and this simple trick. How to Create a Halftone Dot Pattern in Photoshop Learn how to turn your photo into a h

Ridiculously Cool Photoshop Text Effect Tutorials

  Easy Photoshop Text Tutorials for Beginners If you’re still learning the fundamentals of design or want some quick-and-easy text ideas to jazz up your print designs, these beginner tutorials will be a big asset. In your lessons you’ll learn how to apply texture and 3D effects, create logos, utilize masks and other simple techniques for enhancing your text. 1.  Using Text As A Container For More Text In Photoshop 2.  Glossy Emblem Text Effects 3.  Create a Realistic Emboss/Deboss Effect 4.  Icy Styles in Photoshop 5.  How To Create a Gold Text Effect in Photoshop 6. Moon Shine Text Effect 7. Simple Styled Text with Stars Effect 8.  Elegant Glossy Gold Text Effect 9.  Hipster Text Effect in Photoshop CS6 10.  The Sugar Bag Effect 11.  Easy Chalk Ornament Typography in Photoshop 12.  Abstract Shining Text Effect with Groovy Font 13.  Easy Plastic Text with Layer Styles In Photoshop 14.  Papercraft Text Effect 15.  Making a Clipping Mask With Text In Photoshop 16.  Simple Bokeh Text Effe