Step 1
First create a new .PSD document, 600 x 400 pixels in RGB mode, 72 DPI with any background color. Now prepare your assets. Install the Xenippa font onto your computer and open both .PAT files. If you do not know how to install a PAT file onto your computer, take a look at this tutorial explaining the preset manager.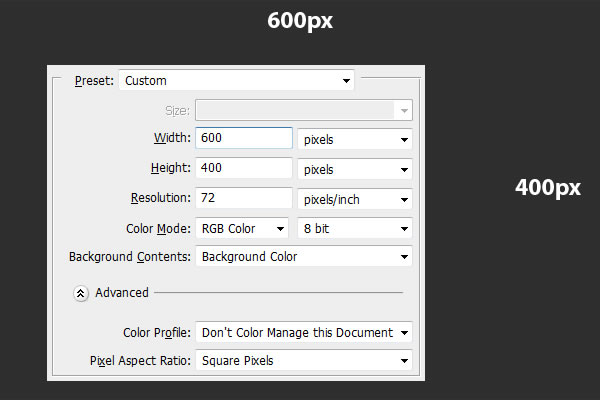
Step 2
Go to Menu > Layer > Layer Style > Blending Options and use the settings below. You can also access Blending Options by double clicking on the layer in your layers menu. The other way is to right click on the layer in your layers menu and choose Blending Options. When you are done with all the settings below, don’t forget to hit "OK" in the Blending Options window.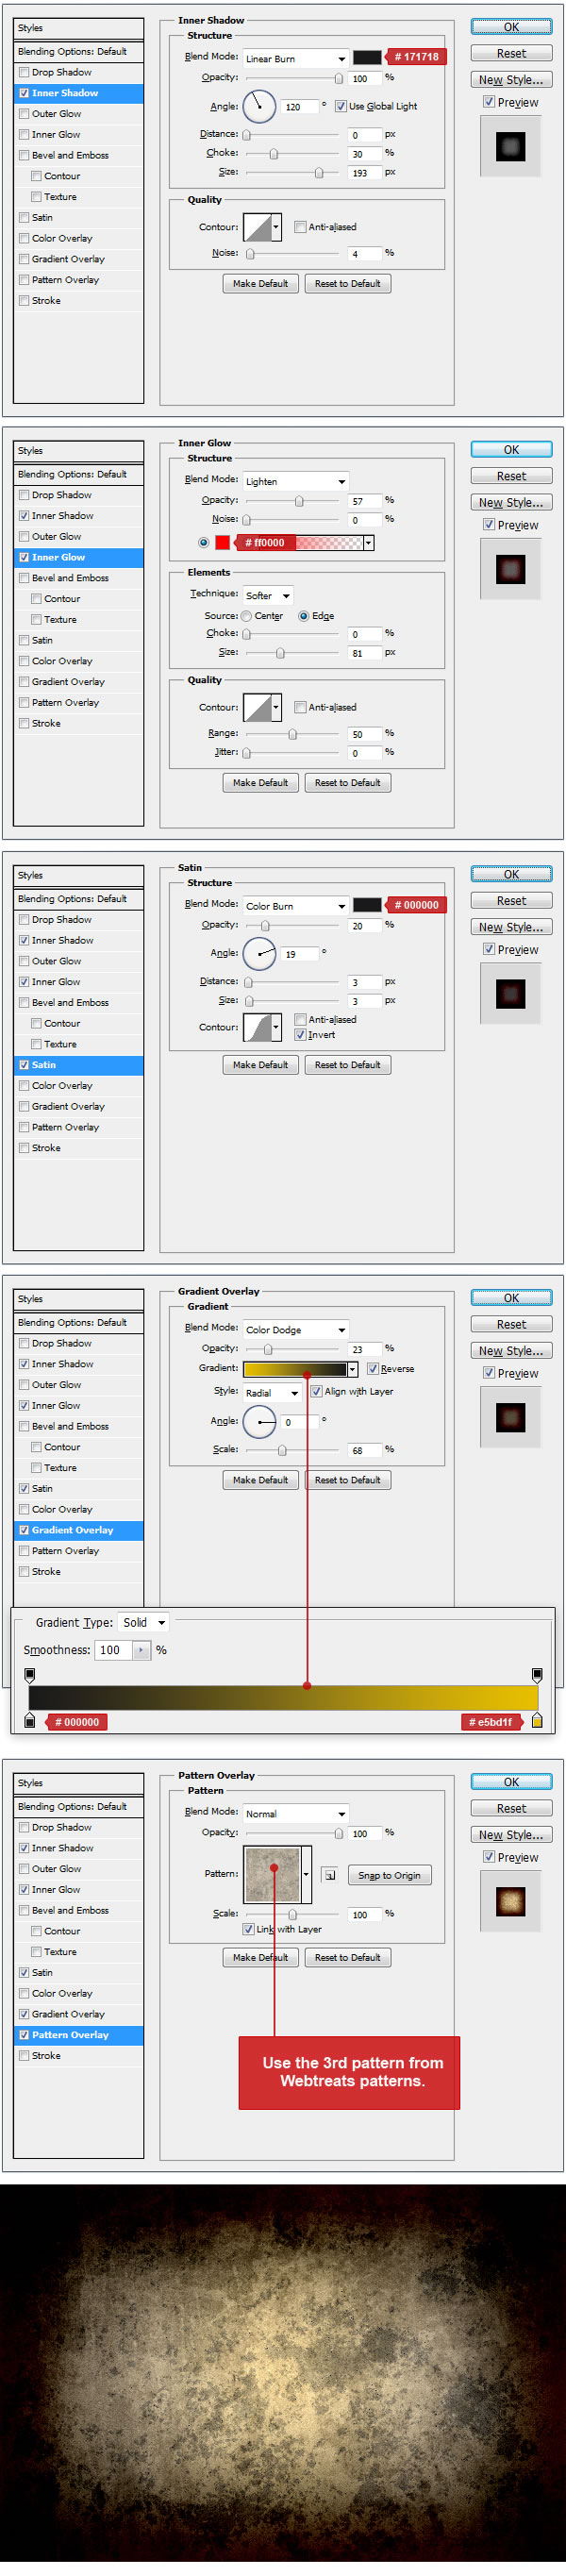
Step 3
Now we can start applying our text effect. First choose the type tool and change font to Xenippa, size 250 pt and anti-aliasing, Sharp. Now type your text somewhere in the center of the image. You can write any word, but in this tutorial I’ll use "Lord."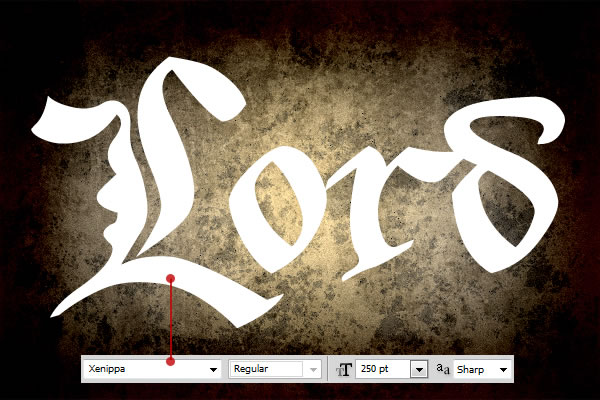
Step 4
Finally, we are ready to start with our text style. Go to Menu > Layer > Layer Style > Blending Options and use the settings below on your text. You can also use the quicker methods to access Blending Options from "Step 2" of this tutorial. When you are done with all the settings below, don’t forget to hit "OK" in the Blending Options window.
Step 4
We are almost there. Now we need to duplicate our text layer. Select the text layer in layer menu and go to Menu > Layer > Duplicate layer and name it as you wish. Now go to Menu > Layer > Layer Style > Clear Layer Style as we will make different style for this layer. Finally, go to Menu > Layer > Layer Style > Blending Options and use the settings below on our text. Again, you can use the quicker methods to access Blending Options from "Step 2" of this tutorial. When you are done with all the settings below, don’t forget to hit "OK" in the Blending Options window.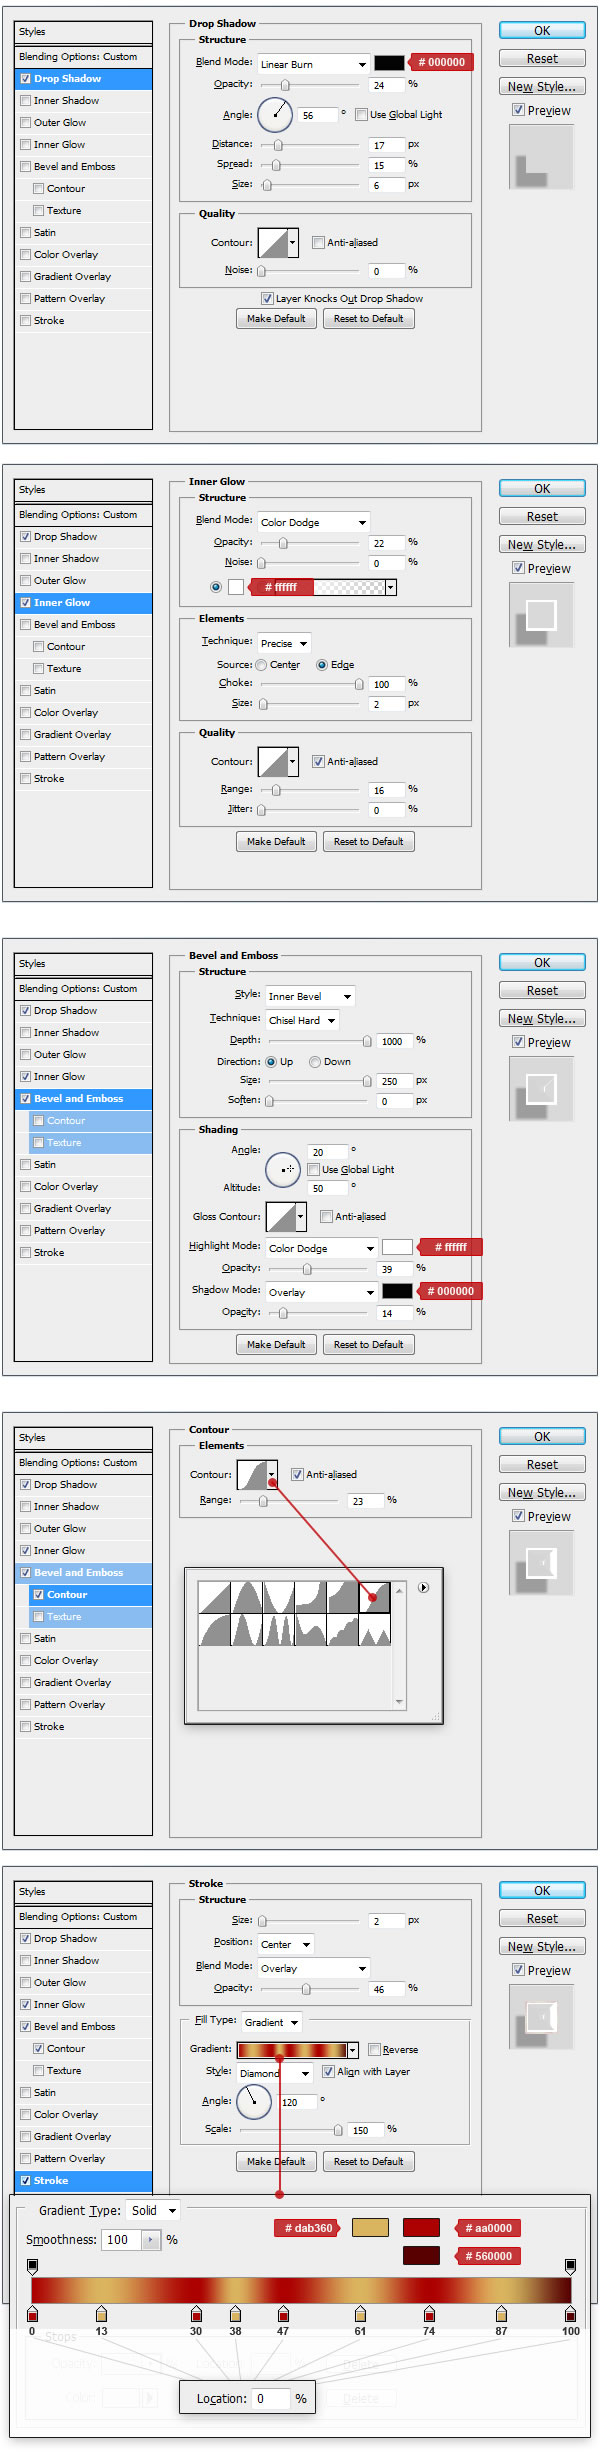
Conclusion
You have now completed this tutorial. Your text should now look similar to the image below.
Comments
Post a Comment