Step 1
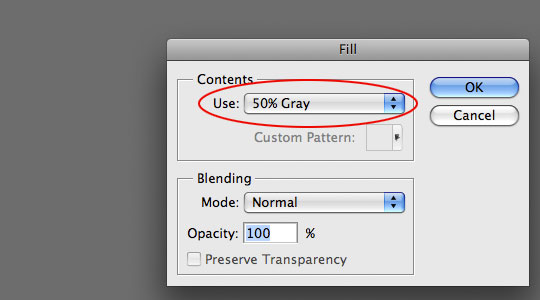
Lets jump right in and get our document set up. Create a new document by choosing File>New from the Main Menu. My working file for this lesson will be 540px x 300px at 72ppi. If you’re following along at home I suggest you start with something similar so that the Layer Styles we apply later will work for you without any adjustment.Before we even get into the text lets change the background color. This is important for a future step, so don’t skip it! Choose Edit>Fill from the Main Menu and when the Fill dialog appears choose 50% Gray from the drop-down menu.
Step 2
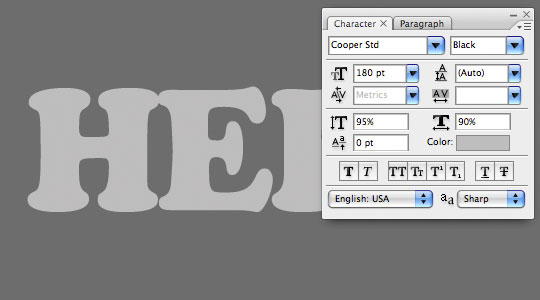
Set your foreground color to #CAC9C9 which is a nice light gray the press the T key to switch to the Type tool. I’m using a font called Cooper Std which is an Adobe font I believe, but I found a very similar font for you if you don’t have this one which can be found for free at webpagepublicity.com, the font is called Cooper Heavy there. It’s a nice bold font and will suit this effect nicely.Set a nice large font size and type your text onto the stage.
Step 3
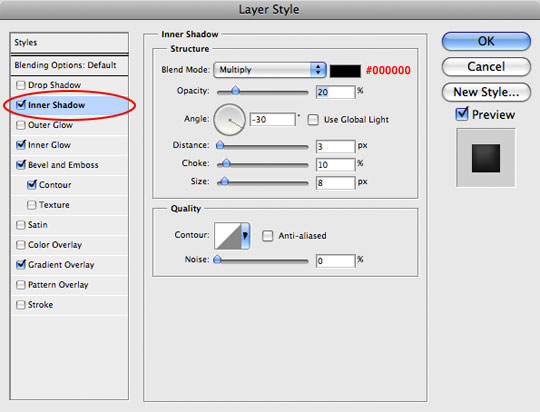
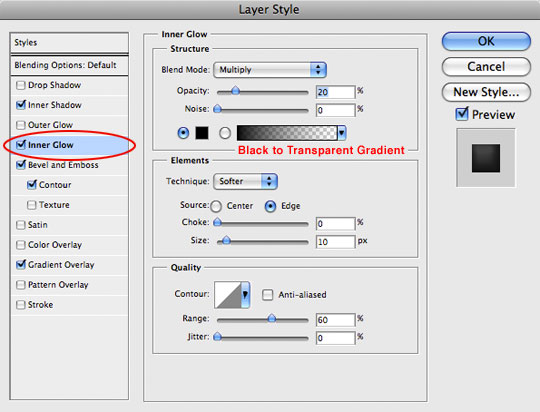
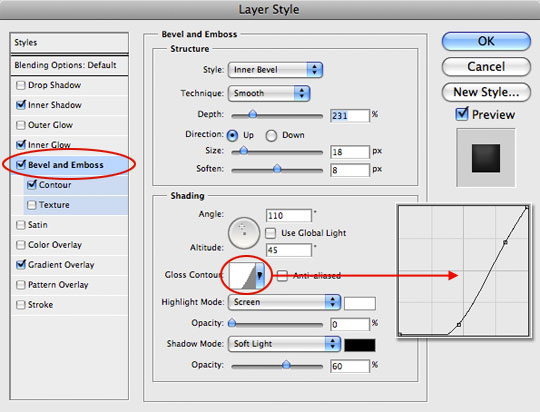
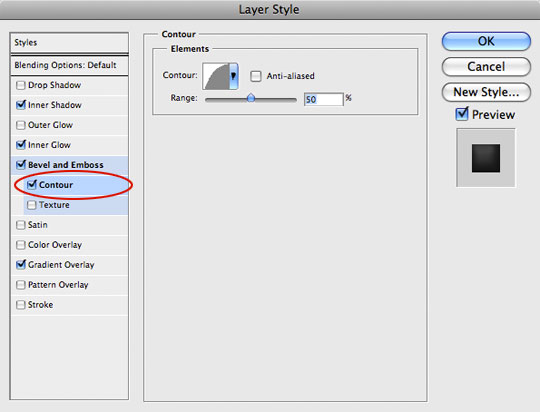
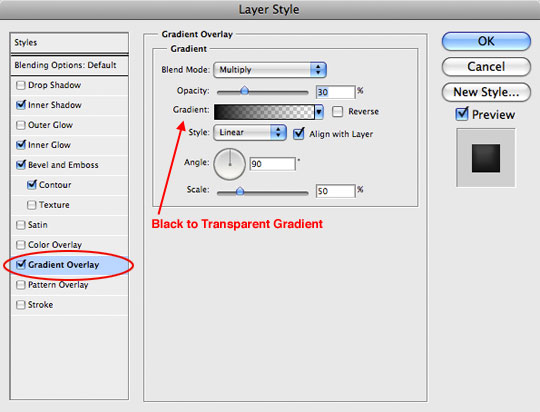
Next we’re going to add a preliminary series of Layer Styles to our text. These styles will add the shape and dimension we need in order to create our Displacement in the upcoming steps.Pull up the Layer Styles dialog by Control-Clicking (PC: Right-Clicking) on the Text layer in the layers palette and by choosing Blending Options from the menu. Move from section to section using the list of styles along the left hand side of the dialog box and enter all the Layer Styles described below.
Pay special attention here to all the settings in these styles. If your text doesn’t end up looking like mine, get your butt back to the beginning and try again!
Step 4
If you were a good little monkey your text should now look like this. If not, you know what you need to do!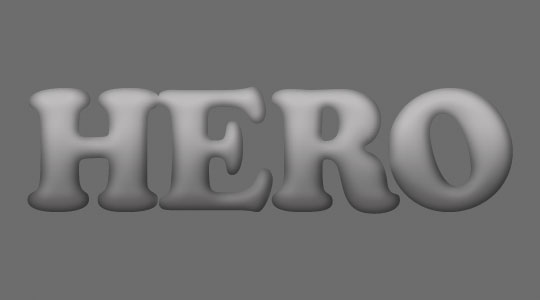
Step 5
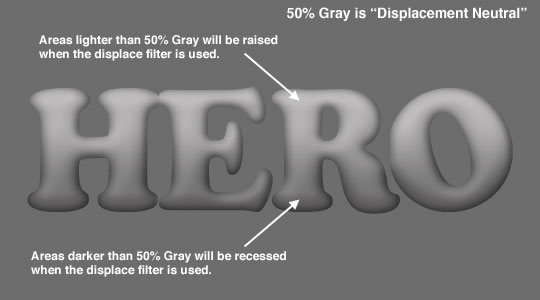
A little education on Displacement Masks:A displacement mask is an independent black and white .psd file that is used to define areas of an image for warping. The 50% gray we added in the background is displacement neutral meaning that no transformation will occur in those areas. The 3D looking surface that we have created by adding Layer Styles to the text will be used to "displace" an overlaying image (which we’ll get in just a minute). The areas darker than 50% gray will be recessed and the lighter areas will be raised.
To create a displacement mask we need to save the file just the way it is. Choose File>Save As from the Main Menu, name it Mask (or something you will remember) and then save it to your desktop or a folder that you will remember later when we need to use the file.
Step 6
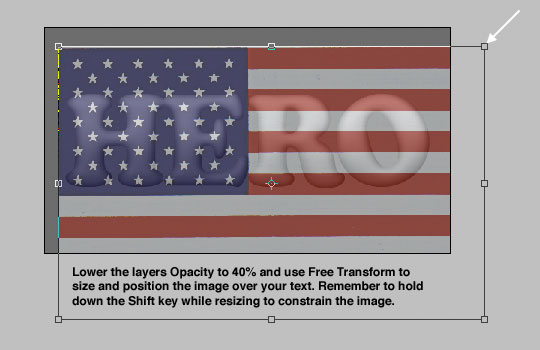
Ok, now it’s time to have a little fun. In this step you need to choose the image which you wish to overlay onto your text, I want to add an American Flag so I hit Google Images and found a nice bright flag image that was larger than my text.Open the image you wish to use, press Command-A (PC: Ctrl-A) to Select All. Copy the area inside the selection by pressing Command-C (PC: Ctrl-C) then close the image and return to your working document, then simply paste the image into the document by pressing Command-V (PC: Ctrl-V). A new layer will be created above your Text layer with your image. At this point the text is completely obstructed by the image we just pasted in, so lets go over to the Layers palette and lower the Opacity of this new layer to 40% so that we can see the text coming through the image.
At this point you can position your image, or use Free Transform to shrink it to fit. To invoke Free Transform press Command-T (PC: Ctrl-T), then while holding down the Shift key to constrain the proportions of the image, click and drag from the corner points until the overlay is to your liking. Commit the transformation by pressing the Enter key.
Step 7
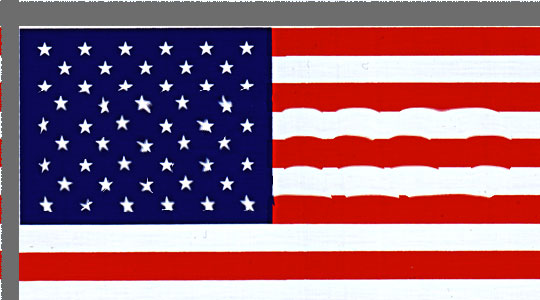
Now that the image is resized and placed correctly over the text, go ahead and bring the layers Opacity back to 100% in the Layers Palette.Press Command-A (PC: Ctrl-A) to Select All. This is especially important if the image you just resized is larger than the document size, because if you don’t select ONLY the area visible on the canvas the displace filter will try to apply itself to the entire image and you’ll end up with an unsatisfactory displacement.
With the selection made, choose Filter>Distort>Displace from the Main Menu. When the Displace Filter dialog box appears, set both the Horizontal and Vertical Scales to 5, and make sure that the Stretch To Fit and Wrap Around boxes are checked and click OK. This will open up the file browser where you’ll need to locate and select the Mask.psd file that you created earlier. Find it, select it, and click Open.
Go ahead and press Command-D (PC: Ctrl-D) to Deselect when you’re done. At this point you’ll notice that some warping has been applied to your image, but it will be unclear just how good the result is until the next step.
Step 8
To really see how the displacement looks, we need to clip the image to our text. To do this simply Command-Click (PC: Right-Click) on the Image layer and choose Create Clipping Mask from the menu. This will mask your image to the text and will also allow all the Layer Styles we applied to the Text layer to also effect the Image layer. You’ll notice that the clipping mask is denoted in the Layers palette with an indentation of the clipped layer and a little arrow pointing to the layer it’s clipped to.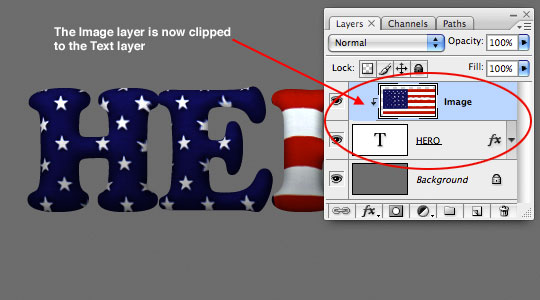
Step 9
Now lets open the Layer Styles for the Text layer back up by double-clicking on the Layer Style icon within the Text layer in the Layers Palette. From the menu on the left, click on Bevel And Emboss to view those settings. Pull the Soften slider back to 3 and move the Highlight Opacity slider from 0 to 100%. This will add the highlights that make the text effect look more glossy. When you’re done, click OK.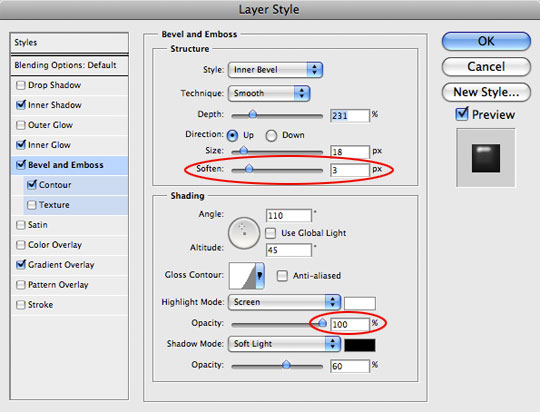

Step 10
Now lets get rid of that 50% Gray background! Click on the Background layer in the Layers palette to select it, press the D key to reset your foreground and background colors to black and white (if they aren’t already) and then simply press Option-Delete (PC: Alt-Backspace) to fill the layer with the background color (white).
Step 11
I think this effect might look nice with a reflection, so lets create one now. With the Background layer still selected, click the Create New Layer icon at the bottom of the Layers palette to add a new layer above the Background layer. Double-Click the name of this new layer and rename it Reflection. By default the new layer will be selected in the Layers palette and that’s perfect. Now lets load the Text layer as a selection by simply holding down the Command (PC: Ctrl) key and clicking on the Text layer’s thumbnail in the Layers palette.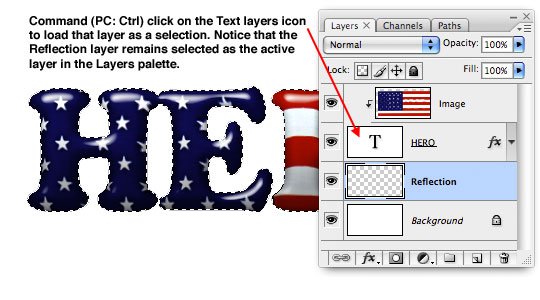
Step 12
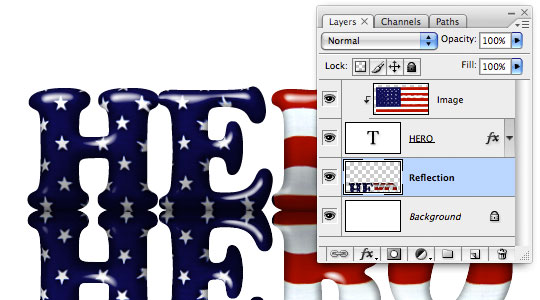
Now we’re going to copy and paste the selected area in two simple keyboard shortcuts. First press Command-Shift-C (PC: Ctrl-Shift-C), this will copy what’s inside the selection from ALL layers whereas if you had just pressed the standard shortcut for Copy you would only copy the selection from the active layer. Then simply press Command-V (PC: Ctrl-V) to Paste what you just copied onto the new blank Reflection layer.Obviously since you copied exactly what was on the stage onto a layer that’s behind everything, you won’t see any changes yet (although you should now see the pasted content in the Layer thumbnail preview in the Layers palette). Lets change that by flipping our newly pasted content upside down. Select Edit>Transform>Flip Vertical from the Main Menu.
Press the V key to switch to the Move tool and then while holding down the Shift key to insure that you move the reflection straight, click and drag it downward until the bottoms of the two meet. (*note: Because the bottoms of my letters curve a little, I’ve moved the reflection up just a few pixels to ensure all points of contact look right.)
Step 13
Next, we’ll make the reflection fade using a Layer Mask and Gradient. With the Reflection layer selected in the Layers palette, click the Add Layer Mask icon at the bottom of the Layers palette (it looks like a rectangle with a circle inside it). You’ll notice now that a new Layer Mask has been added to the Reflection layer.By default, when you add a new Layer Mask, Photoshop selects the mask automatically. This will be evident by the tiny brackets that appear around the Layer Mask thumbnail in the Reflection layer.
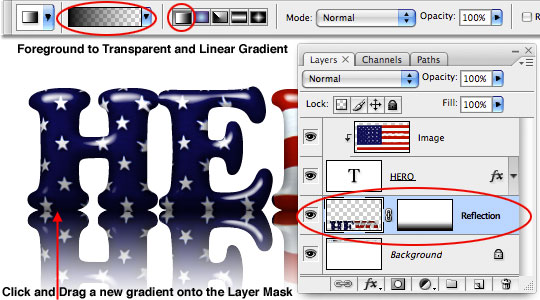
Now lets switch to the Gradient tool by pressing the G key. In the Gradient Options bar at the top of Photoshop make sure that the Foreground to Transparent swatch is selected and that the Linear Gradient icon is selected as shown below, then click and drag a new gradient onto the Layer Mask by simply clicking and dragging your mouse from the bottom of the reflection text to the top and releasing your mouse.
Step 14
To finish off the reflection, lower the Reflection layer Opacity in the Layers palette to around 40%.
Step 15
We might as well take this effect all the way by adding a shadow at the bottom of the layers right? … If I do it to my final image and don’t show you how, I know I’ll hear about it, so lets get to it.Create a new layer above the Reflection layer called Shadows and load the Text layer as a selection, just like we did in Step 11 by holding down the Command (PC: Ctrl) key and clicking on the Text layer’s icon in the Layers palette (make sure that your Shadows layer remains selected). Instead of copying anything this time, lets simply fill the selection with black by pressing Command-Delete (PC: Ctrl-Backspace). Again, you probably won’t see anything except in the thumbnail in the Layers palette because we’re working behind the original Text layer.
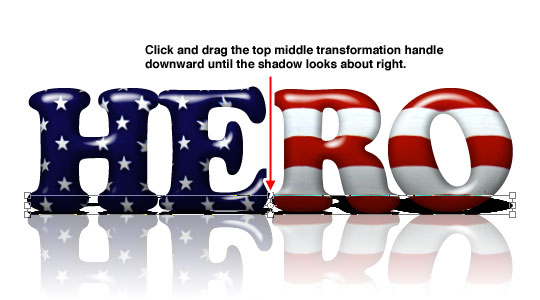
Invoke the Free Transform tool by pressing Command-T (PC: Ctrl-T) and then click and drag the top middle handle of the Transform box downward until the shadow looks right (see my example below).
Step 16
Now we’ll just add a little blur to the shadow by choosing Filter>Blur>Gaussian Blur from the Main Menu. When the dialog pops up, give the blur a setting of 2-3 pixels and click OK. Lower the Shadows layer Opacity to around 60% and if needed, use a round soft edged brush to touch up the shadows and you’re finished!I hope you learned a little something about Displacement Maps and the Displace filter along the way. If you’d like to explore this filter further, check out my Virtual Letterman Jacket tutorial!

Comments
Post a Comment