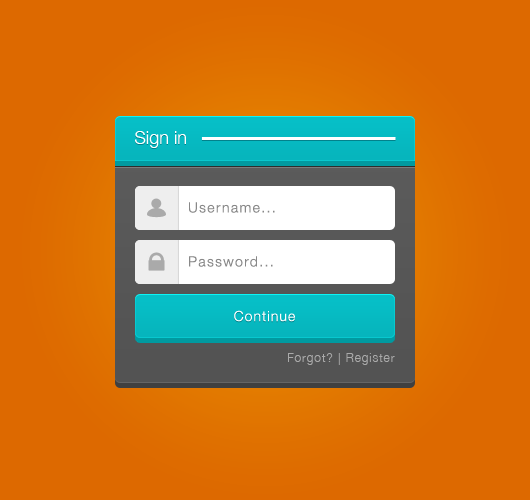
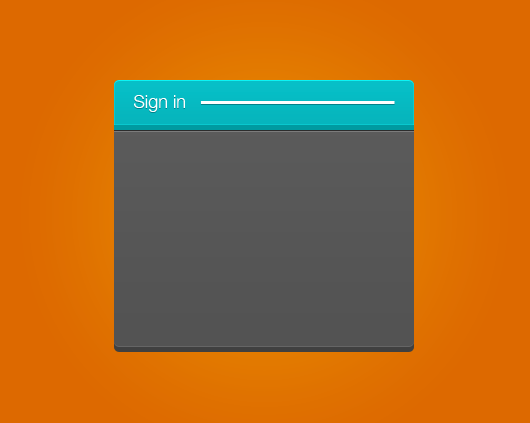
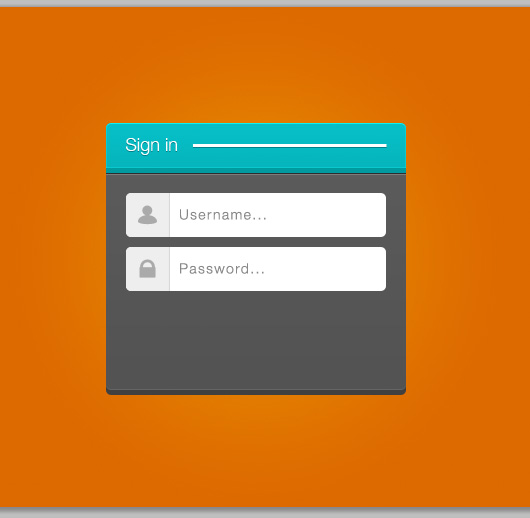
Photoshop is often used to create a gorgeous graphics and user interface design. In this photoshop tutorial,
I’ll show you how to design a simple login form interface. I’ll be
using a combination of vector shapes and layer styles. Let’s get
started!
Check ‘Vertical’ and fill position to ’0px’ and then click ‘OK’
Do it again and fill this:
Vertical: 20px,64px,150px,280px, 300px.
Horizontal: 0px,45px,50px,70px,114px,124px,168px,178px,222px,227px,237px,247px 267px
If you do like I do, the result would look like this
set width to 600px and height to 500px.
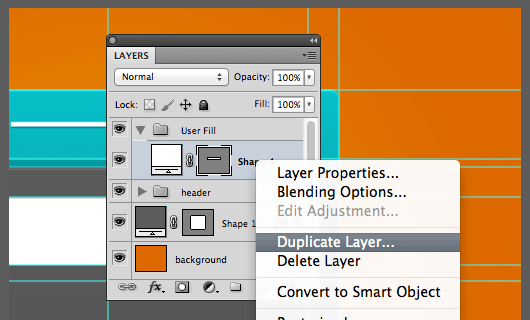
Right-click on the layer “Background” with your mouse and choose ‘Blending Options’
Choose ‘Gradient Overlay’ and apply this layer style
Apply the following layer style to the layer “Shape 1”
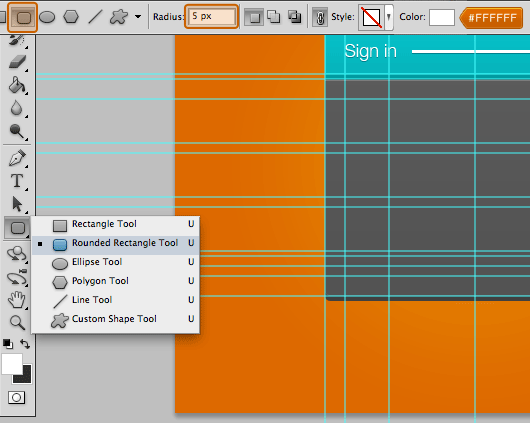
Create object with ‘Rounded Rectangle Tool’ with radius: 5px and color: #06BFC7, like in the picture below

With ‘Pen Tool’ delete the point like in the picture
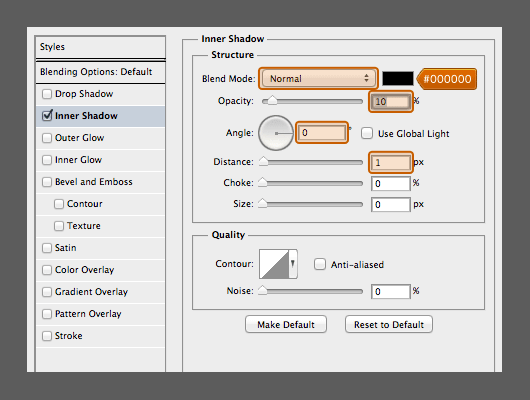
Apply the following layer style to the layer


Apply the layer style to the text

Apply the layer style to the line
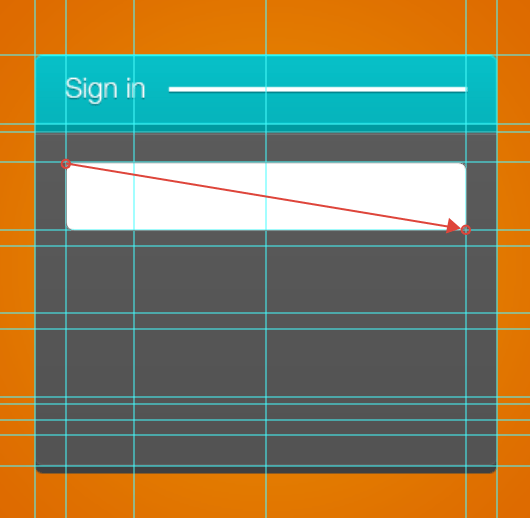
Create object with ‘Rounded Rectangle Tool’ with radius: 5px and color: #FFFFFF
Duplicate the object and change the colour to #EEEEEE
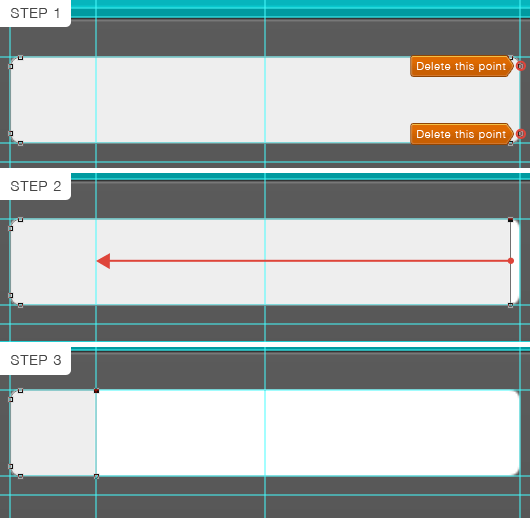
With ‘Pen Tool’ delete and move some point like the picture below
Apply the layer style to the object
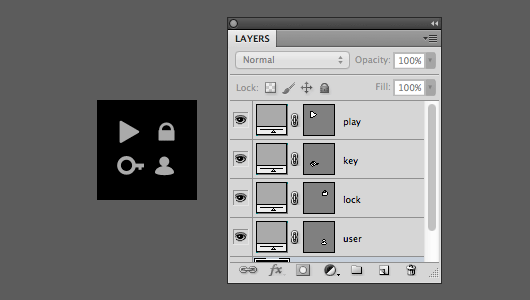
Add icon and text

Here I have prepare this small icon in vector object for you to use (
Download “download-ico-login-form-tutorial.zip” download-ico-login-form-tutorial.zip – Downloaded 545 times – 20 kB
)
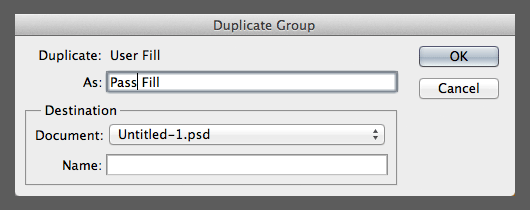
Change the group name to “Pass Fill”
Change the icon and the text
Create object with ‘Rounded Rectangle Tool’ with radius: 5px and color: #06BFC7
Apply the following layer style to the layer

Add the text at the center of the button
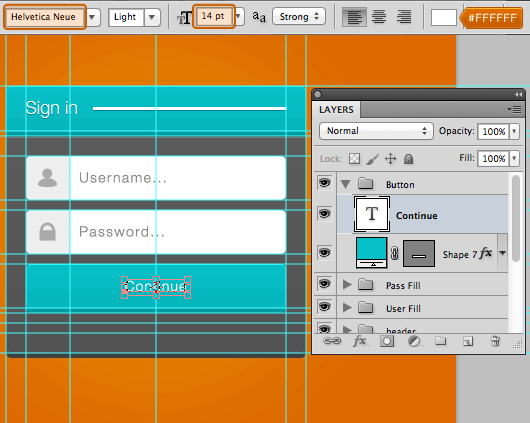
Apply the layer style to the text

Tutorial Details:
- Program: Adobe Photoshop
- Difficulty: Beginner
- Estimated Completion Time: 45 minutes
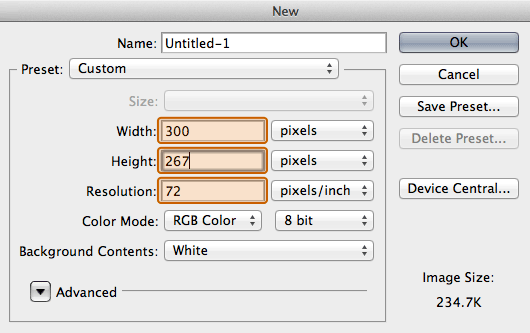
Step 1:
Create a new file, Open menu ‘File’ -> ‘New’. And set Width: 300px, Height: 267pxStep 2:
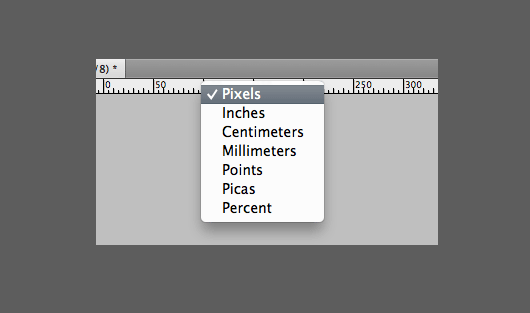
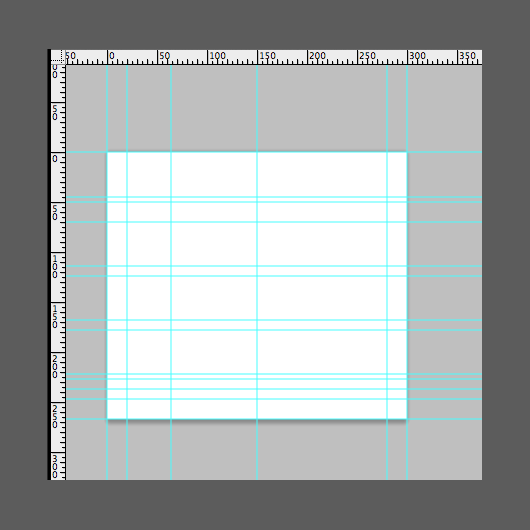
Show rulers by choosing menu ‘View’->’Rulers’. Then change the Ruler unit to Pixel by Right-click on the Rulers with your mouse.Step 3:
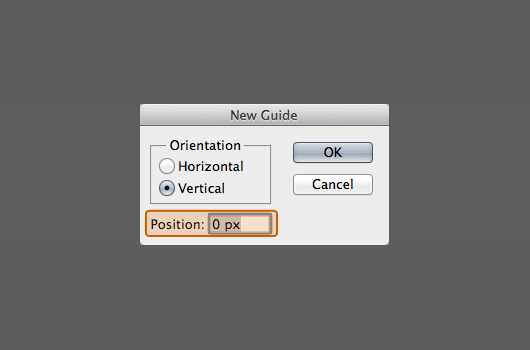
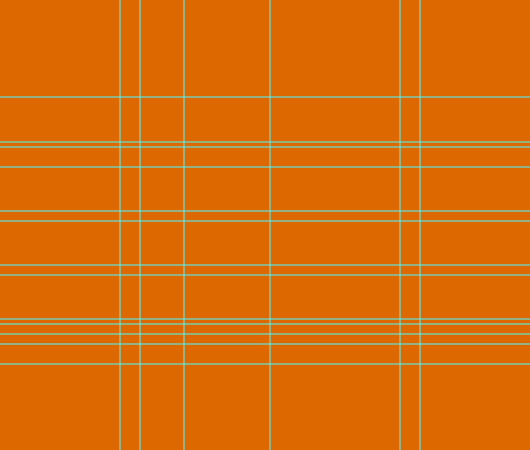
Create guide with choose menu ‘View’->’New Guide’.Check ‘Vertical’ and fill position to ’0px’ and then click ‘OK’
Do it again and fill this:
Vertical: 20px,64px,150px,280px, 300px.
Horizontal: 0px,45px,50px,70px,114px,124px,168px,178px,222px,227px,237px,247px 267px
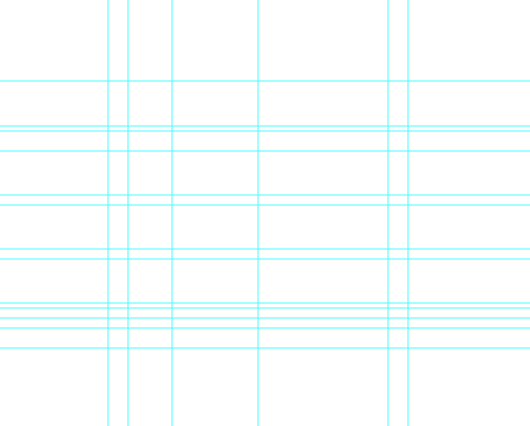
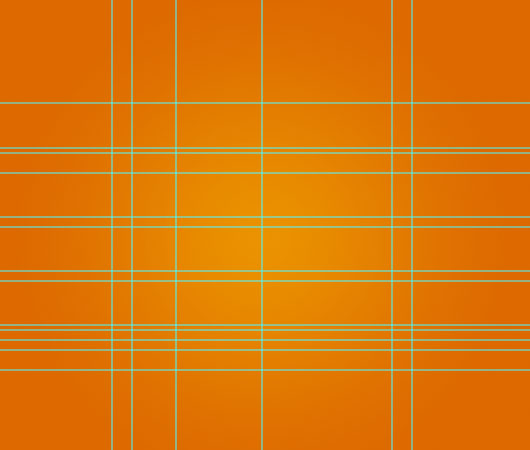
If you do like I do, the result would look like this
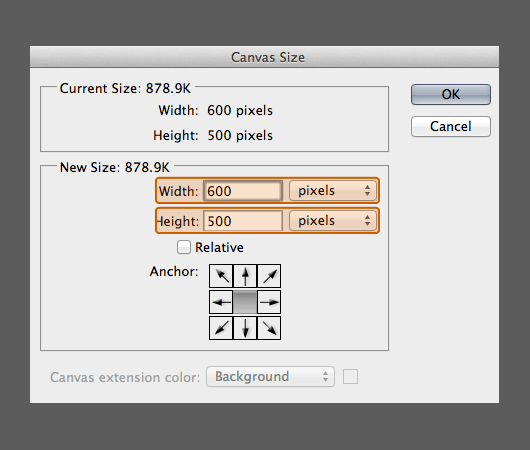
Step 4:
Now after we create the guide, resize the canvas with choice menu ‘Image’->’Canvas size’set width to 600px and height to 500px.
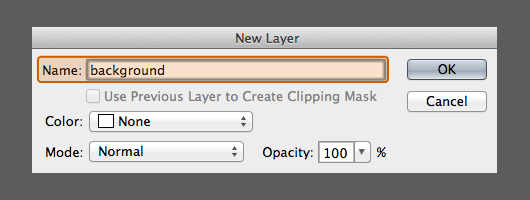
Step 5:
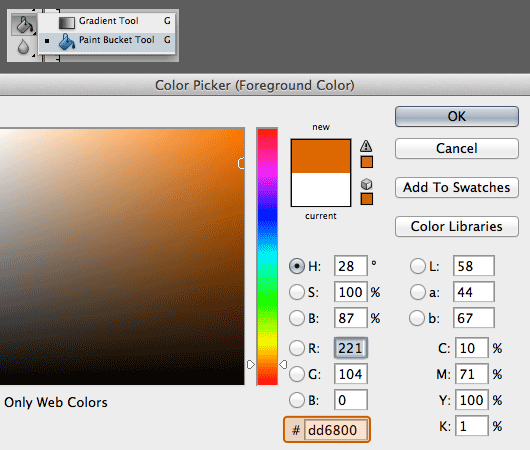
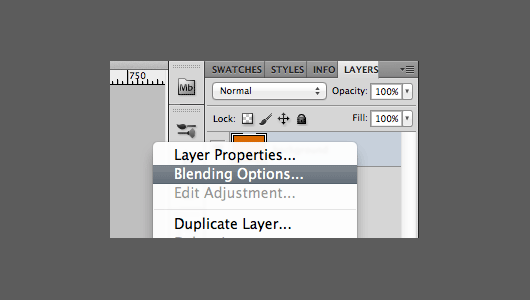
Double click on layer Background. Change the name of the layer to “background”Step 6:
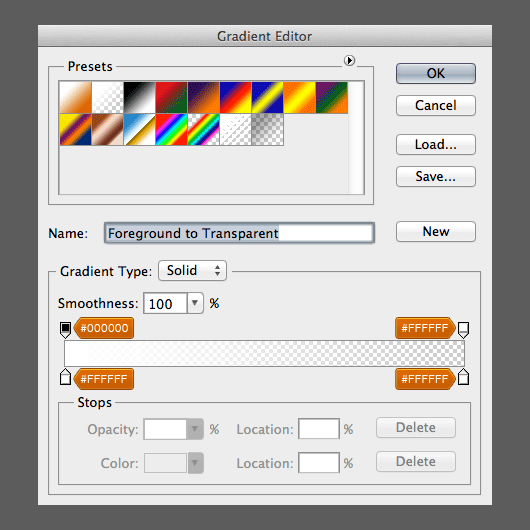
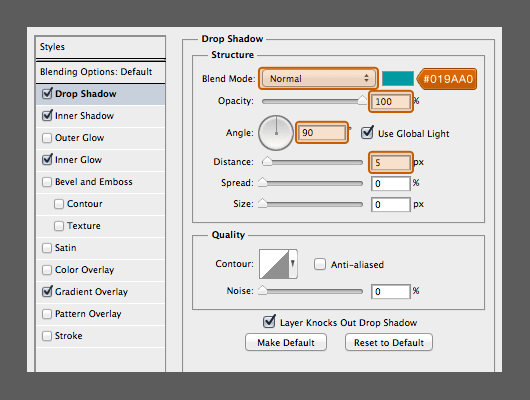
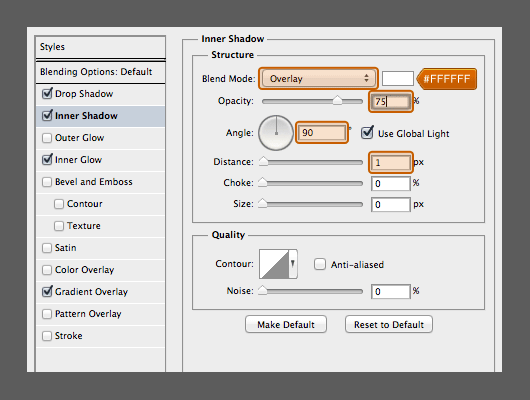
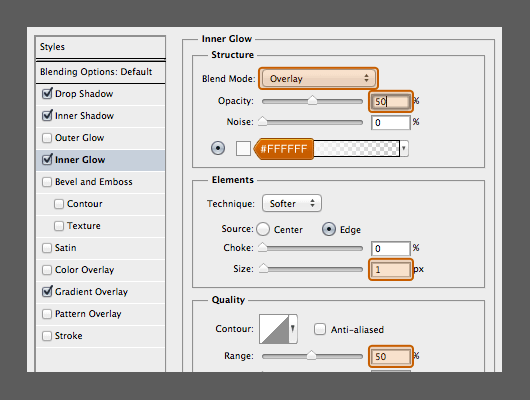
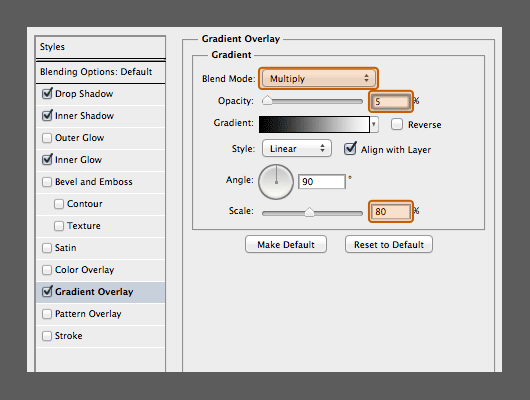
Pick ‘Paint Bucket Tool’ and choose color #dd6800 from side tool box. And paint it to the canvasRight-click on the layer “Background” with your mouse and choose ‘Blending Options’
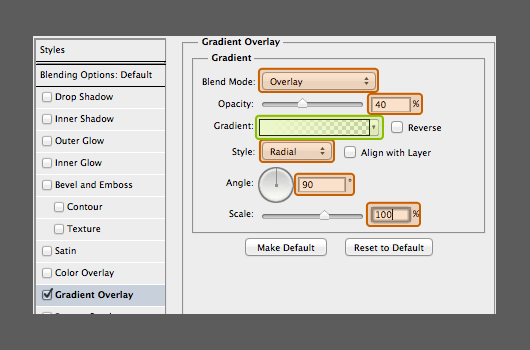
Choose ‘Gradient Overlay’ and apply this layer style
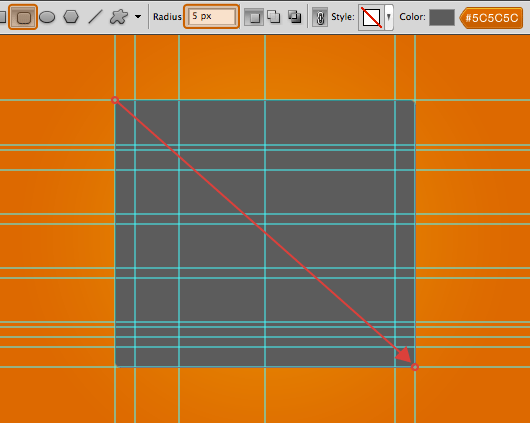
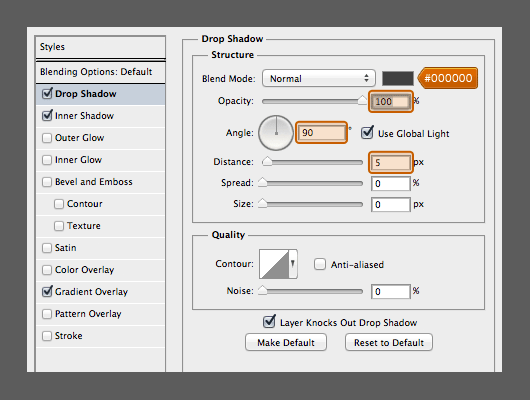
Step 7:
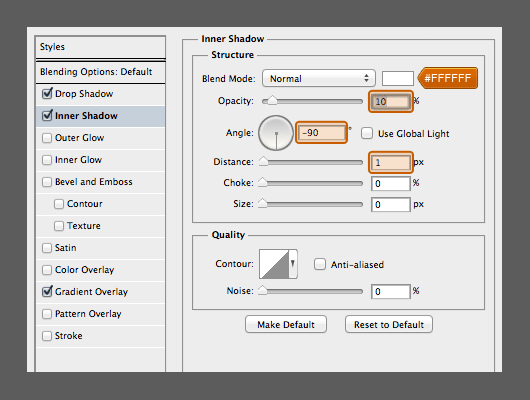
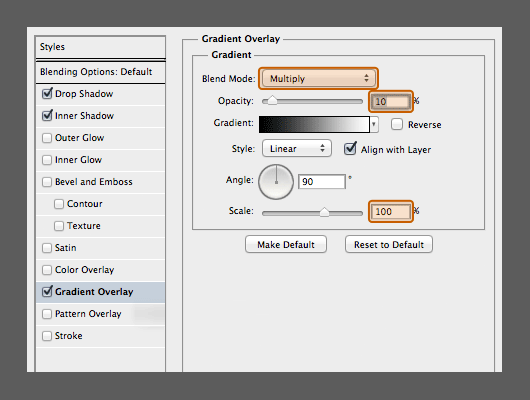
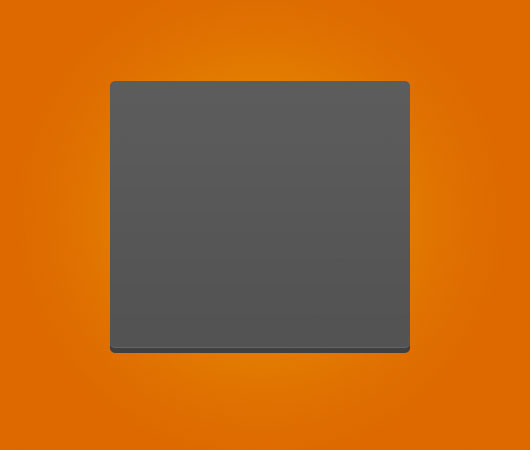
Create object with ‘Rounded Rectangle Tool’ with radius: 5px and color: #5C5C5C.Apply the following layer style to the layer “Shape 1”
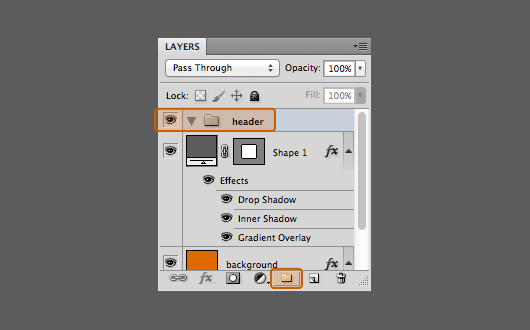
Step 8:
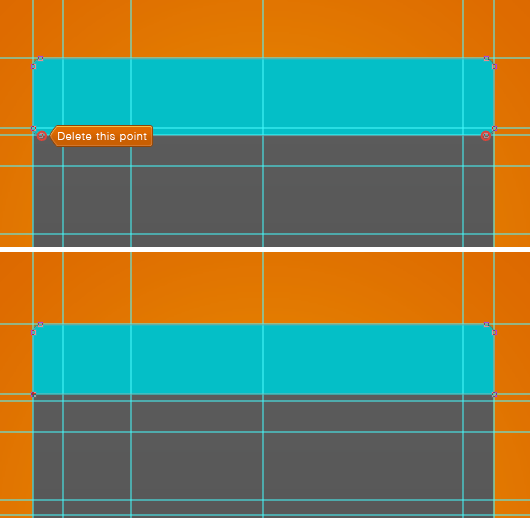
Create a new group and name it “Header”Create object with ‘Rounded Rectangle Tool’ with radius: 5px and color: #06BFC7, like in the picture below
With ‘Pen Tool’ delete the point like in the picture
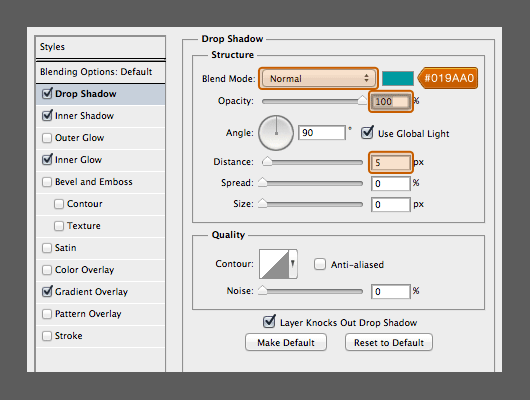
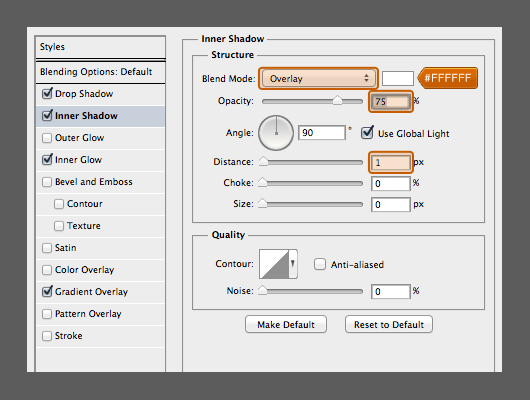
Apply the following layer style to the layer
Step 9:
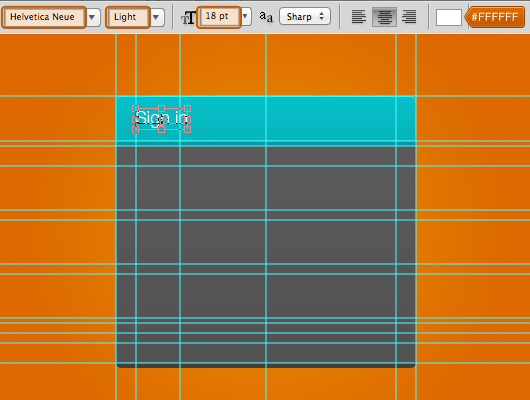
Create a textApply the layer style to the text
Step 10:
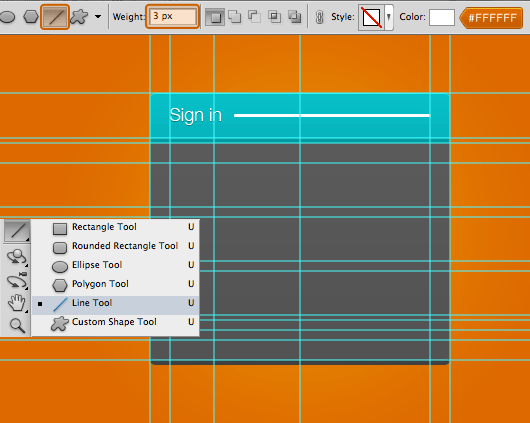
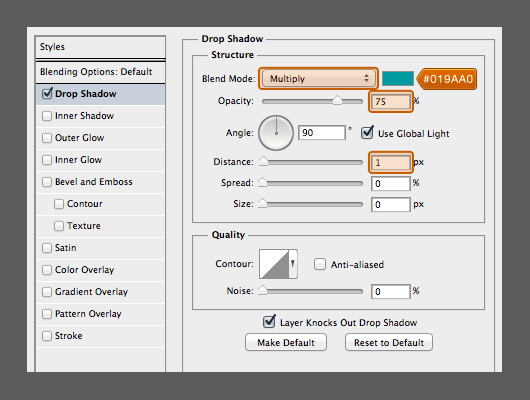
Create line beside the textApply the layer style to the line
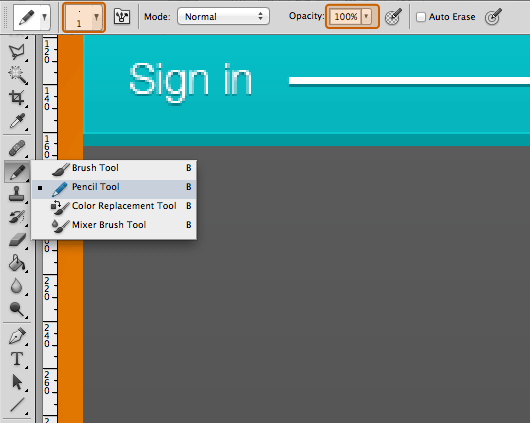
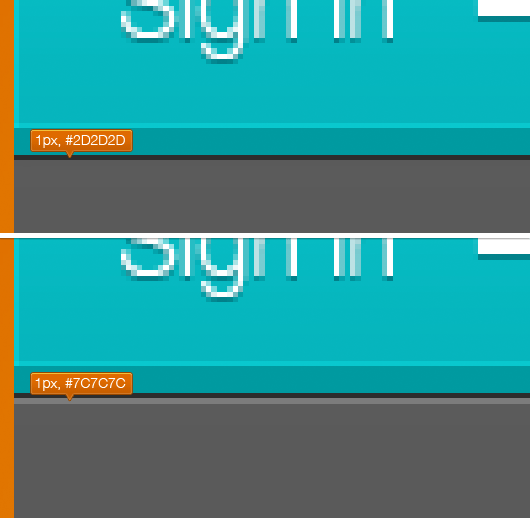
Step 11:
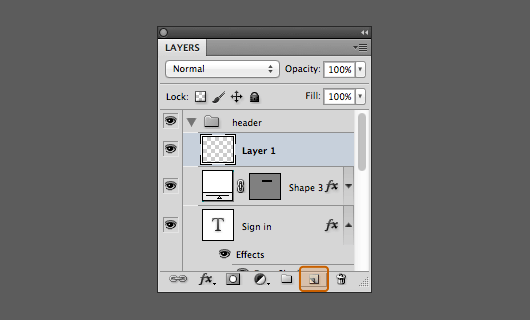
At the bottom of the Header create line with pencil. First create a new layer and then pick Pencil Tool at tool box on side barStep 12:
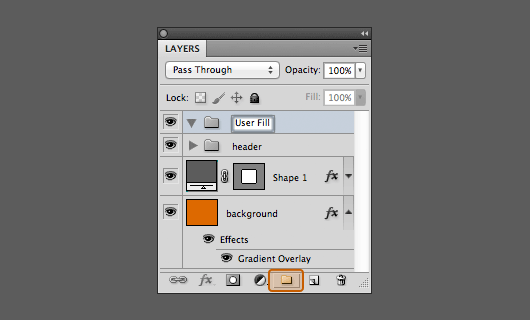
After finish with the header, now create a new group and name it with “User Fill”.Create object with ‘Rounded Rectangle Tool’ with radius: 5px and color: #FFFFFF
Duplicate the object and change the colour to #EEEEEE
With ‘Pen Tool’ delete and move some point like the picture below
Apply the layer style to the object
Add icon and text
Here I have prepare this small icon in vector object for you to use (
Download “download-ico-login-form-tutorial.zip” download-ico-login-form-tutorial.zip – Downloaded 545 times – 20 kB
)
Step 13:
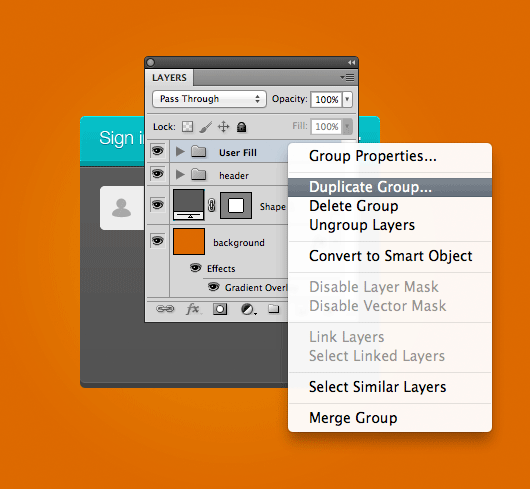
Step 13 is almost the same as in Step 12. Or if you wanna make it quick just dupilcate group “User Fill”Change the group name to “Pass Fill”
Change the icon and the text
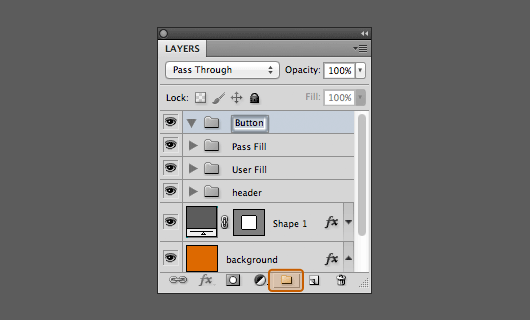
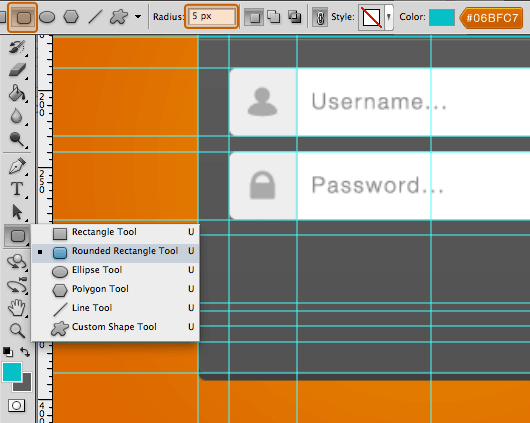
Step 14:
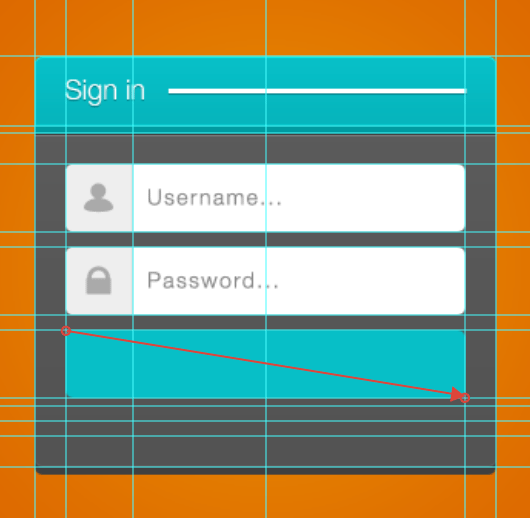
Create a new group and name it with “Button”Create object with ‘Rounded Rectangle Tool’ with radius: 5px and color: #06BFC7
Apply the following layer style to the layer
Add the text at the center of the button
Apply the layer style to the text
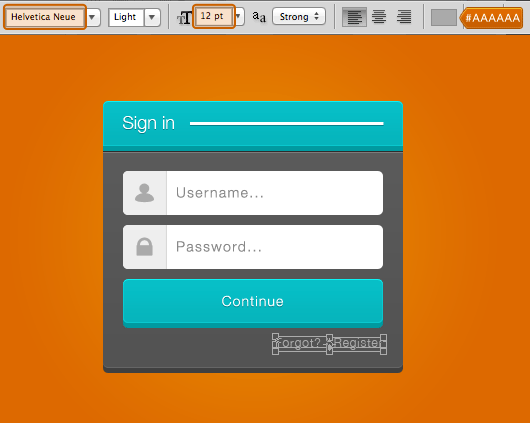
Step 15:
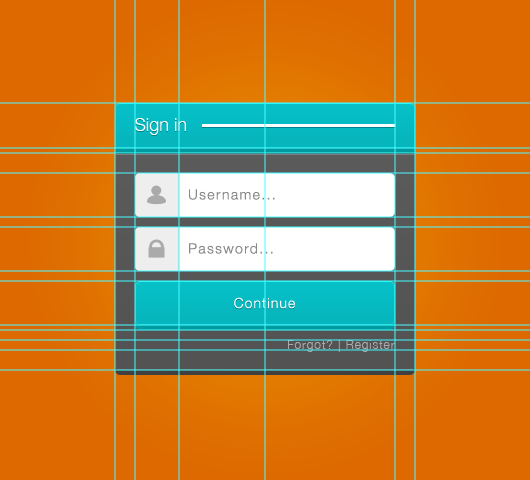
Now the last, Add the text below the buttonConclusion
The point from this tutorial is the spacing between elements. So the first things I made was to prepare the guides which will assist and accelerate the process of making this login form.
Comments
Post a Comment