Have you ever shied away from Photoshop’s 3D features?
They’re becoming increasingly powerful with each version, and are well worth integrating into your design work.
Today you’ll learn how to create a simple wooden text effect using some practical, 3D and texturing techniques in Photoshop CS6 Extended.
It is possible to follow this tutorial using CS5 Extended, but please remember that you must have the extended version of Photoshop in order to work with 3D projects.
Don’t worry if this is your first time working with 3D design, I’ll hold your hand through every step along the way!
Let’s get started shall we?


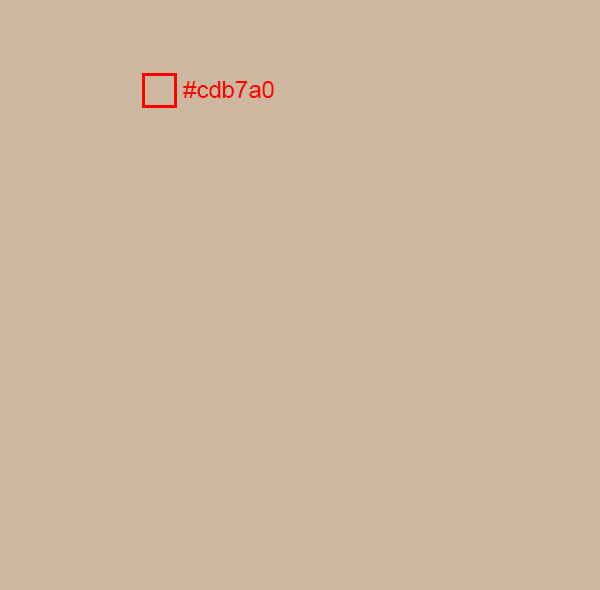
Fill the background layer with a solid color, #ccb79f, this will be useful for blending the wood texture.


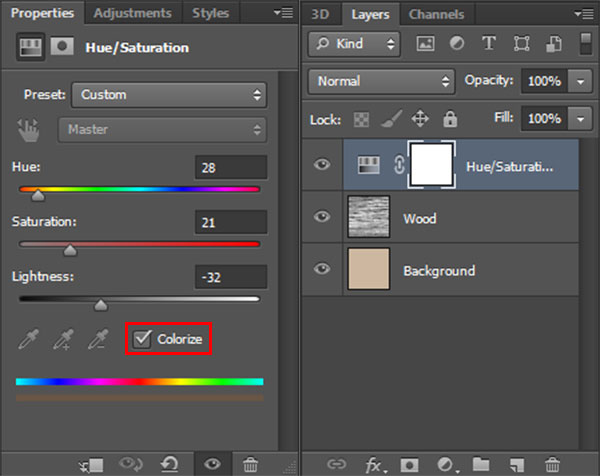
Hue: 28; Saturation: 21; Lightness: -32; Check Colorize.
Automatically your layer panel switch to a 3D panel. The Properties panel show you the actual camera. On the left top corner you can see a floating window showing “something”, that’s your camera top view you can switching between different cameras.
Yours should look like this:


The result:
On the 3D panel select the last 4 layers inside of PSD extrusion (see the image below). With this layers selected go to Properties panel and click on the arrow next to the sphere. This will show you a list with the defaults textures, scroll down until you find Wood Balsa and select. Make sure that your Diffuse color is: #c18759 and Illumination: #352c22. Also change this:
Shine: 50%; Reflection: 15%; Bump: 37%.


The result:


The result:
Diffuse: #9d8365; Specular: #020202; Illumination: #000000; Ambient: #030303; Shine: 50%; Reflection: 15%; Bump: 37%; Refraction: 1,550.

The result:


Close the tab and save changes. Back into our 3D Text document should look like this:

Should look like this:


U Scale: 63,37%; V Scale: 85,15%;U Offset: -18,81%; V Offset: 2,97%. After that Render, the images and enjoy the result. You can do it by clicking on the button icon at the Properties panel or Menu 3D>Render or press Alt+Ctrl+Shift+R.
They’re becoming increasingly powerful with each version, and are well worth integrating into your design work.
Today you’ll learn how to create a simple wooden text effect using some practical, 3D and texturing techniques in Photoshop CS6 Extended.
It is possible to follow this tutorial using CS5 Extended, but please remember that you must have the extended version of Photoshop in order to work with 3D projects.
Don’t worry if this is your first time working with 3D design, I’ll hold your hand through every step along the way!
Let’s get started shall we?
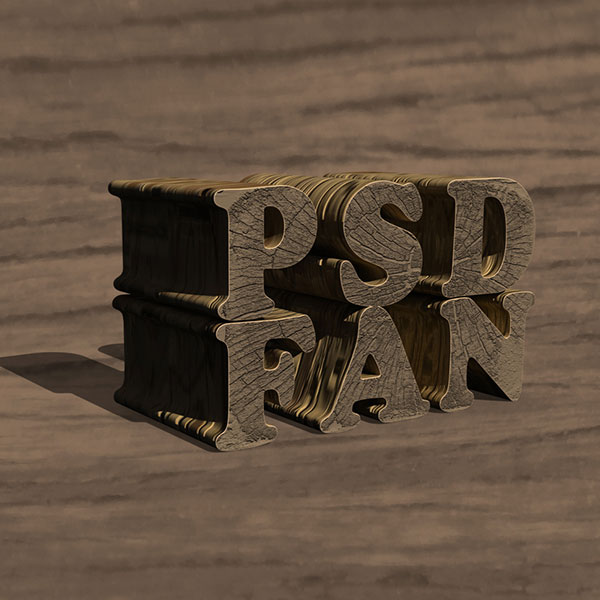
Final Image
As always, this is the final image that we’ll be creating:Resources Used In This Tutorial
Step 1
Start by creating a new document, width 1000px, height: 1000px, resolution: 72. Name it 3D Text.Step 2
Now, let’s create the background.Fill the background layer with a solid color, #ccb79f, this will be useful for blending the wood texture.
Step 3
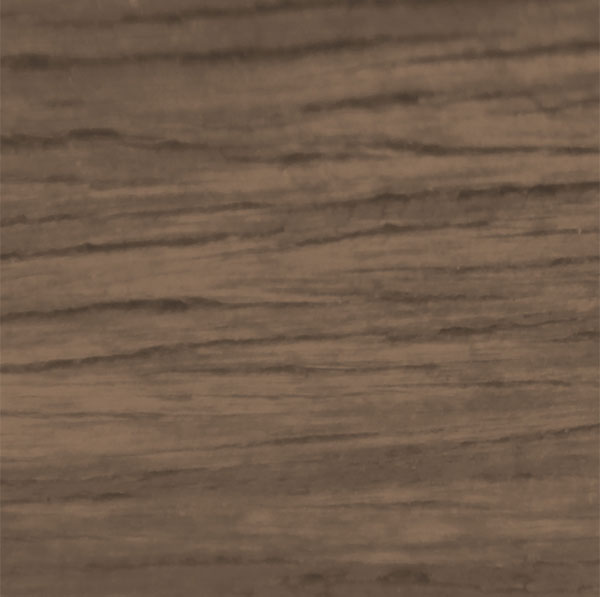
Open the “wood background” photo into another document and select the focus section like I show you below. Paste it into our document at the top of layer panel, name it Wood. Use Free Transform Tool to make it fit in the stage and look fine. Set the Blending Mode to Multiply, opacity to 77% and fill to 84%. At this point should look like this:Step 4
Now add a Hue/Saturation Adjustment Layer. Set this values:Hue: 28; Saturation: 21; Lightness: -32; Check Colorize.
Step 5
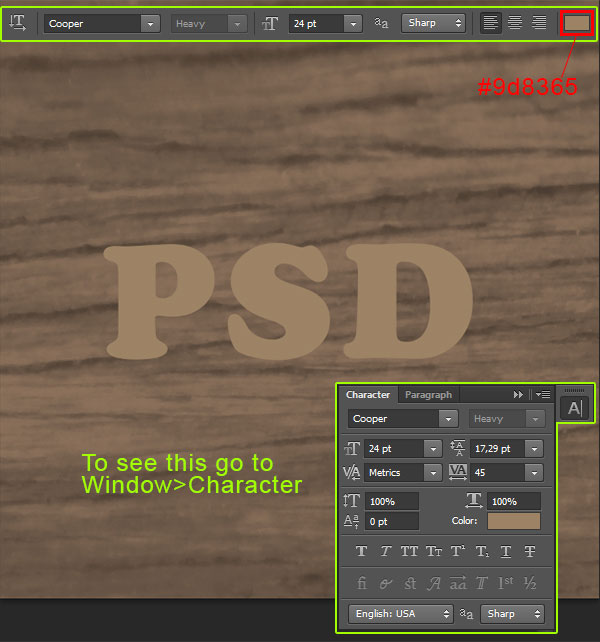
Download the font and install it or use one of your choice. Type PSD, use #9d8365 for the font color and 24 pt for the font size like you can see below.Step 6
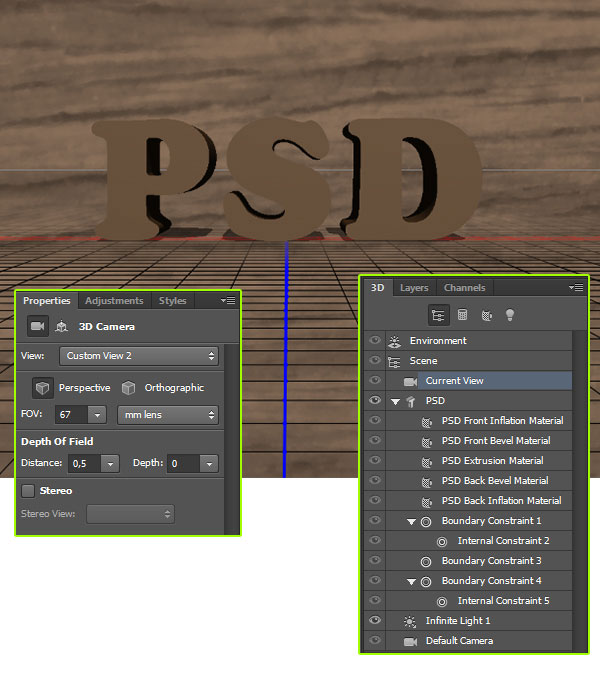
With the text layer selected go to 3D>New 3D Extrusion from Selected Layer. Now your stage will change to 3D view to work better.Automatically your layer panel switch to a 3D panel. The Properties panel show you the actual camera. On the left top corner you can see a floating window showing “something”, that’s your camera top view you can switching between different cameras.
Yours should look like this:
Step 7
Now with the Move Tool selected, the Rotate the 3D Object active and on the 3D panel Current View selected drag on the top of the stage over the text and rotate, your mouse will change into an arrow. Your text now will look like this:Step 8
On your 3D panel you will find your 3D layers. Below “Current View” you will find a layer with a T icon called PSD. The icon represent what kind of content is in the layer. Inside you will find 5 more layers who compose your 3D Object. With the PSD layer selected the Properties panel will change. Go there and change the Extrusion Depth to 347.Step 9
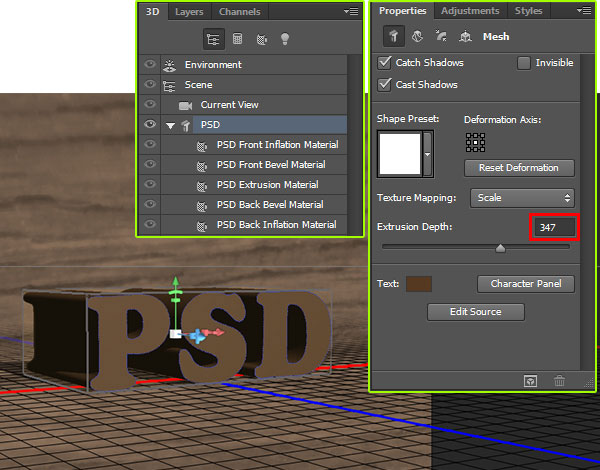
Now on the 3D panel select the Cap Option to show new options. On Bevel section change the Width to 2% and Contour to the round one. On Inflate section change Angle to 90º. After that you can render to take a look on how is going. Click on the render icon at the button of this panel. You can stop the render when you are happy with the result just clicking anywhere on the stage don’t need to wait until the end.The result:
Step 10
Let’s add some texture.On the 3D panel select the last 4 layers inside of PSD extrusion (see the image below). With this layers selected go to Properties panel and click on the arrow next to the sphere. This will show you a list with the defaults textures, scroll down until you find Wood Balsa and select. Make sure that your Diffuse color is: #c18759 and Illumination: #352c22. Also change this:
Shine: 50%; Reflection: 15%; Bump: 37%.
The result:
Step 11
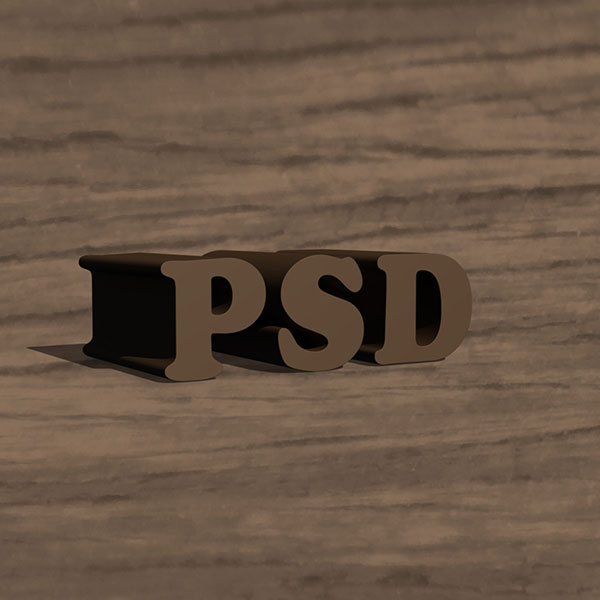
To make it look better with the PSD Extrusion Material layer selected, go to Properties panel and change the wood texture for another one with more cracks. Select Wood Ash. Change Diffuse color to #c99b37 and Bump value to 30%. Now if you want it Render the image to take a better look of how is going.The result:
Step 12
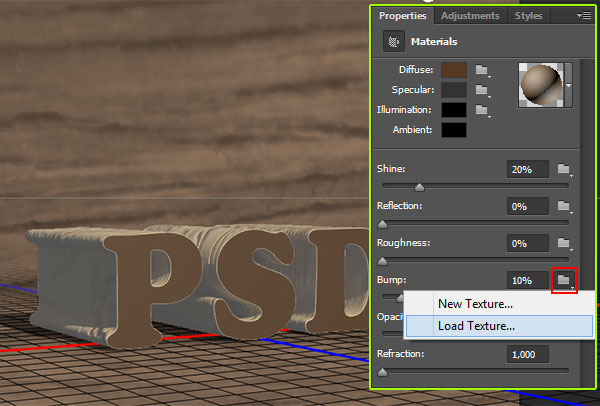
You can add your own texture. How? Let’s do it. Select the PSD Front Inflation Material layer. Go to Properties panel and click on the folder icon at the right of Bump values > Click Load Texture and give it the path to the wood texture from the resources section for this tutorial.Step 13
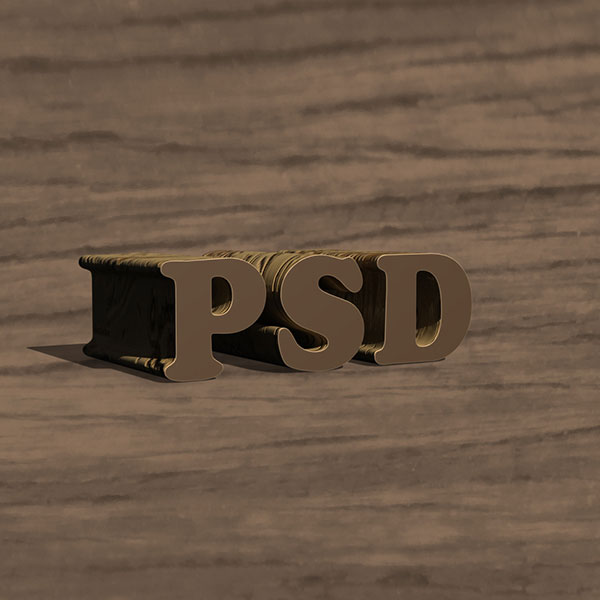
At the Properties panel change this values:Diffuse: #9d8365; Specular: #020202; Illumination: #000000; Ambient: #030303; Shine: 50%; Reflection: 15%; Bump: 37%; Refraction: 1,550.
The result:
Step 14
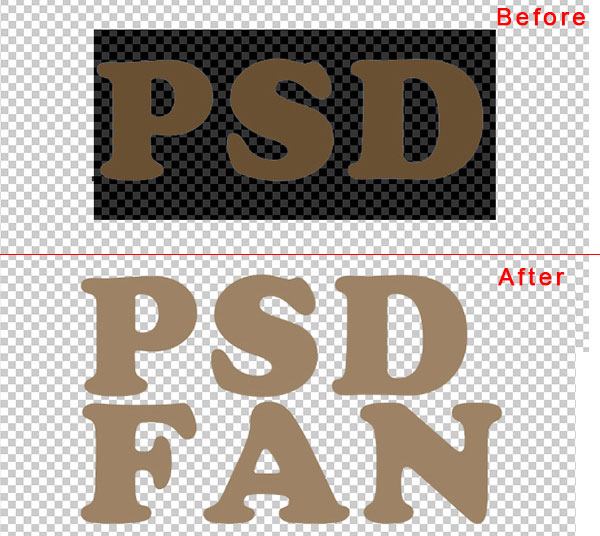
On CS5, after we finish our job on 3D section, we CAN NOT change anything on our 3D Object. Now on CS6 is different, we CAN make changes on our 3D Object. How? Go to your 3D panel and select your 3D Object (PSD). Them on the Properties panel, at the button, click Edit Source, this option will open into a new document your text to be retyped. Now change the text, I’ll add FAN on a new line.Step 15
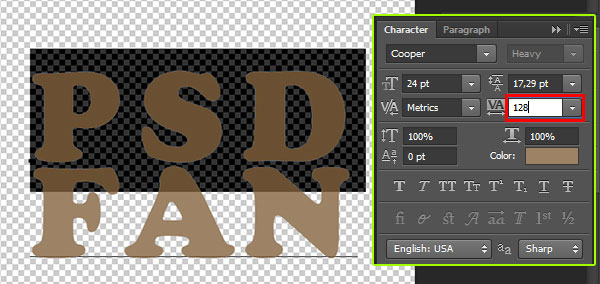
The letter spacing isn’t looking quite right. To fix this, select only the PSD letters not FAN, go to your Character panel and change the tracking values to 128. Now select the whole word and change the leading values to 16,55 pt.Close the tab and save changes. Back into our 3D Text document should look like this:
Step 16
Now go to 3D>Snap 3D Object to Ground Plane. The shadow is fixed. Move the text to fit it well in the stage, scale along Y a little bit. Should look like this:
Step 17
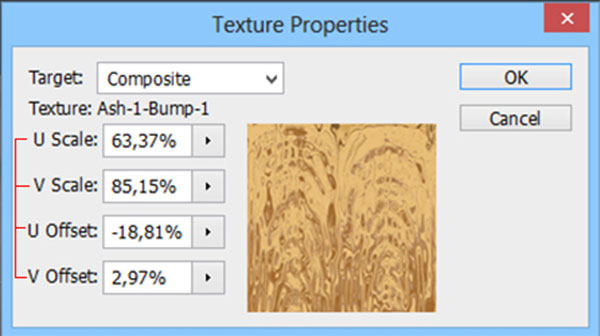
Those textures are too big, so let’s make some changes. Select the PSD FAN Front Inflation Material, at the Properties panel click on the folder icon at the right of Bump values > Edit UV Properties… Change all values to 100%. See the result below:Step 18
Now we are going to do the same but this time for PSD FAN Extrusion Material. Change the following values:U Scale: 63,37%; V Scale: 85,15%;U Offset: -18,81%; V Offset: 2,97%. After that Render, the images and enjoy the result. You can do it by clicking on the button icon at the Properties panel or Menu 3D>Render or press Alt+Ctrl+Shift+R.
And We’re Done!
You can view the final outcome below. I hope that you enjoyed this tutorial and would love to hear your feedback on the techniques and outcome.
Comments
Post a Comment