Final Image Preview
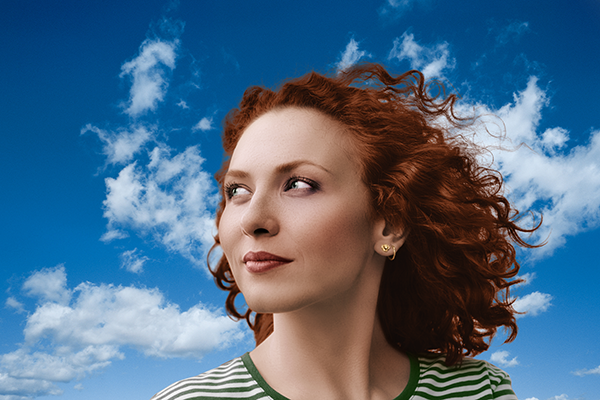
Before we get started, let’s take a look at the image we’ll be creating. Before and after images are shown below. Click the screenshot to view a large color version. As always, the full Photoshop file is available via .
Step 1
Double-click on the background image to make it an active layer. Create a new group by clicking on the little folder icon located at the bottom of the layers palette and put the layer in the group. Name the group “girl”. Draw a path around all the hard edges of the girl. This includes the face and the shoulders. Don’t worry about the hair for now; we will do that separately. Save the path. Make a selection of the path by holding Command-clicking on the path thumbnail in the paths palette. Hit Alt+Command+D and Feather the selection by 0.5px. Apply the selection as a mask on the “girl” group.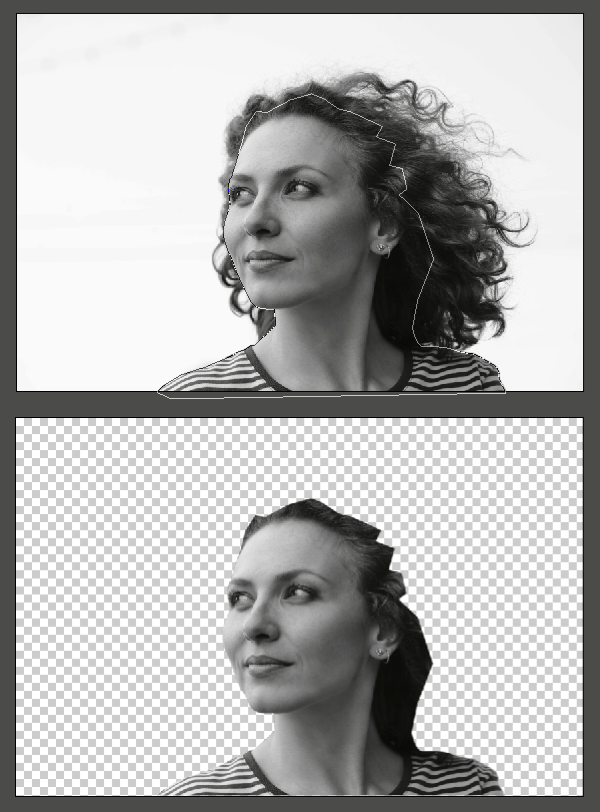
Step 2
Disable the mask on the “girl” group by holding Shift-clicking on the mask thumbnail. Now in the Channels palette, duplicate the red channel by dragging it to the New Channel button at the bottom of the palette. Apply a harsh curve, like the one below, to separate the hair from the background as much as you can.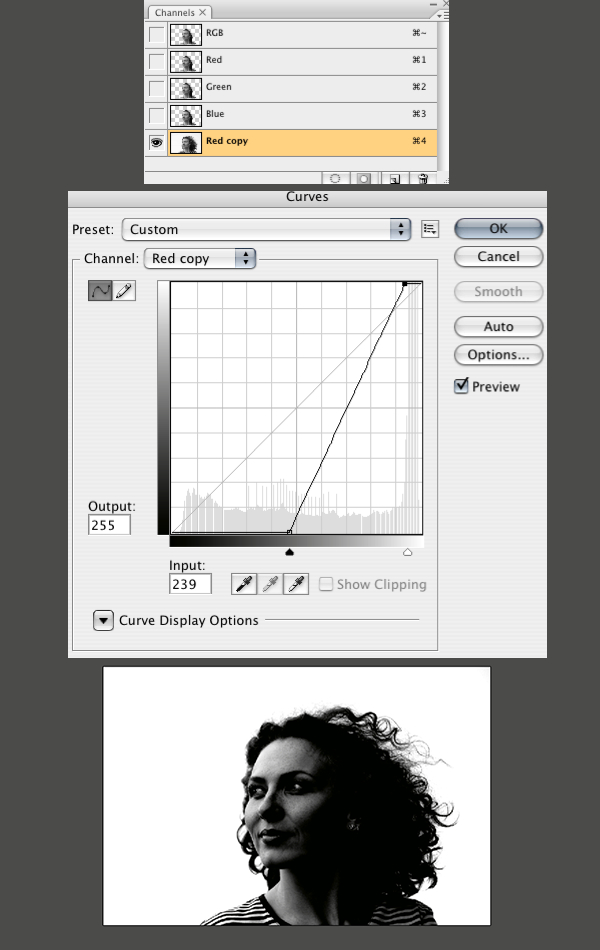
Step 3
Hit Command+I to invert the red copy channel. Re-enable the mask on the “girl” group. Load the selection of the red copy channel with your background color set to white. Hit Delete(backspace) to fill the selection with white on the “girl” mask. If you hit Alt+Click on the mask thumbnail, you can see the mask as a channel. Clean up anything that looks as though it shouldn’t be there, like that line between the hair and the face.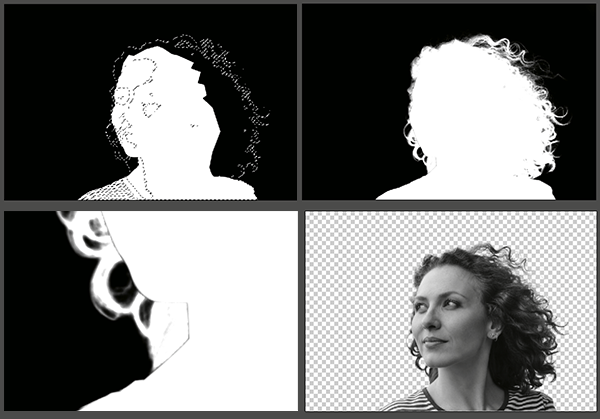
Step 4
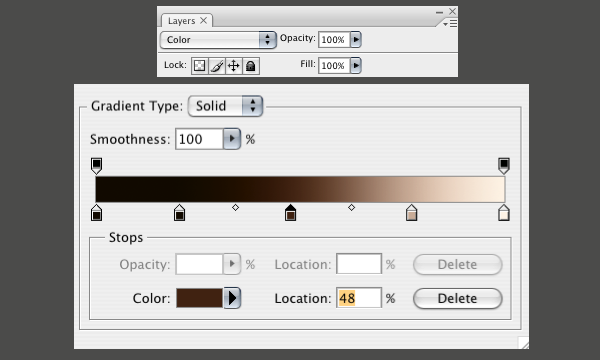
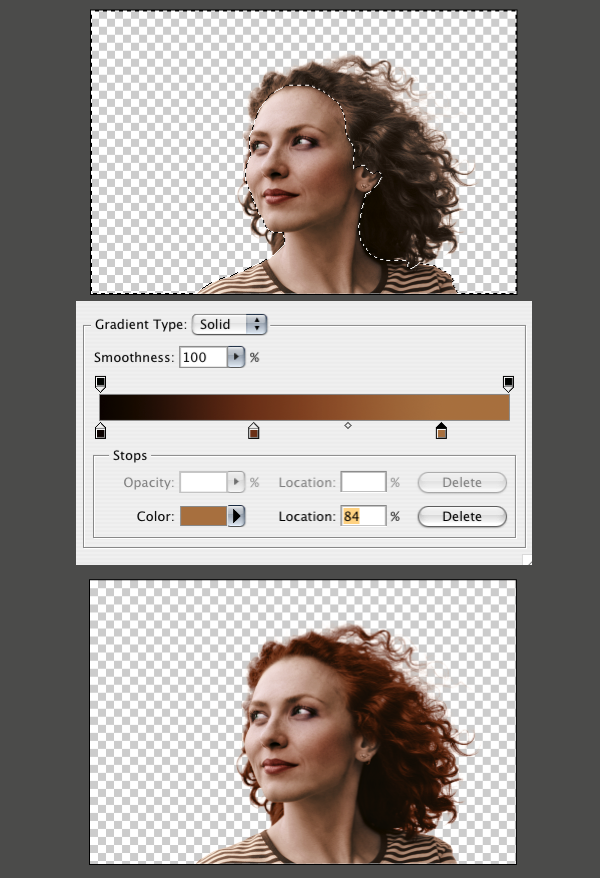
Now let’s start to add some color using a Gradient Map. In the “girl” group, make a new Gradient Map adjustment layer just above layer 0. Hit OK without doing anything and set the Gradient Map layer’s blending mode to Color. Now double-click on the Gradient Map’s layer thumbnail to open up the settings again.A Gradient Map uses the grayscale data from the image below it to apply the gradient that you create. The left side of the gradient represents the darkest parts of the image. The right side represents the light parts. We need to make a gradient that represents what the woman’s skin tone might look like from dark to light. I used the gradient below.
Step 5
Draw a path around the eyes. Load the selection of the path and Feather it 0.5px as we did before. Make a Curves adjustment layer just above the skin layer. Then lighten the eyes a little bit. Now make a Gradient Map layer just above the curves layer and hit OK before adjusting any settings. Set the new Gradient Map layer’s blending mode to color. Now hit Alt+Command+G to apply it as a clipping mask to the curves layer. Now change the Gradient Map’s settings to a pink-to-white fade like below.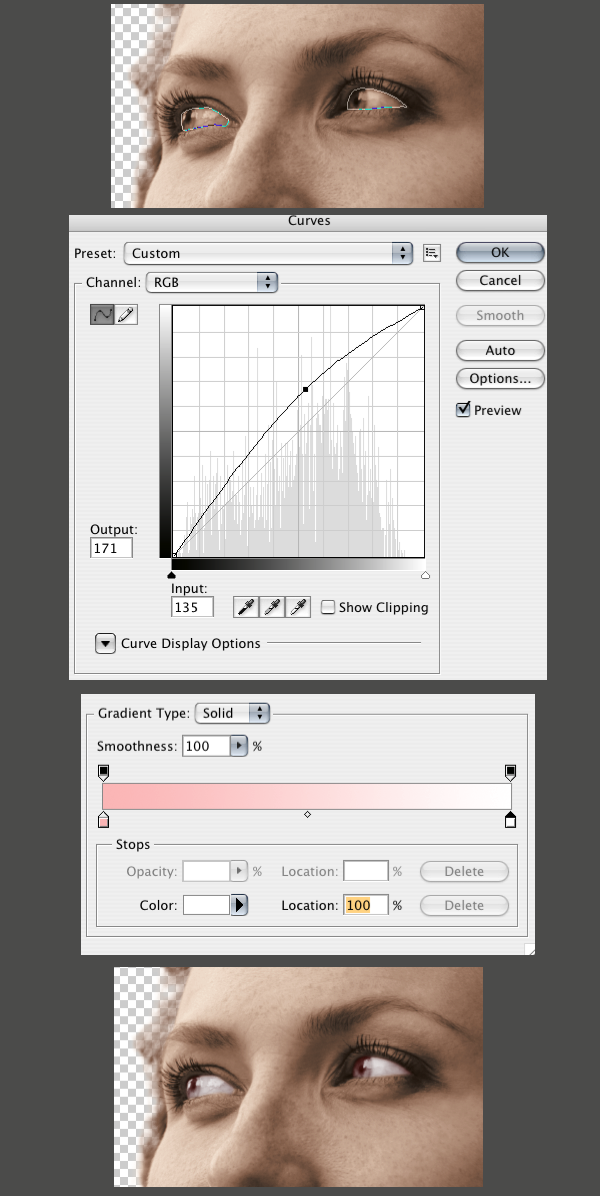
Step 6
Draw a path around just the iris of the eye. Note that we need only the path to follow that one curve between the iris and the whites because the adjustment we are making will be applied as a clipping mask. Load the selection and Feather it 2px. Make a solid color adjustment layer just above the Gradient Map from the previous step. Then set it to a dark faded green. Hit Alt+Command+G to apply it to the same clipping mask you made earlier. Set the blending mode of the green layer to color. You might have to go back and adjust the green until you get a color that looks real.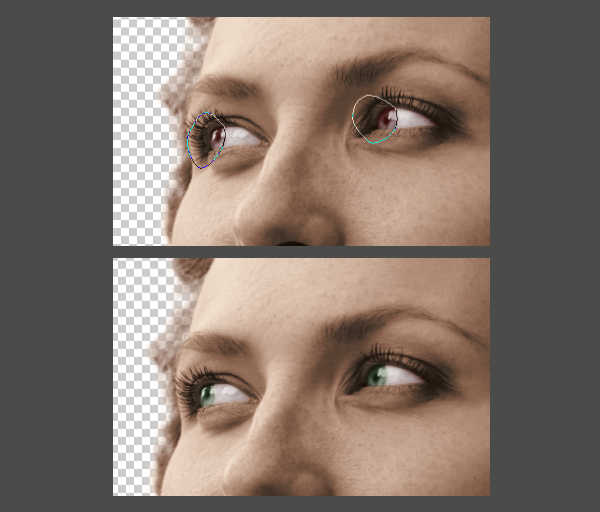
Step 7
Repeat all the previous steps for the lips, except for this one we’ll leave the blending mode of the Gradient Map to Normal, and set the layer’s Opacity to 65%.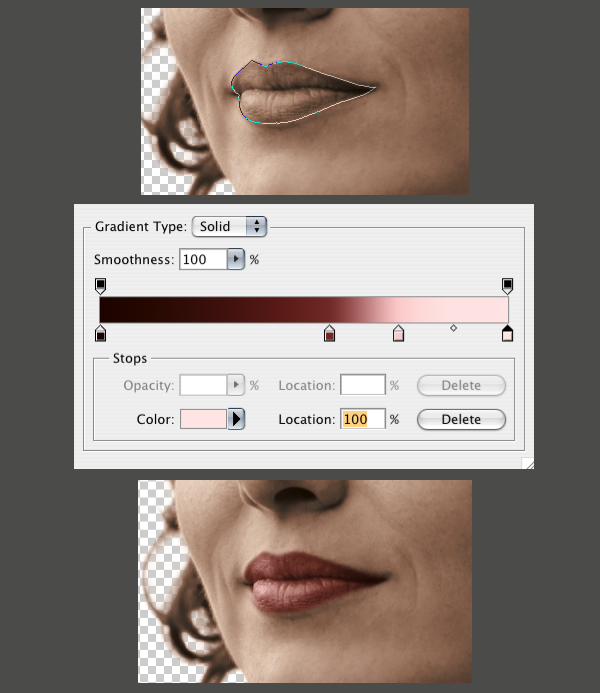
Step 8
We need to get more variance of color in the skin tones to make it look more real. I made some selections around the eyes, nose, and cheeks. Then I feathered them 20–40px, created solid color adjustment layers, set the blending modes to Color, and brought the Opacity way down to 10-20%. Below you can see my selections as quick masks. The layer palette shows the colors I used for the different areas. As you can see I used some red to add some blush to the cheeks, some red around the nose, mouth and eyes, and some blue to go on the bags of her eyes. These small details make all the difference.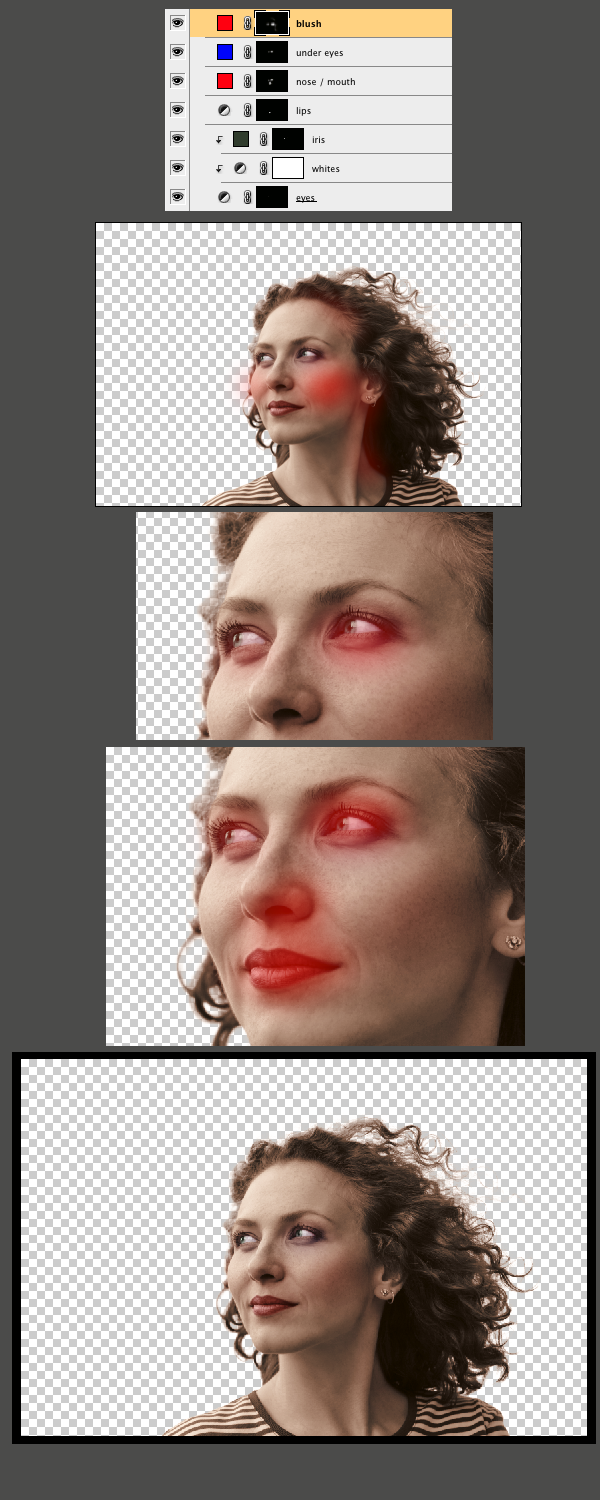
Step 9
Make a loose selection around the face and neck and feather it 50px. Make a curves adjustment layer just above the ‘skin’ Gradient Map that we made earlier. I just went in and tweaked the colors a bit to get a little more color variation in the skin tone. You can download the curve file I used here.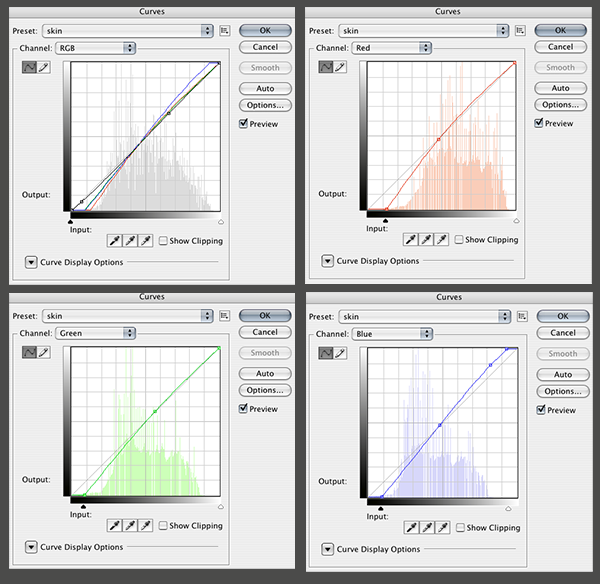
Step 10
Now we need to make a selection of the hair. I used the path that I saved from Step 1. Then I modified it a little to line up with the hairline’s shape and softness. I did this by using Quick Mask Mode(Q), and using brushes of various sizes and softness to match the hairline.Make a new Gradient Map adjustment layer at the top of the “girl” group. Make the gradient a similar to the image below. I left the blending mode at Normal for this layer.
Step 11
Make a selection of the shirt. Then make a new Gradient Map adjustment layer. Hit OK and set the blending mode to Color, as we have done before. Edit the gradient so that it looks something like the one below. You will have to play around with the gradient until you get a good separation between the green and white stripes.
Step 12
Choose a Sky image. I used one I shot myself, but there are plenty of stock images you could use. Bring it into the document below the “girl” group. Hit Command+T, and size it to fill the frame. It looks good, but notice that our hair mask still isn’t really looking that good against the blue background. The hair turns a muddy gray in the transition between hair and sky. To fix this, make a new blank layer just above Layer 0 (the image of the girl). With a large and soft black brush paint over those areas with an Opacity of 15-25% until the transition looks better.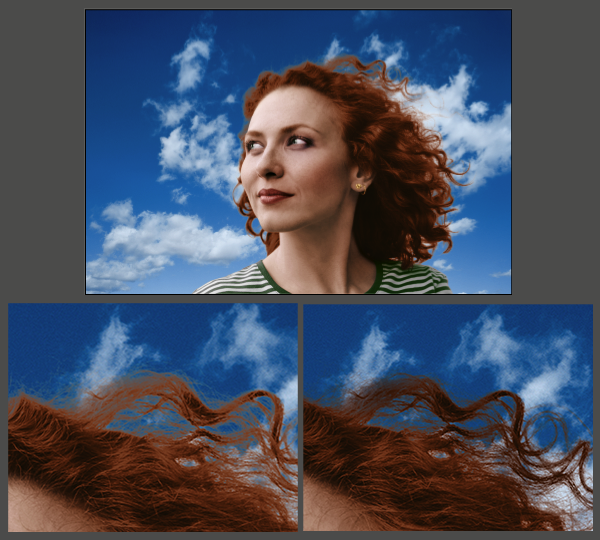
Comments
Post a Comment