1
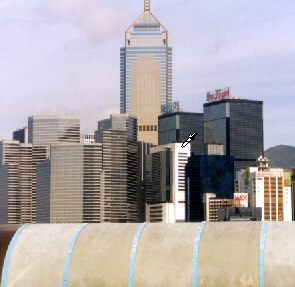
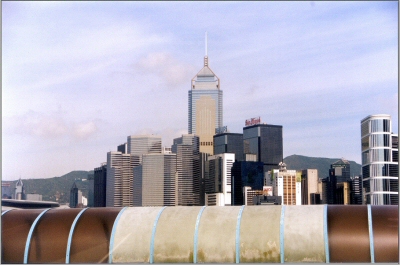
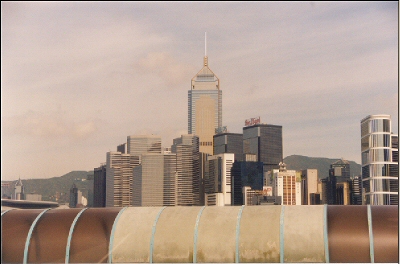 The first illustration is an image that I snapped during a trip to
the amazing city of Hong Kong. As you can see, the image is lacking a
bit of contrast and also has a slight color cast to it. It's really not
that bad (or is it?), but just looks somewhat dirty. You will soon see a
huge difference in image quality.
The first illustration is an image that I snapped during a trip to
the amazing city of Hong Kong. As you can see, the image is lacking a
bit of contrast and also has a slight color cast to it. It's really not
that bad (or is it?), but just looks somewhat dirty. You will soon see a
huge difference in image quality.2
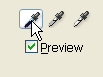 Setting
the black point. Choose a Levels adjustment layer from the layers
palette. We are now going to set the black and white points in the
levels settings. In the Levels dialog box double click the Set Black
Point tool as shown at left.
Setting
the black point. Choose a Levels adjustment layer from the layers
palette. We are now going to set the black and white points in the
levels settings. In the Levels dialog box double click the Set Black
Point tool as shown at left.3
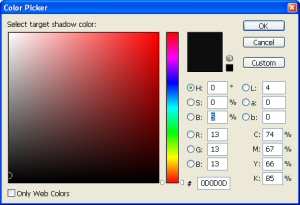 Black
point settings. You will see a color picker. Set everything to solid
black and then change the setting under "B" to 5, as shown at left (this
sets the black point to 95% black). Click OK.
Black
point settings. You will see a color picker. Set everything to solid
black and then change the setting under "B" to 5, as shown at left (this
sets the black point to 95% black). Click OK. 4
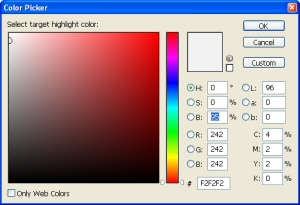 Setting
the white point. Double click the Set White Point tool, which is the
white eyedropper. In the color picker, set for pure white and then enter
95 into the "B" setting as shown. The white point is now set to 95%
white.
Setting
the white point. Double click the Set White Point tool, which is the
white eyedropper. In the color picker, set for pure white and then enter
95 into the "B" setting as shown. The white point is now set to 95%
white. 5
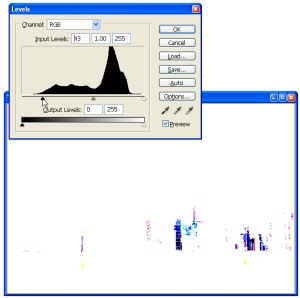 Finding
shadows. We are now ready to perform the image correction. What we are
going to do is click the Set Black Point tool in the darkest part of the
image and the Set White Point tool in the lightest part. Locate the
darkest part of the image. Hold down the Alt (Option on Mac) key and as
you move the shadow slider to the right, the image should turn white. As
you move the slider you will see some areas start to show through. This
is the Black Point threshold, as shown at left. The areas that start to
show are the darkest areas of the image.
Finding
shadows. We are now ready to perform the image correction. What we are
going to do is click the Set Black Point tool in the darkest part of the
image and the Set White Point tool in the lightest part. Locate the
darkest part of the image. Hold down the Alt (Option on Mac) key and as
you move the shadow slider to the right, the image should turn white. As
you move the slider you will see some areas start to show through. This
is the Black Point threshold, as shown at left. The areas that start to
show are the darkest areas of the image.6
 Adjusting
the shadows.Take note of where the dark portions of the image are on
the threshold and return the slider to the far left. Choose the Set
Black Point tool and click on the darkest portion of the image in the
main image window as shown at left. The image will be shifted and the
area we clicked on will now be set to the 95% black that we selected
earlier.
Adjusting
the shadows.Take note of where the dark portions of the image are on
the threshold and return the slider to the far left. Choose the Set
Black Point tool and click on the darkest portion of the image in the
main image window as shown at left. The image will be shifted and the
area we clicked on will now be set to the 95% black that we selected
earlier.7
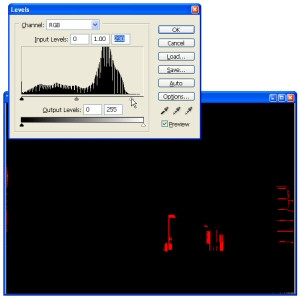 Finding
highlights. Hold down the Alt (Option on Mac) key and move the right
slider to the left to reveal the whitest point of the image. The image
will begin as black and the highlight areas will show through as shown
in the illustration.
Finding
highlights. Hold down the Alt (Option on Mac) key and move the right
slider to the left to reveal the whitest point of the image. The image
will begin as black and the highlight areas will show through as shown
in the illustration.8
 Adjusting
highlights. Choose the Set White Point Eyedropper tool from the Levels
palette. Click on the whitest area of the image as shown at left, the
lightness of the image will be adjusted to match.
Adjusting
highlights. Choose the Set White Point Eyedropper tool from the Levels
palette. Click on the whitest area of the image as shown at left, the
lightness of the image will be adjusted to match.9
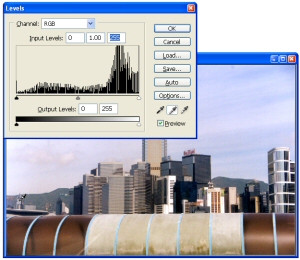 Setting
the Gray point. The tonal qualities of the image will be looking much
better now and the color cast will be reduced a bit. Now to totally
remove the color cast. Choose the Set Gray Point eyedropper from the
Levels dialog box. When we click on the image with this tool it will
choose the selected area as the gray point of the image and balance all
the color to match. Click on a portion of the image that should be a
neutral gray, such as the small tower in the illustration. The colors
will shift; if you are not happy, keep experimenting by clicking the Set
Gray Point tool in different parts of the image.
Setting
the Gray point. The tonal qualities of the image will be looking much
better now and the color cast will be reduced a bit. Now to totally
remove the color cast. Choose the Set Gray Point eyedropper from the
Levels dialog box. When we click on the image with this tool it will
choose the selected area as the gray point of the image and balance all
the color to match. Click on a portion of the image that should be a
neutral gray, such as the small tower in the illustration. The colors
will shift; if you are not happy, keep experimenting by clicking the Set
Gray Point tool in different parts of the image.When you are happy with the result, click OK to apply the Levels to the image. You have now learned how to use the Levels tool correctly. It may seem like a lot to do, but with some practice you can perform this entire correction in under a minute. The illustration below shows the final corrected image, a vast improvement from the original.
See you at the café: PhotoshopCafe.com
Colin
 This article is excerpted from Photoshop CS2 For Digital Photographers (Charles River Media) and is reprinted here by permission. It can also be found on the Photoshop Secrets for Digital Photographers CD.
Colin Smith is the founder of photoshopcafe.com, a thriving Photoshop community. He is also a regular columnist for the NAPP members site and Planet Photoshop. He has authored and co-authored 6 books including New Masters of Photoshop, Foundation Photoshop, Photoshop Most Wanted, Photoshop Trade Secrets and Photoshop to Dreamweaver.
Comments
Post a Comment