How To Make a Cool Cinemagraph Image in Photoshop


What is a Cinemagraph?
Some of the best cinemagraph examples can be found on the creators’ own website. Their original cinemagraphs from New York Fashion Week capture moments just like an ordinary photograph, but also preserve that living moment in time to re-experience endlessly.
As the popularity of the cinemagraph grew we began to see mobile apps such as Cinemagram emerge, which allows the easy creation of amateur cinemagraphs using the device’s built in camera. These apps provide a quick and easy cinemagraph solution, but as always you can achieve the best results when you have fine control over the whole production process, so let’s take a look at how to create our very own cinemagraph from scratch.
How to create a Cinemagraph
Cinemagraphs require some kind of motion, so while the final image looks much more similar to a photograph than a video, we need to begin with actual video footage. Not all videos are suitable though. A cinemagraph is made from a loop using specific portion of the image, so the scene must feature both stationary and animated objects. Here’s a few tips to keep in mind when filming your own cinemagraph footage:- Use a tripod. The background of your scene must remain perfectly still in order for just a specific subject to be animated.
- Feature a scene that includes some kind of continuous or looping motion. Cinemagraphs of subway trains or escalators work really well because they move consistently and predictably.
- Sometimes subtle effects result in the best cinemagraphs. A visually intense scene might just work better as a video, whereas the subtle animation of grass blowing in the wind or an intermittent blink of an eye can create a really impactful image.
Alternatively you could always play around with existing stock video footage. In this tutorial I’ll be creating a cinemagraph using this footage from VideoHive. I figured it would make a cool effect by animating the girl’s reflection while keeping the rest of the scene still, giving a kind of insight into her imagination as she admires the red dress in the mirror.
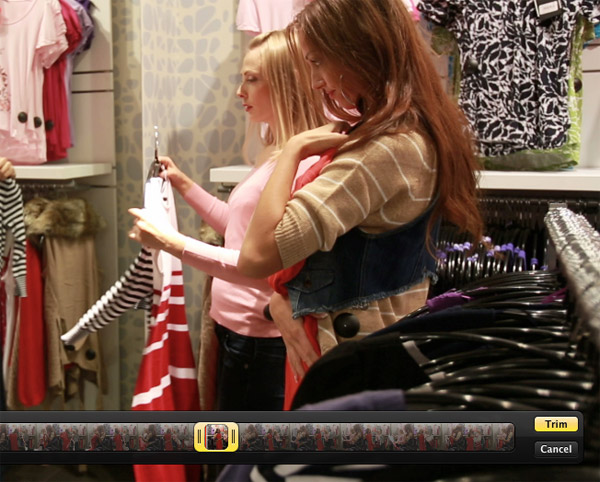
Step one is to scan through the video footage and pick out a portion that would be suitable for animating. We’re looking for a relatively short section that would either seamlessly loop, or reverse without looking too weird. Trim out and save the short footage as a new video file. In Quicktime this is made easy with the Trim function, but the same procedure can be done in a video editing application.

Open Photoshop and go to File > Import > Video Frames to Layers. Leave the default options of “From Beginning To End” and “Make Frame Animation” checked. Mac users receiving some kind of 32bit/64bit error might find this link useful.
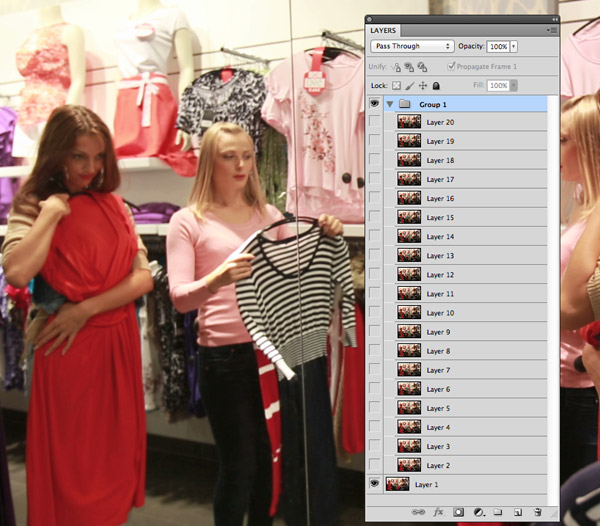
Every frame of the image will be imported as an individual layer. Some intricate cinemagraphs may need to be painstakingly crafted frame by frame, but most can be created with a single mask, so group all the frame layers together with the exception of the first layer.
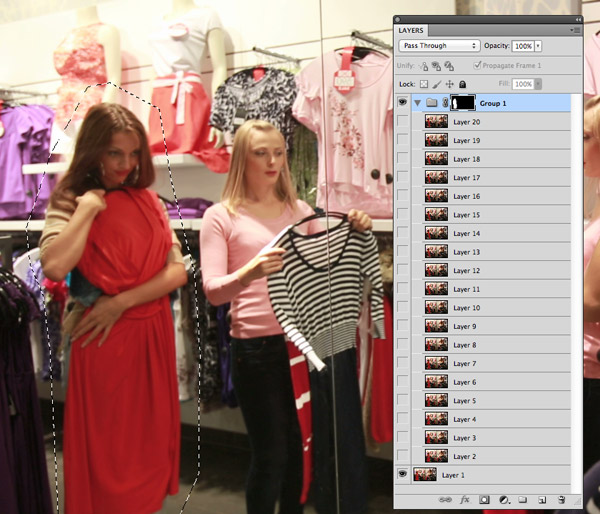
The key to achieving that clever cinemagraph effect is masking out the subsequent layers leaving only the subject intact. Make sure the mask doesn’t allow any other moving elements to creep in further along in the footage.
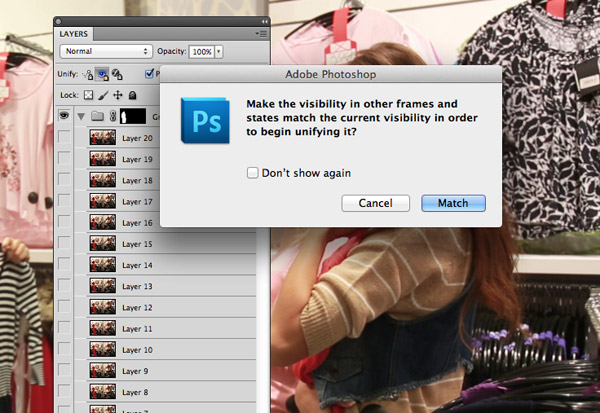
Open up the Animation window to see the frames in sequence. You’ll currently see 99% of the frames have a transparent background thanks to the Layer Mask, to fix this click on the first (bottom) layer and check the Unify Layer Visibility icon.
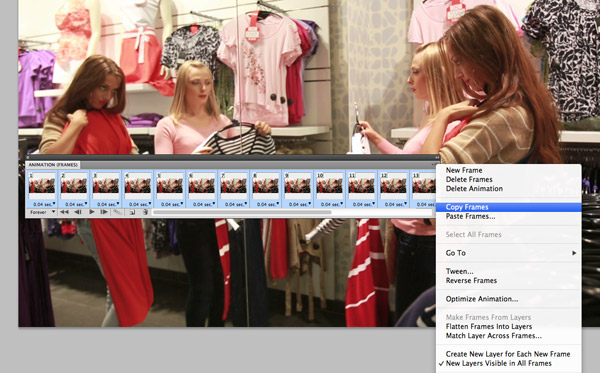
Click the play button in the Animation window to test out the basic cinemagraph effect. Unless your footage perfectly loops the scene will awkwardly stop and repeat. To fix this we need to play the motion backwards in reverse. Select all the frames and select Copy Frames from the menu.
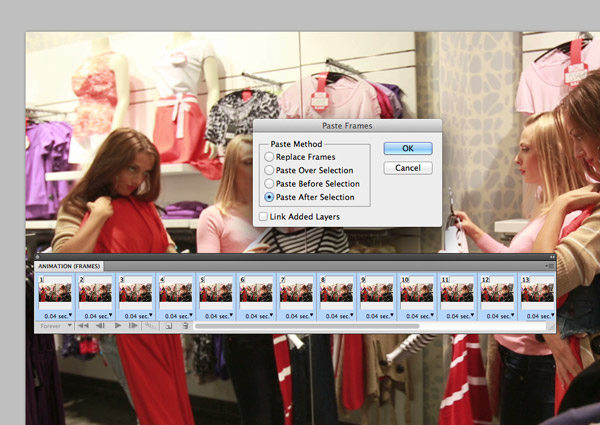
Next, select the Paste Frames option to add the frames to the end of the original animation sequence.
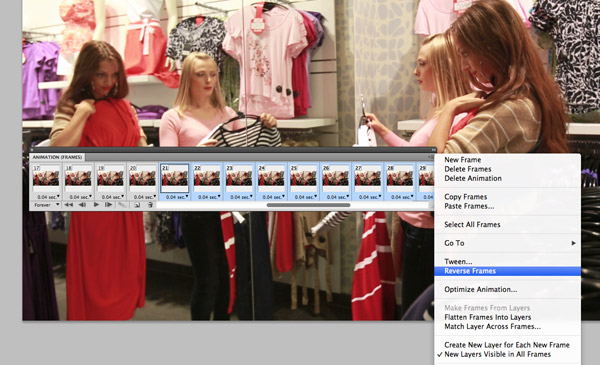
Before deselecting these new frames, open the fly out menu and select Reverse Frames to switch their order to the animation plays forward then back to the start to form a loop.
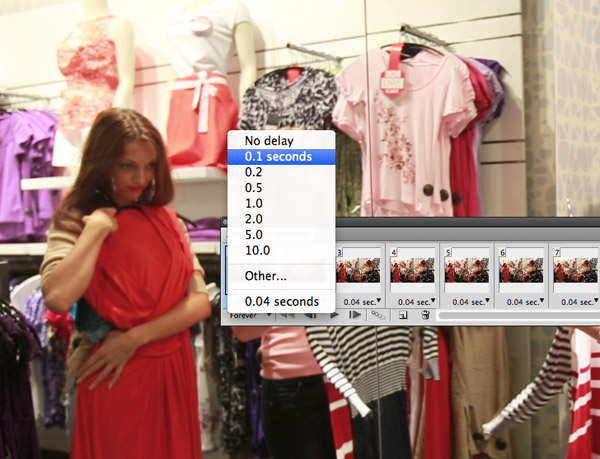
Real looping animations always provide the best and most realistic results as sometimes these reversed effects sometimes look a little obvious. You can tweak the animation to make the reversing effect look a little more natural though, change the pause of certain frames to ease the animation in and out.
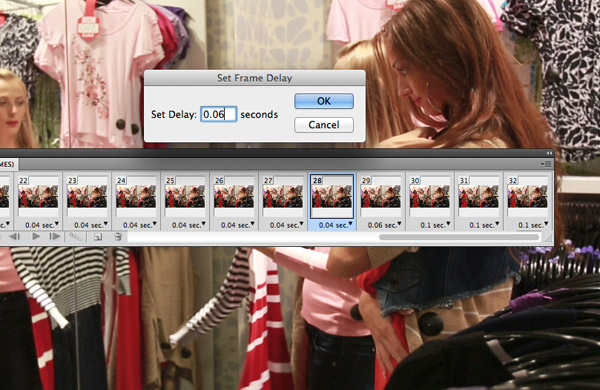
Gradually slowing the animation as the girl twirls in each direction generates a more natural movement and eliminates some of the awkward looping motion.
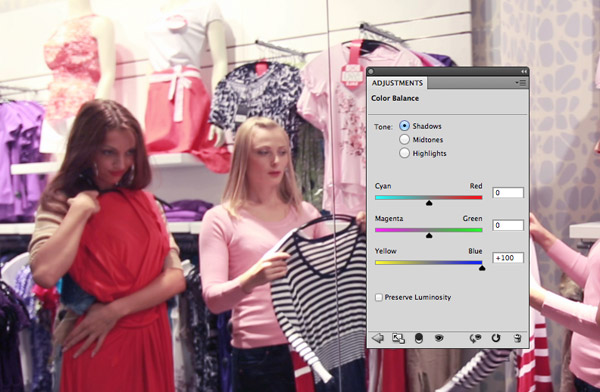
Adding retro style colour correction effects not only makes the image look trendy, it also helps limit the colours so the final GIF file looks better with its limited 256 palette. Add a Color Balance adjustment layer to the top of the layer stack and adjust the slider to 100% Blue in the shadows. Make sure Preserve Luminosity is turned off.
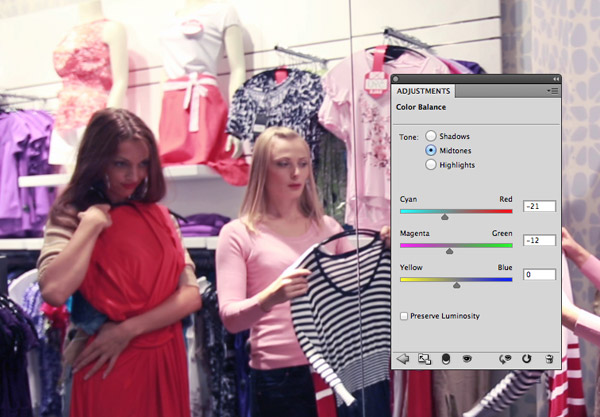
Select the Midtones option and tweak the colours towards Cyan and Magenta.
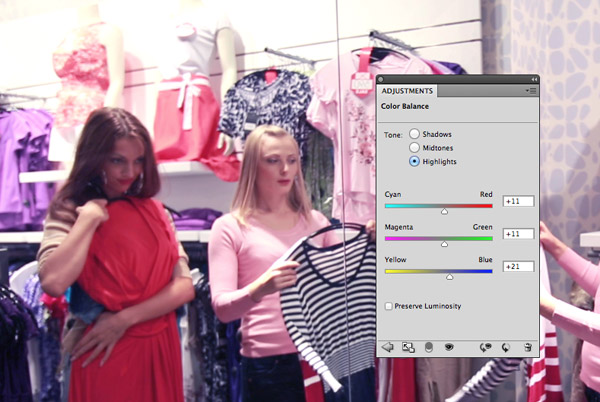
Change the selection to the Highlights and alter the sliders towards Red, Green and Blue.
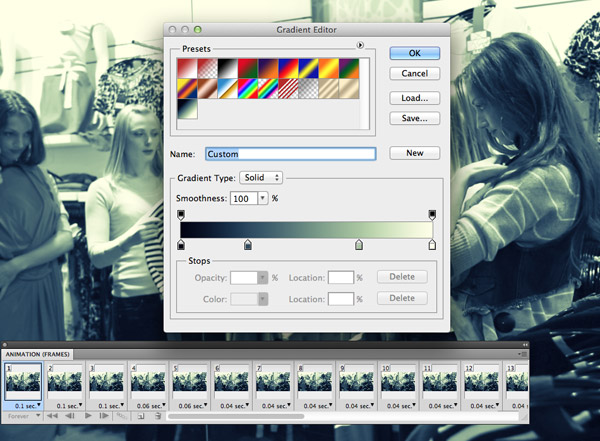
Add a Gradient Map adjustment layer and set up a gradient from a very dark blue (#020413), mid-blue (#2b4a61), green (#a8c6a0) to pale yellow (#feffe6). Change this layer’s Blending Mode to Lighten.
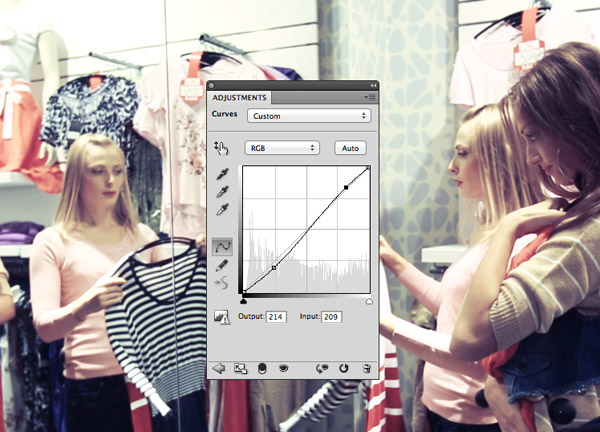
Add a Curves Adjustment Layer and tweak the shadows and highlights to increase the contrast of the image.

An animated GIF image with this much detail in every frame will soon amount to a whopping file size. The best way to reduce the filesize is to physically reduce the size of the image.
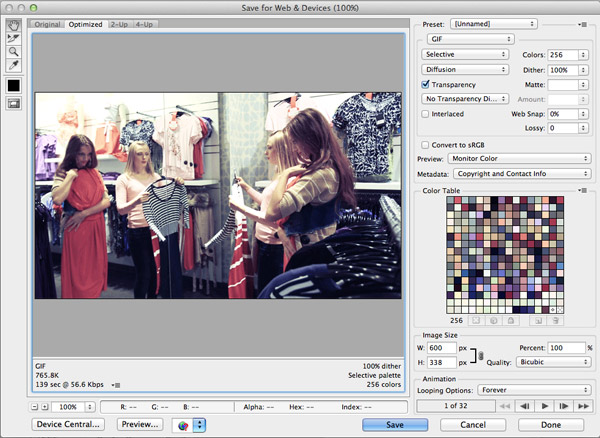
Go to File > Save for Web and change the file type to GIF. Alter the Dithering options to achieve the best quality reproduction. Reducing the colour palette further with duotone or black and white effects can also help improve image quality.
Our final image kind of reflects the cool Cinemagraph effect by capturing this girl’s admiration of the dress, but I have to admit the animation loop still looks a little jumpy. There was a long section of this video that would have made a great cinemagraph, but it became unusable when the second girl moves in front of the subject, thus making the frame masking impossible. Still, it’s a technique that’s fun to use and might come in handy in the future. I’d love to see animated GIF Cinemagraphs make a return as banner ads, digital posters or as cool album art.
Comments
Post a Comment