Water Reflection Effect In Photoshop CS6
In this tutorial, we’ll learn how to add a realistic water reflection to an image. There’s a lot of steps but it’s actually an an easy effect to create and you can add it to any photo you like (although it tends to work best with photos that don’t already contain water in them). To create the water ripples portion of the effect, we’ll be using a couple of Photoshop’s filters, including the Displace filter where we’ll get to make and use a displacement map to bend and distort the image into shape. And new in this CS6 version of the tutorial, we’ll be using Smart Filters to keep much of the effect fully editable even after we’re done!
Download our tutorials as print-ready PDFs! Learning Photoshop has never been easier!
Here’s the photo I’ll be starting with:
The original photo.
And here’s what the final water reflection effect will look like: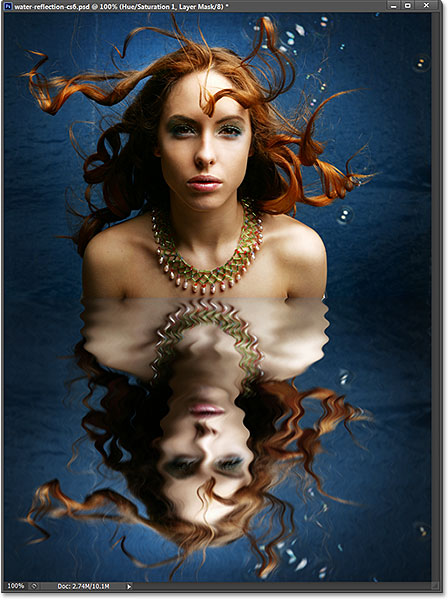
The final result.
As I mentioned, this new version of the tutorial is specifically for Photoshop CS6 users. For earlier versions, please see the original water reflection tutorial. Let’s get started!Step 1: Duplicate The Background Layer
Our first step is to make a copy of our Background layer. If we look in the Layers panel, we see that our photo is sitting on the Background layer which is currently the only layer we have:
The Layers panel showing the photo on the Background layer.
To make a copy of it, go up to the Layer menu in the Menu Bar at the top of the screen, choose New, then choose Layer via Copy. Or, you can press Ctrl+J (Win) / Command+J (Mac) on your keyboard to select the same command with the faster shortcut:
Going to Layer > New > Layer via Copy.
Either way tells Photoshop to make a copy of the layer, and
if we look again in the Layers panel, we see the new copy, which
Photoshop names Layer 1, sitting above the Background layer:
The Layers panel showing the newly added Layer 1.
Step 2: Add More Canvas Space Below The Image
Next, let’s add some additional canvas space below our image to make room for the water reflection. Go up to the Image menu at the top of the screen and choose Canvas Size:
Going to Image > Canvas Size.
This opens Photoshop’s Canvas Size dialog box. First, select the Relative option in the center by clicking inside the checkbox to the left of its name. Then enter 0 Percent for the Width and 100 Percent for the Height (make sure you change the measure type to Percent, not Pixels, Inches or anything else).Below the Relative option is the Anchor option containing a 3×3 grid of squares. Click on the square in the center of the top row to select it. This tells Photoshop to add all of our extra canvas space below the image. Finally, and this isn’t really important but just to make sure we’re doing everything the same, set the Canvas extension color option at the bottom of the dialog box to White:
Setting the Canvas Size options.
Click OK when you’re done to close out of the dialog box and
we now have twice as much canvas space in our document as we did before,
with all of the new canvas appearing below the photo (and filled with
white):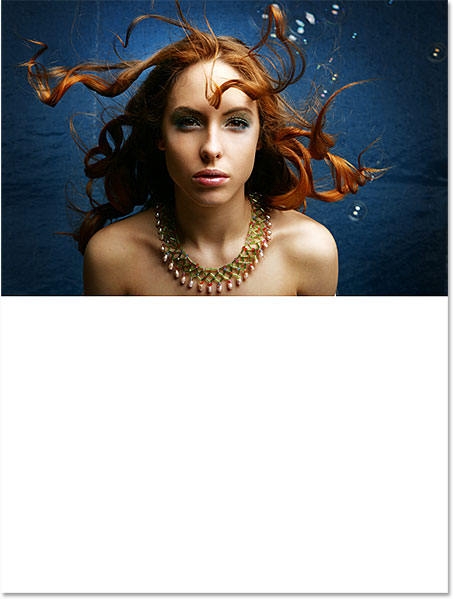
The extra canvas space appears filled with white below the image.
Step 3: Flip The Image On Layer 1 Vertically
We need to flip the copy of our image on Layer 1 so it sits upside down below the original photo, creating a mirror effect. To do that, first go up to the Select menu at the top of the screen and choose All. Or, press Ctrl+A (Win) / Command+A (Mac) on your keyboard to access the Select All command with the shortcut. This will select all of Layer 1, and you’ll see a selection outline appear around the outer edges of the document:
Going to Select > All.
With the layer selected, go up to the Edit menu, choose Transform, then choose Flip Vertical:
Going to Edit > Transform > Flip Vertical.
This flips the image so it’s upside down below the original
photo, just as we needed. Before we continue, let’s remove the selection
outline by going up to the Select menu and choosing Deselect, or by pressing Ctrl+D (Win) / Command+D (Mac) on the keyboard for the shortcut:
Going to Select > Deselect.
And now we have a mirror copy of the image below the original: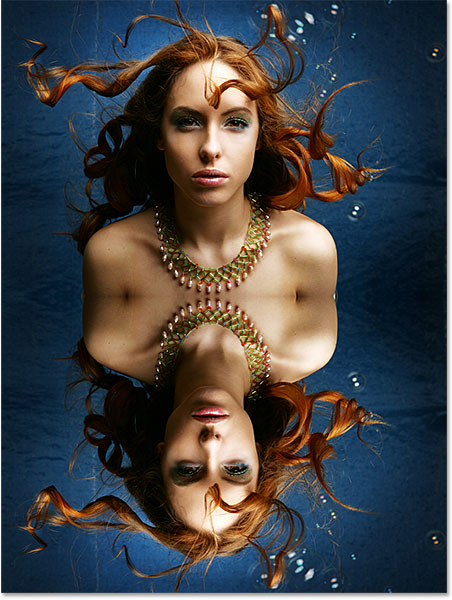
The result after flipping Layer 1 vertically.
Step 4: Merge Both Layers Onto A New Layer
Next, we need to merge both of our layers onto a brand new layer above them. The easiest way to do that is with a keyboard shortcut (I know a lot of people don’t care much for keyboard shortcuts but in this case, it really is the easiest way to do it). Press Shift+Ctrl+Alt+E (Win) / Shift+Command+Option+E (Mac) on your keyboard. Nothing will seem to have happened in the document window, but if we look in the Layers panel, we see that we now have a new layer named Layer 2, and if we look in the layer’s preview thumbnail to the left of its name, we see that the contents from both of the layers below it have been merged onto this new layer:
The contents of the Background layer and Layer 1 have been merged onto the new Layer 2.
Step 5: Add A New Blank Layer
We need another new layer, this time a blank one. To add a new blank layer, click on the New Layer icon at the bottom of the Layers panel:
Click on the New Layer icon.
Once again, nothing will happen in the document window, but a new blank layer named Layer 3 appears above the other layers in the Layers panel:
The Layers panel showing the new blank Layer 3.
Step 6: Fill The New Layer With White
We need to fill this new layer with white. To do that, go up to the Edit menu at the top of the screen and choose the Fill command:
Going to Edit > Fill.
This opens Photoshop’s Fill dialog box. Set the Use option at the top to White, and make sure the Mode option at the bottom is set to Normal and Opacity is set to 100%:
The Fill options.
Click OK to close out of the dialog box and Photoshop fills
Layer 3 with white, temporarily blocking everything else from view in
the document window:
The document after filling Layer 3 with white.
Step 7: Apply The Halftone Pattern Filter To Create Black And White Horizontal Lines
Next, we’re going to use one of Photoshop’s filters – the Halftone Pattern filter – to add a series of black and white horizontal lines to our currently white-filled Layer 3. But before we do, we first need to make sure our Foreground and Background colors are set to their defaults (black for the Foreground color, white for the Background color). The reason is because the Halftone Pattern filter uses the current Foreground and Background colors and for our purposes here, we need these colors to be black and white.The quickest way to make sure they’re set to their defaults is to simply reset them by pressing the letter D (for "Defaults") on the keyboard. If you then look at the Foreground and Background color swatches near the bottom of the Tools panel over on the left side of the screen, you should see the top left swatch (the Foreground color) set to black and the bottom right swatch (the Background color) set to white:
The Foreground and Background color swatches set to their default colors.
Now that we’ve made sure we have the correct colors, let’s
select the Halftone Pattern filter which in Photoshop CS6 is found in
the Filter Gallery. Go up to the Filter menu at the top of the screen and choose Filter Gallery:
Going to Filter > Filter Gallery.
This opens the very large Filter Gallery, with the most dominate feature being the preview area on the left. The middle column of the Filter Gallery is where we select the individual filters, and they’re divided into various categories. Look for the Sketch category and click on its name to twirl it open if you need to so you can see the filters inside of it. Click on the Halftone Pattern filter to select it:
Opening the Sketch category and clicking on the Halftone Pattern filter.
The options for the Halftone Pattern filter are over in the right column of the Filter Gallery. First, set the Pattern Type to Line. Then keep an eye on the preview on the left as you drag the Size
slider to increase or decrease the number of black and white horizontal
lines. These lines will become our water ripples. I’m going to set my
Size value to 10. Below that is the Contrast
slider which controls how sharp the edges of the lines appear. Lower
values create softer edges. We need the edges to be fairly soft so I’ll
set my Contrast value to 4:
The Halftone Pattern options in the right column of the Filter Gallery.
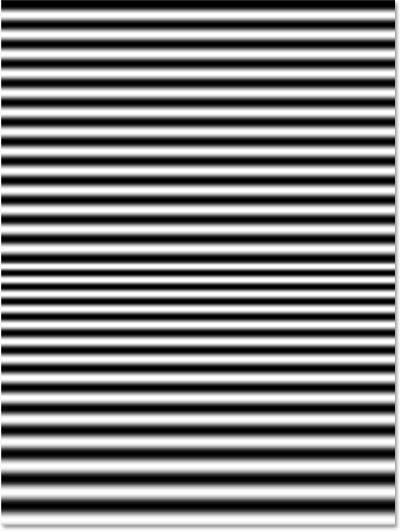
Click OK to close out of the Filter Gallery and apply the filter to Layer 3. Your document should now look similar to this: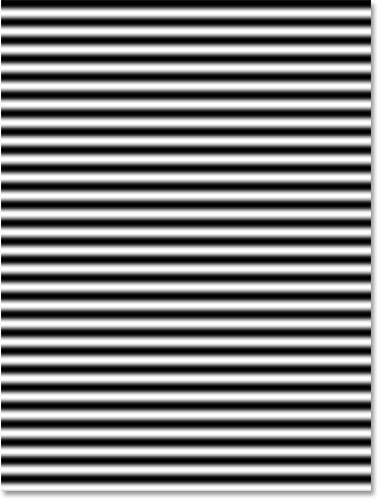
The document after applying the Halftone Pattern filter.
Step 8: Select The Bottom Half Of The Layer
Make sure that Layer 3 is still selected in the Layers panel (it should be highlighted in blue), then hold down your Ctrl (Win) / Command (Mac) key on your keyboard and click directly on the preview thumbnail for Layer 1:
Holding Ctrl (Win) / Command (Mac) and clicking on Layer 1′s thumbnail.
This places a selection outline around just the bottom half of Layer 3 (it may be hard to see in the screenshot):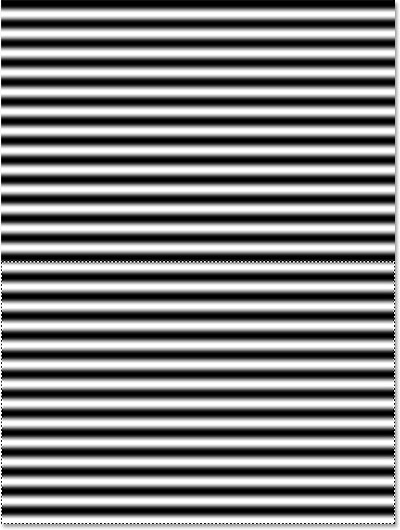
The bottom half of Layer 3 is now selected.
Step 9: Apply The Perspective Transform Command
Go up to the Edit menu at the top of the screen, choose Transform, then choose Perspective:
Going to Edit > Transform > Perspective.
This places transform handles (the little squares) around the bottom half of the layer. Click on either the bottom left or bottom right handle
and drag it outward a short distance. As you drag one of them, you’ll
see the handle on the other side also moving outward in the opposite
direction. Notice as you continue dragging that the black and white
horizontal lines are becoming thicker towards the bottom of the layer
and thinner towards the center thanks to the Perspective mode we’re
using. This will help add realism to our water ripples, making them
appear further apart as we move further away from the edge or source of
the reflection: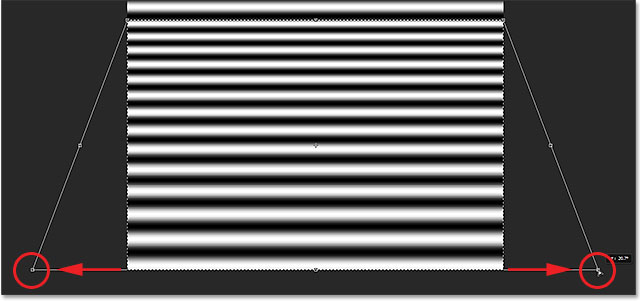
Dragging the bottom left handle outward. The bottom right handle moves in the opposite direction.
The reason we’re ignoring the top half of the layer is
because the water reflection is only going to appear in the bottom half
of our image. There’s no need to worry about the top half since we
really don’t need it.When you’re done, press Enter (Win) / Return (Mac) on your keyboard to accept the transformation, then press Ctrl+D (Win) / Command+D (Mac) on your keyboard to quickly remove the selection outline (or you could go up to the Select menu at the top of the screen and choose Deselect as we did earlier). Your layer should now look similar to this:
The layer after applying Perspective Transform.
Step 10: Duplicate The Layer As A New Document
We’re going to use this layer as a displacement map but first we need to save it as a separate document. Go up to the Layer menu and choose Duplicate Layer:
Going to Layer > Duplicate Layer.
This opens Photoshop’s Duplicate Layer dialog box. Change the Document option in the lower half of the dialog box to New:
Setting the Document option to New.
Click OK to close out of the dialog box. The layer will open as a new Photoshop document in a separate tab.
You’ll see the new tab appear at the top of the screen to the right of
the original document’s tab. Since we haven’t named it yet (we’ll do
that in a moment), it will be appear as "Untitled-1":
Click on the tabs at the top of the screen to switch between open documents.
Step 11: Save And Close The New Document
All we need to do with our new document is save it and then close it. Go up to the File menu and choose Save As:
Going to File > Save As.
This opens the Save As dialog box. I’m going to name my document “water-ripples”. Set the Format option below the File name box to Photoshop .PSD
since the file needs to be saved as a Photoshop document if it’s going
to work as a displacement map. Make sure you save the file somewhere
you’ll remember so you can easily access it later. I’m going to save
mine into a folder on my desktop. When you’re ready, click the Save button to save the file and close out of the dialog box:
Name your document and save it as a Photoshop .PSD file.
Note: Depending on how you have Photoshop’s Preferences set up, a dialog box may open asking if you want to choose the Maximize Compatibility option. Just click OK to accept it and close out of the dialog box.Now that we’ve saved the document, we can close out of it by clicking on the small “x” icon in its name tab at the top of the screen. You’ll see that the document’s name in the tab has changed from "Untitled-1" to whatever you named it a moment ago (mine is named "water-ripples.psd"). Leave the original document open:
Closing the second document but leaving the original open.
Step 12: Delete Layer 3 In The Original Document
Back in the original document, we no longer need our black and white lines layer so make sure Layer 3 is selected in the Layers panel, then press Backspace (Win) / Delete (Mac) on your keyboard to delete the layer. You should now be left with three layers in the Layers panel, with the top layer (Layer 2) selected and highlighted:
The Layers panel after deleting Layer 3.
Step 13: Convert Layer 2 To A Smart Object
We’re ready to start applying some filters to the image to create our water reflection effect, but before we do, let’s first convert the layer into a Smart Object. This way, the filters will be applied to it as Smart Filters which means they’ll remain fully editable in case we want to go back when we’re done and try different filter settings. With Layer 2 selected, click on the small menu icon in the top right corner of the Layers panel:
Clicking the Layers panel menu icon.
This opens a menu with various layer-related options. Choose Convert to Smart Object from the list:
Choosing “Convert to Smart Object” from the Layers panel menu.
It won’t look like much has happened, but a small Smart Object icon will appear in the bottom right corner of Layer 2′s preview thumbnail, letting us know the layer has been converted to a Smart Object:
A Smart Object icon appears in the preview thumbnail.
Step 14: Apply The Motion Blur Filter
Let’s first add a bit of blurring to the layer. Go up to the Filter menu at the top of the screen, choose Blur, then choose Motion Blur:
Going to Filter > Blur > Motion Blur.
When the Motion Blur dialog box appears, set the Angle of the blur to 90° so it moves up and down, then drag the Distance
slider at the bottom of the dialog box a little towards the right to
add just a slight amount of motion blur (keep an eye on the image in the
document window as you drag the slider to preview the results). I’m
going to set my Distance value to 6 pixels, but I’m using a fairly low resolution image here for this tutorial. A higher resolution image may need a higher value: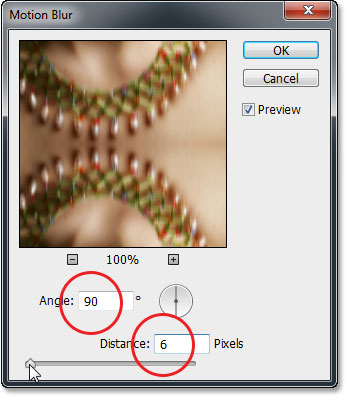
The Motion Blur dialog box and options.
Click OK to close out of the Motion Blur dialog box and apply
the filter to the image. As we can see here, the blur effect is subtle.
Don’t worry that we’ve blurred the entire image. We’ll be fixing that
in a moment:
The image after applying the Motion Blur effect.
Step 15: Apply The Displace Filter
Now let’s create our water ripples effect using the displacement map we just made. Go back up to the Filter menu, choose Distort, then choose Displace:
Going to Filter > Distort > Displace.
There’s actually two parts to the Displace filter. First, we
set some options that determine how the displacement map will affect the
pixels in the image, and then we choose the file we want to use as our
displacement map. Let’s set our main options using the Displace dialog
box that appears. We want our displacement map to distort the image
horizontally, creating ripples that move left and right in the water,
and for that, we need the Horizontal Scale option at the top of the dialog box. I’m going to set my value to 4
but because we’re applying this as a Smart Filter, we can always go
back and try a different value when we’re done if we need to.We don’t need any up and down movement with the effect so set the Vertical Scale option to 0. Finally, set the Displacement Map option to Stretch To Fit and the Undefined Areas option to Repeat Edge Pixels if they’re not set to those values already:
Setting the main Displace options.
Click OK to close out of this first dialog box. A second
dialog box will open letting you choose the file for the displacement
map. Navigate to wherever you saved the “water-ripples.psd” file that we
saved back in Step 11. Click on the file to select it, then click the Open button to open it:
Choosing the displacement map.
As soon as we open the file, Photoshop instantly applies the
displacement map to the entire image, creating the water ripples effect
(again, don’t worry that we’ve affected the entire image. We’ll fix it
in the next step):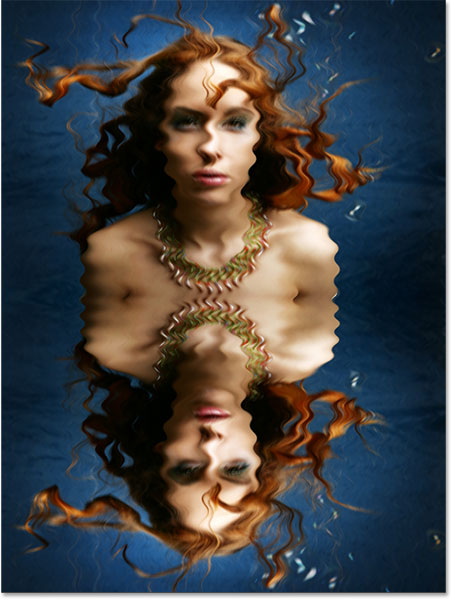
The image after applying the Displace filter.
If we look in the Layers panel, we can see the two Smart
Filters (Motion Blur and Displace) listed below Layer 2. Even though
we’ve already applied the filters to the layer, they both remain fully
editable. If you want to go back and try different settings, maybe by
increasing the Distance value for the Motion Blur filter or trying a
different Horizontal Scale value for the Displace filter, simply double-click
on either of the filters in the Layers panel to re-open the dialog box
and try your new setting to judge the results. As we’ll see at the very
end of this tutorial, just because a particular filter setting works
great with one image doesn’t mean it will work great for every image.
There’s always room to experiment, which is why Smart Filters are so
useful:
Both Smart Filters appear listed below Layer 2. Double-click on either one to change their settings.
Step 16: Add A Layer Mask
Let’s hide our water ripples effect from the top half of the image using a layer mask. With Layer 2 still selected, once again hold down your Ctrl (Win) / Command (Mac) key and click directly on the preview thumbnail for Layer 1:
Holding Ctrl (Win) / Command (Mac) and clicking on Layer 1′s preview thumbnail.
This loads another selection outline around just the bottom half of the image: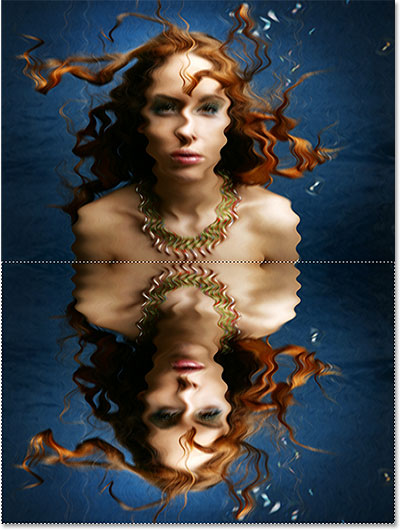
The bottom half is once again selected.
With the selection in place, click on the Layer Mask icon at the bottom of the Layers panel:
Clicking the Layer Mask icon.
A layer mask thumbnail will appear on Layer 2
in the Layers panel, with the top half filled with black, which means
that part of the layer is now hidden from view in the document, while
the bottom half, filled with white in the thumbnail, remains visible:
The Layers panel showing the new mask thumbnail.
And if we look in our document window, we see that the water
ripples effect is now only visible in the bottom half of the image where
the reflection appears. The original photo is once again visible in
the top half:
The image after adding the layer mask.
Step 17: Colorize The Water With A Hue/Saturation Adjustment Layer
To finish off the effect, let’s colorize the water reflection with just a hint of blue. We’ll use an adjustment layer for this, but we want to make sure we’re affecting only the bottom half of the image, so to do that, hold down your Alt (Win) / Option (Mac) key on your keyboard and with the key still down, click on the New Adjustment Layer icon at the bottom of the Layers panel:
Holding Alt (Win) / Option (Mac) and clicking the New Adjustment Layer icon.
Choose Hue/Saturation from the list of adjustment layers that appears:
Choosing a Hue/Saturation adjustment layer.
Holding down the Alt (Win) / Option (Mac) key told Photoshop
to first open the New Layer dialog box before adding the adjustment
layer to the document. Select the Use Previous Layer to Create Clipping Mask
option in the dialog box by clicking inside its checkbox. This tells
Photoshop to “clip” the adjustment layer to the contents of the layer
directly below it, which will limit its effect to just the bottom half
of the image (see our Photoshop Clipping Masks Essentials tutorial for more information on how clipping masks work):
Selecting the “Use Previous Layer to Create Clipping Mask” option.
Click OK to close out of the New Layer dialog box, at which
point Photoshop adds the Hue/Saturation adjustment layer to the document
directly above (and clipped to) Layer 2:
The Layers panel showing the Hue/Saturation adjustment layer clipped to Layer 2.
The controls and options for the Hue/Saturation adjustment layer appear in the Properties panel. First, select the Colorize option by clicking inside its checkbox. Then drag the Hue slider towards the right to set its value to around 210, which gives us a nice blue color: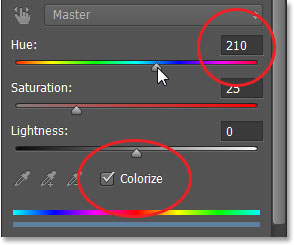
The Hue/Saturation options in the Properties panel.
Here’s my image after colorizing the bottom half with blue: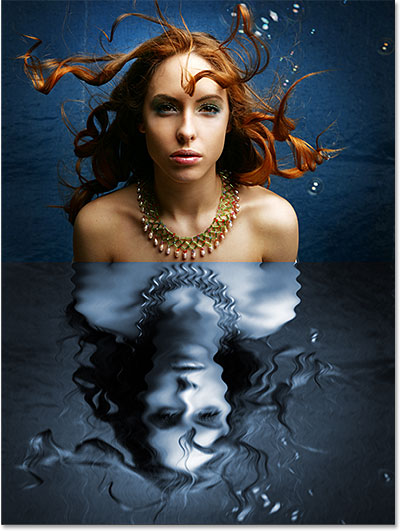
The water reflection is now colorized with blue.
Step 18: Lower The Opacity Of The Adjustment Layer
As our final step, let’s lower the opacity of the adjustment layer so the blue colorizing effect is much more subtle. The Opacity option is located in the top right corner of the Layers panel. Lower it to around 25%:
Lowering the opacity of the adjustment layer to 25%.
And with that, we’re done! Here, after lowering the adjustment layer’s opacity, is my final “water reflection” effect:
The final result.
This water reflection effect works especially well with
landscape photos. Here’s another image that I’ll quickly apply the
effect to (golden forest photo from Shutterstock):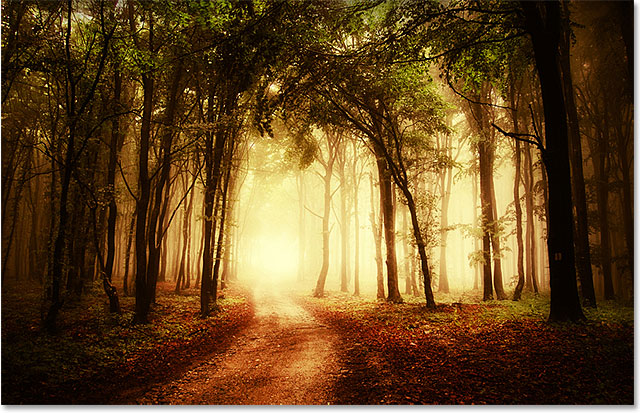
The original landscape photo.
And here’s the result with the water reflection applied. The
only changes I made with this image were that I used a slightly lower Distance value of 4 pixels (instead of 6) for the Motion Blur (Step 14), a Horizontal Scale value of only 1
(instead of 4) in the Displace filter (Step 15) for a more subtle
ripple effect, and in the final step (Step 18), I lowered the Opacity value of the Hue/Saturation adjustment layer all the way down to 10%
instead of 25%. As you can see, the exact values you use in these steps
can change depending on your image, so it’s always best to experiment
and judge the results for yourself: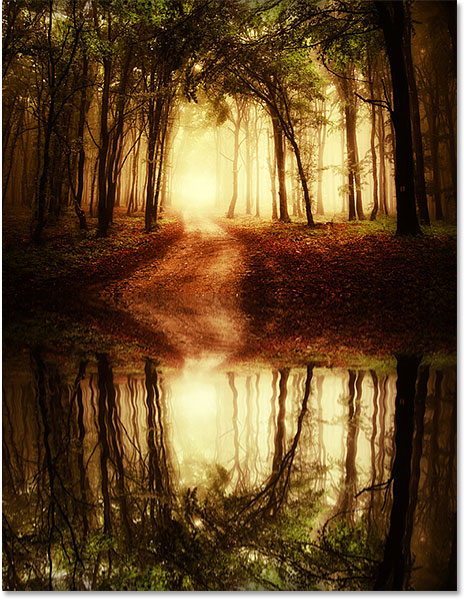
Another example of the water reflection effect.
And there we have it! That’s how to add a realistic water reflection to an image using Photoshop CS6!
Comments
Post a Comment