Creating Animation with Audio in Photoshop CS6 Tutorial
The release of Photoshop CS6 presents another revolutionary step in the history of Photoshop. While theprevious releases of Adobe Photoshop formed a real and significant change in the development ofPhotoshop, the latest version, Photoshop CS6, definitely comes with some amazing new and improved features, such as the 3D feature, content-aware and the animation timeline enhancements.

Although animation in Photoshop is not a new feature, it has improved a lot in Photoshop CS6. In the new Photoshop timeline you can now add video layers, modify video content, build animation and add audio.
In this Photoshop tutorial we will shed light on this feature through the following example. We will use the timeline to create an animated into through adding a video layer and creating text animation.
This article requires you to have a basic knowledge of both Photoshop and the concept of animation. You can download the beta version of Photoshop CS6 from this link.
Before we jump to the tutorial, let us preview the final look of the animation below:
Advertisement
Step1
Create a new Photoshop document by choosing New from the File menu. In the New Document dialog box, choose Film and Video from the Presets list.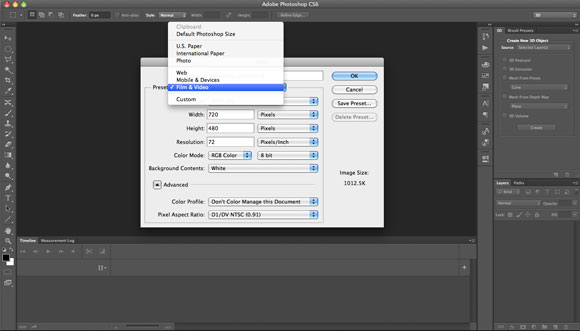
Step2
From the Size, choose NTSC DV Widescreen. This will set the document size, aspect ratio and animation frame per second to meet with the NTSC video standards.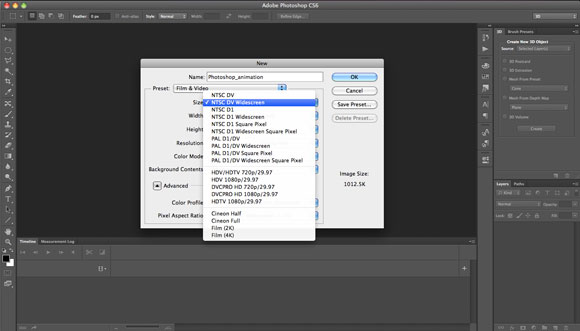
Step3
From the Layer menu, choose Video Layers> New Video Layer From File. Navigate to the video Freemoonriseoverwater.mov and click Open. Due to the size of the video file, you can download a free copy of it from the following link: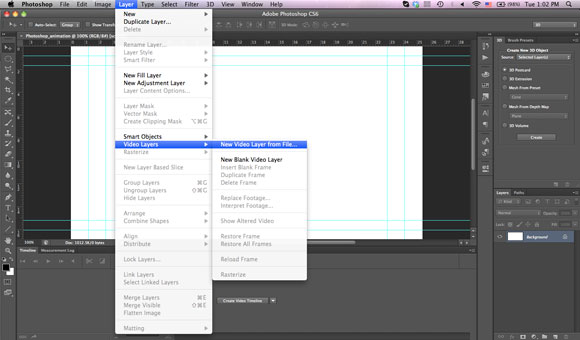
Step 4
On the Timeline panel, you will notice that the video layer appears in the timeline. If you do not see it choose Create Video Timeline from the Timeline panel.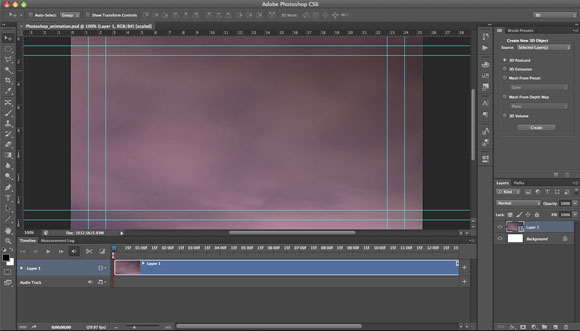
Step 5
Now, we will resize the video to fit the stage. Press Cmd+T (Ctrl+T in Windows) for Free Transform. You will get an alert message that the video will be converted into a Smart Object. Press Ok and resize the video to fit in the stage. You can hold the Shift Key while resizing to maintain the video aspect ratio.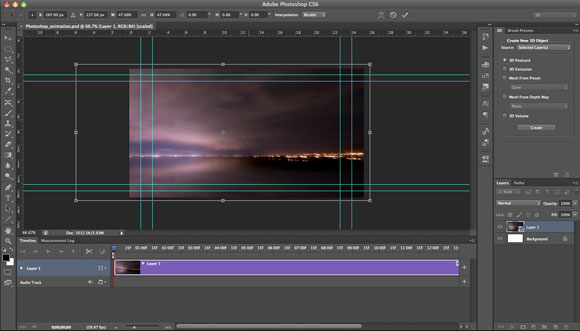
There is a slider in the bottom of the Timeline panel, you can drag it to the right or left to zoom the timeline and reveal more frames of the animation. You can notice this through the frame numbers on the top of the Timeline panel.
Step 6
Using the Type tool, write the word “Adobe” in the middle of the screen and make it small like the one in the figure below. Note that a new animation layer appears on the timeline to allow you to animate the text.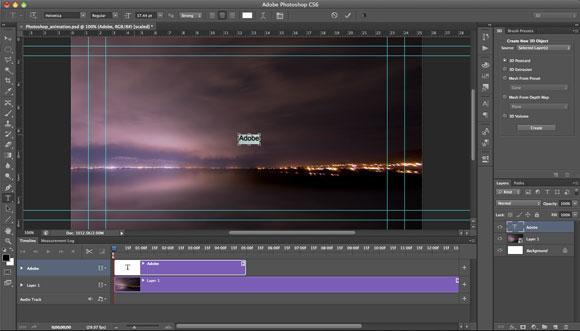
Step7
In the Timeline panel, Click the arrow next to the text layer and click the small stopwatch icon next to the Transform property. This enables you to transform the text, such as moving and scaling.
Step8
Move the timeline indicator to frame number 03:00, which means the 3rd second of the animation.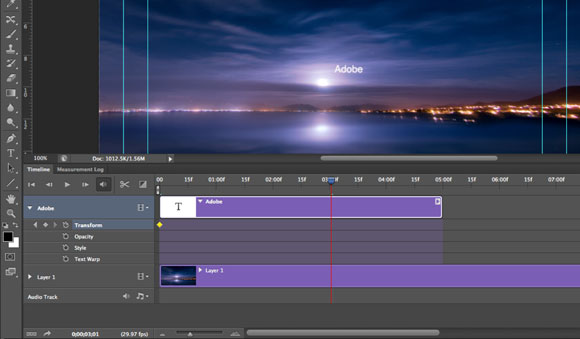
Step9
Scale the text up like in the figure below and place it in the center of the screen.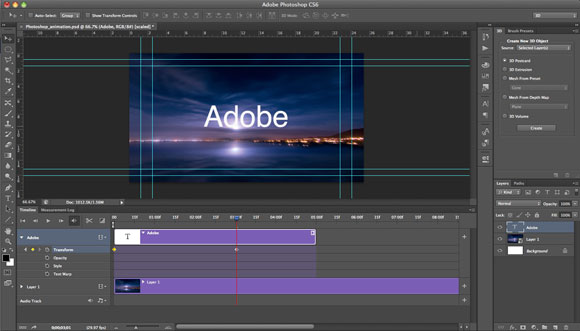
Step10
Move the timeline indicator to frame number 02:00, which means the 2nd second of the animation.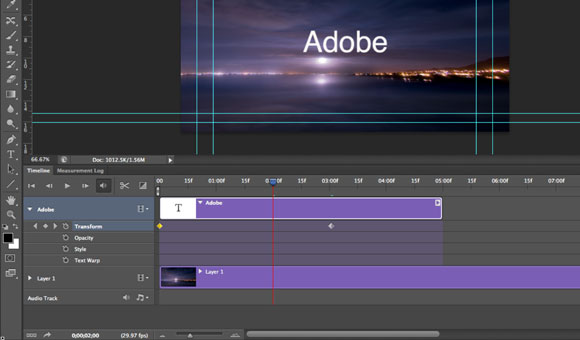
Step11
Click on the stopwatch icon next to the Opacity value. This activates the opacity on the text animation.
Step 12
Now, move the timeline indicator to the end of the text animation on frame 03:00f. From the Layers panel, set the Opacity of the text to zero.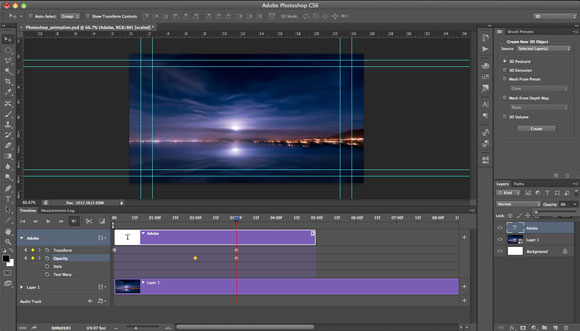
Step13
Move the timeline indicator to frame number 02:00f again. At that point we will create a new text that will appear while the first one fades.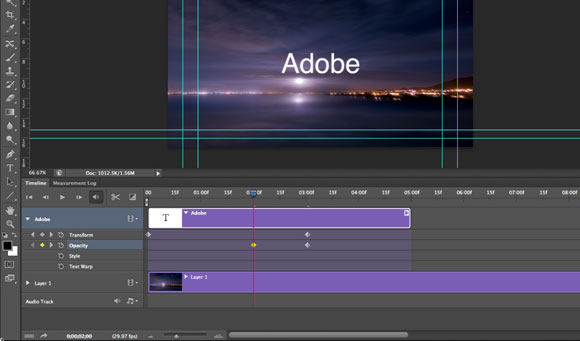
Step14
Using the Type tool, create a new text “Photoshop”. Make it small and place it in the middle of the screen as we did with the previous text.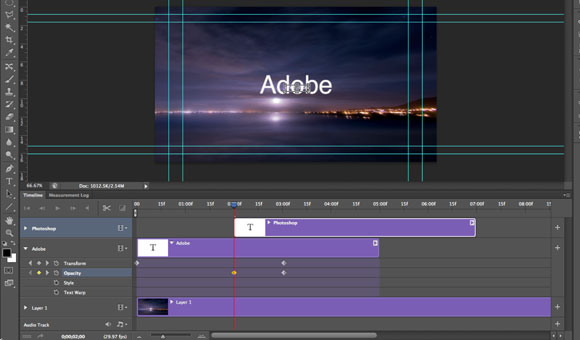
Step15
Click the stopwatch icon next to the Transform property layer.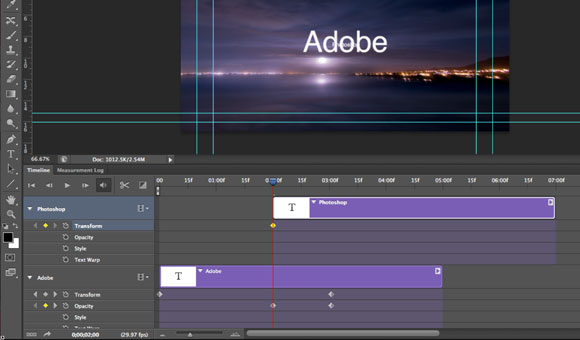
Step16
Move the timeline indicator to frame number 05:00f, this is the 5th second of the animation. Scale the text up as we did with the previous one.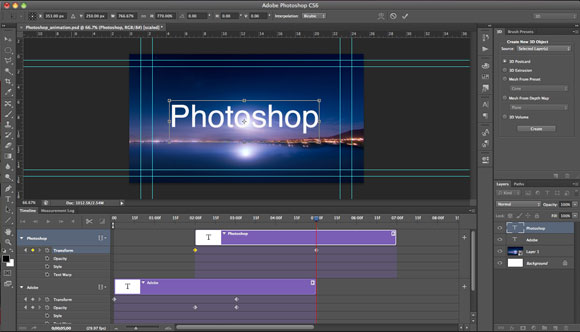
Step17
Move the timeline indicator back to frame number 04:00f, click the stopwatch next to the Opacity property.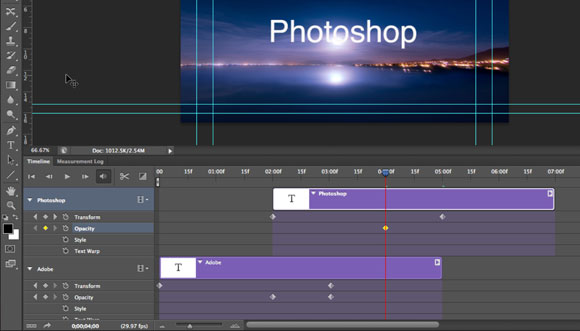
Step 18
Move again to the end of the animation of the second text on frame 05:00f. Set its opacity to 0 from the Layers panel.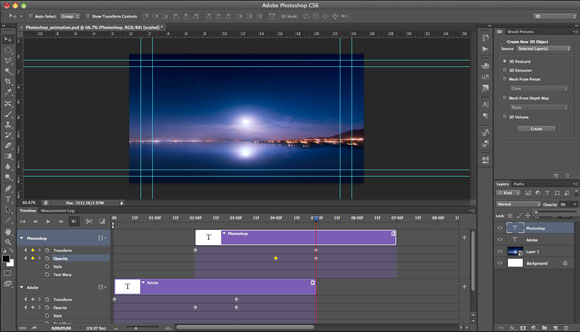
Step19
Move the timeline indicator to frame number 04:00f and create a new text layer. Add the word “CS6” to this layer.
Step 20
Repeat the previous steps to scale and change the opacity of the text. We will have three text animations that fade after the 7th second of the animation.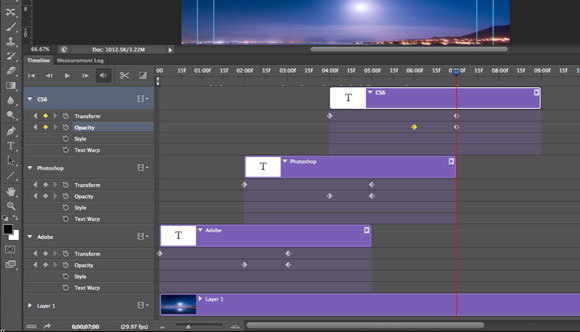
Step21
Move the timeline indicator to the end of the video animation layer.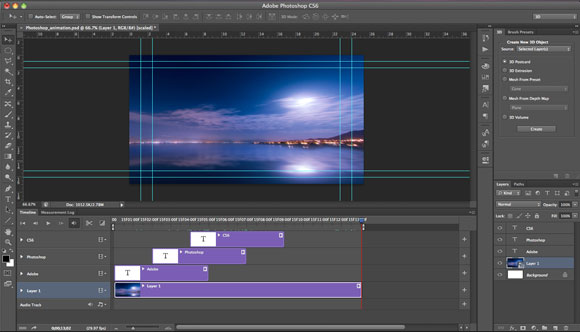
Step22
On the top left of the Timeline panel, select the square transition icon next to the scissors icon. This icon opens a floating menu that allows us to see the available transitions.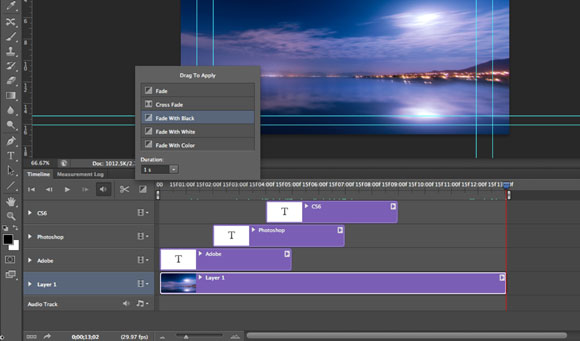
Step23
Select Fade to Black and drag to the end of the video animation layer. This will apply a fade to black transition to the end of the animation. You can preview the animation by pressing the Spacebar in your keyboard or click the Play button in the Timeline panel.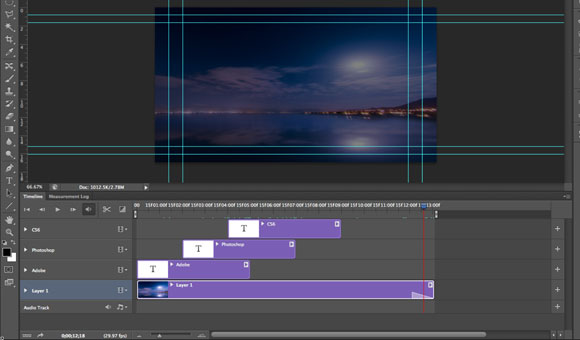
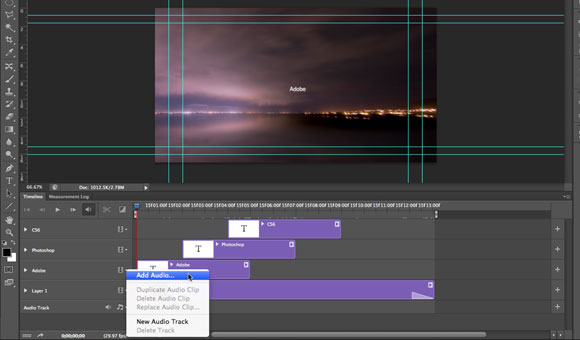
Step24
Now, we will add audio track to the animation. In the Timeline, you can find the bottom layer called Audio Track. Click the music icon on the right side of the audio layer and choose Add Audio. Navigate for the audio track Mystical_10sec.mp3. You can download it from the following URL:http://www.stopmotionpro.com/index.php?option=com_content&view=article&id=43&Itemid=34
And preview it here:
http://www.stopmotionpro.com/media/Audio_files/mystical_10sec.mp3
Then, click Open to add it to the time line.
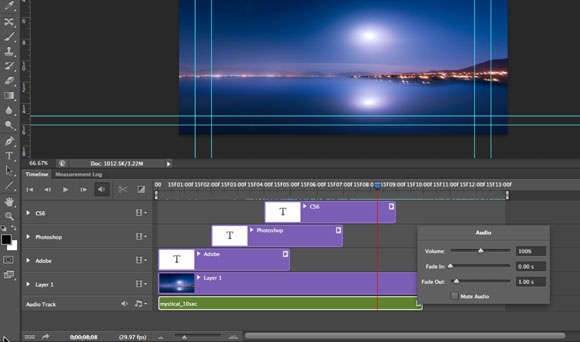
Step25
At the end of the animation, click on the arrow at the end of the audio layer. In the fade out value, set it to 1 sec to fade the sound by the end of the sound track.You can drag the video layer from the end side to crop it. So, it ends in the same time of the audio track.
At this point we have finished creating the animation. In the next steps we will render this animation into video format as follows:
Step26
On the top of the Timeline frame numbers you can find the two brackets in the beginning and the end of the Timeline layer. Make sure to move these brackets to include only the animation frame. These brackets set the frame that will be rendered.
Step27
From the File menu, choose Export>Render Video.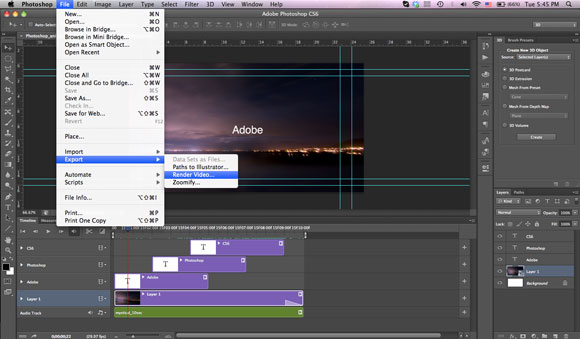
Step28
In the Render Video dialog box, set the name of the video and the path where you would like to save it.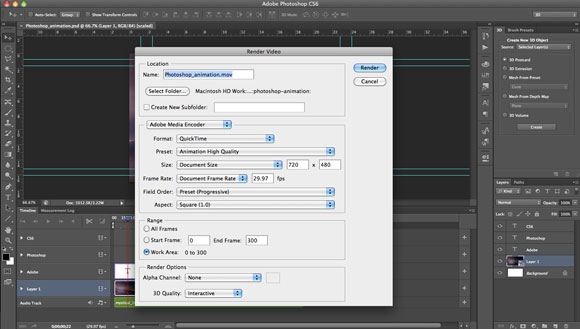
Step 29
Set the render format to Adobe Media Encoder and choose QuickTime format. Set the Presets to High Quality and the size and frame rate as the same. It will be rendered using the same size and rate of the presets we had selected at the beginning of the animation.In the Range area, set the render area to Work Area, this will only render the frames inside the brackets we have mentioned above.
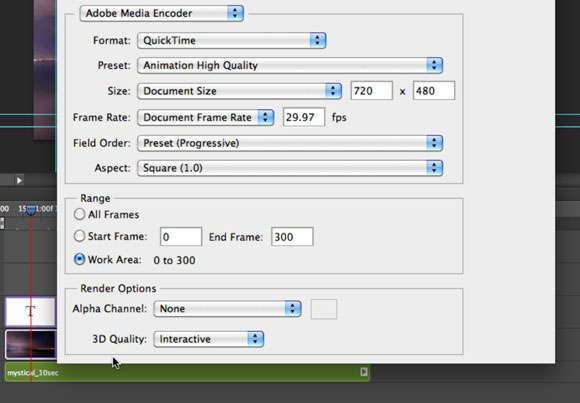
Click the Render button to render the video that should appear as below.
In this tutorial we have overviewed how to create a video animation in Photoshop CS6 using the enhanced Timeline panel. There are many features and options associated with animation in Photoshop and this tutorial intends to overview the video building process so you can start exploring the different animation capabilities of Photoshop CS6 from here.
In the next tutorials we will cover more Photoshop CS6 features. So, please add your comments and questions to increase the benefits of this tutorial.
Comments
Post a Comment