
Design Watercolor Effect Menu


Design Watercolor Effect Menu


This is a two-part tutorial on how to create an artistic and un-typical CSS list menu as seen on Web Designer Wall. In the first part (this article), I will show you how to design a watercolor effect menu in Photoshop. Then in next tutorial, I will show you how to slice the menu and code in CSS. If you need some inspiration on creating an artistic menu, visit our previous post on artistic websites. Ready? Let's begin Part 1. (Update: Part 2 is ready - Advanced CSS Menu)
Download Photoshop file

Preview

Here is a preview of the final image:
sample menu

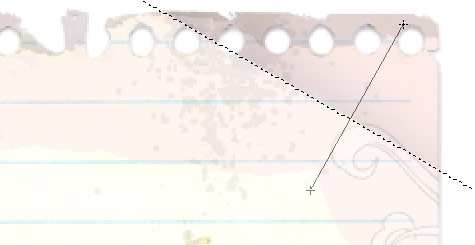
1. Notepaper stock image

First you need to find a notepaper stock image. You can buy stock photo from iStock or scan from a notepad.
screen 1
Cutout the notepaper and apply 2px drop shadow effect.

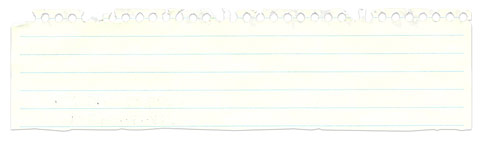
2. Watercolor effects

Cmd + click on the notepaper layer to load the selection. Create a new Layer Group and click on the Add Layer Mask mini icon in the Layers palette. This way everything within the Layer Group will be masked.
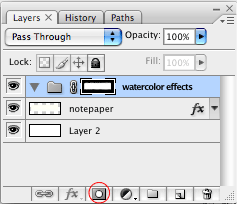
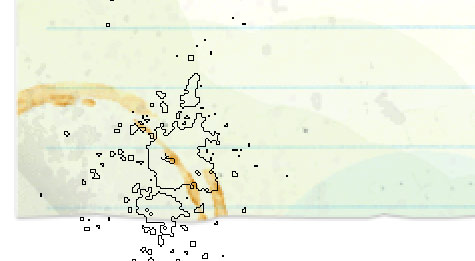
screen 2
Create a new layer. Choose a pink color (or any pastel color), select the Pencil tool, set the tool Opacity to 10%, brush size 100px, and drag around the document as you are doing a watercolor painting.
screen 3
Repeat this step until you get multi layers of watercolor effects.
screen 4

3. Add details

Find some coffee stain images, paste it in and set the layer blending mode to Multiply.
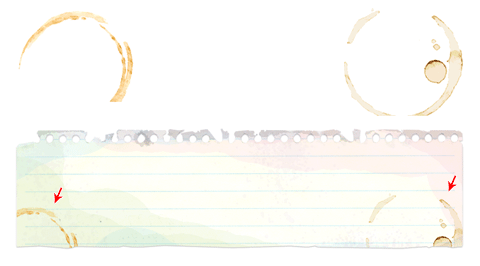
screen 5
Dirty and splatter effect: download and use the splatter or watercolor Photoshop brushes from Bittbox.
screen 6
Add some pencil sketch illustrations. You can either scan your marker sketches or use vector illustration.
screen 7
Make a triangle selection in the corner, pick a grey color and apply a gradient to make the wrinkle effect.
screen 8

4. Hand wrting text

If you don't have any nice hand writing fonts, go to Dafont or Urban Fonts to download them. Create a new Layer Group and enter the navigation text.
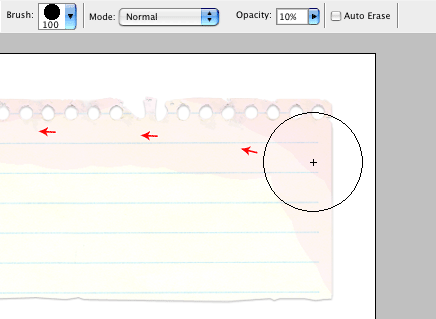
screen 9
Find a different font, enter the menu mouseover text.
screen 10

5. Washout RSS icon

Use the Eraser tool, choose one of the splatter brushes, set tool Opacity to 10% and randomly erase the edge. Then paint some brown color overlay the icon to give the dirty effect.
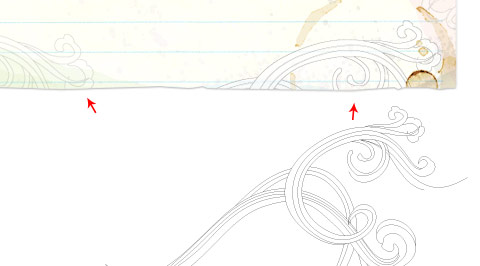
screen 11

6. Sketchy strokes

Sketchy or pencil strokes can be easily created in Adobe Illustrator. Draw a shape or path, open the Brushes palette, click on the charcoal brush and set the Stroke weight to 0.25pt.
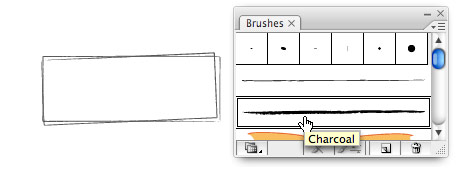
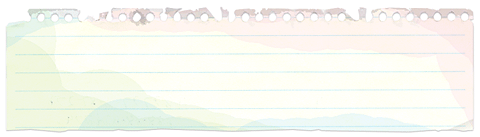
screen 12

7. Final

Here is my final image. If you want to spend more time on the details, you can add paper clips, tapes, post note, pencil sketches, etc.
sample menu

Comments

Popular posts from this blog

Use x-ray techniques in Photoshop to show naked skin through clothing

    Do those new naked body scanners have you freaked out at the airports? As far as the TSA is concerned, those x-ray machines are here to stay, but you might as well take comfort in knowing that airport security guards aren't the only ones looking at your private parts. Practically anyone with a computer can manage to see through your clothes, and it's all thanks to a little program called Photoshop. Thanks, Adobe. With a few tweaks using the tools in Photoshop, you can see those boobs in no time, male or female. The video is in German, but it's not hard to figure our what's going on, especially if you're familiar with Photoshop. First, create a few duplicate layers, then get a handle on some of these tools to make the naked body through the clothes: * Auswahl erstellen (Create Selection) * Tonwertspreizung (Input Levels) * Belichtung (Exposure) You can also do this see-through clothing effect in free design programs, such as  GIMP .

40 latest creative photoshop text effects

Create a Glowing Liquid Text with Water Splash Effect in Photoshop In this tutorial, we will show you the steps we took to create a Glowing Liquid Text Effect in Photoshop. We will be practising the use of liquify filter, layer blending options, as well as some image adjustments. Create a Realistic Wooden 3D Text Image In this tutorial we are going to take a few 2D textures as well as a few Photoshop techniques to create a realistic 3D text image. Easy X-Ray Typography In Photoshop In this tutorial we will show you how to create a simple x-ray effect of a letter, in this case the Abduzeedo logo A. The whole process is quite simple but it will require a couple of hours to pull it off. Easy Furry Text In Photoshop In this tutorial we will show you how to create a really cool and super simple furry text in Photoshop CS6. We will use basic filters and tools but it’s nice to say that we took advantage of the a new feature in Photoshop CS6 that is to apply layer...

Royal 3D Text Effect in Photoshop CS6

  Just make sure to check the 3D settings under Edit -> Preferences -> Performance, and Edit -> Preferences -> 3D. Default values should work fine, but if anything seems to be not working properly you can always check those settings. Step 1 - Create a new 1600 x 1200 px document and Fill the Background with black. Create the text in white using the font Dunkin Sans. The font size is 400 pt and the text is better written in All Caps (if you’re not using only numbers). Step 2 - With the text layer selected, go to 3D -> New Extrusion from Selected Layer. This will instantly convert the text layer into a 3D layer. All the 3D scene elements can be found in the 3D panel (Window -> 3D). Click the main mesh name to edit its settings. - The 3D Mesh settings and attributes can be accessed and modified through the Properties panel (Window -> Properties). If you scroll down the Properties panel you’ll find the Character Panel button, which ...