New Techniques for Cutting Out Hair in Photoshop CS5
 Photoshop
CS5 comes with some exciting tools for designers, one of them that
stand out is the new Refine Edge tool. It really helps when cutting out
an object from a background especially when it involves human hair or
any type of fur that is troublesome and can be tricky to achieve a realistic look.
With Photoshop CS5 it is now possible to achieve the task very easily.
Here are a couple techniques you can use on images especially those
those with varied background tones, the results takes just a few mouse
clicks. In this tutorial we will be replacing a dull background with a
very cool sunset, Check it out!
Final Image

Step 1
Open the sunbathing 2 from Stock.xchng, then crop it down to about 24×24 inches, removing the majority of the sky.
Step 2
Use the Quick Selection Tool, to do a rough selection of the girl. Make the brush size about 37 pixels in diameter at 100% hardness. brush over the image of the girl to do the quick selection.
Step 3
Now use the new Refine Edge tools in Photoshop CS5 to help us out. Click on the Refine Edge button.
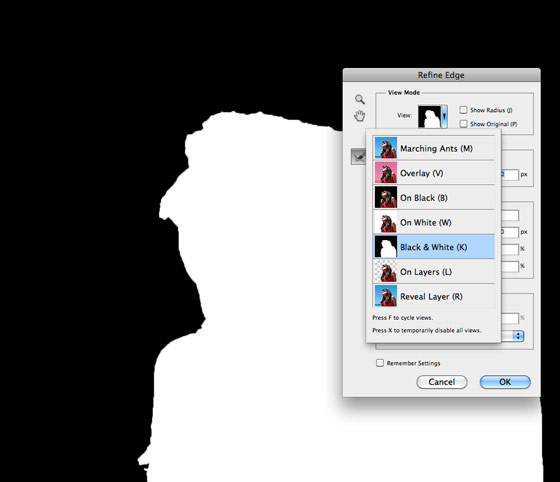
The first thing you should do is decide which “View Mode” you want to work with, this will all depend on the image you are working on. With this particular image we want to see the outline of the hair, so go ahead and set the View Mode to Black and White, this will give us a nice mask.

Step 4
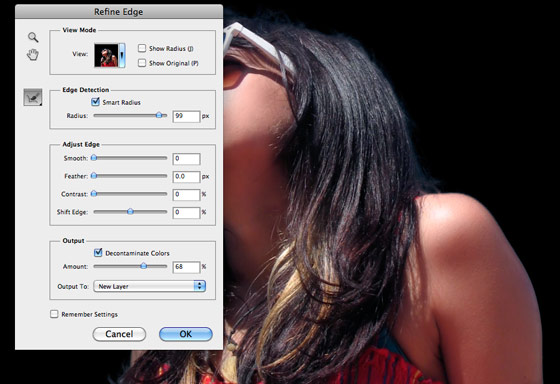
Set the Edge Detection to Smart Radius, then bump the Radius up to 99.0%
Step 5
Change the View Mode to Black, you will notice that the model has some blue from the sky in her hair and on the edges of her skin.
Step 6
Turn on Decontaminate Colors and set the amount to 68%
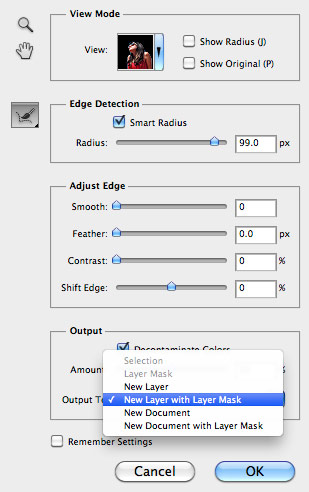
Tweak your settings by switching back and forth between view modes. When you are satisfied, set your Output to New Layer With Mask. Then press OK.

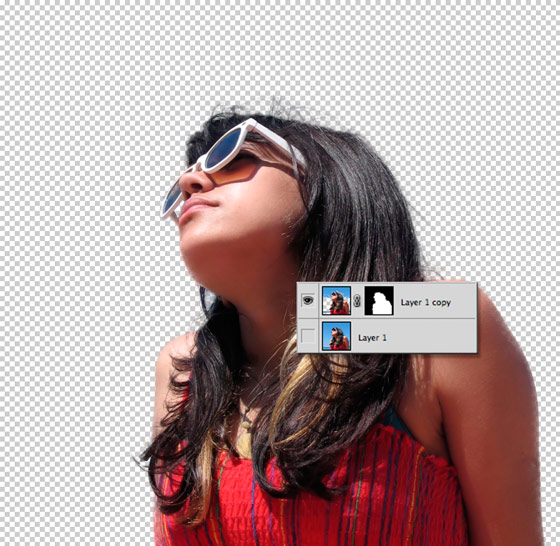
You will notice that Photoshop automatically created a new layer with a mask and turned off your original image layer.

Step 7
Now open the Sunset from Astoria, Queens image from Stock.xchng, copy and paste the image below the new Mask Layer (layer with the girl). See final Image below.Final Image

Comments
Post a Comment