
Enhance Your Image with Selective Color Adjustments
Download Source Files
- Source files for this tutorial are available to Premium members.
Get a Premium Membership
Step 1
Below is our starting image of a couple on a beach. We also need to download a photo of a beach that we’ll use to improve the water and sky in the base image. We’ll see this second image later in this tutorial and in the PSD download available for Plus members. Here are the links to the images we’ll be using for this tutorial: 1 | 2.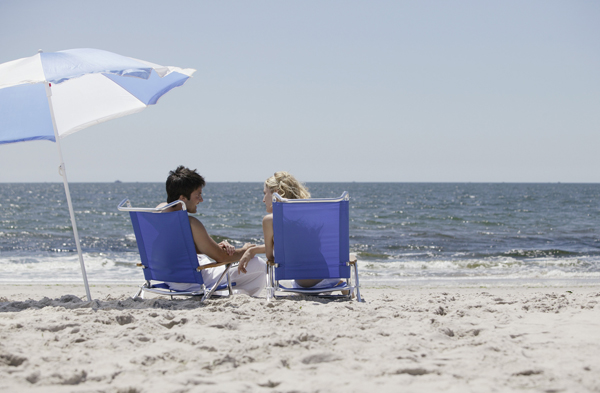
Step 2
First, the base photograph looks washed out. It just isn’t that interesting. Who wants to visit this boring beach? We’ll be fixing that. Regardless of what I’m working on, I always separate the foreground subject matter from the background. Most times, I use the Extract Filter located in the Filters Menu. Extract is easy to use. More often than not, it does a good job of isolating your subject. Make a copy of the base layer. Place it on top of the original. Hide it. Then open up the Extract Filter.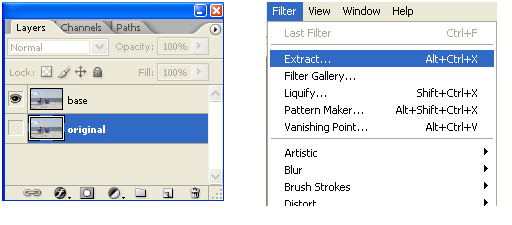
Step 3
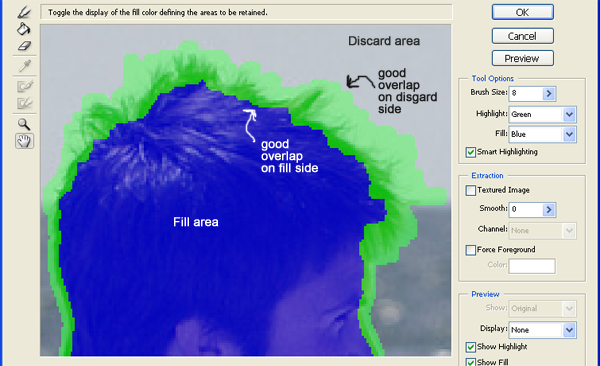
Using the Extract Filter, trace the subject. Then use the Fill Bucket to fill in the area you want to keep. When using the extract filter on complex details like hair, remember to outline the whole problem area so there is definite ink overlap where the detail starts and ends. Otherwise, Photoshop has trouble calculating what to remove. Notice on the hair area, there is good overlay on the sky portion as well as the man’s head.First, I extracted the people. Later on, I moved the umbrella portion to its own layer (easier for me to keep track of, but that’s optional).
Step 4
After a successful extraction, there’s still some touch-up that needs to be done. Using the History Palette, set the state you want the History Brush to go back to. We want to paint back the duplicated layer before we extracted it.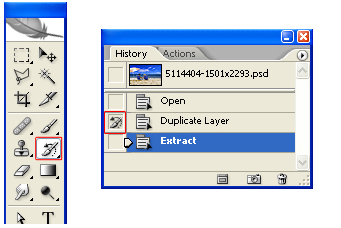
Step 5
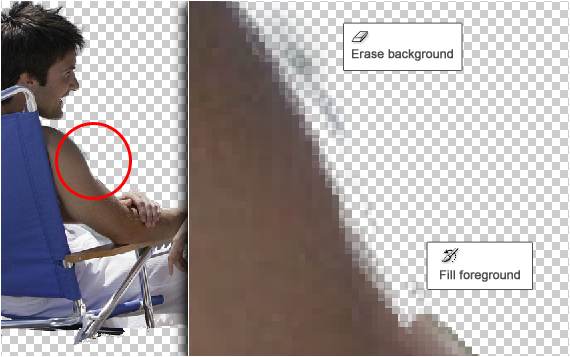
Zoom in tight and you will see some artifacts that weren’t extracted correctly. Sometimes there’s too much background showing. Or there’s foreground that was extracted by mistake. Using the History Brush(Y) and the Eraser Tools, paint back in the foreground and Erase(E) the extra background.Remember to change the softness of your brushes to match the outline of your subject. Use a harder brush when the edges are sharper. Use a softer brush when you are in an unfocused area of the subject. That’s how you keep it realistic.
Turn the visibility of the original photo back on after touching up the whole outline of the subject. You now have a perfectly separated foreground object on top of your background.
Step 6
OK, now that our foreground is on top of everything else, let’s do something about that sky and ocean. Rather than using separate images for the sky and ocean, I found an image that will be used to replace both. I happened to find a clouded sky image that also had a good saturated ocean as well.
Step 7
Paste the new sky image on a new layer beneath the extracted foreground. Line up the original ocean line with the new ocean line. Create a layer mask on the new sky image layer. Use the Gradient Tool (using a black to white gradient fill) to affect the layer mask. Create a gradual fade between the base image and the new sky image. Your result should look like the second image below.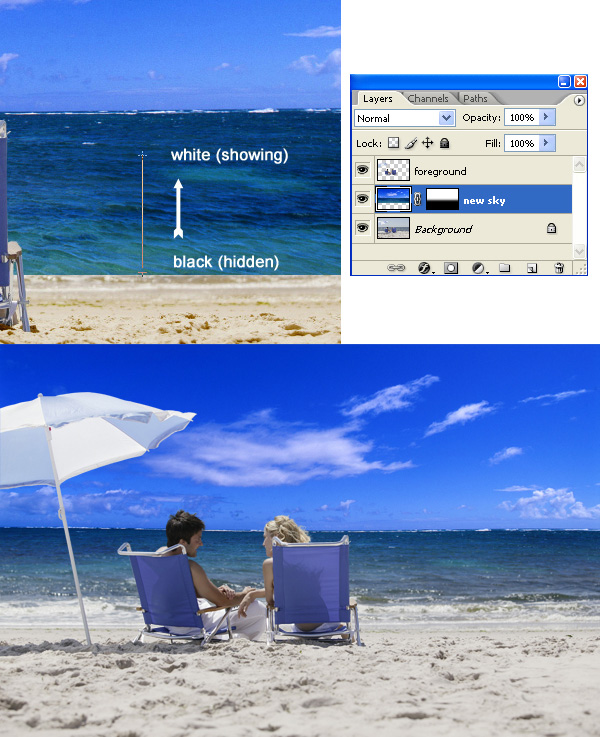
Step 8
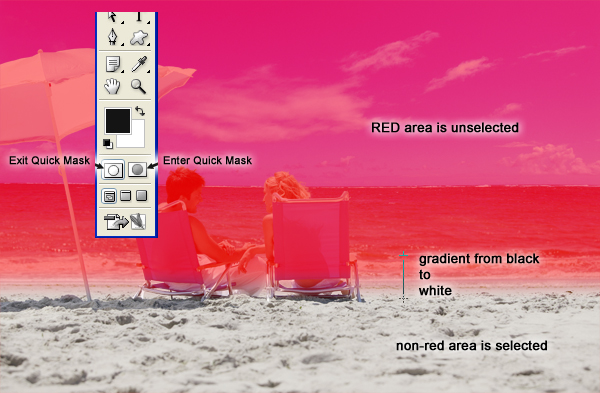
All right, the new sky and ocean look pretty good. But now the sand looks too washed out. Let’s pump it up. Most of the time, I use Selective Color instead of Hue/Saturation. You get better fine tuning and less artifacts that way.Enter the quickmask area (the button for it is located at the bottom of the tools palette). Now everything you paint or fill is treated as a selection. The painted part is the unselected area. Use the Gradient Tool to fill the quick mask from the edge of the water line to the sand. Exit the quick mask. Now you have a selection that is gradated from 100 percent selected to 0 percent selected. In other words, you have a nice selection of the sand area.
Step 9
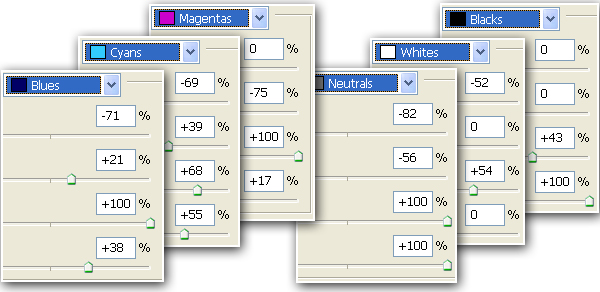
Now use the Layers Palette and add a new adjustment layer. When you create an adjustment layer, whatever was selected turns into a layer mask for that adjustment layer. Select Selective Color from the adjustment layer menu located at the bottom of the layers palette. Since this area is fairly neutral, we’ll be using the colors white, neutrals, and blacks. See below for the exact values. Notice I’ve used the Relative method. That adds and subtracts color from the source in proportion to how much of that color is present in the source pixels. This gives more natural effects. If you use Absolute, it adds the percentage you specified regardless of how much of that color was already present in the image.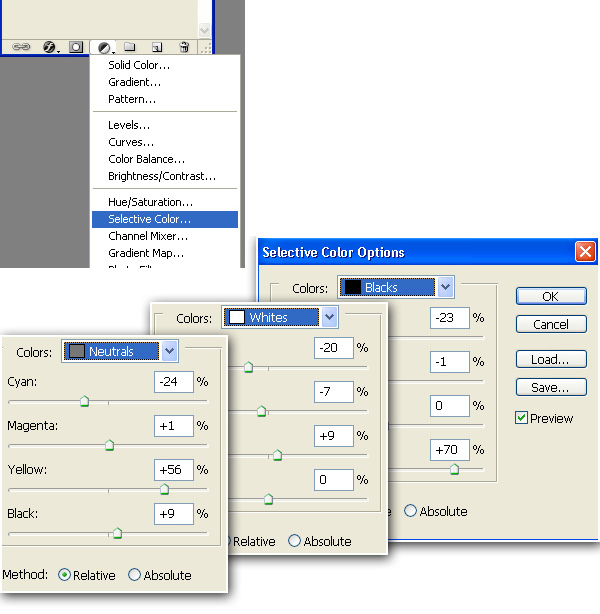
Step 10
Let’s check how our layers and images look at this point by viewing the images below.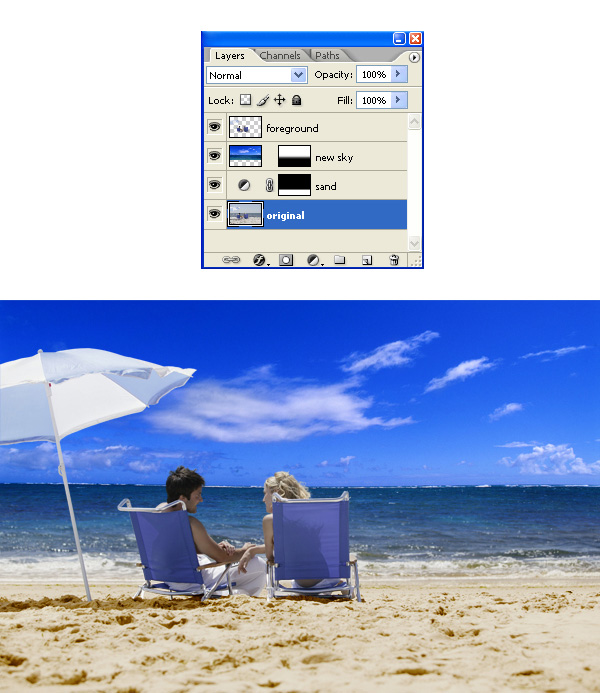
Step 11
We’re looking pretty good. One last big thing: that umbrella, very washed out, and a blue umbrella on a blue sky is not the best choice. Let’s make it pop by making it orange. First, isolate the light blue parts. Since the shapes were pretty simple, I used the Polygonal Lasso Tool. You can also create paths, use the quick mask feature, or even use extract like we did earlier in this tute. Doesn’t matter how you do it, just get a selection of the blue parts of the umbrella shade.I’ve selected the light blue areas. Now they are isolated. Let’s create another Selective Color adjustment layer. See below for the exact values I used. Unlike the hue/saturation adjustment, you can make really broad color shifts without a lot of the artifacts and overly saturated pixels showing up.
Step 12
Since I maxed out the blacks in the neutral color channels, I decided to use yet another selective color adjustment layer in order to bump the contrast a little more. Press Command and Click the layer mask of the umbrella’s selective color adjustment layer. That will turn the mask into a selection. Make a new selective color adjustment layer. You just need to bump the black up in the neutral channel to darken it down a bit.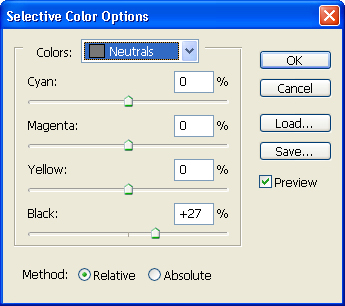
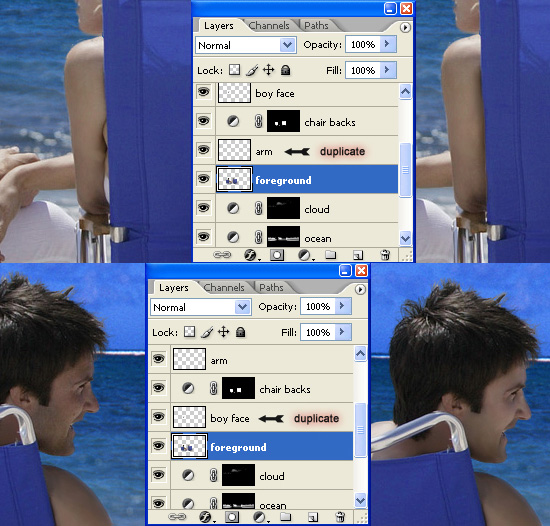
Step 13
From here on out, it’s the fine details that really make an image appear finished. The chairs’ fabric backs need some pumping up. That can be accomplished the same way as with the umbrella by using our new friend the selective color adjustment layer. The woman has some back fat sticking out. That’s not attractive. Let’s get rid of that in a nondestructive way.With the foreground layer selected, lasso the woman’s arm. Press Command+J. That puts the selection on its own layer. Now you can clone, stretch, and manipulate the new copy without destroying any of the original pixels. Same with the man’s face; he’s got some 5 o’clock shadow. Overall, his face is a too dark. Lasso it, copy it to a new layer, and experiment away.
Conclusion
That’s it! This process is how I start all of my photo-editing projects. We spent the time in the beginning to isolate the foreground subjects on their own layer. A lot of our masks are very simple to make. You’ll also notice that I haven’t touched any of the original base photo pixels. These nondestructive techniques make it easy to go backwards or start over.
Comments
Post a Comment