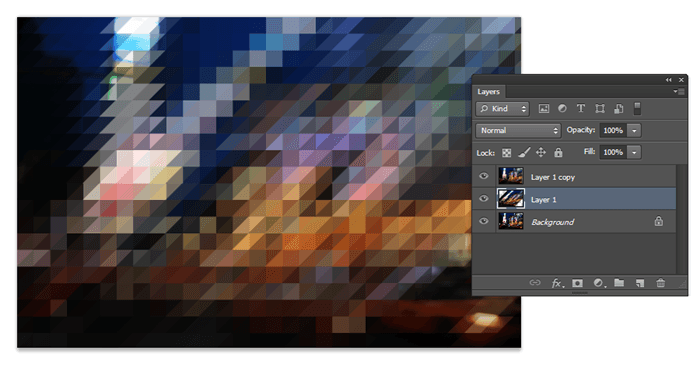
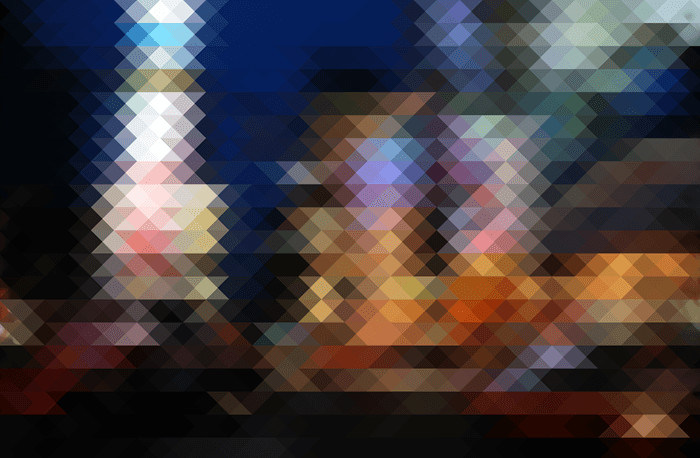
How to Create a Triangle Pixelation Effect in Photoshop

Step 1

Start by opening any photo you want into Photoshop. You should resize the image to your final output size before you continue. This is the photo that we’ll be using.
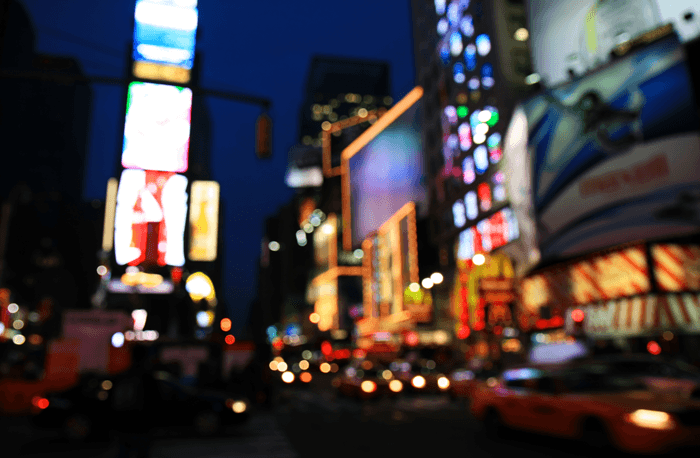
image

Step 2

Duplicate your background layer twice.
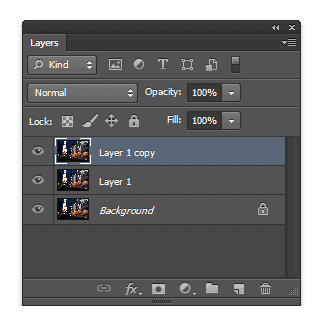
image

Step 3

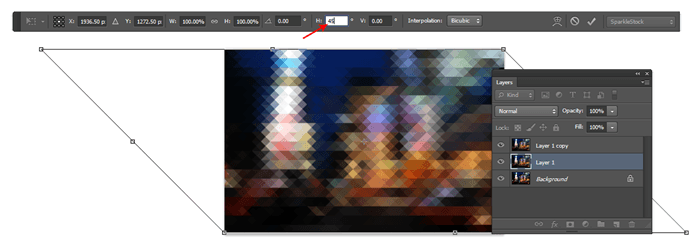
Activate the Transform tool (Ctrl/Cmd+T or Edit > Free Transform) then set the horizontal skew value to 45ยบ.  The horizontal skew setting is located in the options bar when you have your Transform tool activated. Press Enter to apply the transformation.
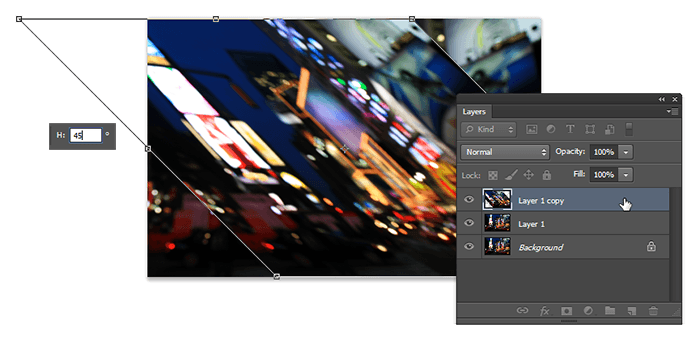
image

Step 4

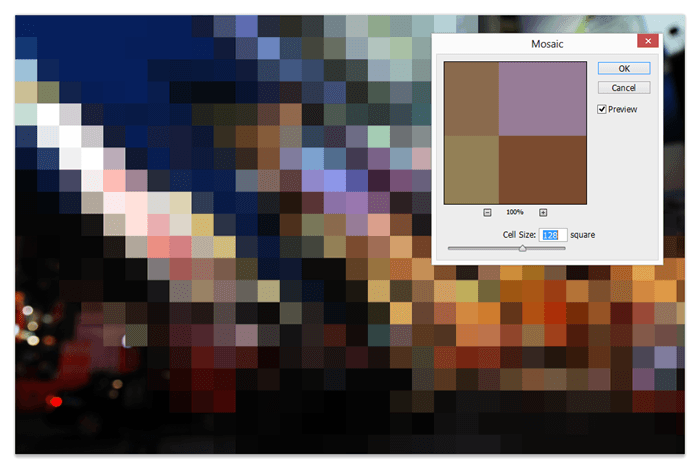
Go to Filter > Pixelate > Mosaic. Adjust the cell size setting to anything you like then click OK.
image

Step 5

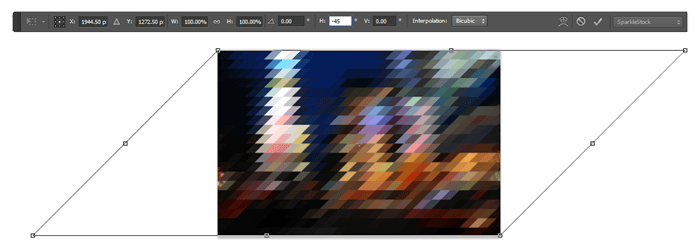
Next, we’re going to transform it the opposite way. Activate the Free Transform tool (Ctrl/Cmd+T or Edit > Free Transform) then set the horizontal skew setting to –45ยบ. Press enter to apply the transformation.
image

Step 6

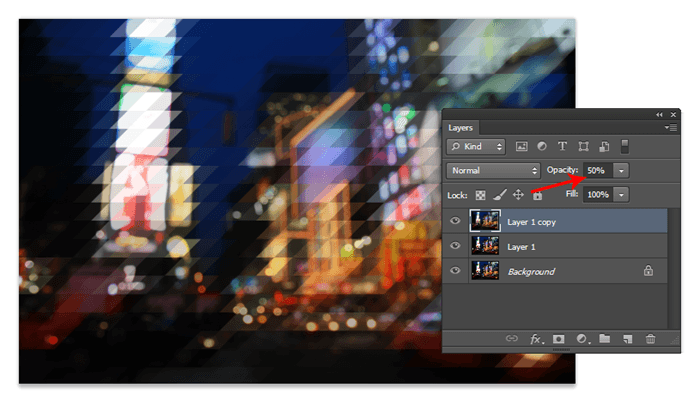
Set this layers opacity to 50% then select the middle layer. We’re going to be doing the same steps but with transformations done
image

Step 7

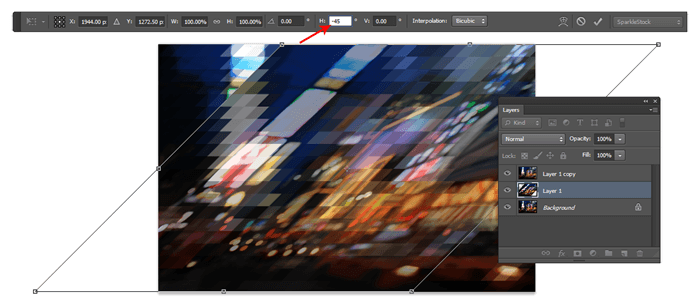
With the middle layer selected, activate the Free Transform tool (Ctrl/Cmd+T or Edit > Free Transform) then set the horizontal skew to –45ยบ.
image

Step 8

Apply the same mosaic filter again. You can do this quickly by pressing Ctrl/Cmd+F or by going into the filter menu and selecting the first filter in the menu. Photoshop automatically places your last used filter on the top of this menu.
image

Step 9

Use the Free Transform tool (Ctrl/Cmd+T or Edit > Free Transform) to transform the layer back to its original shape by setting the horizontal skew value to 45ยบ.
image

Step 10

We’re pretty much done but if you zoom, you can see that the edges don’t really line up. To fix this, press the left or right arrows on your keyboard to nudge the layer until the intersections align.
Here’s how the image looks like so far.
image

Step 11

If you’ll be using this as a background, you might want to apply a faded/vintage film effect. We used the Vesper effect from the Instagram Video Photoshop actions and completed the look with some text using the Abolition font.
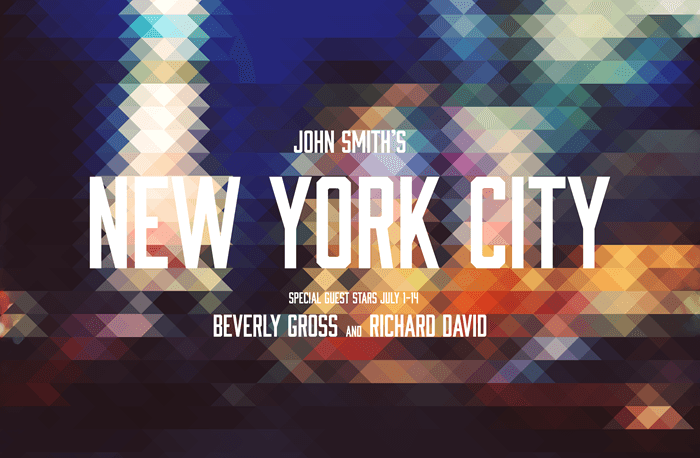
New York City Poster

Comments

Popular posts from this blog

Use x-ray techniques in Photoshop to show naked skin through clothing

    Do those new naked body scanners have you freaked out at the airports? As far as the TSA is concerned, those x-ray machines are here to stay, but you might as well take comfort in knowing that airport security guards aren't the only ones looking at your private parts. Practically anyone with a computer can manage to see through your clothes, and it's all thanks to a little program called Photoshop. Thanks, Adobe. With a few tweaks using the tools in Photoshop, you can see those boobs in no time, male or female. The video is in German, but it's not hard to figure our what's going on, especially if you're familiar with Photoshop. First, create a few duplicate layers, then get a handle on some of these tools to make the naked body through the clothes: * Auswahl erstellen (Create Selection) * Tonwertspreizung (Input Levels) * Belichtung (Exposure) You can also do this see-through clothing effect in free design programs, such as  GIMP .

40 latest creative photoshop text effects

Create a Glowing Liquid Text with Water Splash Effect in Photoshop In this tutorial, we will show you the steps we took to create a Glowing Liquid Text Effect in Photoshop. We will be practising the use of liquify filter, layer blending options, as well as some image adjustments. Create a Realistic Wooden 3D Text Image In this tutorial we are going to take a few 2D textures as well as a few Photoshop techniques to create a realistic 3D text image. Easy X-Ray Typography In Photoshop In this tutorial we will show you how to create a simple x-ray effect of a letter, in this case the Abduzeedo logo A. The whole process is quite simple but it will require a couple of hours to pull it off. Easy Furry Text In Photoshop In this tutorial we will show you how to create a really cool and super simple furry text in Photoshop CS6. We will use basic filters and tools but it’s nice to say that we took advantage of the a new feature in Photoshop CS6 that is to apply layer...

Royal 3D Text Effect in Photoshop CS6

  Just make sure to check the 3D settings under Edit -> Preferences -> Performance, and Edit -> Preferences -> 3D. Default values should work fine, but if anything seems to be not working properly you can always check those settings. Step 1 - Create a new 1600 x 1200 px document and Fill the Background with black. Create the text in white using the font Dunkin Sans. The font size is 400 pt and the text is better written in All Caps (if you’re not using only numbers). Step 2 - With the text layer selected, go to 3D -> New Extrusion from Selected Layer. This will instantly convert the text layer into a 3D layer. All the 3D scene elements can be found in the 3D panel (Window -> 3D). Click the main mesh name to edit its settings. - The 3D Mesh settings and attributes can be accessed and modified through the Properties panel (Window -> Properties). If you scroll down the Properties panel you’ll find the Character Panel button, which ...