Photoshop CS4 New Features – Tabbed Document Windows
Download our tutorials as print-ready PDFs! Learning Photoshop has never been easier!
To see how great the new tabbed document windows feature is, I have
several images saved inside a folder on my desktop that I want to open
all at once inside Photoshop CS4. To do that, I’ll go up to the File menu at the top of the screen and choose Open. Normally, I’d open the images using Adobe Bridge, but to keep things simple for this tutorial, I’ll just open them from inside Photoshop:
Choose File > Open to open images from inside Photoshop.
I’ll navigate to the folder on my desktop that contains my photos,
and to open them all at once, I’ll click on the first one to select it,
then I’ll hold down my Shift key and click on the last one. This selects the first image, the last image and all images in between:
Select the first image, then Shift-click the last image to select all images at once.
With all images selected, I’ll click Open and
Photoshop opens each image for me. In versions prior to Photoshop CS4,
each photo would open in its own independent document window, but with
the default behavior of CS4, the images appear nested inside a single
document. Only one image is visible at a time, but if we look above the
image, we see a series of tabs, with each tab containing the name of one
of the images. The tab of the image that’s currently visible is
highlighted: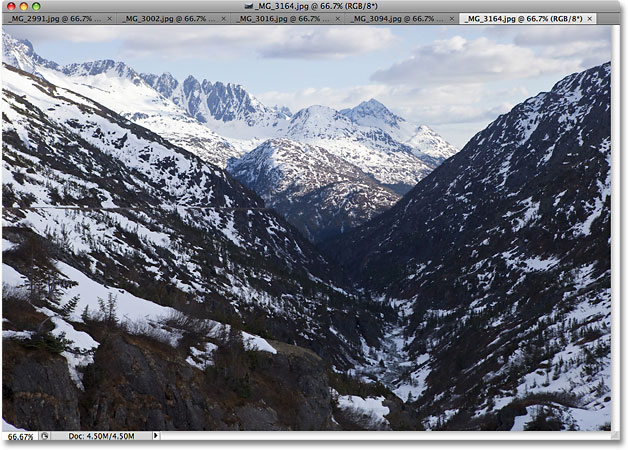
The images appear nested in a single document, with each image given its own name tab at the top.
Switching Between Images
To switch to a different image, simply click on another image’s tab, similar to how you switch between Photoshop’s panels on the right of the screen by clicking on their tabs:
Switch between images by clicking on the name tabs.
Each tab contains the exact same information you’d expect to find at the top of a standard document window in Photoshop, including the name of the image, the current zoom level, the color mode, and the current bit depth.Re-Arranging The Order Of The Images
To move an image and change the order the documents are appearing in, just click on its tab and drag it left or right. Release your mouse button and the image will drop into its new location:
Drag the tabs left or right to change the order of the images.
Cycle Forward And Backward Through The Images
You can cycle through the images using a couple of handy keyboard shortcuts. Press Ctrl+~ (Win) / Command+~ (Mac) to move forward through the tabs, or Ctrl+Shift+~ (Win) / Command+Shift+~ (Mac) to move backwards. The “~” is the tilde key which you’ll find in the top left corner of the keyboard below the Esc key. In previous versions of Photoshop, you could cycle forward through multiple document windows using Ctrl+Tab (Win) / Control+Tab (Mac) or backwards with Ctrl+Shift+Tab (Win) / Control+Shift+Tab (Mac). These older keyboard shortcuts still work in Photoshop CS4, so its your choice which ones you want to use.One potential bit of confusion to keep in mind is that Photoshop moves through the images in the order they were opened, not necessarily the order they appear in on screen. If you’ve re-arranged the order of the images in the tabs and then use the keyboard shortcuts to cycle through them, Photoshop may move through them in an order different from what you expected.
The Fly-Out Image Selection Menu
If you have so many images open at once that Photoshop can’t fit all of their name tabs on the screen, you’ll see a double-arrow icon appear to the right of the tabs. Clicking on the icon brings up a fly-out menu allowing you to select any of the images from a list:
Select images from the fly-out menu if not all name tabs can fit on the screen.
Floating An Image Into A Separate Document Window
To separate an image from the rest of the tabbed documents in Photoshop CS4 and have it float on screen in its own document window, there’s a couple of ways to do it. The quickest way is to simply click on the image’s tab and drag it down and away from the other tabs. When you release your mouse button, the image will appear in its own document window: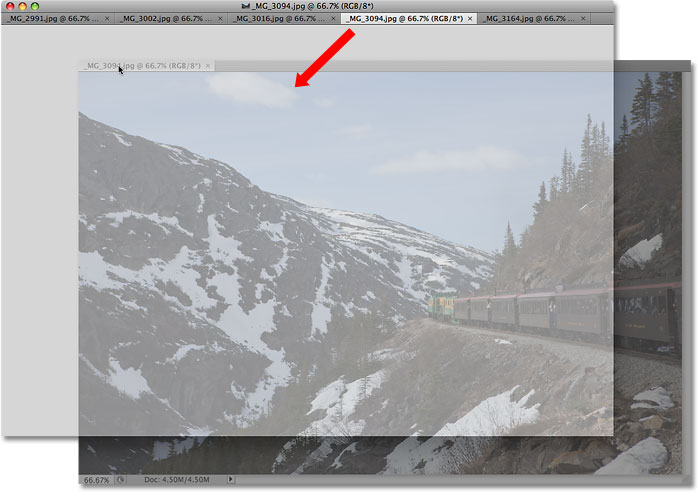
Drag an image away from the other tabs to float it in its own document window.
The other way is to click on the image’s tab to select it, then go up to the Window menu at the top of the screen, choose Arrange, and then choose Float in Window:
You can also choose Window > Arrange > Float in Window.
Floating All Images Into Separate Document Windows
If you want to get rid of the tabs completely and have all open images floating in separate document windows, go up to the Window menu, choose Arrange, and then choose Float All in Windows:
Go to Window > Arrange > Float All in Window to move all open images into independent document windows.
Move An Image Back Into The Tabbed Group
To move a single image back into the group, click anywhere in the gray title bar at the top of its document window and drag it back into the tabs. When you see a blue highlight border appear, release your mouse button and the image will drop back in with the rest of the tabbed documents:
Simply click and drag the image back into the
tabs to return it to the group. Release your mouse button when the blue
highlight border appears.
Group All Floating Document Windows Into Tabs
If you have more than one image floating in a separate document window and you want to quickly group them all back into tabbed documents, go up to the Window menu, choose Arrange, and then choose Consolidate All to Tabs. You can use this option to regroup a single floating document as well:
Go to Window > Arrange > Consolidate All To Tabs to quickly regroup any floating document windows.
Close A Single Tabbed Window
To close a single image inside the tabbed group, click on the small x on the far right of the image’s tab:
Click the small “x” icon to close a single image.
Close All Tabbed Document Windows
To close all tabbed document windows at once, go up to the File menu in the Menu Bar and choose Close All:
Go to File > Close All to quickly close all tabbed document windows.
Disabling The Tabbed Document Windows Feature
If you prefer the old way of working in Photoshop with each image floating in its own document window, you can disable the new tabbed document windows feature from inside Photoshop CS4′s Preferences. On a Mac, go up to the Photoshop menu, choose Preferences, and then choose Interface. On a Windows system, go up to the Edit menu, choose Preferences, and then choose Interface. This brings up the Preferences dialog box set to the Interface options. Here, you’ll find a section called Panels & Documents. To disable the tabbed document windows feature, simply uncheck the bottom two options, Open Documents as Tabs and Enable Floating Document Window Docking:
Uncheck the "Open Documents as Tabs" and "Enable
Floating Document Window Docking" options disable the tabbed document
windows feature.
Click OK when you’re done to accept the changes and exit out of the
dialog box. To enable the tabbed document windows feature at any time,
simply return to the Preferences and select those two options again. To
quickly bring up Photoshop’s Preferences, press Ctrl+K (Win) / Command+K (Mac), then select Interface from the menu on the left of the dialog box.And there we have it! That’s our look at the brand new tabbed document windows feature in Photoshop CS4!
Comments
Post a Comment