Open Multiple Images As Photoshop Layers
In Photoshop CS4, Adobe introduced a great new time-saving feature to Bridge – the Load Files into Photoshop Layers command. If you know in advance that you’re going to be working with multiple images inside your document and you know which specific images you’ll need, Photoshop can now open and load all of your images into the same document and automatically place each image on its own layer! Here’s how it works. You’ll need Photoshop CS4 or higher to follow along (I’m using CS5 for this tutorial).
Download our tutorials as print-ready PDFs! Learning Photoshop has never been easier!
Step 1: Select Your Images In Bridge
Begin by opening Adobe Bridge and navigate to the folder that contains the images you want to add to your document. Here, I have Bridge open to a folder on my Desktop with three photos inside of it. I’ll select the first image (the one on the left) by clicking on its thumbnail: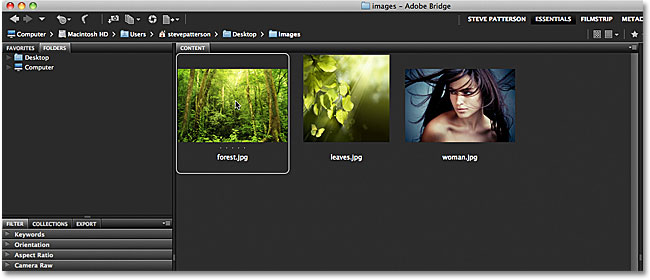
Clicking on the photo on the left to select it.
Then, to select the other two images as well, I’ll hold down my Shift key and click on the last of the three images (the one on the right). All three images are now highlighted and selected: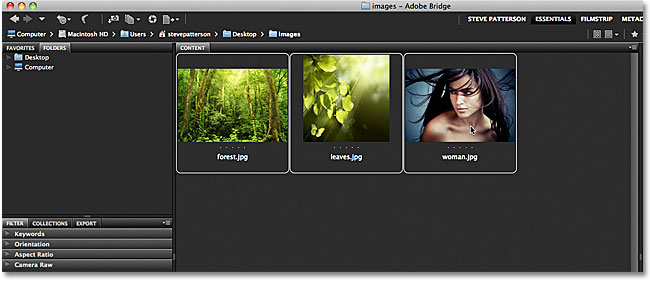
Holding down Shift and clicking on the last image to select all three images at once.
Step 2: Select The “Load Files into Photoshop Layers” Command
With all of the images selected, go up to the Tools menu in the Menu Bar along the top of the screen in Bridge, choose Photoshop for a list of Photoshop-specific options, then choose Load Files into Photoshop Layers: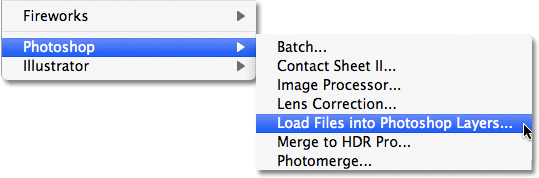
In Bridge, go to Tools > Photoshop > Load Files into Photoshop Layers.
And that’s all there is to it! Photoshop will open automatically if
it’s not open already and will add all three images (or as many images
as you selected) into the same document. It may take a few moments for
Photoshop to process everything, but when it’s done, you’ll see a single
document open on your screen containing all of your photos: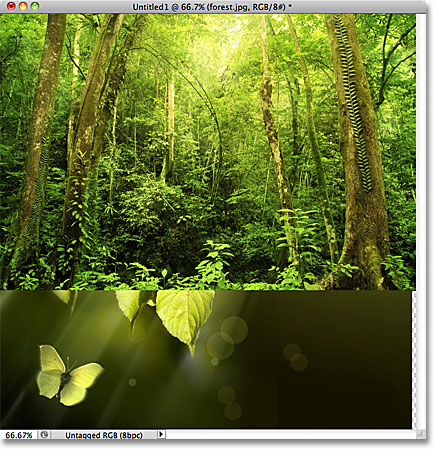
All of the images have opened inside a single Photoshop document.
Some images may be blocking others from view in the document window,
but if we look in the Layers panel, we see that each of the three photos
I selected in Bridge has been added to the document and placed on its
own layer. Notice that Photoshop used the names of the images for the
layer names: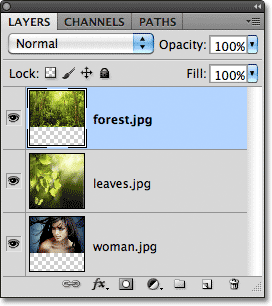
Each photo has been added on its own layer
inside the Layers panel. The name of the image is now the name of the
layer it sits on.
Viewing Individual Layers
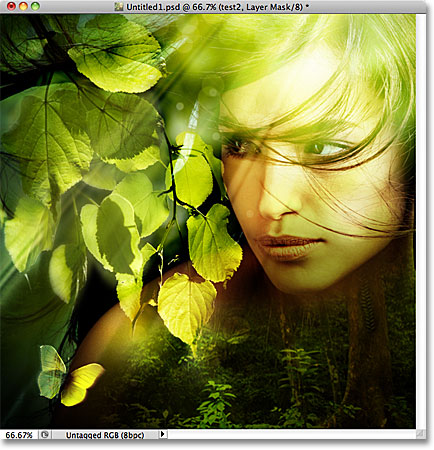
If you want to view a specific image in the document window, hold down your Alt (Win) / Option (Mac) key and click on the layer visibility icon for the layer you want to view. It’s the little eyeball icon on the far left of each layer in the Layers panel. Photoshop will temporarily turn off every layer in the document except the one you clicked on. For example, I want to view the photo of the woman which is currently being blocked by the other two images above it in the document, so I’ll hold down my Alt (Win) / Option (Mac) key and click on the layer visibility icon for the “woman.jpg” layer:
Holding Alt (Win) / Option (Mac) and clicking the layer visibility icon for the “woman.jpg” layer in the Layers panel.
This turns off the other two layers and displays only the “woman.jpg”
image in the document window. To turn the other layers back on when
you’re done, simply hold down Alt (Win) / Option (Mac) and click once
again on the same layer visibility icon. Notice the checkerboard pattern
below my photo, which is how Photoshop represents transparent areas of a
layer. The reason part of this layer is transparent is because each
image I opened was a different size, so Photoshop created a document
wide and tall enough for all of them to fit into. This means that some
images will still need to be resized and repositioned with the Free Transform command after they’ve been loaded into the document, but that’s something we would normally have to do anyway: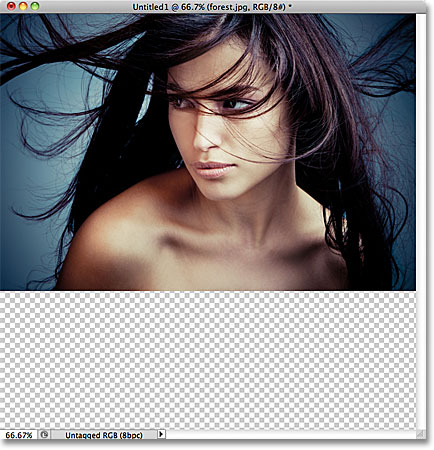
Only the selected layer is now visible in the document.
Renaming The Layers
The only thing I don’t really like about the Load Files into Photoshop Layers command is that it includes the file extension in the name of each layer (“forest.jpg”, “leaves.jpg”, “woman.jpg”). Fortunately, it’s easy to rename layers. Simply double-click directly on the name of a layer to highlight it, then type in a new name. Or, in this case, simply delete the file extension from the end of the name. I’ll double-click on the name “forest.jpg” to highlight it, then I’ll delete the “.jpg” part at the end: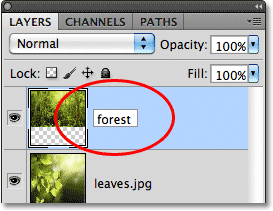
Deleting the “.jpg” file extension from the end of the layer name.
When you’re done, press Enter (Win) / Return
(Mac) to accept the name change. I’ll go ahead and rename the other two
layers as well, deleting the file extension at the end of each one: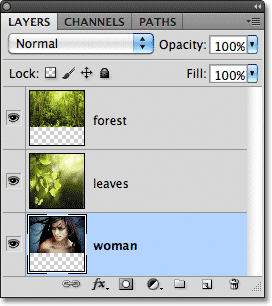
All three layers have been renamed.
With each image already on its own layer in the same document thanks
to the Load Files into Photoshop Layers command, we can spend a bit more
time being creative with our designs and less time on less interesting
tasks like dragging or copying images from one document into another.Blending images and creating composites goes far beyond the scope of this tutorial (see our Photo Effects section for lots of great ideas with step-by-step instructions), but just for fun, here’s my result after spending a few minutes playing around with the images using blend modes and layer masks:
All three images combined into one.
And there we have it!
Comments
Post a Comment