Painted Edges Photo Border With Photoshop CS6
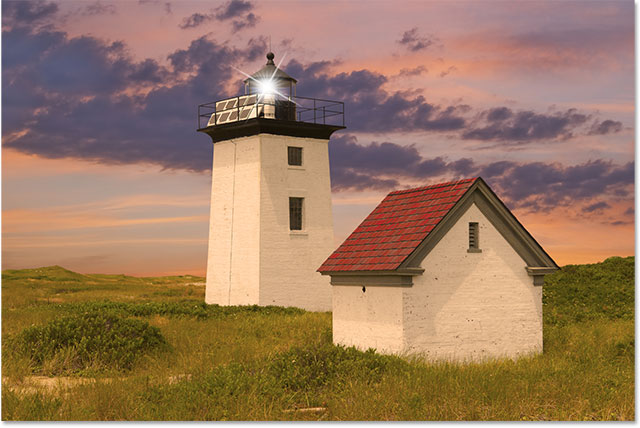
The original photo.
And here’s what the final “painted edges photo border” will
look like. In this example, the canvas color around the image is white,
but as I mentioned, we’ll learn at the end of the tutorial how to change
it by sampling a new color directly from the photo itself: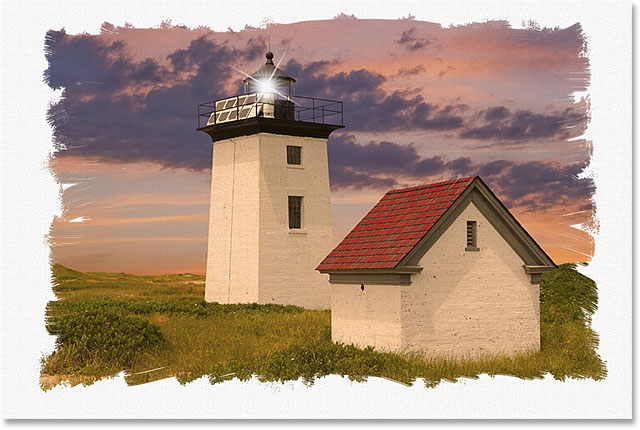
The final result.
Let’s get started!Step 1: Add A White Solid Color Fill Layer
With our photo newly opened in Photoshop, let’s start by adding a white-filled layer above our image. Click on the New Fill or Adjustment Layer icon at the bottom of the Layers panel:
Clicking the New Fill or Adjustment Layer icon.
This opens a list of all the fill and adjustment layers we can choose from. Select a Solid Color fill layer from the top of the list:
Choosing Solid Color from the list.
Photoshop will pop open the Color Picker so
we can choose the color we want to fill the layer with. This layer is
going to become the canvas behind the image so let’s initially choose white by entering a value of 255 for the R, G and B options (which stand for Red, Green and Blue) near the bottom center of the dialog box: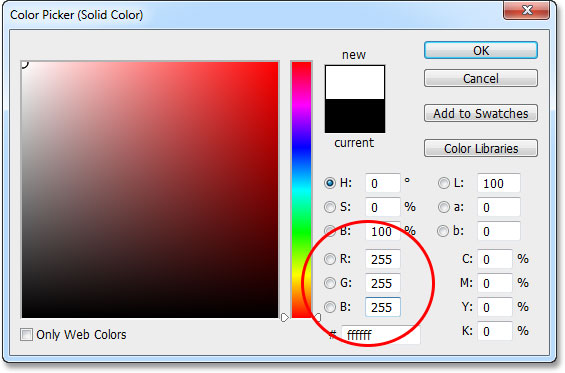
Set the R, G and B values to 255 to select white for the fill color.
Click OK to close out of the Color Picker. Your document will
appear completely filled with white, temporarily blocking the photo
from view, and if we look in the Layers panel, we see the Solid Color
fill layer (named Color Fill 1) sitting above the Background layer which holds our image:
The Layers panel showing the new Solid Color fill layer.
Step 2: Select The Fill Layer’s Mask
Select the layer mask for the fill layer by clicking on its mask thumbnail in the Layers panel. A white highlight border will appear around the thumbnail letting you know the layer mask is now selected. In a moment, we’re going to begin painting on the mask to allow the photo below the fill layer to show through:
Clicking on the layer mask thumbnail.
Step 3: Select The Brush Tool
Grab Photoshop’s Brush Tool by clicking on its icon in the Tools panel along the left of the screen:
Selecting the Brush Tool from the Tools panel.
Step 4: Load The “Thick Heavy Brushes” Brush Set
With the Brush Tool selected, click on the Brush Presets icon near the far left of the Options Bar along the top of the screen:
Clicking the Brush Presets icon.
This opens the Brush Preset Picker. The
brushes we want to use for this effect are not loaded into Photoshop by
default so we need to load them in manually. Click on the small menu icon (the little gear icon) in the top right corner of the Brush Preset Picker:
Clicking the menu icon.
This opens a menu with various options, including a list of additional brush sets ready to load into Photoshop. Click on the Thick Heavy Brushes set near the bottom of the list to select it:
Loading the Thick Heavy Brushes set.
Photoshop will ask if you want to replace the original brushes with the new brush set. Click the Append button to simply add these new brushes in with the originals. They’ll appear below the original brushes in the list:
Clicking the Append button.
Step 5: Choose The “Flat Bristle” 111 px Brush
With the new brush set loaded in, click again on the menu icon in the top right corner of the Brush Preset Picker:
Clicking again on the menu icon.
Then choose either Small List or Large List
from the menu when it appears. This will display the brushes in the
Brush Preset Picker as a list that will make it easier to choose the
brushes we need. I’m going to choose Large List:
Choosing Large List from the Brush Preset Picker menu.
Scroll down the list of available brushes in the Brush Preset Picker until you find the Flat Bristle 111 px brush (it will be near the bottom of the list). Double-click on it to select it and close out of the Brush Preset Picker:
Double-clicking on the Flat Bristle 111 px brush.
Step 6: Paint With Black On the Layer Mask
We need to paint with black on the layer mask to reveal the photo underneath the Solid Color fill layer. Photoshop uses the current Foreground color as the brush color, so press the letter D on your keyboard to quickly reset your Foreground and Background colors, which will make your Foreground color white and your Background color black. Then press the letter X on your keyboard to swap them so your Foreground color becomes black. You can see the current Foreground and Background colors in the color swatches near the bottom of the Tools panel:
The Foreground (top left) color swatch should now be set to black.
Then, simply begin painting brush strokes across the main
part of the image from left to right. Since we’re painting on the layer
mask, you won’t actually see the black brush color. Instead, with each
new brush stroke, more of the original image below the Solid Color fill
layer will be revealed. If you’re not happy with one of your brush
strokes, press Ctrl+Z (Win) / Command+Z (Mac) on your keyboard to undo it, then continue painting: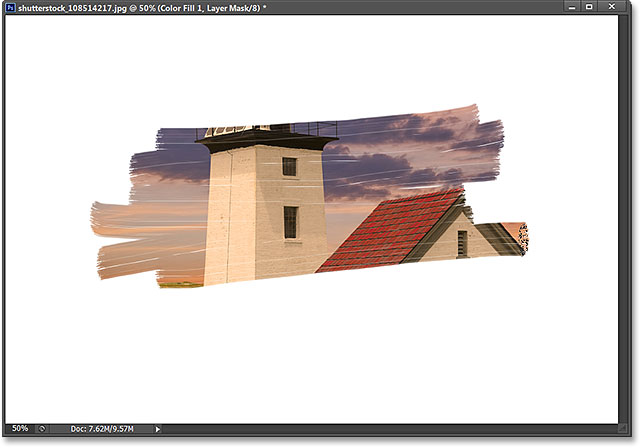
Painting some initial brush strokes to reveal the photo through the fill layer.
Continue painting brush strokes until you’ve revealed enough
of your image, keeping lots of room around the edges for the canvas
area:
The main area of the photo is now revealed.
Step 7: Select The “Rough Flat Bristle” 111 px Brush
Let’s enhance the painted edges effect with a different brush. Right-click (Win) / Control-click (Mac) anywhere inside the image to re-open the Brush Preset Picker. You’ll find the Rough Flat Bristle 111 px brush directly below the Flat Bristle brush we initially selected. Double-click on it to select it and close out of the Brush Preset Picker:
Double-clicking on the Rough Flast Bristle brush.
Step 8: Paint Smaller Strokes Around The Edges
With the new brush selected, go around the edges of the image and paint small strokes to add some paint specks and splatters to the effect. Try to keep most of the brush inside the already painted area so that only a small bit of it extends out beyond the edges. You don’t want to overdo it here. Allow only a tiny bit of the brush to extend into the white area and paint with very short strokes. Even simply clicking an area once or twice with the brush can be enough. Again, if you feel you’ve made a mistake, press Ctrl+Z (Win) / Command+Z (Mac) to undo and try again:
Adding some extra touches around the edges with the second brush.
Step 9: Add A New Blank Layer
Let’s finish off the main effect by adding a canvas texture. Click on the New Layer icon at the bottom of the Layers panel:
Clicking the New Layer icon.
This adds a new blank layer named Layer 1 directly above the Solid Color fill layer:
The Layers panel showing the newly added layer.
Step 10: Fill The New Layer With White
At the moment, the new layer is blank so let’s fill it with white. Go up to the Edit menu in the Menu Bar along the top of the screen and choose Fill:
Going to Edit > Fill.
This opens the Fill dialog box. Set the Use option at the top of the dialog box to White. Make sure the Mode option near the bottom is set to Normal and Opacity is set to 100%,
then click OK to accept it and exit out of the dialog box. Photoshop
will fill the layer with white, once again temporarily blocking
everything else from view in the document window:
Setting the Use option to White.
Step 11: Apply The Texturizer Filter
Go up to the Filter menu at the top of the screen and select the Filter Gallery:
Going to Filter > Filter Gallery.
When the Filter Gallery appears, click on the Texture category in the middle column to twirl it open and view the various filters in that category, then select the Texturizer filter by clicking on its thumbnail:
Opening the Texture category and choosing the Texturizer filter.
The controls and options for the Texturizer filter appear in the right column of the Filter Gallery. First, set the Texture option to Canvas. Leave Scaling set to 100% and set the Relief to 4. Select Top Left for the Light option:
Setting the options for the Texturizer filter.
When you’re done, click OK to close out of the Filter
Gallery. Photoshop fills the layer with the canvas texture (I’ve
enhanced it a little bit here just to make it easier to see in the
screenshot):
Photoshop applies the canvas texture to the white-filled layer.
Step 12: Change The Layer’s Blend Mode To Multiply And Lower The Opacity
To blend the canvas texture with the rest of the image, simply change the layer’s blend mode from Normal to Multiply. You’ll find the Blend Mode option in the top left corner of the Layers panel:
Changing the top layer’s blend mode to Multiply.
Then, to fade the texture so it appears more subtle, lower the layer’s opacity value down to around 30%. The Opacity option is directly across from the Blend Mode option at the top of the Layers panel:
Lowering the layer’s opacity.
Here’s my effect after changing the blend mode to Multiply
and lowering the opacity. The canvas texture is pretty hard to see in
the small screenshot here but should be easily visible in your document: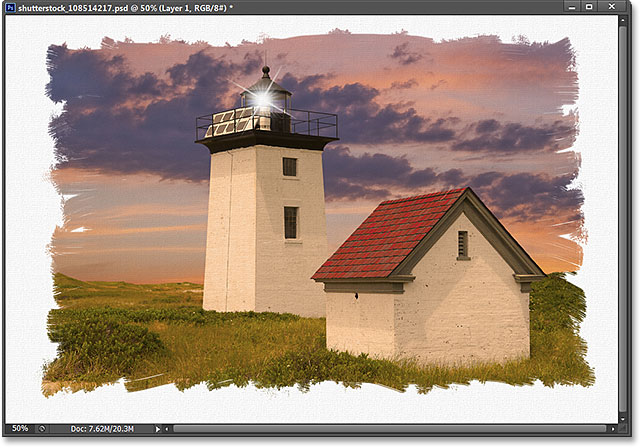
The effect with the canvas texture added.
Changing The Canvas Color (Optional)
At this point, the effect is complete and if you’re happy with using white for your canvas color, you can stop here. If you want to try a different color for the canvas, the easiest thing to do is sample a color directly from the photo itself. To do that, double-click on the Solid Color fill layer’s thumbnail (the little color swatch icon to the left of the layer mask thumbnail):
Double-clicking the fill layer’s thumbnail.
This will open the Color Picker. Rather than
choosing a color from the Color Picker, move your mouse cursor over an
area of your image that contains a color you want to sample. Your mouse
cursor will change into an eyedropper icon. Simply
click on the color to sample it and your canvas will instantly change to
the new color. You can click on as many different colors as you like
until you find the one that works best. Click OK when you’re done to
accept the new color and close out of the Color Picker. Or, if you can’t
find a color that works, click Cancel to close out of the Color Picker
and leave your canvas set to white: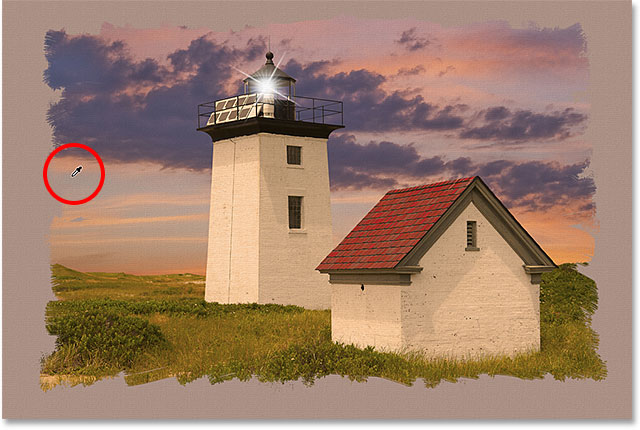
Clicking on a color in the image to sample it and change the canvas color.
And there we have it! That’s how to give an image a painted edges photo border with Photoshop CS6!
Comments
Post a Comment