Create a “Real Steel” Film Poster Inspired Text Effect in Photoshop
Posted on February 13th, 2012 in Text Effects.
In this tutorial, I will show you the steps I took to
Create a “Real Steel” Film Poster Inspired Text Effect in Photoshop.
This is an intermediate tutorial so some steps can be tricky, but why
not have a try :)Along the way, we will mainly talk about how to use layer blending mode and adjustment layer to apply texture onto the text.
Get your creative juices flowing by checking out some of the inspirational business cards created by top notch designers.
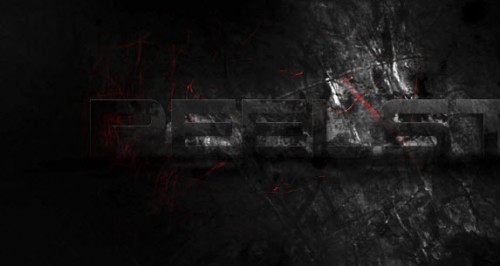
Here is a preview of the final effect I have for this tutorial: (click to enlarge)

Alternative version with cooler colour:

PSD File Download
You can download the PSD File for this tutorial via the VIP Members
Area for only $6.95/Month (or less)! You will not only get this PSD
File, but also 70+ other PSD Files + Extra Goodies + Exclusive Photoshop
tutorials there. Signup now and get exclusive :) Find out more about the VIP Members Areas
OK Let’s get started!
To complete this tutorial, you will need the following stocks:OK Let’s get started!
Step 1
Create a new document with 1200px * 700px with black background. Let’s start by preparing the background – load the paper texture image into Photoshop, select a piece of it as shown below:
Copy and paste the selection onto our canvas (resize to fit if necessary), add the following 2 adjustment layers on top of it:
Black and White

Levels

Use a soft eraser (set opacity and flow to be 40%) to remove some parts of the paper texture, you will have the following effect:

Step 2
We will add some metal texture onto the background – load the metal texture into Photoshop, select a piece as shown below:
Copy and paste the selection onto our canvas, then change the blending mode to “overlay”, you will have the following effect:

Add the following 3 adjustment layer as clipping mask to this metal texture layer:
Black and White

Levels

Curves

and here is the effect so far:

Step 3
We will start making the text effect – load the font and type some texts onto our canvas:
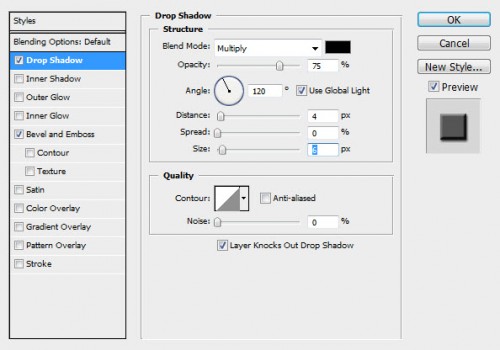
Apply the following layer blending mode to the text layer:
Drop shadow

Bevel and Emboss

Then add a layer mask to the text layer, erase the lower part of the text with a soft brush:

Then paint some shadow under the text with a black soft brush to add some depth:

Step 4
Now we will add the metal texture onto the text – go back to the metal texture and select a piece with the text layer selection:
Copy and paste the selection onto the text, you will have the following effect:

Add the following 2 adjustment layers as clipping mask to this text metal layer:
Black and White

Curves

Then, go back to the text metal texture layer, use a soft eraser to remove some part of the texture, as shown below:
Hint: make sure you set the eraser flow and opacity to be around 20%, and gently erase the texture. This will add variety and depth for the text.

Step 5
We will add some fire texture onto the text. Load the fire image into Photoshop, and use a 30px feather lasso tool to select a piece:
Copy and paste the selection on a layer below the text layer, so it appears behind the text:

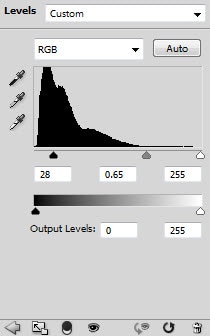
Hit Ctrl + L to bring up the levels adjustment tool, apply the following setting:

Change the blending mode of this fire texture layer to “Screen”, you will have the following effect:

Duplicate this fire layer a few times, resize and rotate them, scatter them around the text:

Step 6
We’re almost done! To add some more details, I flatten the image and applied some “Reduce Noise” filter effect as shown below:
Add a new layer and use a soft white brush with around 40% flow and opacity, paint some highlights for the text:

Add a curves adjustment layer on top with the following settings to bring out more contrast:

I then further added some colour and light adjustments and here is the final effect I have: (click to enlarge)

Alternative version with cooler colour:

That’s it for this tutorial! Hope you enjoy it and find it useful! Till next time, have a great day!
Comments
Post a Comment