The Custom Shape Tool In Photoshop
Having tools that allow us to easily draw circles and squares is great, but what about more interesting shapes? What if you wanted to add, say, a heart shape to a wedding or engagement photo, or the shape of a dog or a cat to a pet store logo? How about shapes of flowers and leaves, snowflakes, music notes, or a copyright symbol to add to your images? Photoshop actually ships with all of these shapes and more, and lets us add them to our designs just as easily as adding circles and squares. Adobe calls these more complex shapes custom shapes, and we draw them using the tool we’ll be looking at in this tutorial – the Custom Shape Tool.
Download our tutorials as print-ready PDFs! Learning Photoshop has never been easier!
The Custom Shape Tool
You’ll find the Custom Shape Tool nested in with Photoshop’s other Shape tools in the same spot in the Tools panel. By default, the Rectangle Tool is the tool that’s displayed, but if you click on it and hold your mouse button down, a fly-out menu will appear listing the other tools that are available in that spot. The Custom Shape Tool is at the bottom of the list:
Click and hold on the Rectangle Tool, then select the Custom Shape Tool from the fly-out menu.
If you already have one of the other Shape tools selected, you can
quickly grab the Custom Shape Tool from the Options Bar. You’ll see a
series of six icons, each representing a different Shape tool. The
Custom Shape Tool is the last icon on the right (it’s the icon that
looks like a blob):
If another Shape tool is already active, the Custom Shape Tool can be selected from the Options Bar.
Choosing A Custom Shape
Once we have the Custom Shape Tool selected, we need to choose the shape we want to draw. A shape preview thumbnail will appear in the Options Bar to the right of the Custom Shape Tool icon. The thumbnail displays the custom shape that’s currently selected:
The preview thumbnail displays the currently selected custom shape.
To choose a different shape, click on the preview thumbnail. This will open the Shape Picker
which displays all of the shapes we currently have to choose from.
Photoshop actually comes with many more shapes than the limited number
we’re presented with at first. We’ll see how to load in the other shapes
in a moment:
Click on the preview thumbnail to open the Shape Picker.
To choose a shape, simply click on its thumbnail, then press Enter (Win) / Return (Mac) to close the Shape Picker. Or, double-click on the thumbnail, which will select the shape and close the Shape Picker for you. I’ll choose the Heart shape:
Selecting the Heart shape from the Shape Picker.
Choosing A Color For The Shape
Once you’ve chosen your shape, select a color for it by clicking on the color swatch to the right of the word Color in the Options Bar:
Click on the color swatch to choose a color for the custom shape.
Photoshop will pop open the Color Picker so we can
choose the color we want. Since I selected a heart shape, I’ll choose
red for my color. Click OK when you’re done to close out of the Color
Picker:
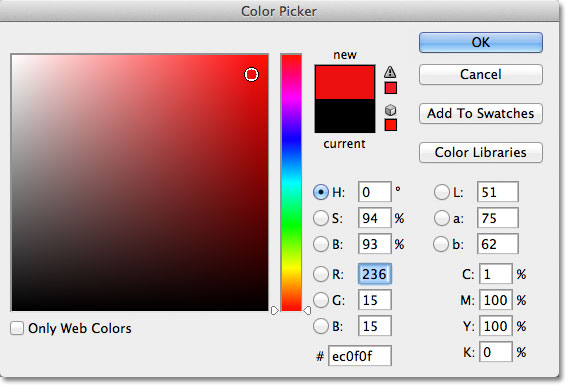
Choose a color for the shape from the Color Picker.
Select The “Shape Layers” Option
As I mentioned in the previous tutorial, Photoshop lets us draw three very different kinds of shapes with the Shape tools. We can draw vector shapes, which are resolution-independent and fully scalable without any loss of image quality (the same type of shapes we’d draw in a program like Illustrator). We can also draw paths, which are just outlines of shapes, or we can draw pixel-based shapes where Photoshop fills the shape with colored pixels. In most cases, we want to be drawing vector shapes, and to do that, we need to have the Shape Layers option selected in the Options Bar. It’s the left icon in a group of three icons near the far left of the Options Bar:
Select the Shape Layers option in the Options Bar to draw vector shapes.
To draw the shape, click inside the document to set a starting point,
then keep your mouse button held down and drag away from the starting
point. As you drag, Photoshop displays an outline of what the shape will
look like:

Click to set a starting point, then drag out the rest of the shape.
Release your mouse button to complete the shape, at which point Photoshop fills it with the color you chose in the Options Bar:

Photoshop fills the shape with color when you release your mouse button.
Drawing A Shape With The Correct Proportions
Notice, though, that my heart shape looks a bit distorted. It’s wider and shorter than I was expecting it to be. That’s because by default, Photoshop makes no attempt to keep the correct proportions or aspect ratio of the shape as we’re drawing it. I’ll press Ctrl+Z (Win) / Command+Z (Mac) on my keyboard to undo the shape so I can try again.To draw a custom shape with the correct proportions, click in the document, keep your mouse button held down and begin dragging out the shape as you normally would. Once you begin dragging, press and hold your Shift key on your keyboard and continue dragging. As soon as you press (and hold) the Shift key, you’ll see the outline of the shape snap into its proper aspect ratio:
Hold Shift as you drag out the shape to draw it with the correct proportions.
When you’re happy with the size of the shape, release your mouse
button, then release your Shift key (make sure you release the Shift key
after releasing your mouse button). Photoshop again fills it with color:

Release the Shift key only after you’ve released your mouse button.
I’ll again press Ctrl+Z (Win) / Command+Z
(Mac) on my keyboard to undo the shape, then I’ll choose a different
shape by clicking on the preview thumbnail in the Options Bar to open
the Shape Picker. This time, I’ll select the music notes:
Clicking on the music notes thumbnail to select the shape.
To draw the music notes, I’ll click inside the document to set a
starting point and, with my mouse button held down, I’ll begin dragging
away from the starting point. As soon as I’ve started dragging, I’ll
press and hold my Shift key to force the shape into its correct proportions as I continue dragging:
Holding Shift as I drag to keep the proportions of the notes correct.
I’ll release my mouse button to complete the shape and Photoshop fills it with the same color I chose for the previous shape:

The new shape is filled with the same color as the previous one.
Next, we’ll learn how to change the color of an existing shape, and
how to load in all of the additional custom shapes Adobe included with
Photoshop!
Changing The Color Of An Existing Shape
What if I wanted my new shape to be a different color than the previous one? I could have simply chosen a different color from the Options Bar before drawing the new shape, but it’s just as easy to change a shape’s color after we’ve drawn it. Every new custom shape we draw is placed on its own Shape layer in the Layers panel, and each Shape layer comes with its own color swatch icon which displays the current color of the shape. To change the color, double-click on the color swatch:
Double-click on the Shape layer’s color swatch to change its color.
Photoshop will re-open the Color Picker so we can choose a new color. I’ll choose purple:
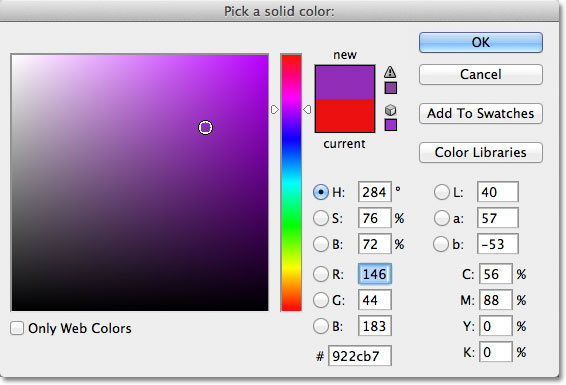
Choose a new color for the shape from the Color Picker.
Click OK when you’re done to close out of the Color Picker, and just like that, Photoshop changes the color of the shape for us:

We can change the color of any vector shape any time we want.
Loading Additional Shape Sets
As I mentioned, Photoshop comes with more custom shapes for us to choose from than the handful we’re given to start with. We just need to load them in ourselves, and we do that by clicking on the shape preview thumbnail in the Options Bar to open the Shape Picker, then clicking on the small arrow in the top right corner of the Shape Picker:
Click on the small arrow in the top right corner of the Shape Picker.
This opens a menu with various options, and in the bottom part of the menu is a list of additional shape sets that were installed with Photoshop. Each of these sets is a collection of shapes that share a common theme, like Animals, Music, Nature,
and so on. A few of the sets listed here are new in Photoshop CS5
(which is the version I’m using) but most are available in any recent
version of Photoshop:
All of these additional shape sets are included with Photoshop but need to be loaded in manually.
If you happen to know which set contains the shape(s) you need, you
can select it by clicking on its name in the list. An easier thing to
do, though, is to simply load all of them in at once, which we can do by
choosing All from the top of the list:

Choose “All” to load all of the additional custom shapes into Photoshop.
Photoshop will ask if you want to replace the current shapes with the
new shapes or if you want to add the new ones in with the originals.
Choose Append, which will keep the original shapes and add the new ones after them:
Choose “Append” to load the new shapes into Photoshop while still keeping the originals.
And now, if we open the Shape Picker by clicking on the shape preview
thumbnail in the Options Bar, we see all the new shapes we have to
choose from! I’ve expanded the Shape Picker a little here so we can see
more of the shape thumbnails. Use the scrollbar along the right side of
the Shape Picker to scroll through the complete list:
The Shape Picker is now loaded with all the custom shapes that Adobe included with Photoshop.
Here’s a random sample of some of the many shapes we now have available to us:

The Shape Picker is now loaded with all the custom shapes that Adobe included with Photoshop.
As useful as many of these ready-made custom shapes can be, it’s
entirely possible that even after loading them all in, we still won’t
find the shape we need for the particular design we’re working on, and
that’s where the real power of Photoshop’s custom shapes comes in,
because Photoshop lets us create any shape we want from scratch! Be sure
to check out our Create Your Own Custom Shapes tutorial for everything you need to know on creating, saving and using your very own collections of custom shapes!
And there we have it! That’s the basics of adding custom shapes to our document with the Custom Shape Tool. In the next tutorial, we’ll look at the difference between vector shapes, paths and pixel-based shapes in Photoshop!
Comments
Post a Comment