Final Image Preview
Take a look at the image we’ll be creating. Want access to the full PSD files and downloadable copies of every tutorial, including this one? Join Psd Plus for just $19/month. You can view the final image preview below.Here’s what we’ll achieve by the end of these two parts.
For now though, we’re going to try and get this far.
Step 1
The first program on today’s list is Illustrator. Start it up, create a new web document with standard settings and type in your word using this free font.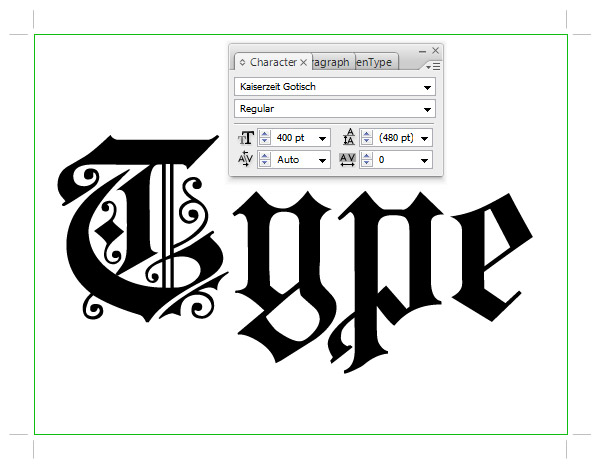
Step 2
As you can see when zooming in, the font has a lot of harsh edges because it’s free, and not meant to be used for display purposes. We want a clean, few-endpoints font that won’t reveal any bugs in Cinema 4D. So turn down the Opacity of the text, and create a new layer. Lock the previous layer and start to trace your own version of the first letter.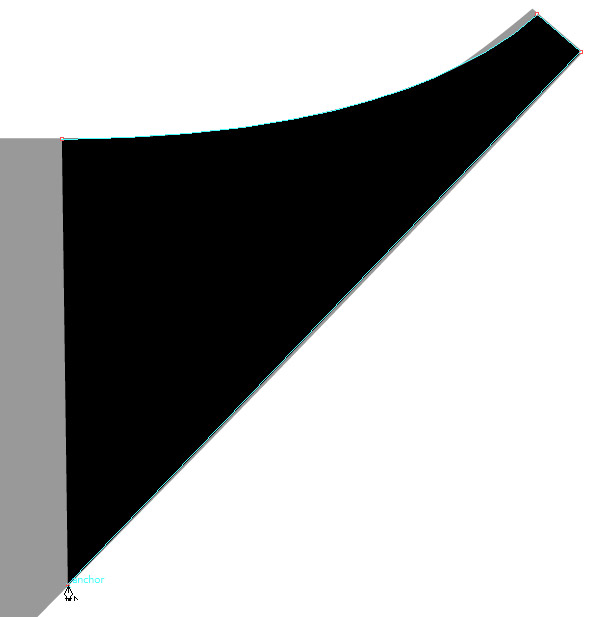
Step 3
Try to keep the lines as smooth and natural as possible. You may choose to follow the edges by the letter (pun totally intended) or create a slightly different version like I did.
Step 4
Create a new layer underneath and create two bars over the old ones. While the color has no importance, I chose different values to make the tutorial easy to follow.
Step 5
Then on a layer above, create some dots with the Ellipse Tool (E). Create a rectangle too with the Rectangle Tool (M) and rotate it by 45 degrees.
Step 6
Then trace the… swirly thing near the center. Once you’ve done that, go to Object > Path > Offset Path. Use the values shown below.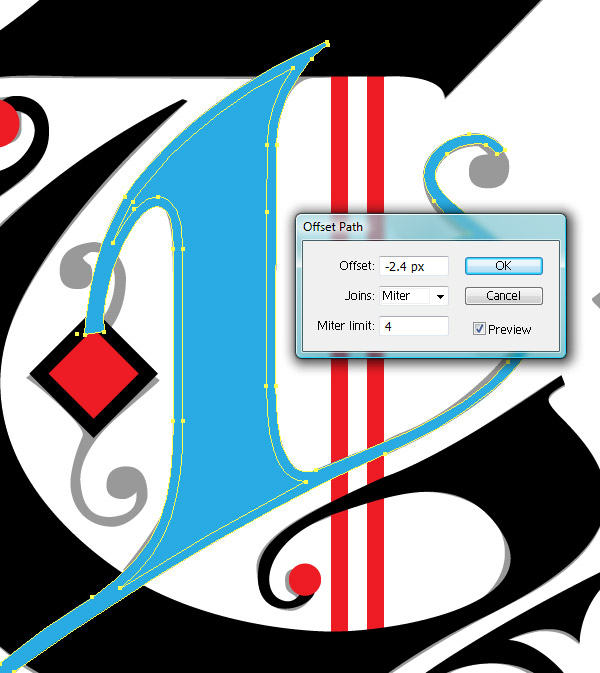
Step 7
Locate your Pathfinder (Window > Pathfinder) and click on the Trim icon.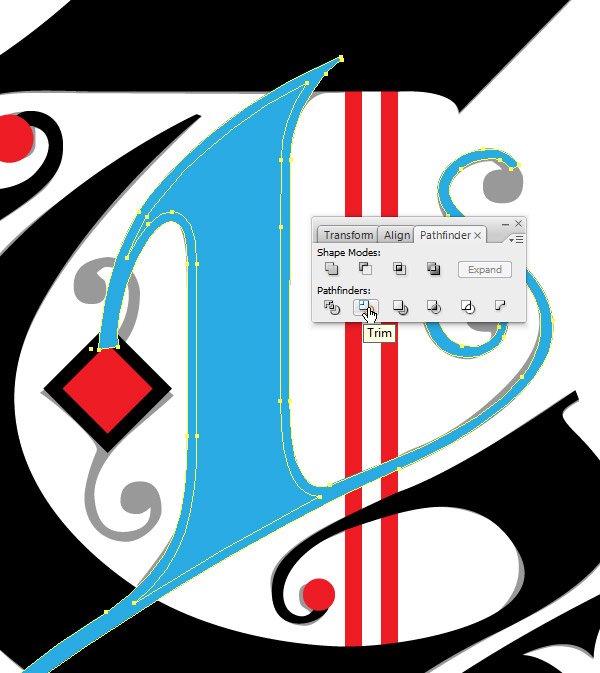
Step 8
Select the Direct Selection Tool (A), or white arrow, and click firstly away from the object, then in the center. Delete that part.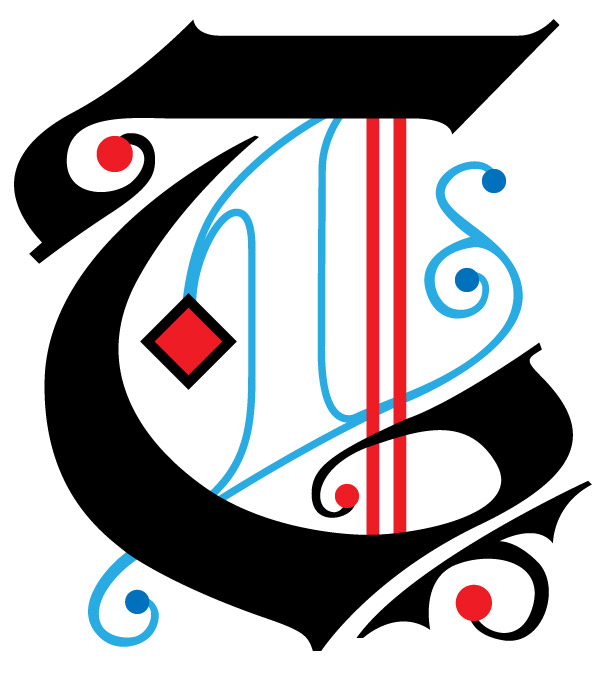
Step 9
Now trace the rest of the word.
Step 10
Copy all the letter faces and paste them on a separate layer (Command + F).
Step 11
Go to Object > Expand Appearance.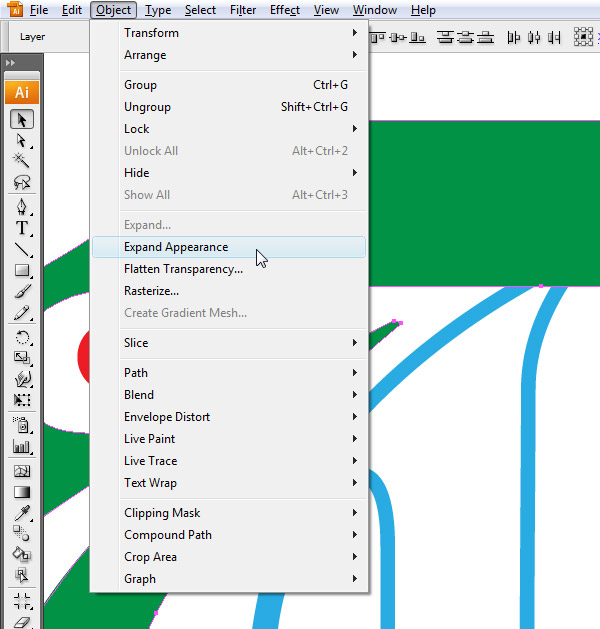
Step 12
Go to Window > Stroke and give the text a 1 pt stroke.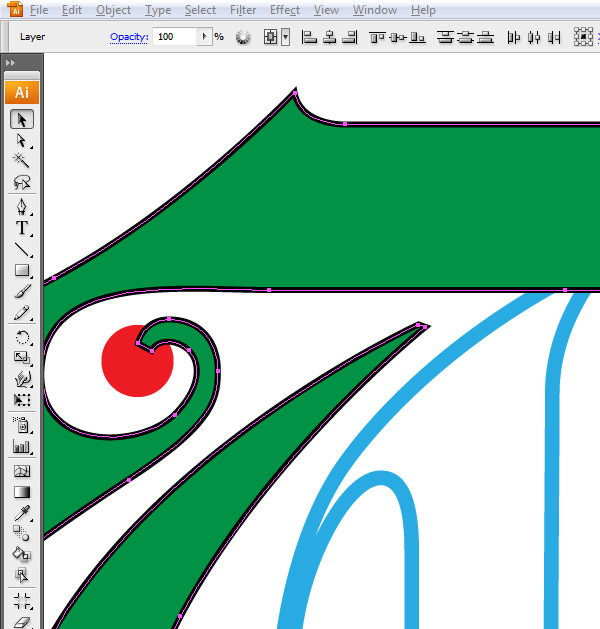
Step 13
You’ll now have to click away and click back to only the top part of the text. For some reason, you can’t change the stroke alignment of all the elements at once. Anyway, change the alignment by clicking on the middle icon. Also, change the Weight to 7 points.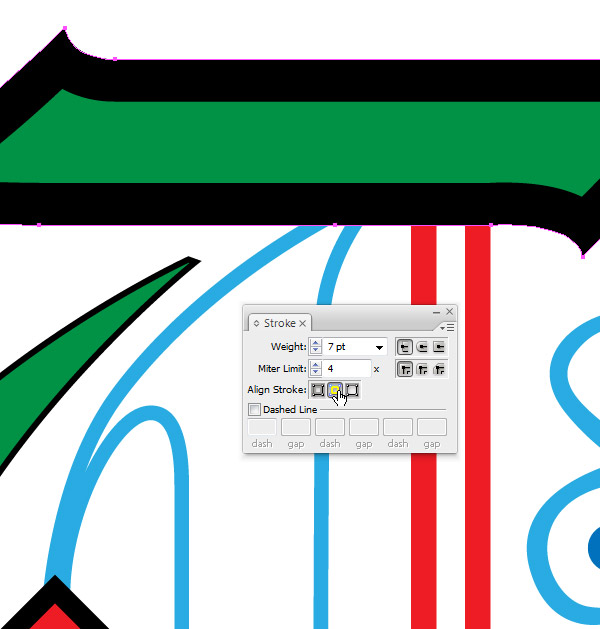
Step 14
Now go to Object > Expand Appearance.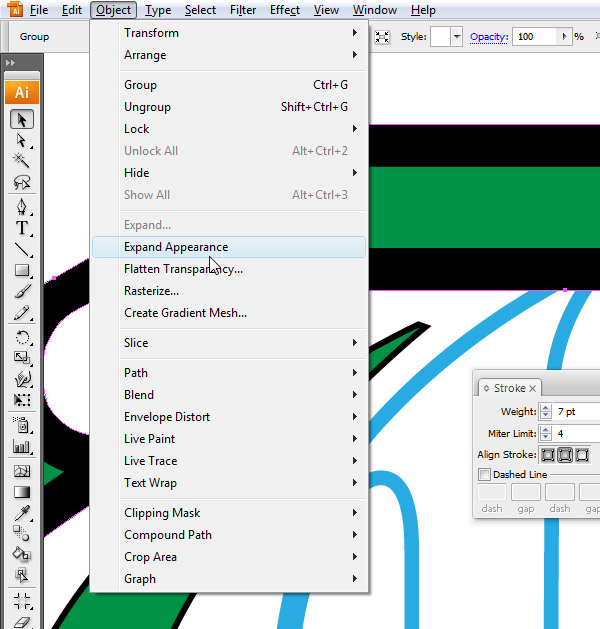
Step 15
Trim it with the Pathfinder.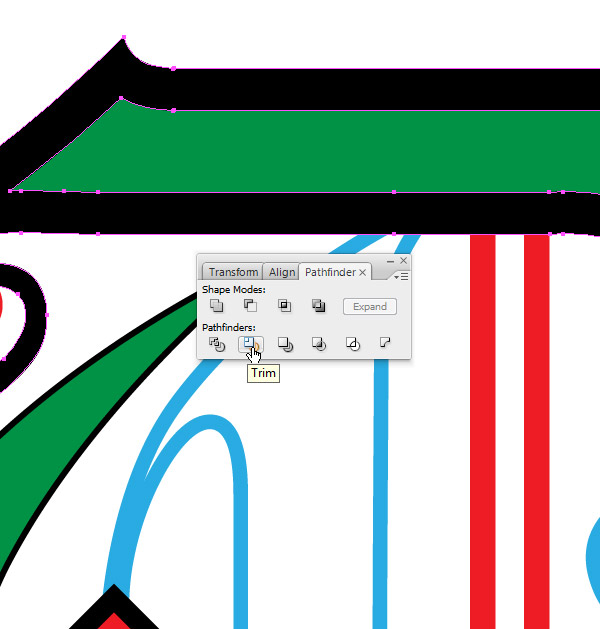
Step 16
Then offset it by -2.4 pt.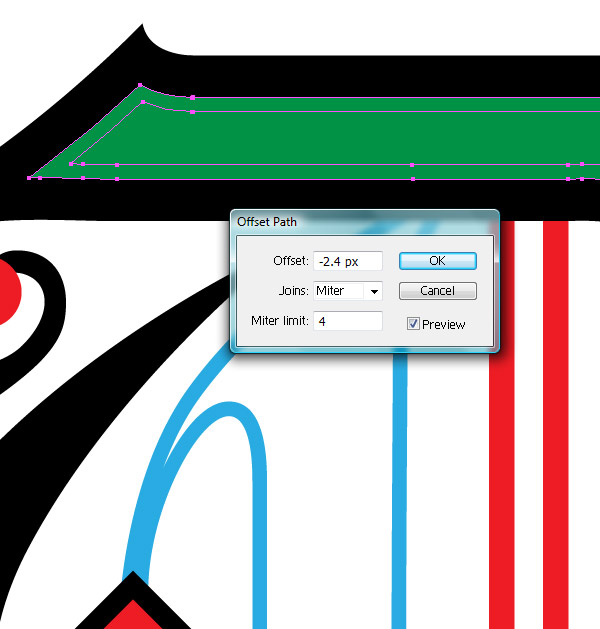
Step 17
Trim it again to flatten the effect.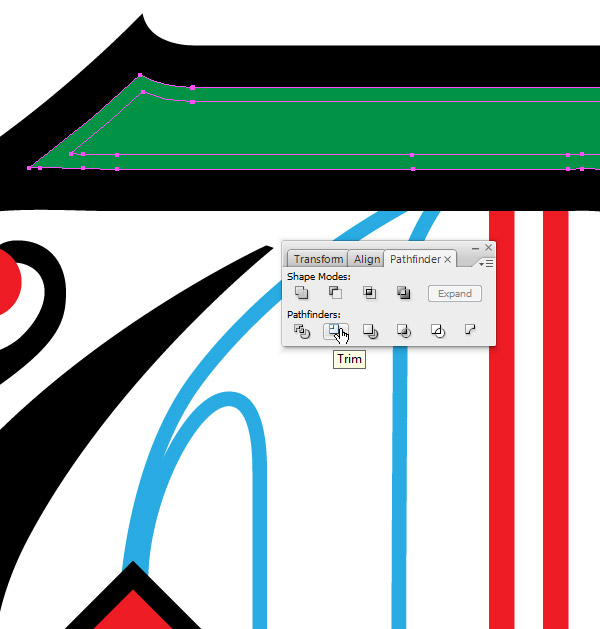
Step 18
Now you can use the Direct Selection Tool (A) to delete the center.
Step 19
Repeat this process for all the remaining portions of the text.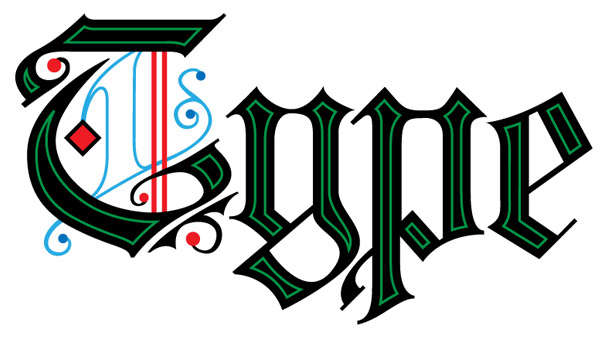
Step 20
Now save it as an Illustrator 3 file. Cinema 4D won’t be able to access later formats.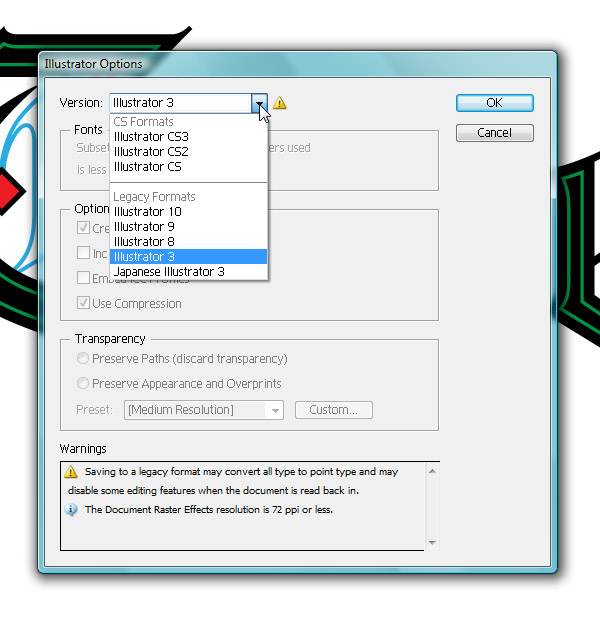
Step 21
Our second software choice is Cinema 4D. Create a new Scene and go to File > Merge and locate the Illustrator 3 file. Click open to have the file placed inside the scene. Now go to your Objects panel and Shift-click on the first nine paths. Delete those. These are corner markers you get when importing the Illustrator file.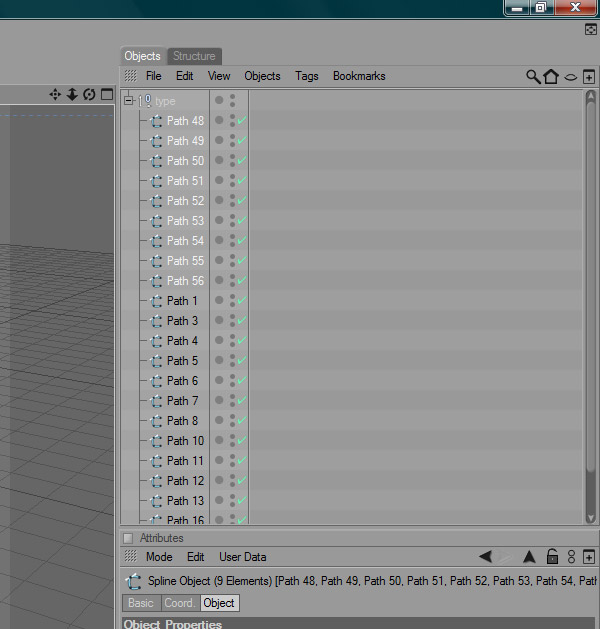
Step 22
Move paths five and six away from the group by Shift-dragging them over the group in the Object Menu. Any object that you want to extrude individually, you’ll have to separate from the group.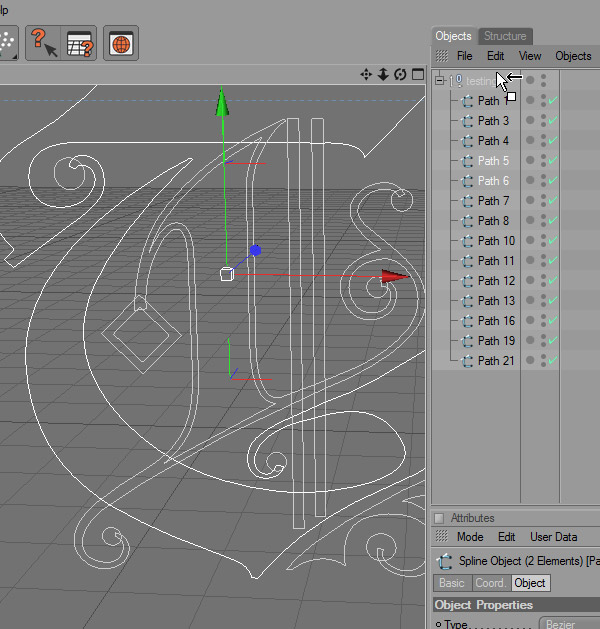
Step 23
Now click and drag the Add HyperNURBS button and release over Extrude NURBS.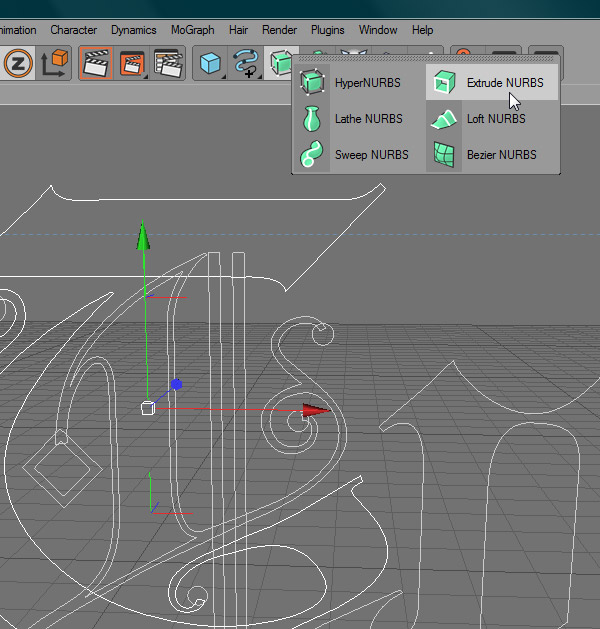
Step 24
Shift-click on the two paths, and drag them on top of the Extrude NURBS.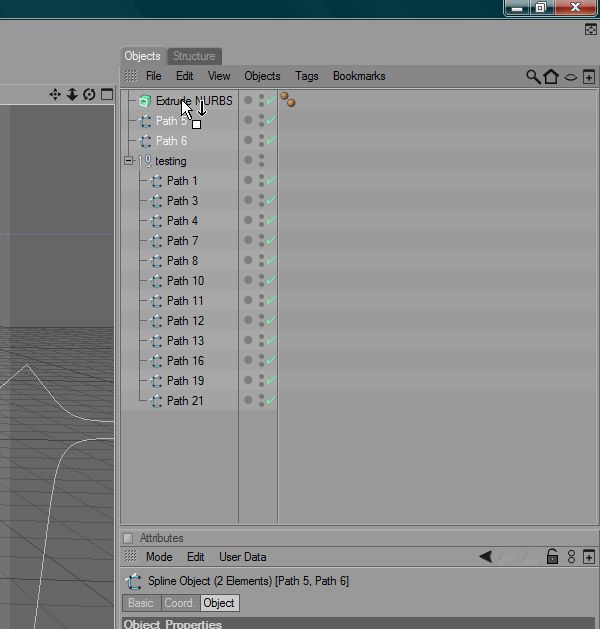
Step 25
Tick the Hierarchical box. This means that the Extrusion will affect all the objects placed under the Extrude NURBS.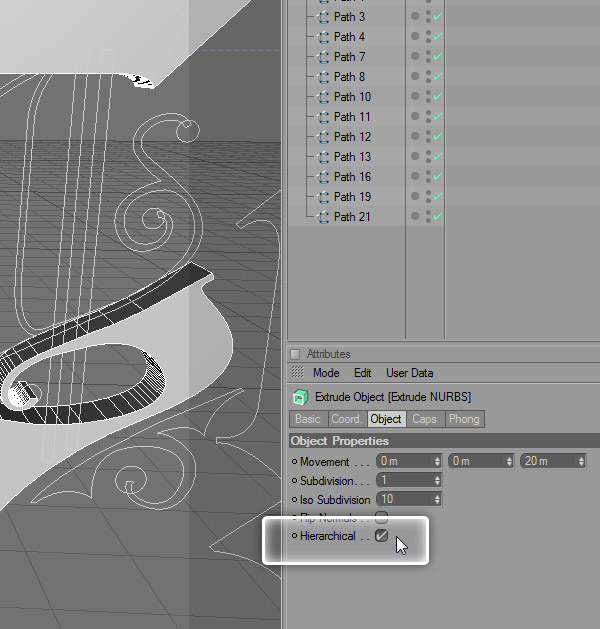
Step 26
Click on the Caps tab and change the settings to those shown below.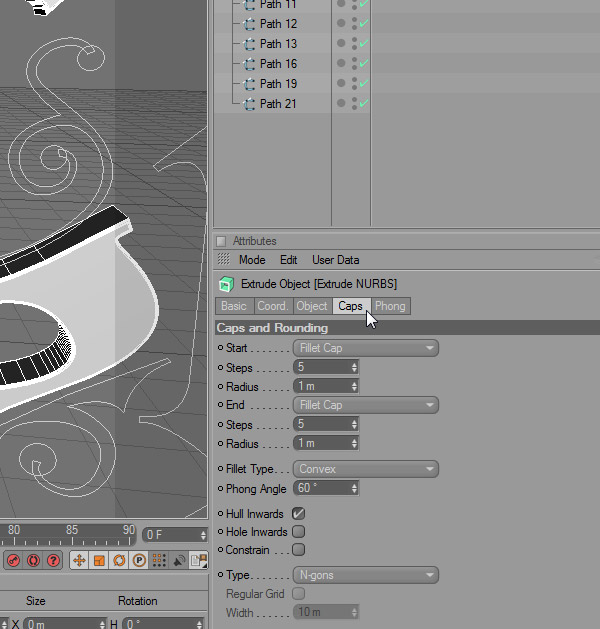
Step 27
After doing this for each part of the letters, move the Extrude NURBS back and forth until you have the paths aligned at different points in space. Also, click back to the Object tab and change the Movement to 40.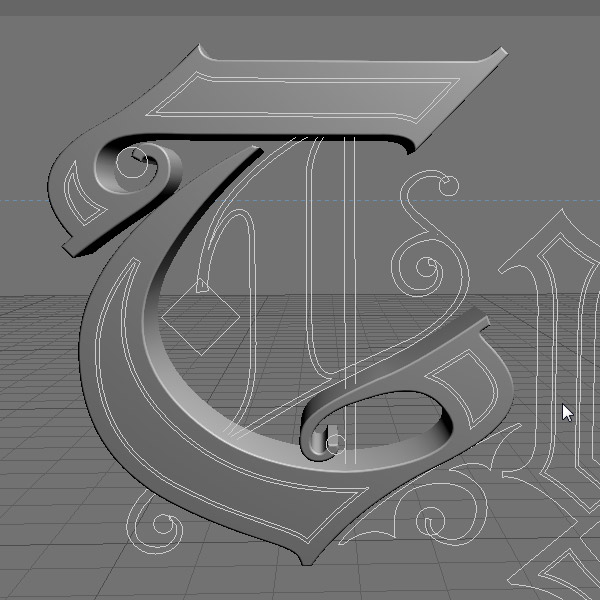
Step 28
Pick the center detail and repeat the process explained above. Just change the movement to 20 meters.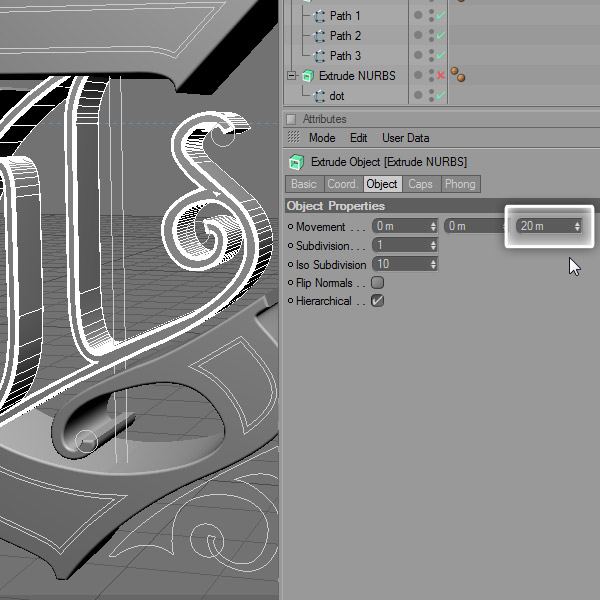
Step 29
Next up are the dot paths. You can see more tabs at once by Shift-clicking on two or more, in this case Object and Caps. Use the following settings. Notice that we’ve changed the appearance of the edges from a soft corner, to a half circle.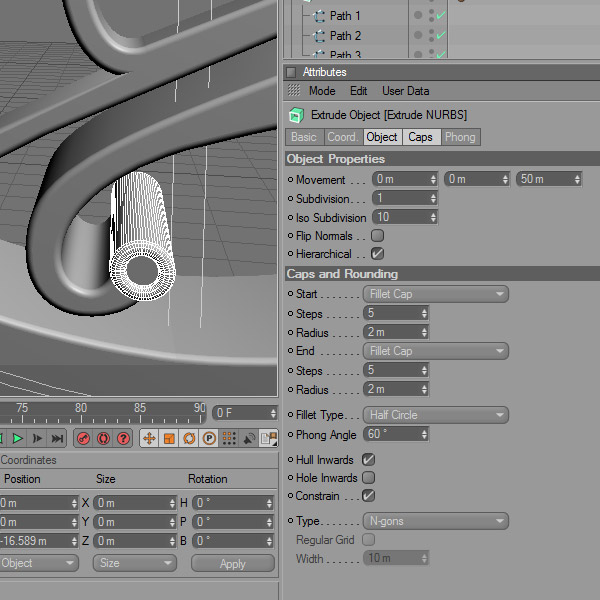
Step 30
Then create the same Extrusion effect for paths 1, 2 and 3, but with a 30m Movement value.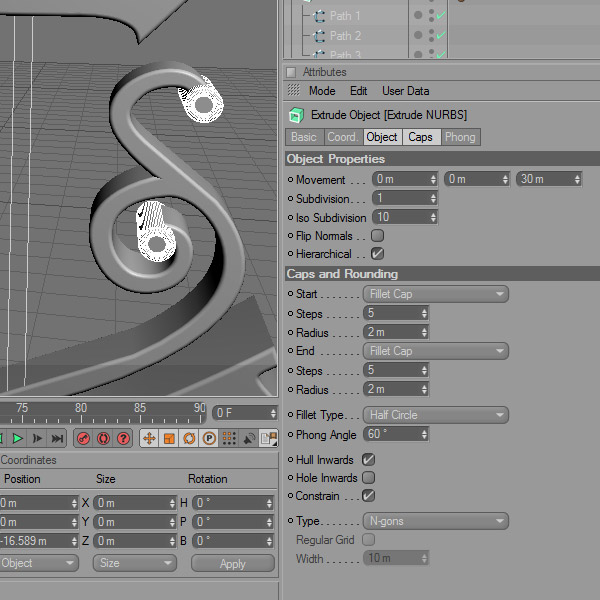
Step 31
For the diamond, use slightly different values. We’ve also constrained the effects to the original size by ticking the Constrain box for the dots and diamond. Doing that with small objects may create artifacts, or visual bugs. This happens when the constrained effect expands past the object dimensions.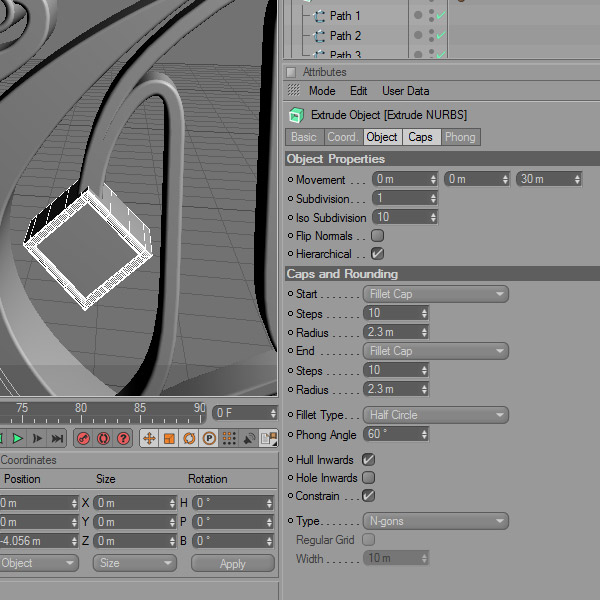
Step 32
Create an Engraved effect over the rod that connects the letter.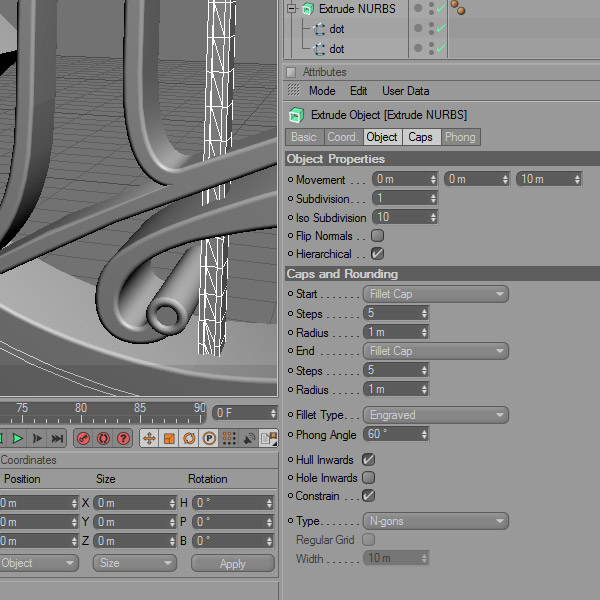
Step 33
Use the following settings for the final dot.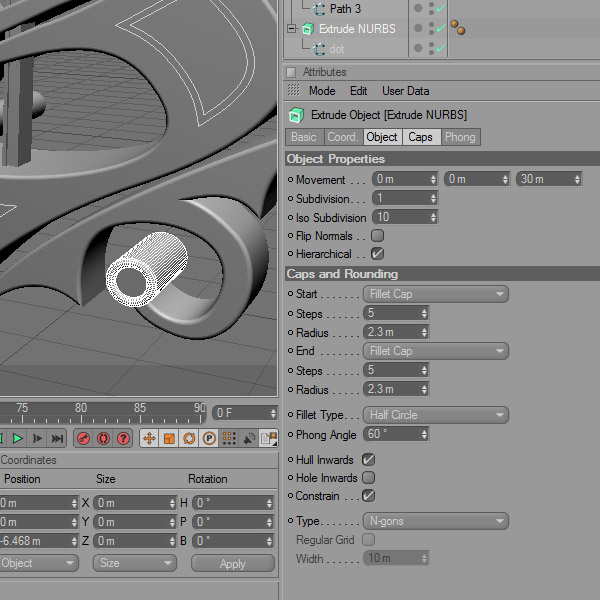
Step 34
Finnish off the first letter by extruding the borders.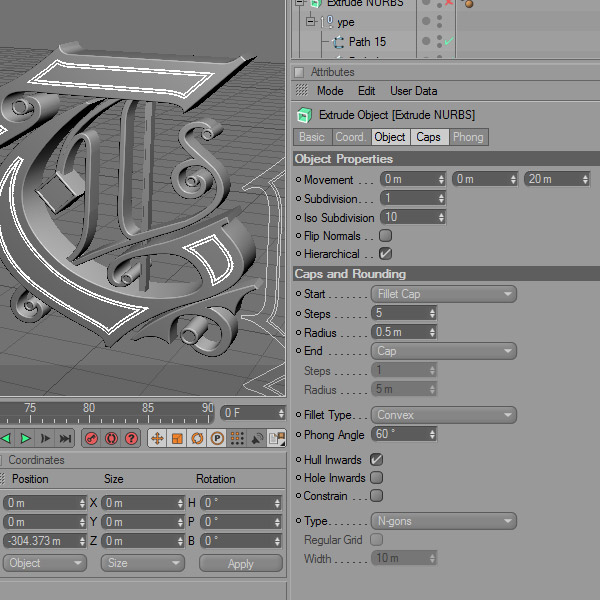
Step 35
Do the same for the remaining letters.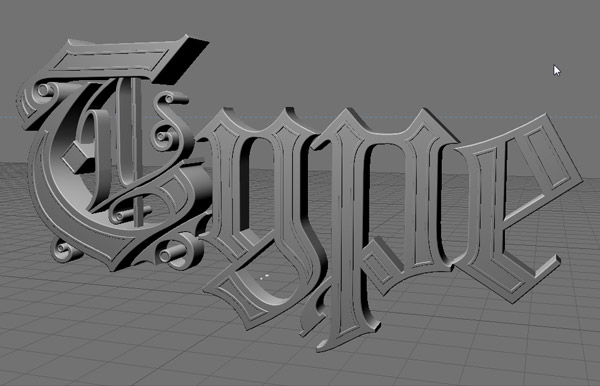
Step 36
Copy the connecting rod (Command + C) and paste it (Command + V). This will paste it in the exact same position.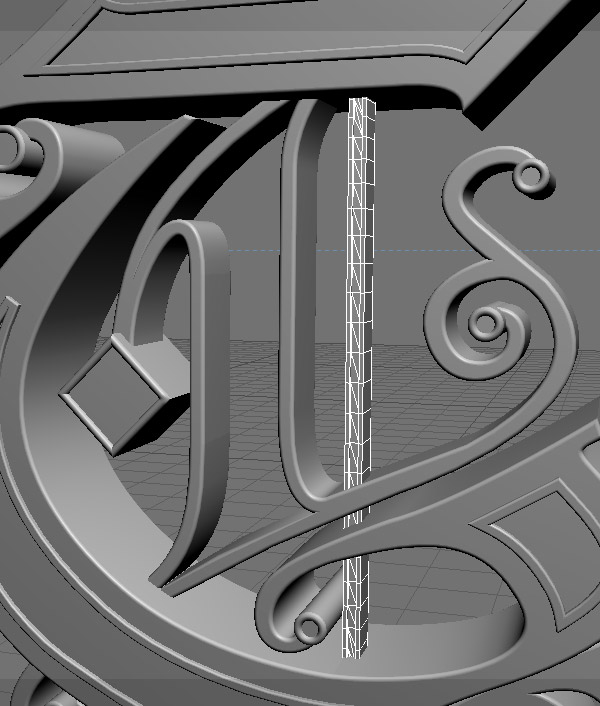
Step 37
Use the move tool to reposition the rod inside the following letter.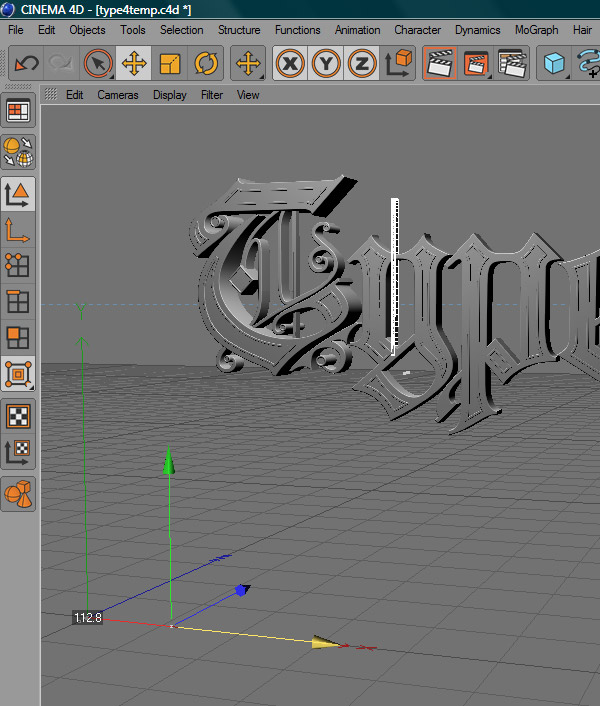
Step 38
On the left side of the interface you have different methods of selecting an object. We want to move just the top endpoints in order to resize the rod. First though, hide the extrusion effect by clicking on the green check mark from the Objects menu. Then select the Point Tool and Move Tool (highlighted in the following screenshot) and Shift-click on the top two endpoints.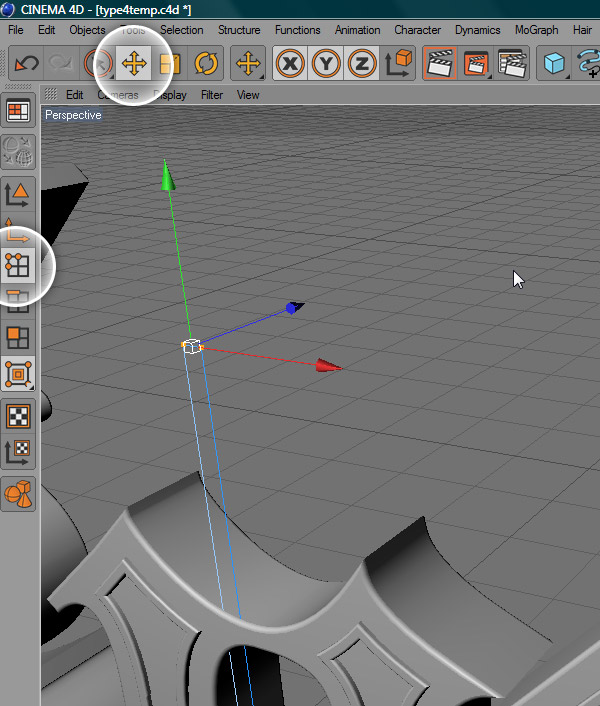
Step 39
Drag the yellow arrow down until the dots disappear inside the letter.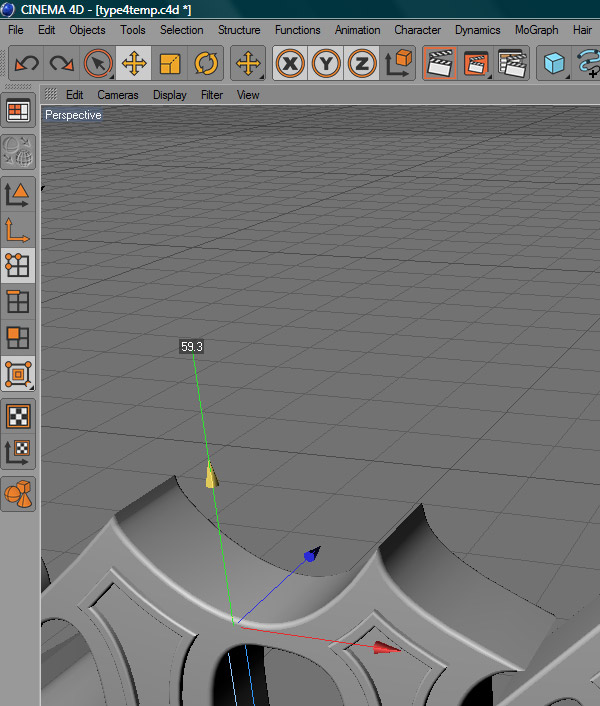
Step 40
Do the same for the bottom endpoints until they reach the bottom loop and bring back the Extrude NURBS.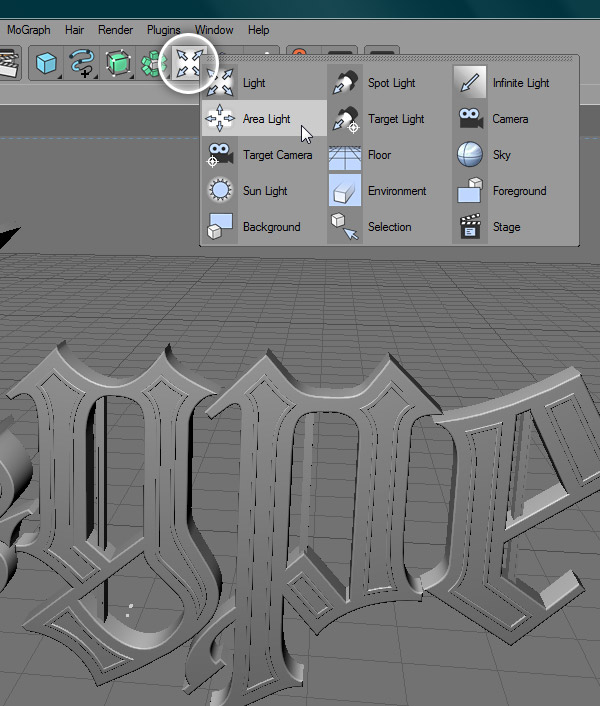
Step 41
It’s time to add a light source to the scene. For the lighting, we’re going to rely on an HDRI map environment and one Area Light. First of all add an Area Light.
Step 42
Bring it up over the text with the Move Tool.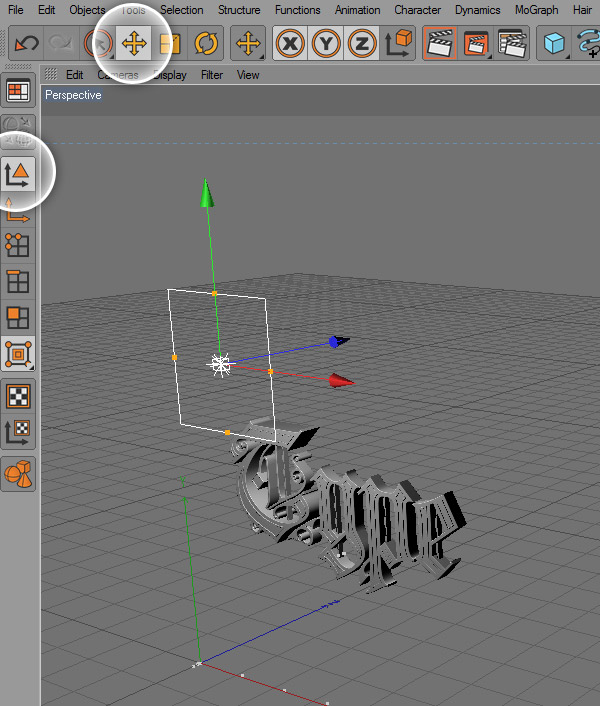
Step 43
Rotate it by 45 degrees with the Rotate Tool.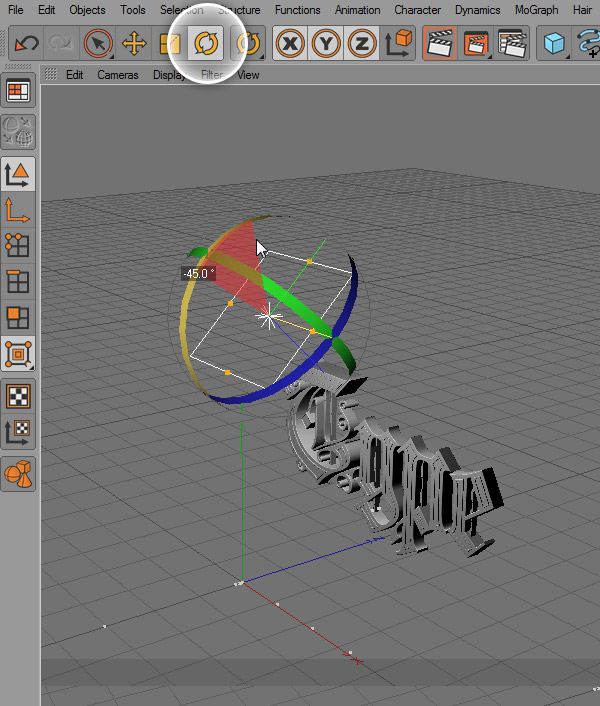
Step 44
Change the dimensions by dragging the endpoints with the Move Tool.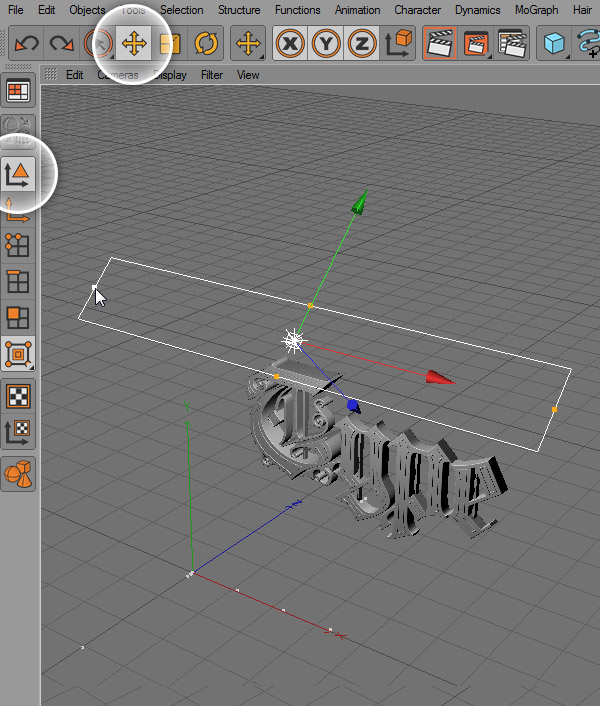
Step 45
Now add a Sky Object.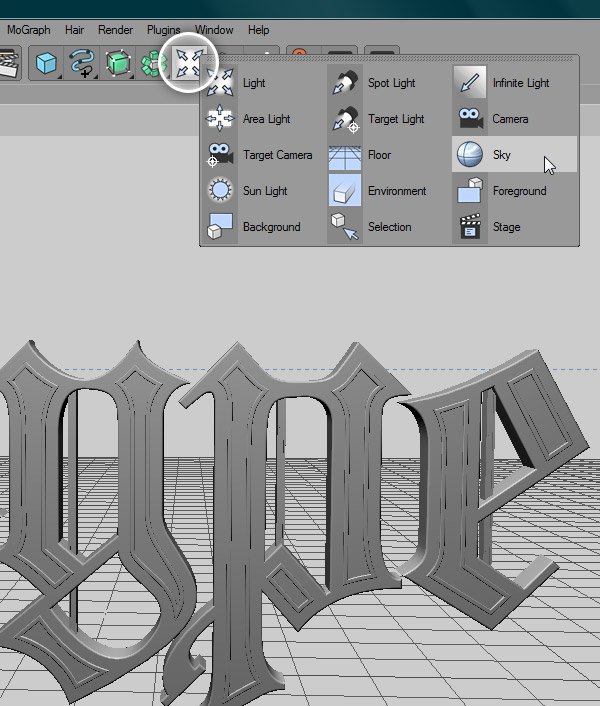
Step 46
Create a new material from the Material Menu.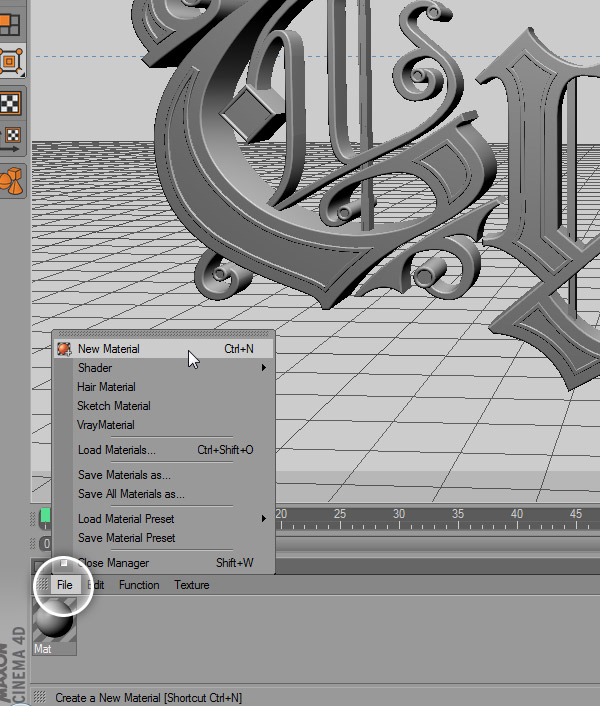
Step 47
Double-click on the material icon from the menu to bring up the Material Editor. Uncheck all the boxes and activate Luminance. You’ll now need this free HDRI map collection. Remember where you place it, and don’t make it a temporary location. Try to find a safe spot because you may find yourself linking more files to these HDR files. After you press Open, you’ll be asked if you want to copy the HDR file to the root folder. You can do that, or press No if you don’t move the folder after this point.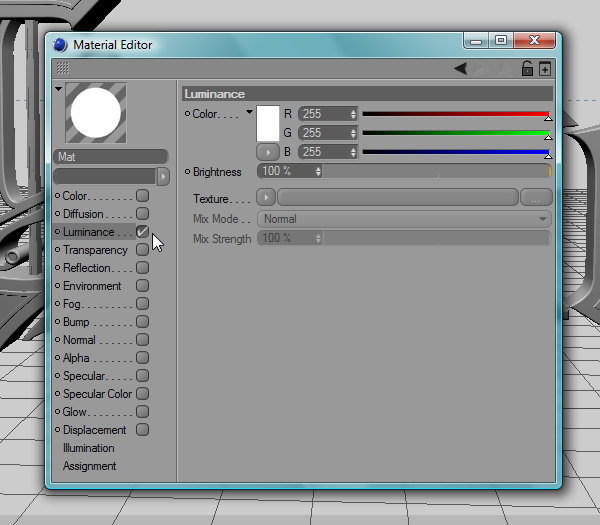
Step 48
Click on the three dot button and find the studio number seven from the folder. Open the small version.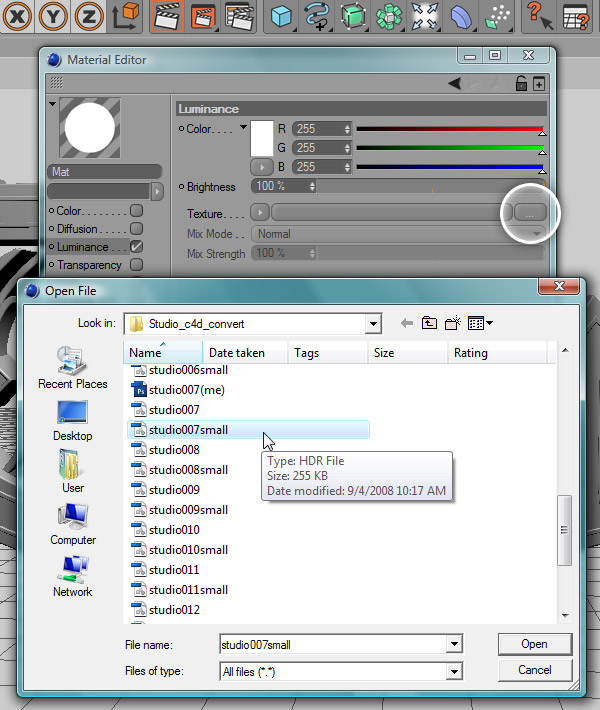
Step 49
Drag the material over the Sky object.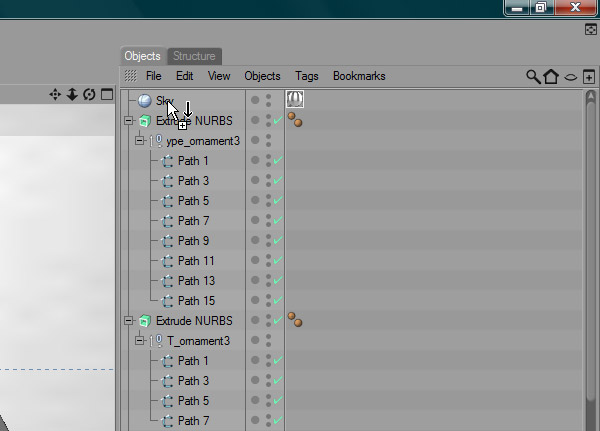
Step 50
Find an appropriate angle to view the text from and add a Camera.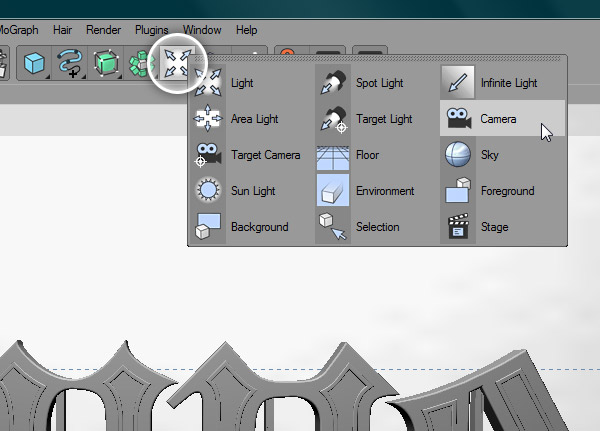
Step 51
To activate the camera, click on the white icon from the Object menu.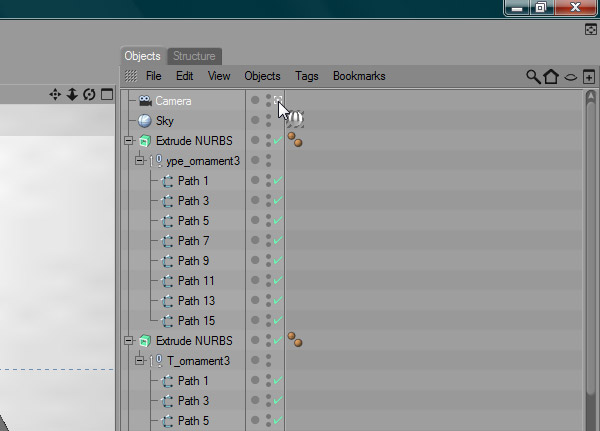


Comments
Post a Comment