Transforming Selections In Photoshop
Fortunately, there’s no need to go through all that hassle and frustration because Photoshop makes it easy to move, resize and reshape selection outlines after we draw them using the Transform Selection command!
Download our tutorials as print-ready PDFs! Learning Photoshop has never been easier!
Here’s an image I have open in Photoshop: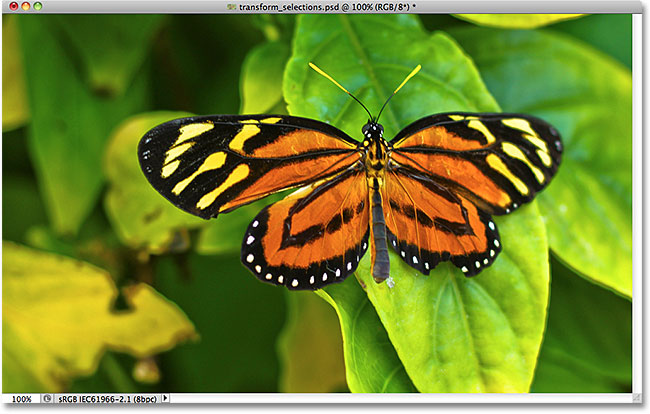
The original image.
I want to select the area around the butterfly, so I’ll grab the Rectangular Marquee Tool from Photoshop’s Tools panel: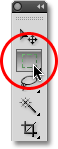
Selecting the Rectangular Marquee Tool.
With the Rectangular Marquee Tool selected, I’ll click somewhere in
the top left corner of the area I want to select, then with my mouse
button still held down, I’ll drag down to the bottom right corner of the
area to draw my initial selection outline around the butterfly,
releasing my mouse button when I’m done to complete the selection:
Dragging out a rectangular selection around the butterfly.
Unfortunately, if we look at my selection outline, we see that I
didn’t do a very good job with my initial attempt. Some of the butterfly
is still extending out beyond the top, left and right edges of my
selection: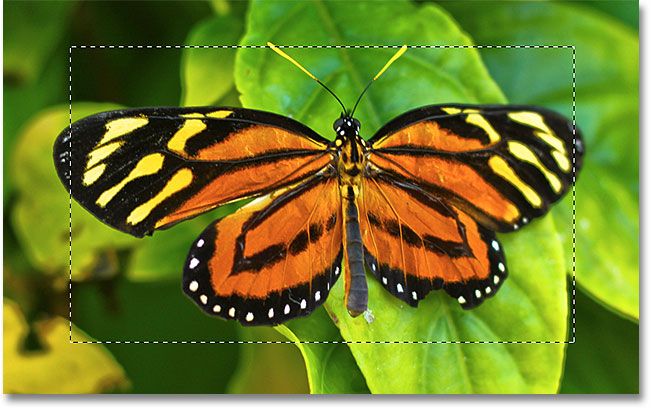
My first selection attempt didn’t turn out as well as I had hoped.
What many people would do in this case is undo the selection and try
again, hoping they get it right the next time, but why keep starting
over when we can just fix what we already have? That’s exactly what we
can do using the Transform Selection command.Free Transform vs Transform Selection
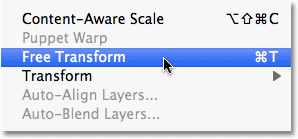
Before we look at how to use Transform Selection, it’s important to note the difference between it and another similar yet very different command, Free Transform. Both are used to move, resize and reshape selections. The difference is that Free Transform affects the pixels inside the selection outline while Transform Selection affects only the selection outline itself.I’ll go up to the Edit menu in the Menu Bar along the top of the screen and choose Free Transform:
Selecting Free Transform from the Edit menu.
The Free Transform command places transform handles (little squares)
around the selection, one in each corner and one on the top, bottom,
left, and right. We can alter the shape and size of the selection by
clicking on any of the handles and dragging them. Since the butterfly’s
wings are currently extending out beyond the left and right edges of my
selection, I’ll need to make my selection wider. Watch what happens,
though, when I use Free Transform to drag the left side of the selection
further towards the left: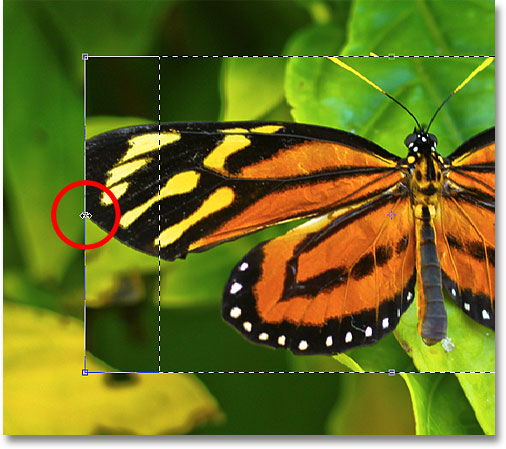
Resizing the left edge of the selection with Free Transform.
Since Free Transform affects the pixels inside a selection, all I’ve
managed to do is stretch the image itself. The selection outline, which
is what I wanted to resize, didn’t move, and the butterfly’s wing now
extends even further outside my selection than it did before. In many
cases when retouching images or creating photo effects,
resizing and reshaping the image with Free Transform is exactly what
we want to do, but not in this case. I needed to resize my selection
outline without moving anything inside the selection. For that, we’ll
need the Transform Selection command.I’ll press the Esc key on my keyboard to exit out of Free Transform and undo the change. To access the Transform Selection command, go up to the Select menu at the top of the screen and choose Transform Selection:
Go to Select > Transform Selection.
The Transform Selection command also places the same handles around
the selection, just like Free Transform did, but these handles affect
the selection outline itself, not the pixels inside of it.
I’ll click on the left handle and drag it further towards the left, just
as I did with Free Transform a moment ago. This time, I’m moving the
left edge of the selection outline without moving the image. The
butterfly’s left wing now fits easily within my selection: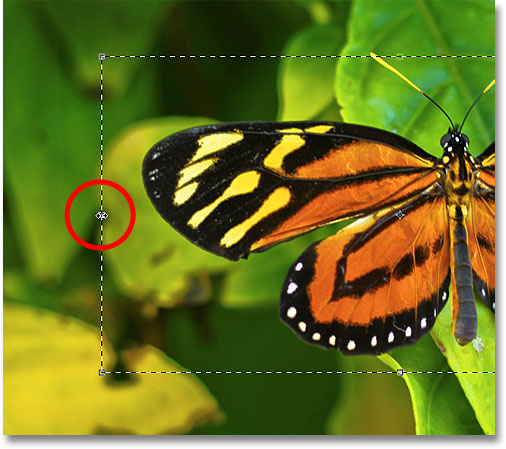
Clicking on the left Transform Selection handle and dragging it further to the left.
I’ll do the same thing with the right edge of the selection outline, extending it further to the right by dragging its handle: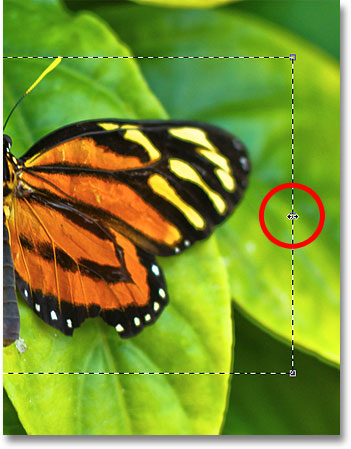
Dragging the right edge of the selection outline further to the right.
I’ll also click on the top handle and drag it upward to fit the top of the butterfly into the selection: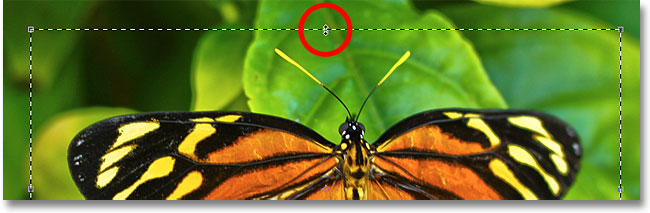
Dragging the top Transform Selection handle.
You can move and rotate the selection outline as well using Transform
Selection. To move it, simply click anywhere inside the selection
outline and drag it around inside the document with your mouse. To
rotate it, move the cursor outside the selection outline, then click and
drag. Here, I’ve rotated the selection outline a few degrees
counterclockwise: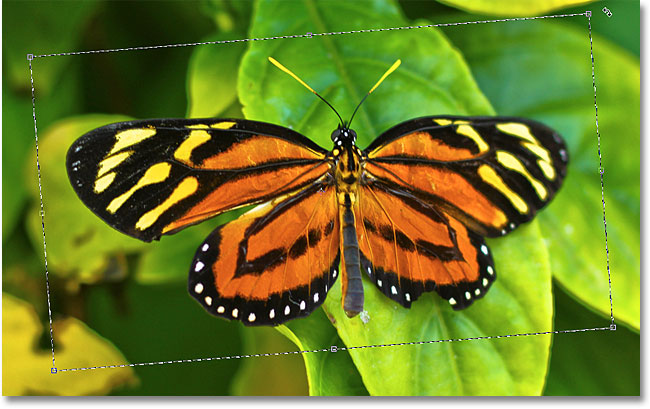
Rotating the selection outline without rotating the image inside the selection.
When you’re done, press Enter (Win) / Return (Mac) to accept the changes and exit out of the Transform Selection command.With my selection outline now perfectly sized and positioned where I want it thanks to Photoshop’s Transform Selection command, let’s do something interesting with it. I’ll quickly copy the selected area to its own layer by pressing Ctrl+J (Win) / Command+J (Mac) on my keyboard:

The selected area is copied to its own layer above the original image.
I’ll click on the Layer Styles icon at the bottom of the Layers panel:
Clicking the Layer Styles icon.
I’ll choose Stroke from the list of Layer Styles,
which I can use to place a simple photo border around the selected area,
giving me a “picture in picture” effect: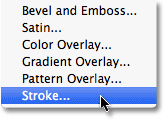
Choosing a Stroke layer style.
This opens Photoshop’s Layer Style dialog box with options for the stroke appearing in the middle column. I’ll set the Size of my stroke to around 13 px (pixels) and change the Position to Inside, which will give my stroke sharp corners. Then I’ll set my stroke color to white by clicking on the color swatch to the right of the word Color and selecting white from the Color Picker: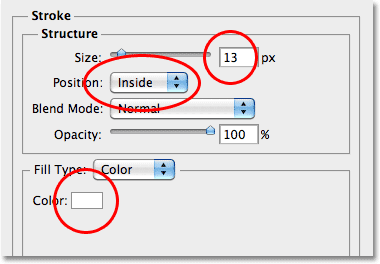
The Stroke options in the Layer Style dialog box.
I’ll add a shadow to the selected area as well by clicking directly on the words Drop Shadow
at the top of the list of layer styles along the left of the dialog
box. The middle column of the dialog box changes to show options for the
drop shadow. I’ll lower the Opacity down to around 60% so the shadow appears less intense, and I’ll change its Angle to 120°. Finally, I’ll set the Distance to 13 px and the Size of the shadow to 10 px: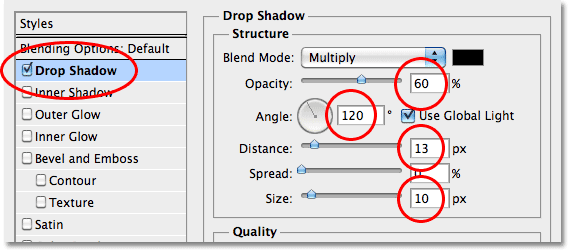
The Drop Shadow options in the Layer Style dialog box.
I’ll click OK to exit out of the Layer Style dialog box, and we can
see the white stroke and drop shadow now applied to the selected area in
the document window: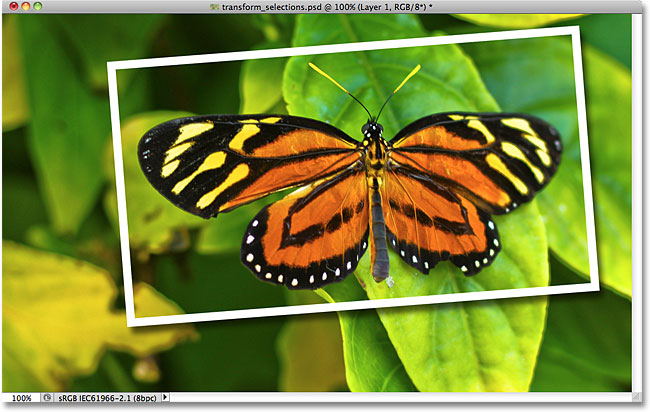
The butterfly now appears to be in its own photo within the larger image.
Finally, let’s quickly convert the original image in the background
to black and white. I’ll click on the Background layer in the Layers
panel to select it, then press Ctrl+J (Win) / Command+J (Mac) to duplicate the layer. Photoshop gives us lots of ways to convert images to black and white, including the amazing Black And White image adjustment first introduced in Photoshop CS3, but in this case, I’ll just desaturate the image by pressing Shift+Ctrl+U (Win) / Shift+Command+U (Mac) on my keyboard: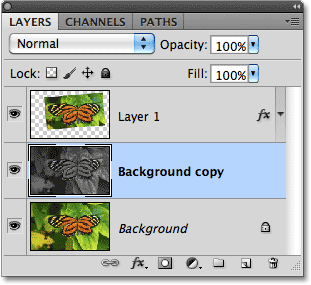
Creating a copy of the Background layer, then desaturating the copy.
With the background now desaturated, here’s my final “picture in
picture” result which I was able to create quickly and easily thanks in
large part to Photoshop’s Transform Selection command: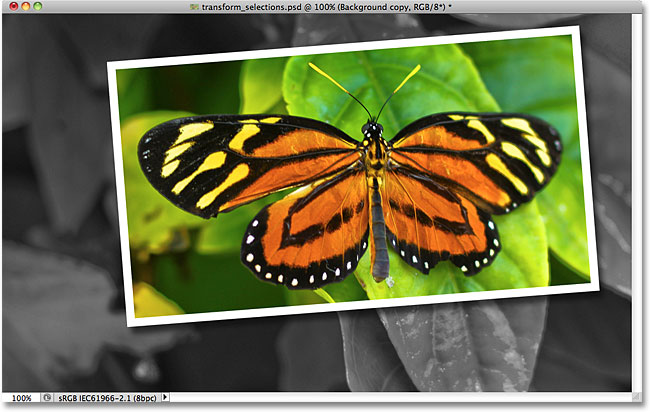
The final effect.
And there we have it!
Comments
Post a Comment