Photoshop Shapes – Add, Subtract, Intersect and Exclude
This tutorial assumes you already have a solid understanding of how to draw vector shapes, which you can learn all about in the first tutorial in this series – Photoshop Shapes and Shape Layers Essentials.
Download our tutorials as print-ready PDFs! Learning Photoshop has never been easier!
I’ve gone ahead and created a new Photoshop document, with white as my background color, and I’ve used the Ellipse Tool to draw a single circular shape (I held down my Alt (Win) / Option (Mac) key as I was dragging out the shape to force it into a perfect circle):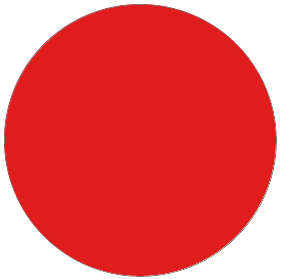
A circular shape drawn with the Ellipse Tool.
If we look in my Layers panel, we see that my document currently contains two layers – the white-filled Background layer on the bottom and the Shape layer (Shape 1) for my shape directly above it: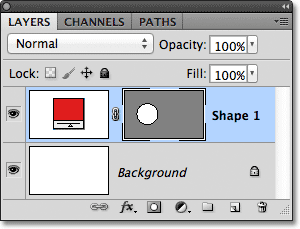
The Layers panel showing the Shape layer sitting above the Background layer.
With the Ellipse Tool still selected, I’ll draw a second similar shape partly overlapping the original: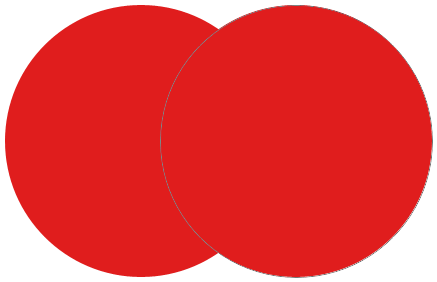
Adding a second shape to the document.
By default, Photoshop assumes that each time we draw a new shape, we
want to draw a separate, independent shape, and it places the new shape
on its own Shape layer. If we look again in my Layers panel, we see that
I now have a second Shape layer (Shape 2) sitting above the original.
Both shapes are completely separate from each other: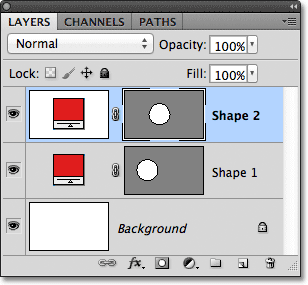
Each of the two shapes in the document appears on its own Shape layer.
This default behavior of creating a new Shape layer for each shape we
draw is often what we want, but there are other, more interesting
things we can do with shapes in Photoshop than simply adding new ones
all the time. For instance, we can combine two shapes together by adding
the new shape to an existing one, or we can use the new shape to remove
part of the original shape. We can intersect two shapes so only the
areas that overlap remain visible in the document, or we can do the
opposite, hiding the overlapping areas from view.Officially, these options I just described are called Add to Shape Area, Subtract from Shape Area, Intersect Shape Areas, and Exclude Overlapping Shape Areas, and they’re represented as a series of icons in the Options Bar when we have one of Photoshop’s Shape tools selected. There’s also a fifth option, Create New Shape Layer, which is selected for us by default:

From left to right – Create New Shape Layer, Add
to Shape Area, Subtract from Shape Area, Intersect Shape Areas, and
Exclude Overlapping Shape Areas.
If you’ve selected a Shape tool from the Tools panel but don’t see
these options in the Options Bar, check to make sure you have Shape Layers, not Paths or Fill Pixels, selected in the far left of the Options Bar:
Make sure Shape Layers is chosen in the Options Bar.
Add To Shape Area
As I mentioned, the Create New Shape Layer option is selected for us by default, which is why Photoshop always places each new shape we draw on its own independent Shape Layer:
The Create New Shape Layer option is selected by default.
I’ll delete the second shape I added a moment ago by dragging its Shape layer (Shape 2) down to the Trash Bin at the bottom of the Layers panel: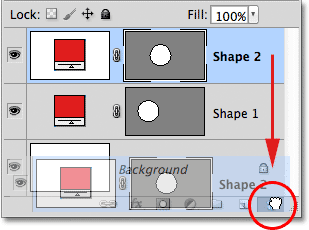
Dragging the Shape 2 layer on to the Trash Bin to delete it.
And now I’m back to having just my original Shape layer (Shape 1) sitting above the Background layer:
The second shape has been deleted.
Before I do anything else, notice that a white highlight border is appearing around the vector mask thumbnail on my Shape layer: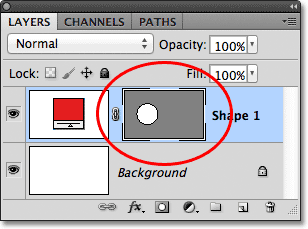
A highlight border is visible around the vector mask thumbnail.
This is important because it means the shape’s vector mask is currently selected. The vector mask is what defines the look of the shape (the color swatch
to the left of the vector mask thumbnail defines the color of the
shape). If the vector mask is not selected, the Add, Subtract, Intersect
and Exclude options will be grayed out and unavailable in the Options
Bar. If you see them grayed out, check to make sure a white highlight
border is appearing around the Shape layer’s vector mask thumbnail. If
it’s not, click on the thumbnail to select it.Now that I’ve made sure the vector mask is selected, I’ll choose the Add to Shape Area option by clicking on its icon in the Options Bar:

Selecting the Add to Shape Area option (second icon from the left).
A small plus sign (+) will appear
in the lower right of my mouse cursor letting me know that any shape I
draw next will be added to my existing shape rather than appearing on
its own Shape layer. I’ve enlarged the mouse cursor here to make it
easier to see:
The small plus sign in the lower right lets us know we’re in the Add to Shape Area mode.
I’ll draw another circular shape with the Ellipse Tool, again overlapping the original shape as I did before: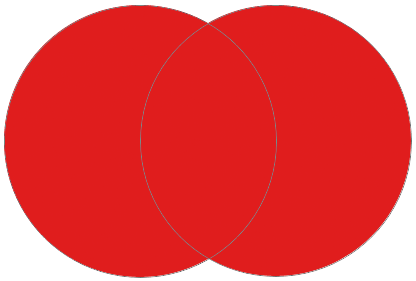
Drawing a second circular shape with the Add to Shape Area option selected.
The result doesn’t look much different than it did last time, but if
we look in the Layers panel, we see that instead of having two separate
Shape layers, both shapes now appear on the same vector mask on the same
Shape layer, which means that even though they may look like separate
shapes in the document, they’re actually one single shape: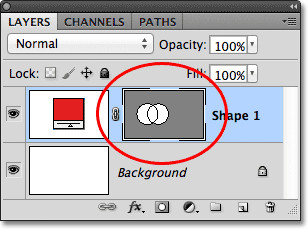
The vector mask thumbnail shows both shapes on the same Shape layer.
At the moment, we can see the thin path outline around the shapes.
The path is visible because the vector mask is selected and active. To
hide the path outline, all we need to do is deselect the vector mask by
clicking on its thumbnail. The white highlight border around the
thumbnail will disappear when you click on it, indicating that the
vector mask is no longer active: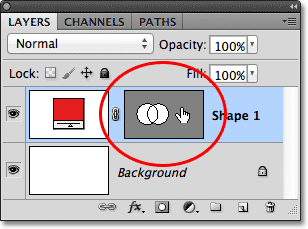
Click on the vector mask thumbnail when the highlight border is visible to deselect the vector mask.
With the vector mask deselected, the path outline is no longer visible around the shape:
The path outline is only visible when the vector mask is active (selected).
Remember, though, that a Shape layer’s vector mask must be selected
if we want access to the Add, Subtract, Intersect and Exclude options in
the Options Bar. Now that I’ve deselected the vector mask, the options
in my Options Bar are grayed out and unavailable to me. Only the default
Create New Shape Layer option remains available:
The Add, Subtract, Intersect and Exclude options are no longer available with the vector mask deselected.
To re-select the vector mask and make it active again, just click on
its thumbnail. The white highlight border around it will re-appear, and
the options will again become available in the Options Bar: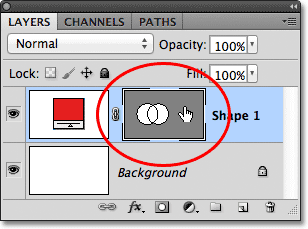
Click again on the vector mask thumbnail to re-select it.
Subtract From Shape Area
I’ll undo my last step and remove the second shape I added by pressing Ctrl+Z (Win) / Command+Z (Mac) on my keyboard, and this time, I’ll select the Subtract from Shape Area option in the Options Bar:
Selecting the Subtract from Shape Area option (third icon from the left).
A small minus sign (-) appears in the lower right of my mouse cursor letting me know I’m in the Subtract from Shape Area mode:
The small minus sign indicates we’re in Subtract from Shape Area mode.
I’ll draw another circular shape with the Ellipse Tool, again
overlapping the original, and this time we get a different result.
Instead of adding the new shape to the existing one, the new shape has
been used to remove, or cut away, part of the initial shape where the
two shapes overlap. As we can see by the path outlines, both shapes are
there in the document, but only the part of the original shape that is
not being overlapped by the second shape remains visible: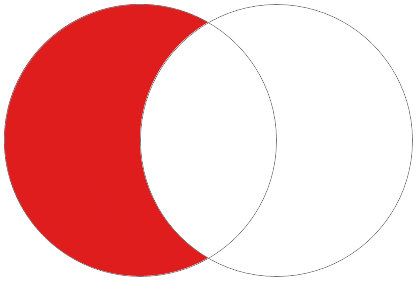
In Subtract from Shape Area mode, the second shape is used to remove part of the initial shape.
Just as we saw with the Add to Shape Area option, both shapes have
been added to the same vector mask on the same Shape layer in the Layers
panel: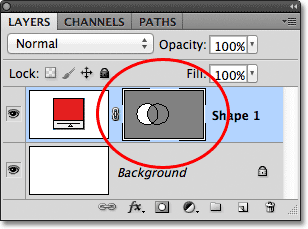
Both shapes again appear in the same vector mask thumbnail.
I’ll click on the vector mask thumbnail to deselect it, which removes
the path outline from around the shape and makes it easier to see the
result. With part of it removed, the original circular shape now looks
more like a moon:
Hide the path outline by deselecting the vector mask to see the results more clearly.
So far, we’ve learned how to add and subtract shapes. Up next, we’ll
learn how the Intersect and Exclude options work, as well as how to
easily switch between these four drawing modes after we’ve already drawn
the shape!Intersect Shape Areas
I’ll again press Ctrl+Z (Win) / Command+Z (Mac) to undo my last step and remove the second shape, then I’ll select the Intersect Shape Areas option in the Options Bar:
Selecting the Intersect Shape Areas option (fourth icon from the left).
A small x appears in the lower right of my mouse cursor, telling me that I’m now in the Intersect Shape Areas mode:
The small x appears when the Intersect Shape Areas option is selected.
I’ll draw my second shape, and this time, only the area where the two shapes intersect remains visible: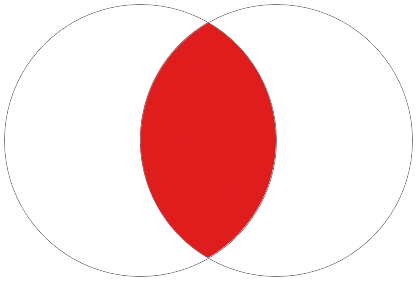
Both shapes are hidden except for the area where they overlap each other.
Again we can see in the Layers panel that both shapes were added to the same vector mask. Just like a normal layer mask, the small white area on the vector mask thumbnail represents the part of the shape that’s visible in the document: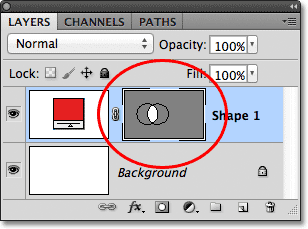
White areas on a vector mask represent the visible area of the shape in the document.
Exclude Overlapping Shape Areas
I’ll remove the second shape by pressing Ctrl+Z (Win) / Command+Z (Mac), and finally, I’ll select the Exclude Overlapping Shape Areas option in the Options Bar:
Selecting the Exclude Overlapping Shape Areas option (the icon on the right).
We know we’re in the Exclude Overlapping Shape Areas mode because a small circle with an x in the center of it appears in the lower right of the mouse cursor:
A small circle with an x inside tells us we have the Exclude Overlapping Shape Areas option selected.
I’ll draw my second shape, and this time, we get the exact opposite
result from what we saw when the Intersect Shape Areas option was
selected. With Exclude Overlapping Shape Areas, the overlapping area of
the shapes is hidden, while the rest remains visible: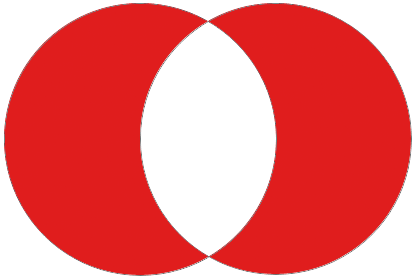
The Exclude Overlapping Shape Areas mode hides areas of the shapes that overlap.
And once again, we see in the Layers panel that both shapes were added to the same vector mask on the same Shape layer: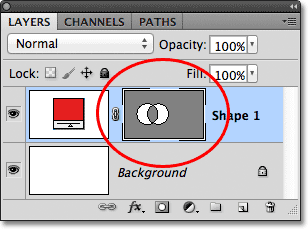
All four options (Add, Subtract, Intersect and Exclude) add the new shape to the same vector mask as the initial shape.
Switching Between Options After Drawing The Shape
What if, after drawing my second shape in the Exclude Overlapping Shape Areas mode as I just did, I realize I had the wrong option chosen in the Options Bar? What if I meant to draw the second shape in, say, the Subtract from Shape Area mode instead? I could undo my last step to remove the shape, choose the correct option from the Options Bar and then draw the second shape again, or I could simply select the second shape and switch the option for it!To select the shape, we need the Path Selection Tool (the black arrow) from the Tools panel:
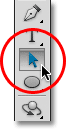
Selecting the Path Selection Tool from the Tools panel.
With the Path Selection Tool in hand, I’ll simply click inside the
shape I need to select. Even though the two shapes are part of the same
vector mask on the same Shape layer, we can still select them
individually just by clicking on them. Here, I’ve clicked on the second
shape (the one on the right), and we can see the path’s anchor points (the small squares) that have appeared around it letting us know the shape is now selected and active: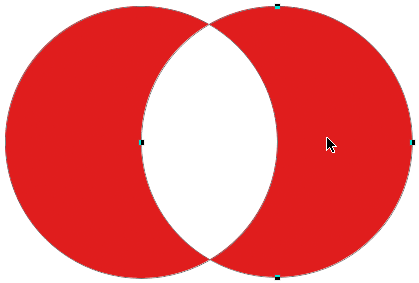
Select the shape you need by clicking on it with the Path Selection Tool.
If we look in the Options Bar, we see that the Path Selection Tool
gives us access to the same Add, Subtract, Intersect and Exclude options
that we’re given when we have any of the Shape tools selected. The only
option we don’t get with the Path Selection Tool is the Create New
Shape Layer option, since we can’t actually draw a shape with the Path
Selection Tool. We can, however, use the Path Selection Tool to easily switch an existing shape from one mode to another.With my second shape selected in the document, I’ll click on the Subtract from Shape Area option in the Options Bar (second icon from the left):

The Path Selection Tool gives us the same Add, Subtract, Intersect and Exclude options.
And just like that, the shape switches from its initial Exclude
Overlapping Shape Areas mode to the Subtract from Shape Area mode in the
document: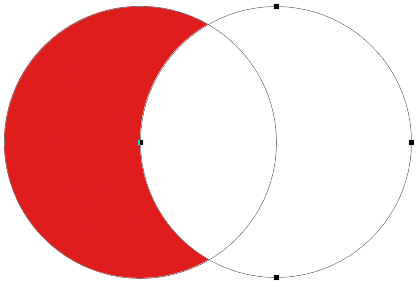
The second shape is now in Subtract from Shape Area mode. No need to delete and re-draw it.
Deleting Shapes On The Same Shape Layer
Finally, what if I wanted to delete the second shape entirely and go back to just my initial circular shape? I couldn’t simply drag the Shape layer down on to the Trash Bin because that would delete the entire Shape layer. Instead, I’d select the second shape by clicking on it with the Path Selection Tool, just as I did a moment ago, then I’d press Backspace (Win) / Delete (Mac) on my keyboard. This will delete the selected shape without deleting the entire Shape layer.And there we have it! That’s the basics of combining vector shapes in Photoshop using the Add, Subtract, Intersect and Exclude options!
Comments
Post a Comment